Skyteam ST50-8 Technical manual
SKY TEAM CORPORATION LTD.
1104 CARNIVAL COMMERCIAL BLDG.
18 JAVA ROAD NORTH POINT HONGKONG
TEL:00852 25089428
FAX:00852 25089478
EMAIL:[email protected]
HTTP://WWW.SKYTEAM.CN

Dear customers:
Welcome to Skyteam family. We thank cordially to you for choosing Skyteam motorcycle.
Skyteam motorcycles have good designing, advanced technology, beautiful outlook. They have been
sold around many countries around the world. They have good fame in customers.
Skyteam motorcycles are ideal means of transportation and will bring more convenience and pleasure
to your life.
This owner's manual contains the right usage and simple inspecting and adjusting methods of Skyteam
motorcycle. Please make sure to read it carefully before running your motorcycles. It will help in using
and maintaining Skyteam motorcycles. In order to ensure well and safe running of your motorcycle,
please use Skyteam spare parts(including oil). If you meet any problem in using Skyteam motorcycles,
please do not hesitate to contact with us. We will try to solve your problems with our high efficient service.
PREFACE
ALL INFORMATION IN THIS MANUAL IS SUBJECT TO CHANGES
WITHOUT PRIROR NOTICE FROM THE MANUFACTURER

Important Notes
Consumer information
Fixation of spare parts
Controls
Key
Ignition switch
Instrument panel
Left handlebar
Right handlebar
Fuel tank cap
Fuel cock
Kick starter level
Rear brake pedal
Gearshift level
Steering lock
Helmet lock
Fuel and engine oil
Running-in
Checks before riding
Riding tips
Starting the engine
CONTENTS
Starting off
Driving on a slope
Use the brakes and parking
Checks and maintenance
Periodic maintenance items
Tools
Lubrication
Battery
Air cleaner
Spark plug
Carburetor
Throttle cable adjustment
Transmission chain
Brakes
Rear brake light switch
Tire
Lighting bulbs
Fuse
Troubleshooting
Specifications
1
2
3
8
11
11
11
11
12
12
13
13
14
14
15
15
16
17
18
19
21
21
○○○○○○○○○○○○○○○○○
○○○○○○○○○○○○○○
○○○○○○○○○○○○○○
○○○○○○○○○○○○○○○○○○○○○
○○○○○○○○○○○○○○○○○○○○○○
○○○○○○○○○○○○○○○○
○○○○○○○○○○○○○○
○○○○○○○○○○○○○○○○
○○○○○○○○○○○○○○○
○○○○○○○○○○○○○○○○
○○○○○○○○○○○○○○○○○○
○○○○○○○○○○○○○○○
○○○○○○○○○○○○○○
○○○○○○○○○○○○○○○○
○○○○○○○○○○○○○○○○○
○○○○○○○○○○○○○○○○○
○○○○○○○○○○○○○○○
○○○○○○○○○○○○○○○○○○○
○○○○○○○○○○○○○○
○○○○○○○○○○○○○○○○○○○
○○○○○○○○○○○○○
○○○○○○○○○○○○○○○○○○
○○○○○○○○○○○○○○
○○○○○○○○
○○○○○○○○○○○
○○○○○○○○
○○○○○○○○○○○○○○○○○○○○○
○○○○○○○○○○○○○○○○○○
○○○○○○○○○○○○○○○○○○○○
○○○○○○○○○○○○○○○○○○
○○○○○○○○○○○○○○○○○○
○○○○○○○○○○○○○○○○○○
○○○○○○○○○○
○○○○○○○○○○○○○
○○○○○○○○○○○○○○○○○○○○
○○○○○○○○○○○
○○○○○○○○○○○○○○○○○○○○○
○○○○○○○○○○○○○○○○
○○○○○○○○○○○○○○○○○○○○○
○○○○○○○○○○○○○○○○
○○○○○○○○○○○○○○○○○
23
24
24
26
27
29
29
29
30
31
33
33
34
36
40
40
41
41
42
44

RUNNING-IN INFORMATION FOR YOUR MOTORCYCLE
The first 1,600km is the most important in the life of your motorcycle. Proper running-in operation
during this period will help ensure maximum life and performance of your new motorcycle.
Motorcycle reliability and performance depend on special care and restraint exercise during the running-
in period. It is especially important that you avoid the operation that may cause the engine parts to over-
heat.
Please refer to the "running-in" section for specific running-in recommendation.
Please read this manual and follow its instructions carefully.
To emphasize special information, the words WARNING, CAUTION and NOTE imply special meaning
and should be carefully read.
IMPORTANT NOTES
WARNING:
CAUTION:
NOTE:
The personal safety of the rider may be involved, disregarding this information could result
in personal injury.
These instructions point out special service procedures or precautions that must be followed
to avoid damaging the machine.
This provides special information to make maintenance easier or important instructions more
explicit.
2
ACCESSORY INSTALLATION AND SAFETY PRECAUTION TIPS
There are a variety of accessories available to Skyteam owners. The installation of unsuitable
accessories can lead to unsafe riding. For proper installation of accessories, we have laid down some
principles that will help you make the correct choice and installation of accessories:
(1)If you want to install an accessory which will result in an extra weight or an aerodynamic effect on your
motorcycle, try to install it as low as possible and as close as possible to the center of gravity of your
motorcycle. Check carefully the holder for installing accessories to make sure for its firmness. The loose
installation will lead to unstable and dangerous conditions due to weight deviation.
(2)Check the net clearance and turning angle to make sure that they are adequate. The improper load,
which may result from installing accessories, will very likely lower their safety. Checks should also be
made to ensure that this load will not hinder the idling, turning and other control actions.
(3)Fixing the accessories on handlebars or front fork will result in unstable operation. This extra weight
will reduce the maneuverability of your motorcycle during turning operation, meanwhile, it will also cause
unstable condition due to vibration at the front end. Therefore, accessories fixed on handlebars or front
fork should be minimized.
(4)Parts like wind glass, windshield, waist support, bags across seat and suitcase all have a aerodynamic
effect on the stability of your motorcycle, when there is a side wind or large vehicles passing by. The
improper installation or bad design of accessories will affect your driving safety. Therefore, you should be
careful when choosing and installing accessories.
CONSUMER INFORMATION
3

(5) Certain accessories displace the rider from his normal riding position. This will restrict not only the
freedom of movement of the rider, but also his control ability.
(6)Extra electrical accessories may overload the existing electrical system. Severe overloads may damage
the wiring harness or create a dangerous situation due to the loss of electrical power during the operation
of the motorcycle.
When fix additional parts on your motorcycle, mount is as low as possible and as close as possible to the
motorcycle. An improperly mounted load can result in a high center of gravity that is very dangerous and
make the motorcycle difficult to handle. The size of a load can affect the aerodynamics and the handling
of the motorcycle. Balance the load between the both sides of the motorcycle and fasten is firmly.
SAFE RIDING RECOMMENDATONS FOR MOTORCYCLE RIDERS:
Motorcycle riding is an exciting sport with great joy. Nevertheless it also requires some extra precautions
to ensure the safety of the rider. These precautions include:
WEAR A HELMET
The serious injury is head injury. High quality helmet is one of the most important accessories a driver
requires. So the driver must wear a helmet when he drives. The driver should also wear a suitable pair of
goggles.
RIDING APPAREL
Tight and non-flapping apparel will make your riding movement comfortable and safe when riding your
motorcycle. Good quality motorcycle riding apparel should be chosen.
4
CHECKS BEFORE RIDING
Review in detail the instructions in the "CHECKS BEFORE RIDING" section of this manual. Do not
forget to perform all the safety checks to ensure the safety of the rider.
TO FAMILIARIZE YOURSELF WITH THE MOTORCYCLE
Your riding skill and your mechanical knowledge form the foundation for safe riding practices. We
suggest that you practice riding your motorcycle in a non-traffic situation without obstacles until you are
thoroughly familiar with your motorcycle and its controls. Remember that practice makes perfect.
TO KNOW YOUR SAFETY SPEED LIMITS
Ride within the boundaries of your own skill at all times. Knowing these limits will help you avoid
accidents.
BE EXTRA SAFETY CONSCIOUS ON BAD WEATHER DAYS
Riding on bad weather days, especially wet days, requires extra caution. Remember braking distance
doubles on rainy days. Pay attention to the traffic markings on the road. Whenever in doubt about road
condition, SLOW DOWN!
PREVENT THE ACCIDENT
When other vehicles drive toward and turns a head of the motorcycle, accident often happens. A
clever driver always supposes that other drivers may not notice him even in the daytime. Bright and
reflective dress should be wear when you drive the motorcycle. In the evening, you should open the front
5

and rear lights to warn other drivers. Be sure not to drive your motorcycle into the blind areas of other
drivers.
REFIT
Remove original equipment and refit the motorcycle may cause dangerous riding. Be sure that all
equipment's fixation applies to the local standards and regulations.
SERIAL NUMBER LOCATION
The frame and/or engine serial numbers are used to register the motorcycle. These information are
very important to Skyteam service centers when you order spare parts or ask for special service. The
frame number or vehicle identification number(VIN) are stamped on the tube of the steering head. The
engine number is stamped on the left side of the crankcase. The name plate is on the right side of head
pipe of the frame
6
Please write down the serial numbers in the following blocks:
FRAME NO.
ENGINE NO.
7

9
Cap, fuel tank
Name plate
Lever, kick starter
Shock absorber, rear
Tool kit
Spark plug
Pedal, rear brake
Oil drain screw
Foot rest
FIXATION OF SPARE PARTS
Beam switch high/low Instrument panel Night light switch Lever, brake, front
Engine start switch
Horn switch
Ignition switch
Cap, fuel tank
8
Lever, clutch

10
Fuel cock
Air cleaner
Battery & fuse
Shock absorber, rear
Helmet lock
Lever Assy, gear shifting
Foot rest
Stand, prop
Lever, choke
CONTROLS
KEY
This motorcycle is equipped with a pair of identical ignition keys. Keep the spare key in a safe place.
IGNITION SWITCH
There are two positions for ignition switch:
"OFF" position
All electrical circuits are disconnected.
" "position
The ignition circuit is connected and the engine can be started.
INSTRUMENT PANEL
SPEEDOMETER
The speedometer indicates the driving speed in kilometers per hour.
ODOMETER
The odometer keep the record of the total distance that the motorcycle
has run since it was used.
NEUTRAL INDICATOR LIGHT
When the transmission is in neutral position, the green neutral indicator
light comes on. When the transmission is not in neutral, the indicator
won't flash.
11
WARNING
When you are going to drive to another traffic lane or turn right(left), you should open turn
signals in time. When finished, turn switch to the middle.
HORN BUTTON
Press the button and the horn will sounds.
RIGHT HANDLEBAR
Nighttime riding light switch
"": When the engine is running, the head light, instrument light and tail light
come on simultaneously.
LEFT HANDLEBAR
DIMMER SWITCH
Move the switch to " " position, the head light high beam comes on. On
the contrary, move the switch to " " position, the low beam is on.
TURN SIGNAL SWITCH
When the switch in " " position, the left turn signal light starts flashing,
When the switch is in " " position, the right turn signal light starts flashing. When the switch is in middle
position, the turn signal lights do not work.
12
"": No matter the engine runs or not, the head light, instrument light and tail light come on simultaneously.
" ": The head light, instrument light and tail light come off simultaneously.
Electrical Start Button " "
“ ”: Push down the electrical start button to start the engine.
Front Brake Lever
Grip the front break lever to break the front wheel.
Throttle Grip
The throttle grip is used to control the engine speed. Twist it toward yourself to accelerate and turn it
away from yourself to decelerate.
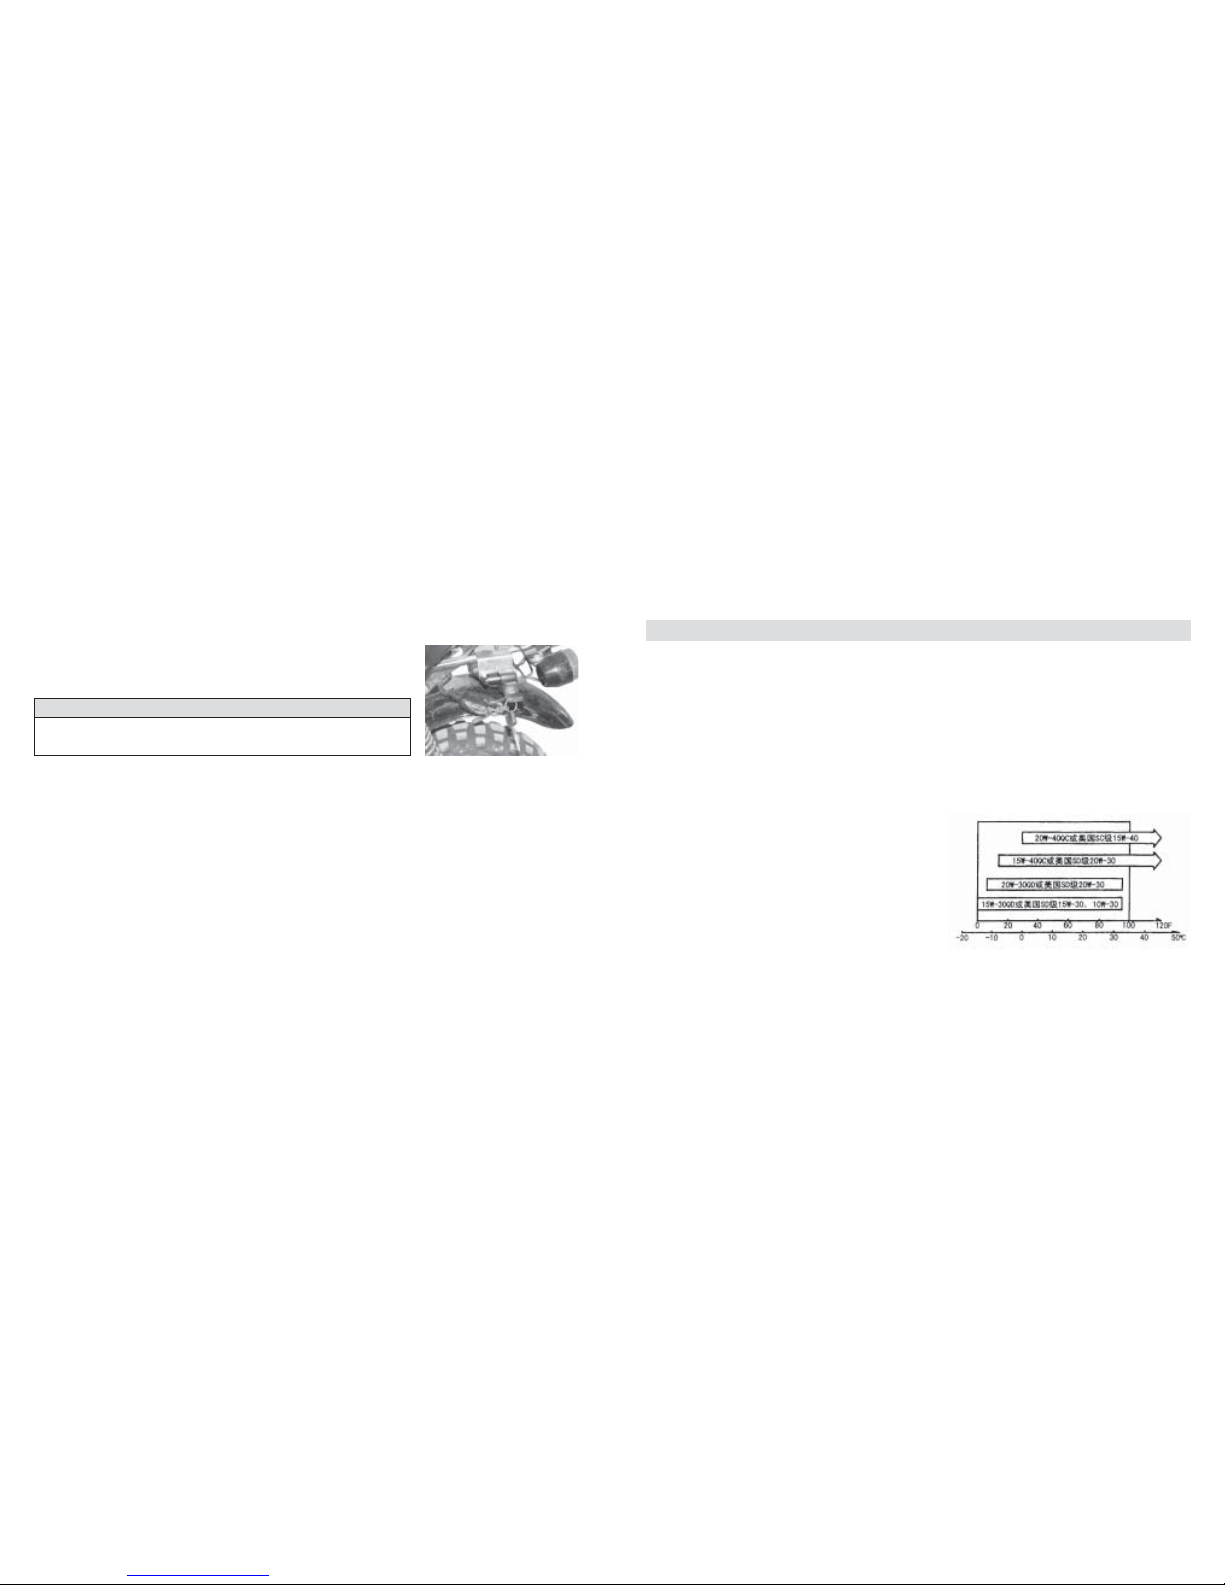
FUEL TANK CAP
FUEL COCK
This type of motorcycle has a manual fuel lever that can be located in
the following three positions:"ON"(Open), "RES"(Reserved) and
"OFF"(Close)
"ON": normally the fuel lever is in this position.
WARNING
Do not overfill the fuel tank(less than the bottom of the filler
tube as shown) to prevent the overflow when the fuel temperature
increases. Do not splash gasoline on warm engine. Do not fill
the fuel as shown in the picture.
Fuel Gasoline
level
Filler tube
13

During this time, the gasoline flows through the fuel plug to the carburetor.
"RES": If the fuel level in the fuel tank is too low. Turn the lever to the "RES" position to use the reserved
fuel.
"OFF": When you stopped the engine, even for a few minutes, you should turn the fuel lever to "OFF"
position.
CAUTION
After you stopped the engine, it will be very dangerous if the fuel lever is still in the "ON" or
"RES" position. It will cause the carburetor to overflow and the fuel may flow into the engine,
which, when the engine is started, may bring serious mechanical damage or fire.
You must turn the fuel lever to "OFF" position when you stopped the engine.
NOTE
When the fuel tank is in the "RES" position, refuel the tank at a nearby gasoline station at
once. After the refueling, turn the fuel lever to "ON" position.
KICK STARTER LEVER
The kick starter lever is located on right side of the engine.
WARNING
After starting the engine, check if the kick starter lever has returned to its normal position.
REAR BRAKE PEDAL
Stamping the rear brake pedal to brake the rear wheel. Meanwhile the rear brake indicator light turns on.
14
GEARSHIFT LEVER
This type of motorcycle has four gear positions. The lever
is connected with a ratchet. When one gear has been
chosen, the lever returns to its original position automatically
for the choice of another one.
CAUTION
When the gearshift is in neutral gear position, the green indicator in the head light housing
(neutral indicator light) will light.
STEERING LOCK
Turn the handlebar to the left and insert the key. Turn 180 degrees
clockwise, then draw out the key. You have locked the steering lock.
WARNING
Don't move the motorcycle when the steering lock is locked.
Otherwise you may loose balance. Turn Lock
15
HELMET LOCK
Insert the ignition key into helmet lock and turn counterclockwise to
open the lock. Match the lock ring of the helmet to right position and lock
the helmet lock. Then draw out the key.
WARNING
Do not ride with the helmet on the lock. The helmet may drawn
into the rear wheel and cause the motorcycle out of control.
16
FUEL
Please use SH0041-93 non-lead fuel with octane number great than 90.
Using non-lead fuel will prolong the service time of the spark plug, exhausting system and other parts
of the motorcycle.
OIL
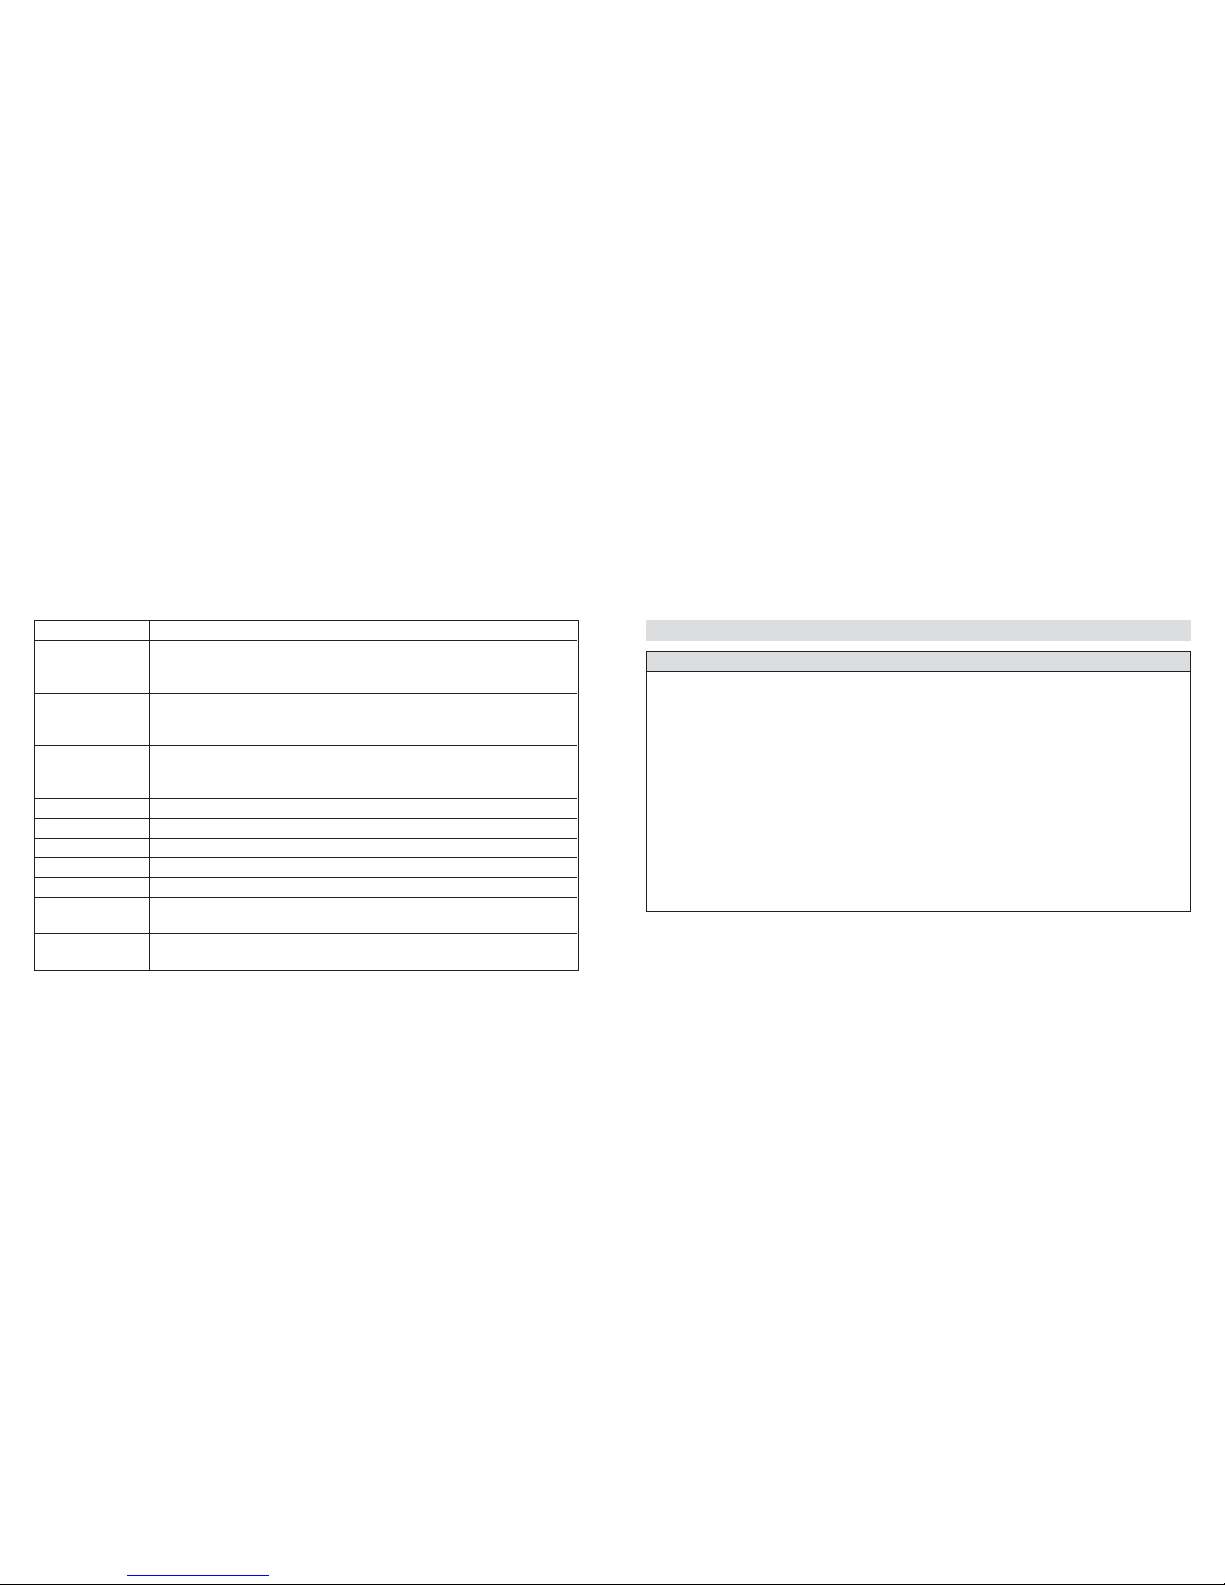
This motorcycle use the oil confirming to Chinese standard GB11121-95 and U.S. standard
SAEJ183E80. Please use 15W/40 SF/CD GB11121-95 engine oil. We recommend you to use Skyteam's
oil for 4-stroke engine-type 15W/40. Do not use common oil, vegetable oil or castor oil.
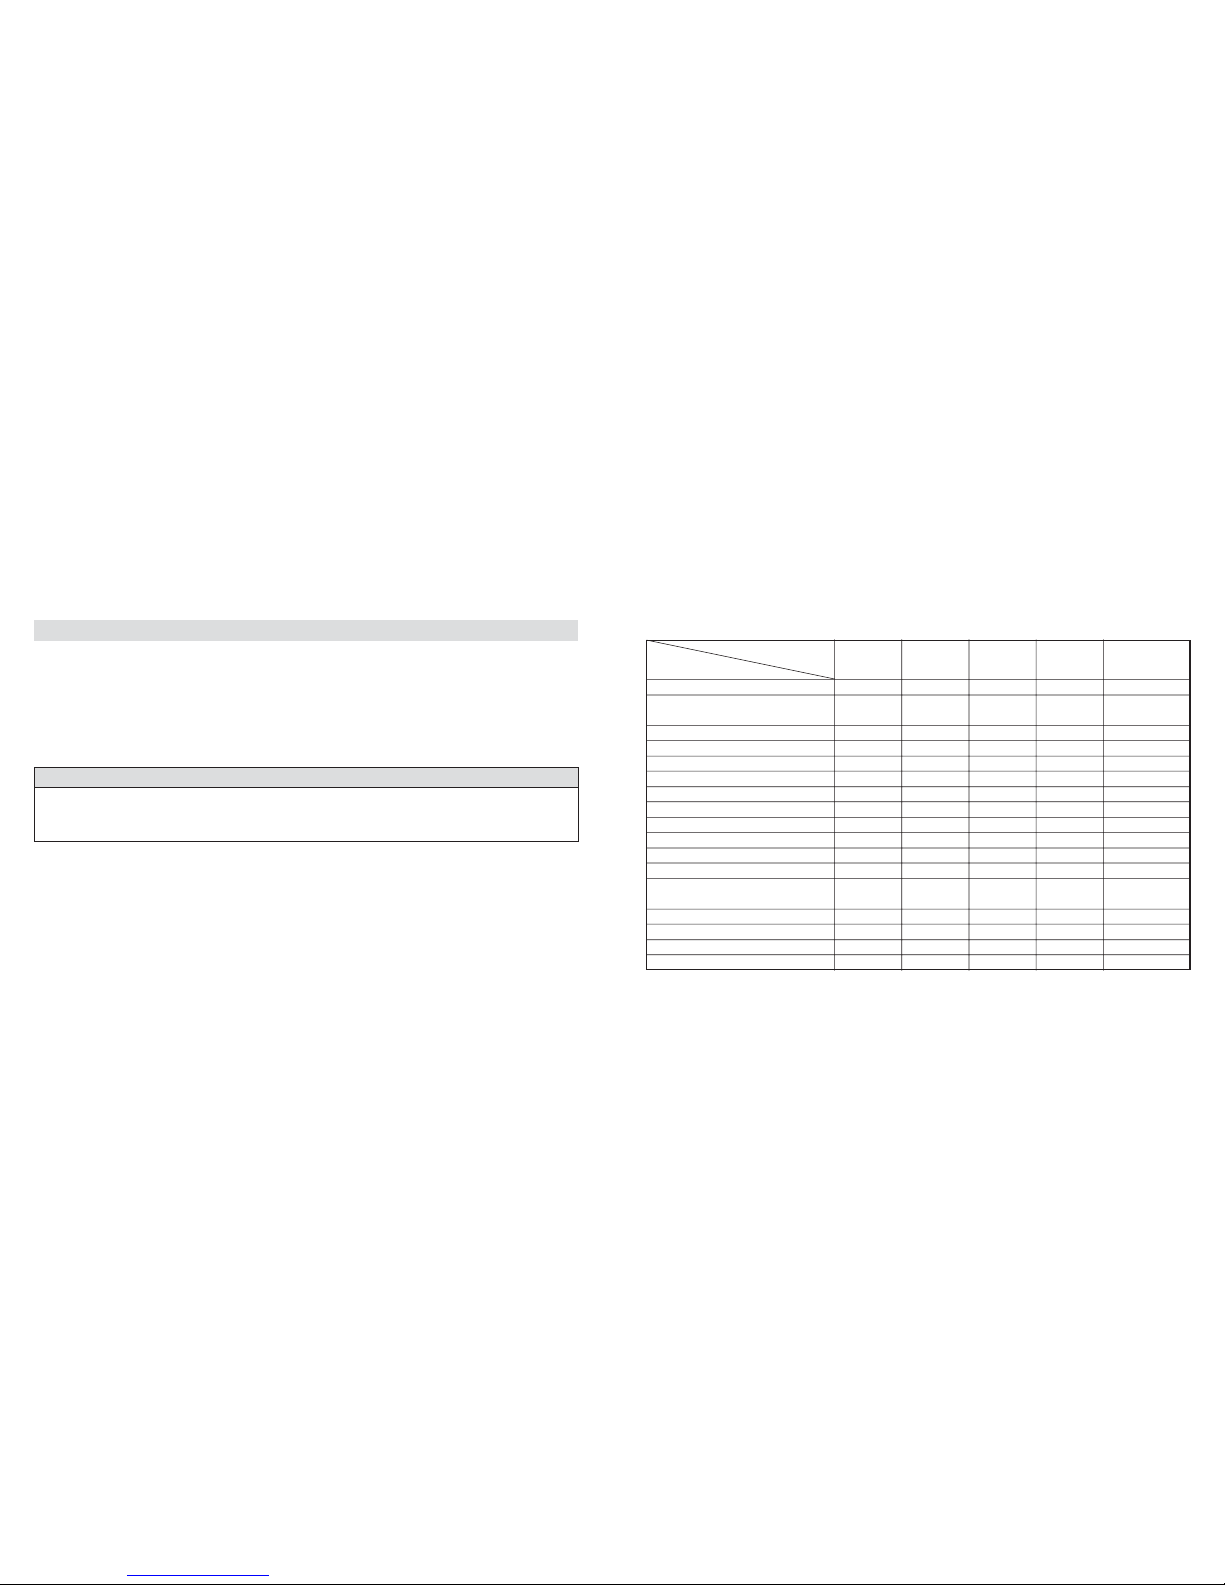
Please choose different oil according to the different area and temperature. Reference to the following
chart.
FUEL AND ENGINE OIL RECOMMENDATION
17

RUNNING-IN
The forward explains how important the proper running-in is to achieve maximum life and performance
of your new motorcycle. The following guidelines explain proper running-in procedures.
MAXIMUM SPEED
TO VARY THE ENGINE SPEED
The engine speed should be varied and not held at a constant speed .This allows all the parts in the
engine to be loaded and unloaded. The parts will cool down when they are unloaded. This is helpful in
matching between the engine parts. During running-in period, it is necessary to apply a reasonable
stress on all engine parts to ensure the best matching between them. The load applied should not
excessive.
TO AVOID CONSTANT LOW SPEED
Operating of the engine at a constant low speed(light load) can cause parts grazed and not properly
seated. Allow the engine to accelerate freely at different gears provided that the recommended maximum
limit is not exceeded. However, please do not use full throttle for the first 1600km.
Initial 150km
Up to 800km
Up to 1600km
Less than 30km/h
Less than 35km/h
Less than 45km/h
18
ALLOW THE ENGINE OIL TO CIRCULATE BEFORE RIDING.
To start the engine that was in hot or cold condition, it should be allowed to have sufficient idling time
prior to being loaded or running, this way could ensure the lubricating oil to be applied to all the important
parts.
PERFORM YOUR FIRST AND THE MOST CRITICAL SERVICE
The first 1,000km service is the most important one that your motorcycle will receive. At this time all
adjustments should be made, and all fasteners should be tightened and the dirty oil should be replaced.
Timely performing of the first 1,000km service will ensure optimum service life and performance of the
engine.
CHECKS BEFORE RIDING
Before riding the motorcycle, be sure to check the following items. Never underestimate the importance
of these checks and perform all of them before riding your motorcycle.
CAUTION
The first 1,000km service should be performed as outlined in the Maintenance Schedule
section of this Owner's Manual. Pay particular attention to the caution and warning in
Maintenance Schedule section.
19
WHAT TO CHECK CHECK FOR:
(1)Smoothness
(2)No restriction of movement
(3)No play or looseness
(1)Correct pedal and lever play
(2)No dragging
(3)No slippage
(1)Correct pressure
(2)Adequate tread depth
(3)No crack or cuts
Fuel enough for planned distance
STEERING
BRAKES
TIRES
FUEL
Neutral indicator light
Correct function
Enough amount of oil
(1)Correct play of the throttle cable
(2)Easy operation and positive return of the throttle grip to the closed position.
(1)Suitable strain
(2)suitable lubricating
INDICATOR
HORN SWITCH
ENGINE OIL
THROTTLE
LIGHTING Operation of all lights: Head, Tail, Brake, Instrument and Turn signal lights
TRANSMISSION
CHAIN
20
RIDING TIPS
WARNING
(1)If it is your first time to ride a motorcycle of this type, we suggest that you practice on a non-
public road until you are thoroughly familiar with the controls and operation of the motorcycle.
(2)Riding with only one hand is extremely dangerous. Keep both hands firmly on the handlebars
and feet securely on the footrests. Under no circumstances should both hands be removed
from the handlebars.
(3)Don't try to shift gear in the course of cornering. Slow down to a safe speed before negotiating
a corner.
(4)When the road surface is wet or slippery, there is a reduction in tire friction. You should
reduce speed when you experienced these conditions in which braking and cornering ability
are weakened.
(5)In the case of side winds which may be experienced at the exits of tunnels, when passing by
the cut of hill, or when being overtaken by large vehicles, you should reduce speed and ride
alertly.
(6)Follow the speed limit and traffic regulations at all times.
STARTING THE ENGINE
Check the fuel lever to make sure that it is at "ON" position, insert the key into the ignition switch and
turn it clockwise to the "ON" position. When transmission is in neutral, the neutral indicator will light.
21

A
B
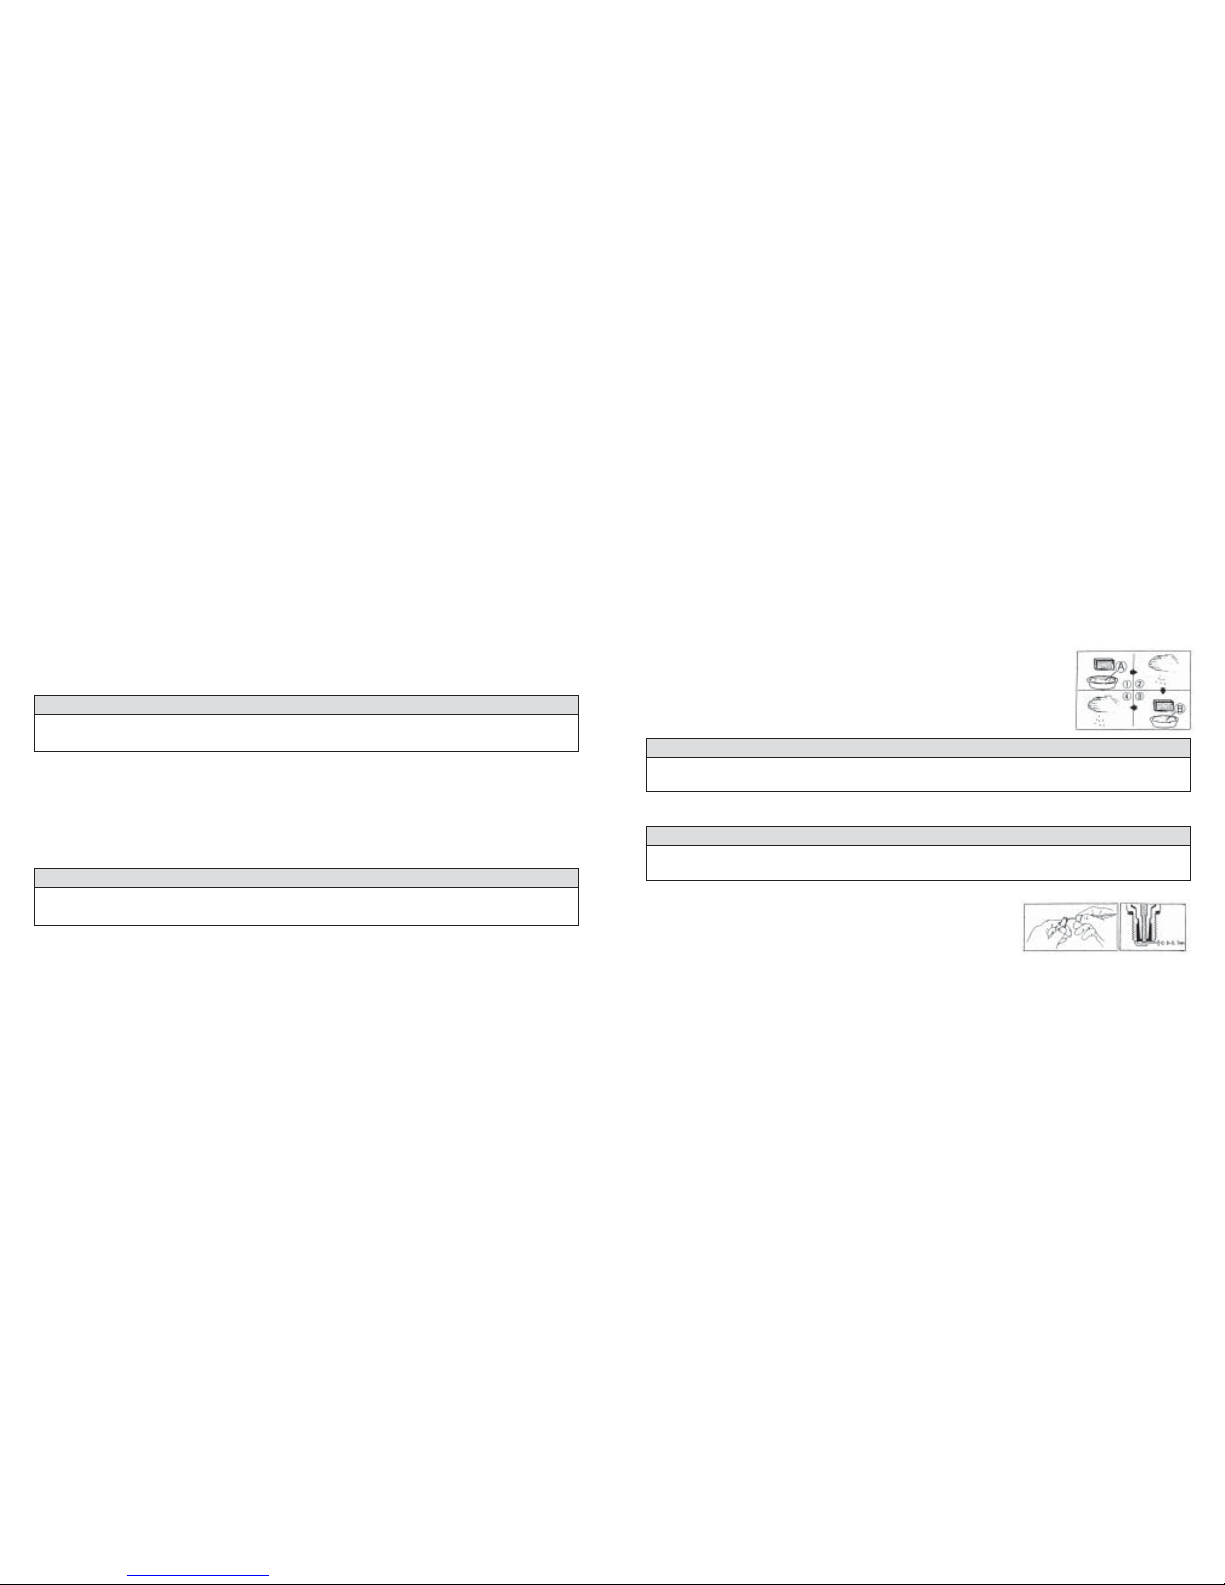
WHEN THE ENGINE IS COLD
Turn the choke lever from "A" position to "B" position, push the electric
starter button or depress the kick starter lever to start the engine.
Immediately after the engine starts, let the engine run until the engine
sufficiently warms up, then return the choke lever to its original position.
When the engine runs smoothly and the choke lever is in its disengaged
position, the engine is warmed up sufficiently. The more cool is the
temperature, the more time is needed for warming up the engine.
WHEN THE ENGINE IS WARM
Open the throttle by 1/8 to 1/4, push the electric starter button or depress
the kick starter lever. The operation of the carburetor choke system is
usually not necessary when the engine is warm(the choke lever should be at "A" position).
CAUTION
Always start the engine with the transmission in neutral.
NOTE
If 2~3 times operation can not start the engine, open the throttle grip 1/8 to 1/4 turn, then
restart the engine.
A motorcycle not used for long-time or poor vaporized fuel may cause difficult starting, in
this time, don't turn the throttle grip, but repeatedly start the engine.
22
A
B
ST125-8, ST125-8A
ST50-8, ST50-8A, ST110-8, ST110-8A
WARNING
Do not run the engine indoor where there is little or no ventilation available. Carbon monoxide
fumes are extremely poisonous. Never leave the motorcycle running while unattended, even
for a moment.
CAUTION
Do not let engine run excessively without riding, or it will overheat and may damage internal
engine components.
STARTING OFF
Automatic clutch
Stamp down the shifting lever, the first gear is engaged. Twist the throttle lever toward yourself, the
motorcycle moves forward.
For shifting to next higher gear, slowly increase the speed, and then shut off the throttle. Turn shifting
lever to next higher gear and open the throttle, the highest gear can be engaged by following these steps.
Manual clutch
Keeping the engine running at idle speed, pulling in the clutch lever and wait a minute, stamp down the
shifting lever with left foot toe to engage the first gear. Slowly open the throttle and lightly leave the clutch
lever, the gear is engaged and the motorcycle moves forward.
For shifting to next higher gear, firstly open the throttle, then shut off the throttle, at same time leave the
clutch, stamp down the shifting lever to 2nd gear. Then lightly loosen clutch lever to let the gear engaged,
then slowly open the throttle.
23
WARNING
Before starting off you must put the side stand back to its upper position. Don't let it hang.
DVRIVE ON A SLOPE
When climbing up a slope, the motorcycle may begin to decelerate and appear lack of power. You should
change the gear shift to low speed positions, allowing the engine to run in normal power range. But the
shift change should be quick to prevent the motorcycle loss the potential to move forward.
When going down a slope, you should gear down your engine to make it easy to break your motorcycle.
Don't run your engine excessively.
USE THE BRAKE AND PARKING
Twist the throttle grip away from yourself to close the throttle completely.
Apply the front and rear brakes evenly and at the same time.
NOTE
An inexperienced rider would only use the rear brake, which could speed up the wear of the
brake and make the braking distance longer.
WARNING
It's dangerous to use the front or rear brake only. It can cause skidding and loss of control.
When driving on wet and slippery roads or turning a corner, be extremely careful and brake
slowly. Braking abruptly on a slipery or rough road is particularly dangerous.
24
Pulling in the clutch lever and letting the linkage gear in the transmission disconnected, reduce the
motorcycle speed and shift the gear into neutral, until full brake.
WARNING
The higher the speed is the longer the braking distance is required. Be sure to keep distance
between you and the vehicles or objects in front of you.
Before you stop the motorcycle, change the gear to neutral position. See the neutral indicator light to
ensure the gear is in the neutral position.
The motorcycle should be parked on a solid and plain ground.
If your motorcycle has to be parked by the side stand on a slope, you'd better get your motorcycle
engaged in the first gear to prevent sliding. Return the gear shift to the neutral prior to starting the
engine.
Turn the ignition switch to "OFF" to shut down the engine.
Take the ignition key out the switch.
Turn the fuel lever to "OFF".
Lock the steering lock.
25
CAUTION
Proper running-in maintenance(1000km)is a mandatory item that could make your motorcycle
reliable and give full performance at all time. Be sure that this periodic maintenance is performed
thoroughly and in accordance with the instructions in this manual.
The chart below indicates how many kilometers or how many months you have to make periodic
services. At the end of each interval, be sure to check, inspect, lubricate and service as instructed. If your
motorcycle is used under high load conditions such as continuous full throttle operation, or is operated in
a dusty climate, certain services should be performed after that to ensure reliability of the motorcycle.
Under this condition, Skyteam service station could give you further instructions. Steering components,
suspension and wheel components are key items that require very special and careful servicing. We
suggest that you have these items checked and serviced by your authorized dealer.
CHECKS AND MAINTENANCE
26
PERIODIC MAINTENANCE CHART
* wheel center bearings (Front &
rear)
* Intake and exhaust valve
clearances (cold state)
Item
Period First
1000km 1600km 3000km 5000km
Afterwards
Every
2000-3000km
* Engine fixing bolts and nuts
Transmission Chain tension
Carburetor
Air cleaner
Lubricating oil in gear box
Lubricating oil filter gauze
Spark plug
Throttle grip and cable
* Front and rear brakes
Type pressure
Soft shaft of odometer
Gasoline tank cock
Steering stem
* * All fasteners
* Fuel and lubricating pipes
C(check)
C
-
Change
C
C
C
C
C
C
C
C
C
C
C
C
C
Clean
-
Change
C
C
-
C
-
-
-
C
C
C
A
(adjust)
-
C
C
Clean
Change
C
C
C
C
C
-
C
C
C
C
C
-
C
C
-
Change
C
C
C
C
C
C
C
C
C
C
A
Oil
C
CA
Clean
Change
C
C
C
C
C
-
C
C
C
C
CA
(Check&Adjust)
C
27

NOTES:
(1)This table is a reference for periodic maintenance, ideally more checks and maintenance should be
carried out.
(2)"Check" in the table contains cleaning, adjusting, lubrication and changing.
(3)Ask for a professional repairer when you can not treat any items by yourself.
(4)The intake and exhaust valves should be checked after every 1,600km. The valve clearance in cold
state is 0.05mm.
(5)After worn, the limiting thickness of the upper plate of the brake shoe is 1.5mm. The brake shoes
should be replaced in full sets.
(6)Checks should often be made to see the swing condition of the front and rear wheels. If the wheel
swing seriously, find out the reason and conduct troubleshooting.
**The steel rim and hub in front and rear wheel assemblies are connected by four connecting bolts(M8X16-
Zn.D), whose tightening torque value is 18-25N.m.
NOTE
In the periodic maintenance you may need to change one or more parts. We suggest you to
use Skyteam spare parts. We suggest you to go to qualified Skyteam service station for
maintenance to the items with "*". For other items, you may check and maintain for yourself.
28
TOOLS
To help you to implement the periodic maintenance, we supply you with a tool kit which is placed in the
small bag below the rear side of the frame.
LUBRICATING
In order to keep every part of your motorcycle performing well and extend their service life, you should
do proper for your driving. After driving on rainy day or washing the motorcycle, you are required to apply
the lubrication on the necessary parts. The main places to be oiled are drive chain, brake cable, front
brake lever and kick start lever pivot.
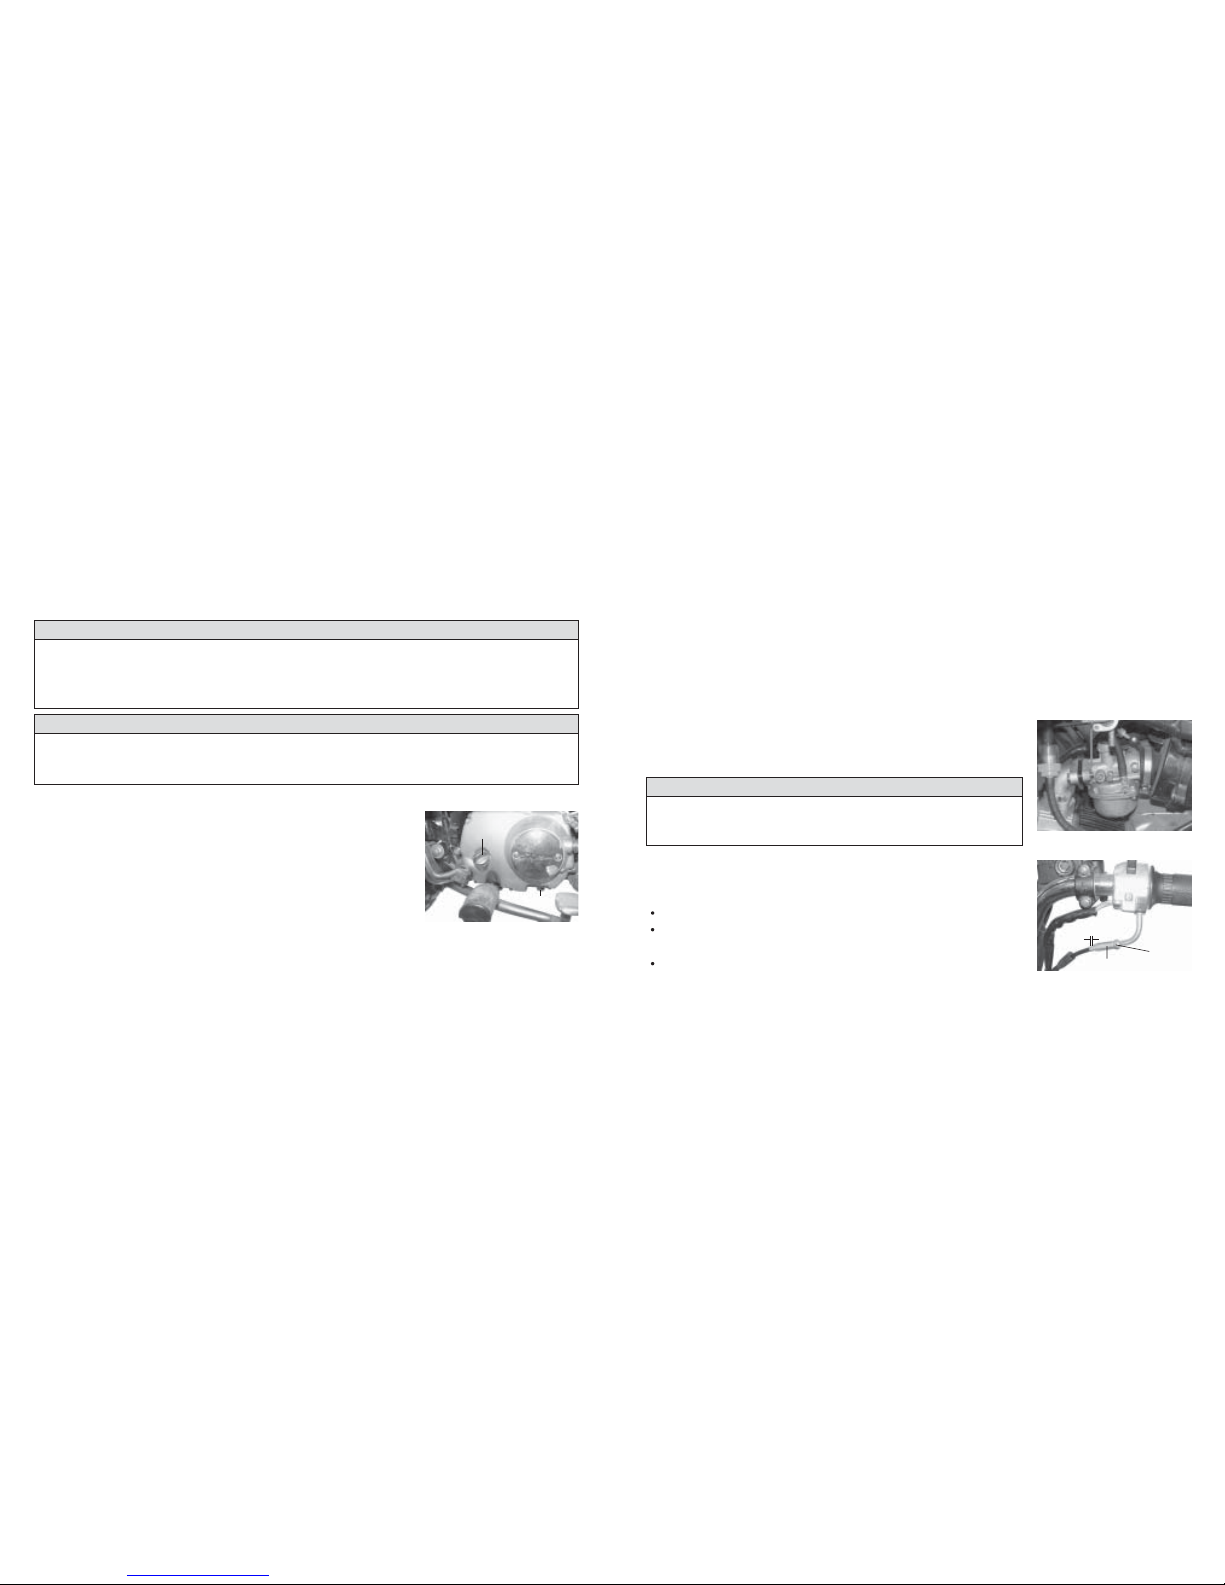
BATTERY
This battery is 12V-4Ah dry and needn't to be maintained, so it doesn't
have to be checked and supplied with electrolyte.
When the left side cover of motorcycle is opened, the battery (1) and
fuse (2) can be seen.
Pls cover the lid 25minutes after adding the electrolyte, when the battery
is used for the first time. The voltage should be higher than 12.5-12.6volt
when measured by the multi-meter. If the voltage is lower than the
stipulated data, pls change the battery with the accumulator.
ATTENTION
If the manufacturing date is before two years, the battery must be charged when it's the first time to use.
29
CHARGING METHORD
Pls charge 10-12 hours under 0.2ampere AC. Then the charging voltage is 12.5-12.6 volt, and the
performance of the battery could act 90%-100% which allow the battery could be used for quite a long
time.
If the battery is not used for a long time, pls take it away from the motorcycle to avoid discharging or
leaking automatically. Pls take apart the connector if the battery is left on the motorcycle.
AIR CLEANER
If the air cleaner filter is clogged with the dust, the intake resistance will be increased, resulting in the
reduction of output power and more consumption of the fuel. The checks and cleaning should be conducted
to the filter assembly for every 3,000km.
CAUTION
The battery cover cannot be dismounted and more once assembled, because the battery is
hermetic.
NOTE
Under dusty conditions, the air cleaner filter assembly must be cleaned or replaced more
frequently.
30
CLEANING THE FILTER ASSEMBLY
Clean the filter assembly as the following:
(1)Fill a washing pan of a proper size with non-flammable cleaning solvent(A),
immerse the filter assembly in the solvent and wash it clean.
(2)Squeeze the solvent off the washed filter assembly by pressing it between
the palms of both hands. Do not twist and wring it or it will develop fissures.
(3)Immerse the filter assembly in a pool of motor oil (B) and squeeze the oil
off it to make it slightly wet with oil.
CAUTION
Before and during the cleaning operation, carefully examine the filter assembly for any
crackles. A new one should be replaced if a crackle is observed.
(4)Reinstall the cleaned filter assembly. Be absolutely sure that the filter assembly is securely in position
and is sealed properly.
CAUTION
Never start the engine without the filter assembly in position. It will quicken engine wear and
shorten the engine service life.
SPARK PLUG
After the first 1,000km and afterwards every 3,000km riding, remove
the carbon deposits from the spark plug with a small metal wire brush
or a spark plug cleaner. Re-adjust the electrode gap of spark plug with
a gap thickness gauge to make it between 0.6 to 0.7mm
The spark plug should be replaced after every 6,000km riding.
31
CAUTION
The standard spark plug for this motorcycle has been carefully selected to meet most
operation ranges. If the spark plug color differs from a standard one, you should consult your
Skyteam dealer before selecting an alternative plug with a different heat range. The selection
of an improper spark plug can lead to severe engine damage.
CAUTION
Do not over torque the spark plug otherwise threads of the cylinder head will be damaged.
Do not allow contaminants to enter the engine through the spark plug hole when the plug is
removed.
TRANMISSION OIL(GEAR BOX OIL)
After a long time driving, the transmission oil may degrade, which could
reduce the lubricating performance of the oil. Therefore, after first 1000km
driving and every 6000km afterwards, change the oil according to the
following instructions:
Changing of the oil in the engine case should be done when the engine
is warm.
Screw out the oil gauge(1)and the drain plug(2)to drain the oil
thoroughly. Then refit the drain plug and fill in new oil. The oil level can be checked by using the oil gauge:
insert the oil gauge in the gear box, the oil level should be maintained between the upper limit marking
and lower limit marking. (When checking, do not screw in but insert the gauge in to the oil filling hole.)
32
CARBURETOR
Undisturbed carburetion is the basis to ensure good performance of your engine. The carburetor has
been presented to the optional condition before delivery. Do not attempt to change its setting. There are
two adjustments that you should take care: engine idle speed and throttle cable play.
THROTTLE CABLE ADJUSTMENT
As shown in the figure, there should be 0.5-1mm backlash in the throttle
cable. Adjust it according to the following instructions:
Hold the hose of the throttle cable and check the backlash.
Loose out the locking nut (1) and turn the adjusting nut (2) until the
required backlash is obtained.
Tighten the locking nut.
CAUTION
It is recommended that this adjustment to be conducted by the
approved dealer. You can do it by yourself according to the above
procedures if a speedometer is available.
CARBURETOR IDLE SPEED ADJUSTMENT
(1)Start up the engine and warm it up.
(2)When the engine is warm, turn off the throttle, turn the adjusting
screw in or out so that the engine may run at its idle speed shown in
“SPECIFICATIONS”
0.5~1mm
33

TRANSMISSION CHAIN ADJUSTMENT
We suggest you to change your transmission chain in Skyteam's service station or dealer's station
when it has been worn.
When performing the periodical check, the following states of drive chain should be checked.
(1)Loose pins (2)Damaged rolls (3)Dry and rusty chain links (4)Excessive damages (5)Twisted and bonded
links (6)Loosely adjusted chain
If the above troubles are found, the sprocket is most likely to be damaged. Therefore the following
check of the sprocket is necessary.
(1)Excessively worn sprocket teeth.
(2)Broken or damaged sprocket teeth.
(3)Loosened locking nuts of the sprocket.
After every 1,000km riding, adjust the transmission chain tension
according to the following method to ensure the sag is between 15-25mm.
Depending on your riding conditions, you may make frequent adjustment.
WARNING
To ensure the safety, you should make checks and adjustments to the transmission chain
before riding.
WARNING
For every 1,000km riding at most, adjust the transmission chain tension. In fact you'd better
to adjust before every riding. Excessive chain slack could cause the chain to come off the
sprockets and result in an accident or serious engine damage. The transmission chain
adjustment should be conducted as per following methods:
34
(1)Place the motorcycle on the side stand.
(2)Loosen the locking nut(1), and then loosen the adjusting nut.
(3)Adjust the sag of transmission chain by turning the adjusting bolt to the right or left. At the same
time, the centers of the front and rear sprockets must be held in alignment. For your convenience of
adjustment, reference marks are made on swing arms and all chain adjusters. They can be aligned with
each other and referenced from one end to another. Refit the locking nut(1) and lock the adjusting nut(2)
after the sag of transmission chain is adjusted between15-25mm.
WARNING
Hot exhaust pipe may hurt people, sometimes even the engine
has been stopped. You must not check the chain unless the
exhaust pipe has cooled down.
NOTE
Be sure the two sprockets are not worn, or replace them with
new ones.
CAUTION
Fit the joint clip to the chain with its open end toward the reverse
movement direction.
35
(1)(2)
This manual suits for next models
6
Table of contents
Other Skyteam Motorcycle manuals


