Slamm Outbreak User manual

INSTRUCTION MANUAL

ASSEMBLY INSTRUCTIONS
Please note: ADULT ASSEMBLY REQUIRED
Unpack your scooter from the box and check that all the parts pictured below are present. In addition to this we recommend you use two 36mm
spanners or an adjustable wrench (not supplied) to set up your headset correctly. You can set up the scooter with out spanners but it’s harder to
keep the headset nuts secure and achieve the correct headset adjustment.
Before you head out there are a few things you’ll need to know that will help you get the most out of your scooter and help
you maintain it properly.
A) Bars
B) Bar Stem
C) deck
D) Forks
E) Brake
F) Bar Grips
G) Clamp
H) Rear Wheel
I) Front Wheel
J) Headset Top Nut
K) Headset Lower Nut
L) Headset Top Cup
M) Headset Bottom Cup
N) Allen Keys
a)
c)
e)
f)
G)
h) i)
J)
n)
l)
k)
m)
D)
b)
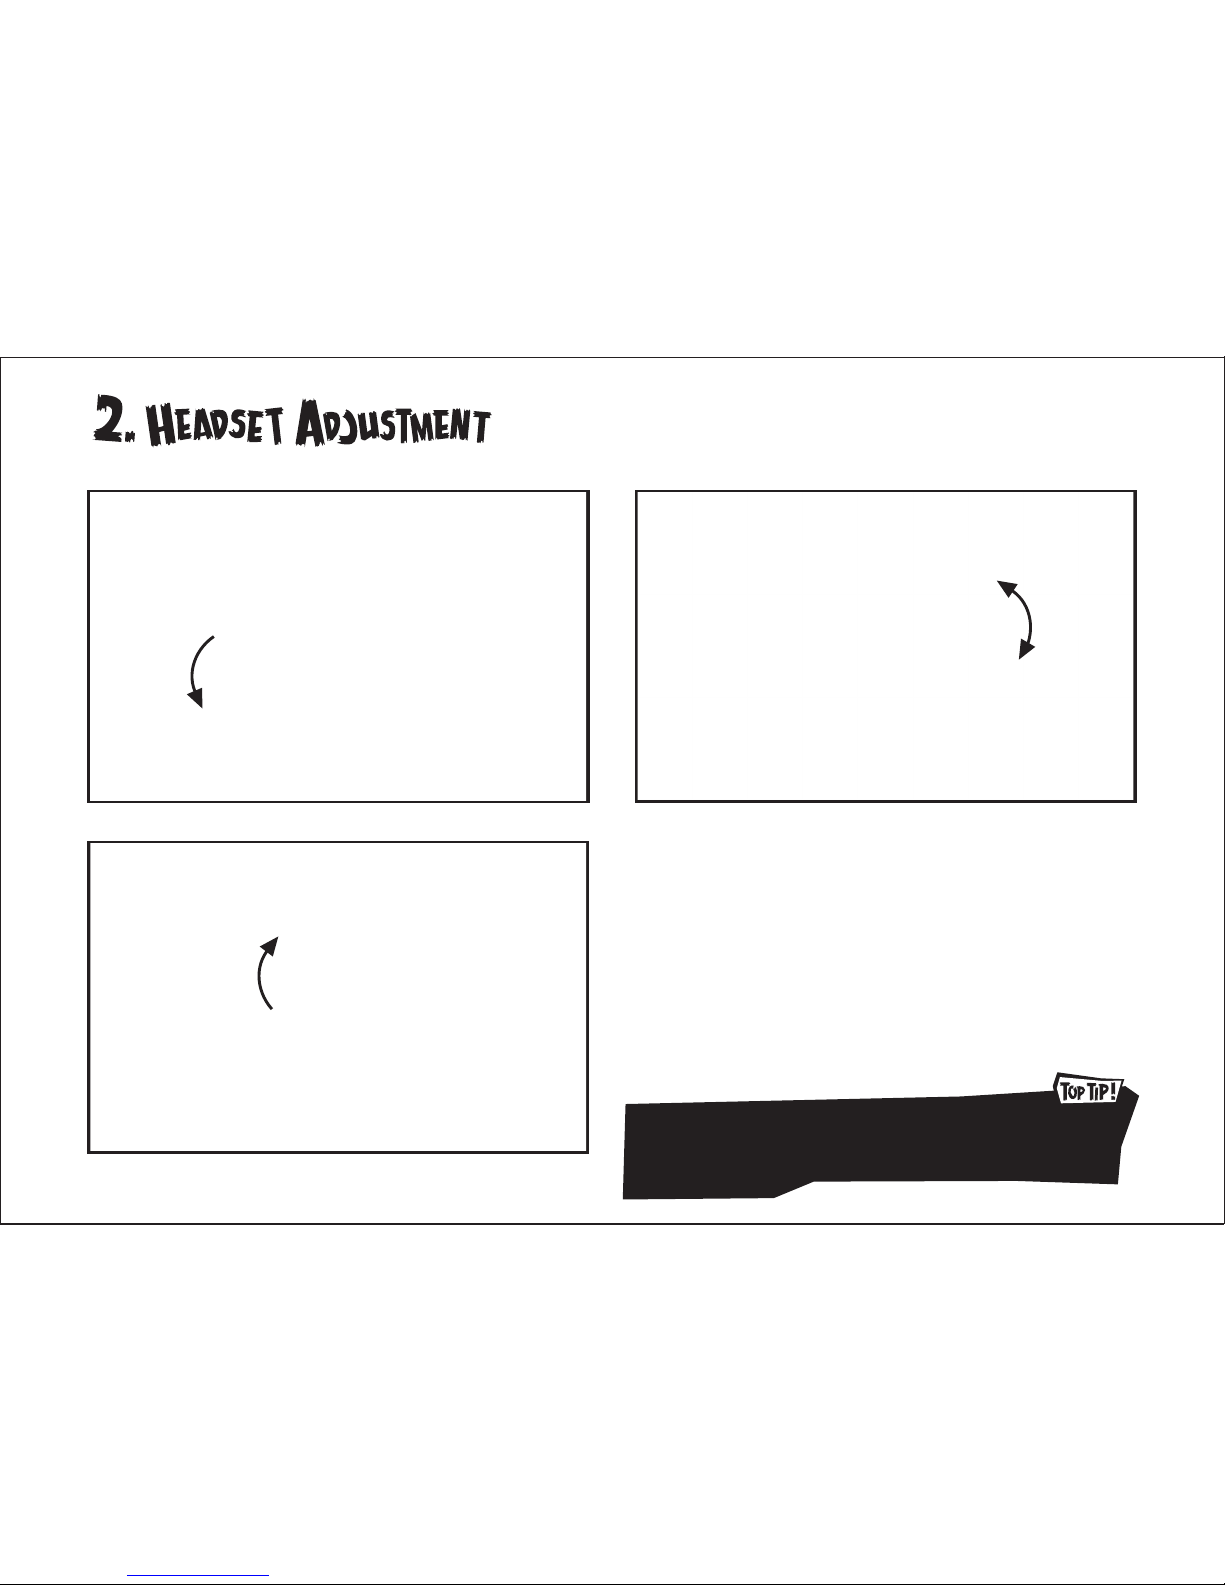
The rst and most important part of building your scooter is checking that the headset is correctly adjusted. If it wobbles, has play or is too tight
follow the simple instructions below to make sure it is working correctly. This is important so take your time to get it right.
Step 1: locate the top two headset adjuster nuts that sit just above the
head tube and loosen o the top nut so you can adjust it.
Step 2: Hand tighten the lower nut so there is no play or wobble in the
fork. It should still turn easily but there needs to be some resistance with
the bars o. Having this nut too tight or too loose may result in damage
to the bearings!
Step 3: Now tighten the top nut down on to the bottom nut to secure it
in place. While holding the lower nut in place tighten the top nut as much
as possible to lock it o. *
Be careful to make sure the bottom nut doesn’t move or that will adjust
the headset!
The fork should have a slight resistance once correctly adjusted.
This is because the bars are not fitted and the bearings require
load to spin. Once the bars are fitted it should spin freely! if not
re-check the above
1 2
3
*NOTE: Two 36mm spanners will make this job much easier

The next stage is to attach the bar to the fork.
Step 1 Step 2 Step 3 Step 4
Step 1: Slide the bar onto the fork stem. If it’s tight slightly loosen o all 4 clamp bolts using the 5mm Allen key provided.
Step 2: Ensure the back of the clamp is in line with the slot in the back of the bar stem, this allows the clamp to pinch evenly on the bars. Slide the bar
right down so the bottom of the bar sits ush with the top headset nut. Now it’s on you need to make sure the bars are straight before you tighten them!
Step 3: Make sure the front wheel is straight to the deck with the arrow on the fork pointing forwards. Now holding the wheel still, align the bars so they
are a right angle to the deck/wheel. Keeping everything straight, tighten the bottom clamp bolt up slightly so that the bars keep their position on the fork
stem.
Step 4: Working your way up the bolts tighten them a bit at a time keeping the pressure even. Once you get to the top clamp bolt go back to the bottom
bolt and start again. Keep doing this until the bars are completely secure.
Always check the bars are tight before use by securing the front wheel and trying to turn the bar.
Make sure the bar is completely pushed down onto the headset, this will help stop the headset from loosening
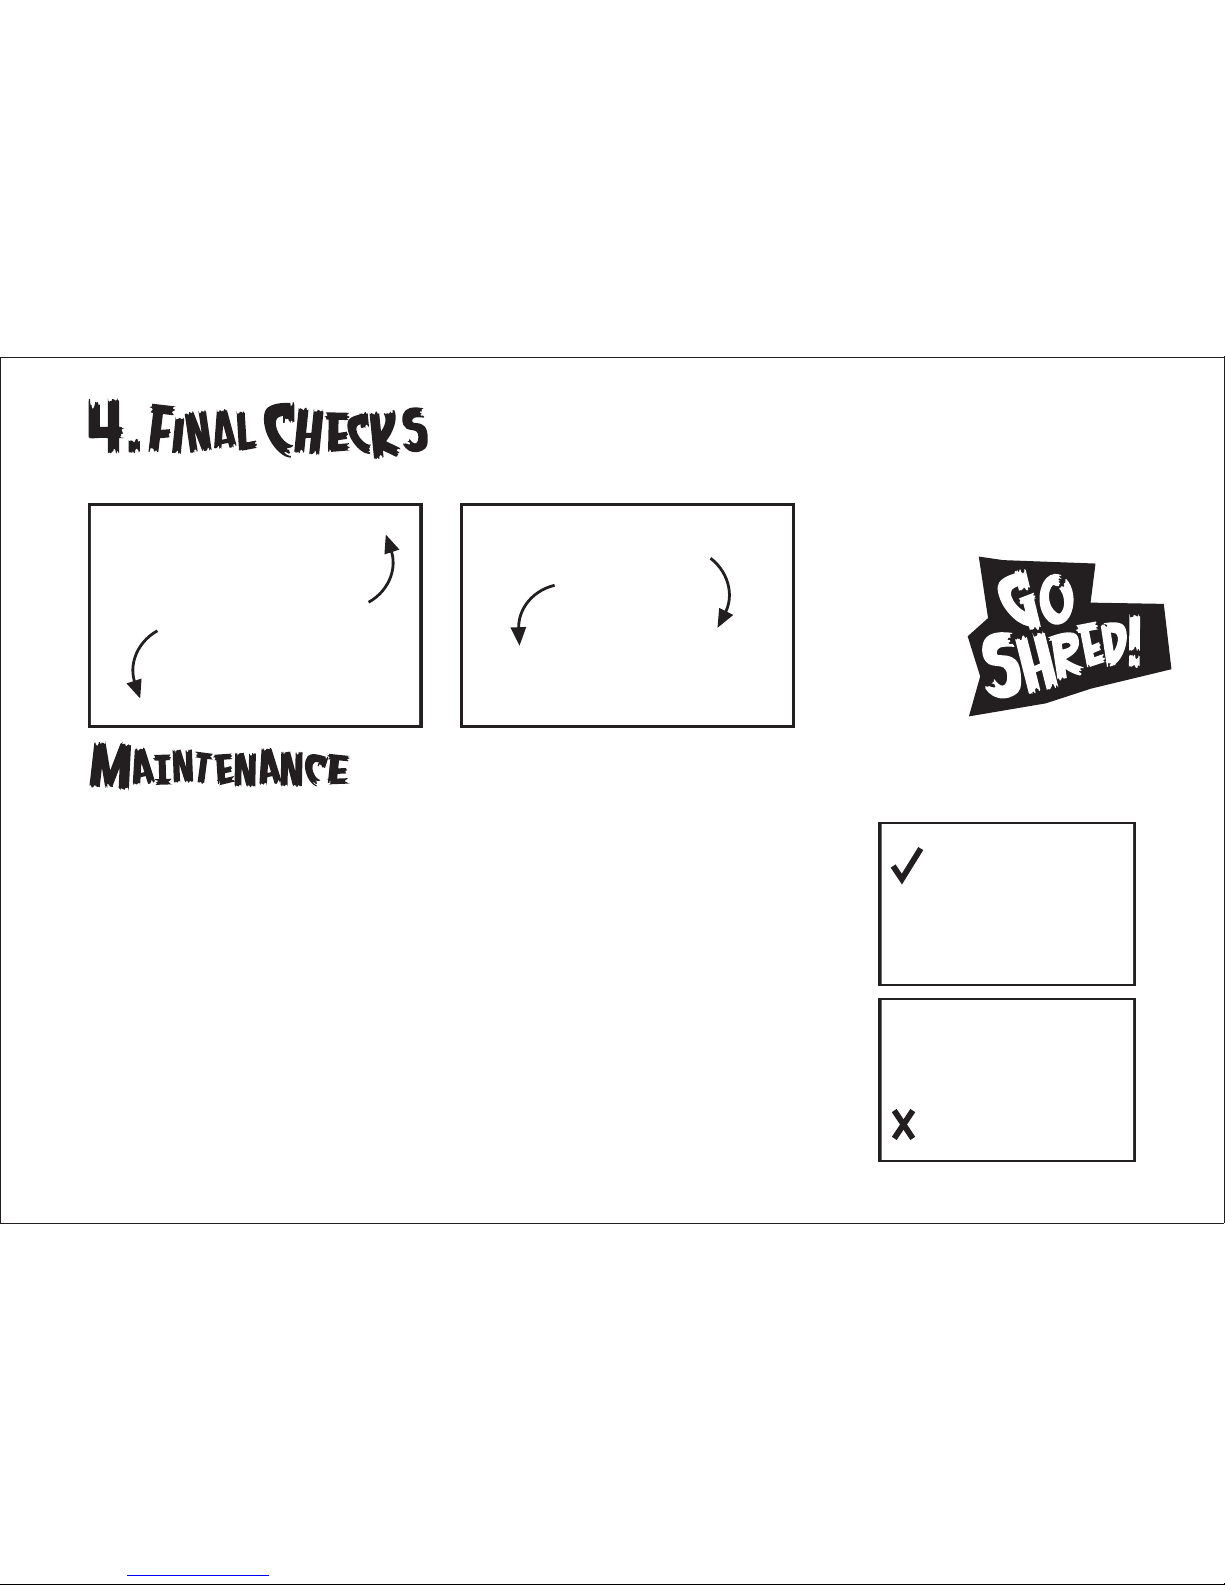
Now you’re almost ready to shred! Before you do anything else check that all other locking nuts and bolts are tight, the brake works correctly and
the wheels spin freely. Don’t worry if the wheels don’t spin well at rst, the bearings need breaking in and will always spin better under load!
To keep your Scooter looking fresh and working at its peak performance you need to follow these tips:
Always store your scooter in a dry place.
Clean your scooter with a soft damp cloth after each use. Do not use solvents or bleaches when cleaning!
If your scooter gets wet make sure you dry all metal parts to prevent rusting!
Regularly clean and grease your headset bearings - these bearings get the most use and if they are not well
maintained they can become damaged. Over time they deteriorate and need replacing due to the nature of
freestyle scootering. You can purchase replacement parts from most scooter shops and websites.
For your own safety use original spare parts only - Do not make any structural changes!
The wheel bearings tted as standard are sealed low maintenance bearings and do not require greasing
but you can still clean them by wiping them with a damp cloth to remove any grit and dirt!
The wheels should be replaced when they are worn down or damaged. You can help reduce this by
rotating your wheels from front to back regularly and by braking smoothly. Do not lock the back wheel
when braking as this will cause at spots! See the diagrams on the right for the correct way to brake to
help prevent locking up.
IMPORTANT! You must check your scooter properly before you use it!
Make sure you check the construction of your deck and bars before you use the scooter! Check all bolts are
tight and all xings and self locking nuts are functioning correctly!
DO NOT USE YOUR SCOOTER IF IT IS DAMAGED!

Step 1: Locate the top two headset adjuster nuts that sit just above the head tube and loosen o the top nut. NOTE: using two 36mm spanners
will help
Step 2 : (a) Now completely remove the top lock nut from the fork tube. (b) Repeat this step for the lower headset nut. While doing this be
careful that the forks don’t slide out from the deck head tube so no bearings are lost or damaged.
Step 3: Now carefully slide the forks down and out from the deck. Do not knock the bearings when doing this or you could damage them.
Step 4: With the fork removed you can now change or service the bearings. Carefully slide the lower bearing up and o the fork tube. When
re-installing the bearings ensure the bearing unit is the correct way round as seen in image 4(b). Wrong tment will result in damage!
Step 5: Now carefully remove the top bearings. Make sure the bearings are the correct way round when putting in the new unit like in image 5.
Step 6: With the bearings removed check the bearings condition and remove any dirt or old grease with a dry cloth from both bearings and
cups. Apply a thin even coverage to the bearing and inner cup lips, but not too much as it could result in the bearings becoming clogged. Now
install the bearings!
Step 7: Slide the forks back up into the head tube. IMPORTANT! Take care not to damage the bearings when doing this!
Step 8: Screw the lower nut back on rst, followed by the top nut. Take care not to cross thread the nuts!
Now nally follow the Headset Adjustment instructions in this manual and you’re good to go!
To help maximize the life of your headset and keep it performing at it’s best, the inner bearings must be serviced. However they may still eventually
need replacing with a new unit. The following steps explain how to either service or replace the inner headset bearings.
1 2a2b4 4b3
5 6 7 8
Adult Assistance required!

ADULT ASSEMBLY REQUIRED - An adult must assist children when assembling or making adjustments to the scooter.
This product is not suitable for children under the age of 8.
100kg Maximum rider weight
Always wear full protective equipment including helmet, wrist, knee and elbow pads!
Make sure the helmet ts well & the chinstrap is securely buckled!
Always wear closed toe shoes when riding your scooter
Ride on smooth, paved surfaces away from motor vehicles and other road users or trac
Avoid sharp bumps, drains and sudden surface changes otherwise the scooter may suddenly stop!
Avoid surfaces with sand, gravel, dirt, leaves and other debris at all times.
ALWAYS avoid water or using your scooter in wet conditions. Wet weather impairs traction, braking and visibility.
Do not ride your scooter at night or in poor light.
Avoid hills and excessive speeds associated with riding downhill.
The brake will get hot during use. Do not touch straight after braking.
Obey all local trac and scooter riding laws and regulations. Watch out for other users and pedestrians.
Do not use the scooter if it has any damage. Replace any worn or broken parts immediately!
Check all parts are secure and functioning correctly before every ride.
The scooter is designed to be used by one person at a time. Do not allow more than one person to ride the scooter at the same time!
For your own safety, please use original spare parts only. Do not make structural changes or modictations to the scooter.
INSTRUCTIONS FOR USE
Grip the handle bars with your hands, place one foot on the deck and the other foot on the ground
Pay attention to your surroundings and make sure that your riding area is clear
Kick backwards with your foot beside your scooter to give you motion, repeat kicking action to maintain motion
To stop or slow down, place your kicking foot heel on the brake block above the rear wheel. When travelling at speed, it will be impossible to stop immediately! Be careful and
avoid emergency conditions!
Do not over-steer as this could cause you to fall o your scooter
LIMITED WARRANTY
This scooter comes with a warranty of 90 days except for normal wear items such as wheels, bearings or headsets.
This warranty does not cover damage caused by:-
Misuse, or contrary to the agreed use, improper assembly or maintenance or normal wear
Improper installation of wheels, ball bearings, springs, deck and other parts of the scooter
External causes, such impacts against the curbs, barriers, obstacles and sudden or excessive forces or stresses
Inappropriate repairs or modications
Warning! If you ride your scooter in a manner that places large forces and stresses on the product, the scooter will not be covered under warranty. The scooter is designed to
meet aplicable safety standards, however the forces exerted through extreme riding may cause premature wear to all parts!
Be Careful!
You will see people doing tricks and stunts. These are people who have been practicing on scooters for a very long time. Don’t try something until you’re ready!
Maintain a tight hold on the handlebars at all times

Stateside HOUSE
1 CORINIUM INDUSTRIAL ESTATE
RAANS ROAD
AMERSHAM
BUCKINGHAMSHIRE
ENGLAND
HP6 6YJ
Table of contents


