Slee MCS II User manual

2 Manual_MCS_II_2021-10-003.00_EN.docx
Content
1. Safety Instructions.............................................................................................. 4
1.1. About this Manual.................................................................................................... 4
1.2. Used Symbols and their meanings ............................................................................. 4
1.3. Emission................................................................................................................... 5
1.4. Hazard Sources......................................................................................................... 5
1.5. Personal protective equipment .................................................................................. 5
1.6. Transport and stocking ............................................................................................. 6
1.7. Environmental conditions.......................................................................................... 6
1.8. Safety measures on installation location .................................................................... 6
1.9. Intended Use............................................................................................................ 7
1.10. Approved Operators.............................................................................................. 7
2. Information about MCS II .................................................................................. 8
2.1. Technical Data.......................................................................................................... 8
2.2. Shipment ................................................................................................................. 8
3. Overview components of the MCS II ................................................................ 9
3.1. Operating Panel Buttons ..........................................................................................11
3.2. Type plate ...............................................................................................................11
4. Operation.......................................................................................................... 12
4.1. Power-on the MCS II................................................................................................12
4.2. Main Screen (Setting 1)............................................................................................12
4.3. Setting 2 .................................................................................................................13
4.4. Conveyor operation .................................................................................................13
4.5. Operation menu ......................................................................................................13
4.5.1. Program setting................................................................................................14
4.5.2. Installation .......................................................................................................15
4.5.3. Individual operations.........................................................................................15
4.6. Installation of external exhaust system......................................................................18
4.7. Loading Xylol...........................................................................................................19
4.8. Loading mounting media.........................................................................................20
4.9. Adjusting the CG head ............................................................................................21
4.10. Start the process ..................................................................................................22
4.11. Power-off the device ............................................................................................23
4.11.1. Replace the xylol in the dispenser reservoir.....................................................23
4.11.2. Seaking the dispenser needle overnight .........................................................24

Manual_MCS_II_2021-10-003.00_EN.docx 3
5. Troubleshooting ............................................................................................... 25
5.1. The message window ..............................................................................................25
5.2. The alarm codes ......................................................................................................27
5.2.1. Definitions of alarm codes ................................................................................27
5.3. List of error codes....................................................................................................27
5.3.1. Motion errors ...................................................................................................27
5.3.2. Details of driver errors.......................................................................................28
Task errors......................................................................................................................29
5.3.3. System errors....................................................................................................29
5.3.4. Network errors .................................................................................................29
6. Cleaning, Maintenance and Recycling ............................................................ 30
6.1. Cleaning Instructions ...............................................................................................30
6.2. Cleaning and maintenance plan...............................................................................31
6.3. Abandonment / Recycling ........................................................................................31

4 Manual_MCS_II_2021-10-003.00_EN.docx
1. Safety Instructions
1.1. About this Manual
This manual will help you to handling the device. Please read the manual completely and follow
the advice. Acquaint yourself to the control elements and their functionality by studying the
figures. This way, an adequate use of the device, is ensured. If you have problems, feel free to
contact the competent SLEE medical GmbH contact person.
The device present is offered with two different power supply variations. Please check the tool
identification plate to make sure that the device’s power supply matches your local power supply.
Different power supply variations mean no difference in handling and functionality of the device.
1.2. Used Symbols and their meanings
Danger!:
This symbol warns you of risks for the life or health of persons. Danger warnings
are marked by a red framed triangle.
Warning!:
This symbol warns you of risks for machine, material or environment. Warnings are
marked with a yellow warning triangle.
Crushing hazard!:
Working with this machine contain crushing hazard from the movable parts.
Flammable hazard!:
Working with this machine contain flammable hazard from used reagents .
Notice:
Notices, meaning important information for the user, that are not classified as
danger or warning, are marked with an information symbol.

Manual_MCS_II_2021-10-003.00_EN.docx 5
1.3. Emission
The emission caused by the use of reagents in the unit is absorbed by the powerful fans and the
activated carbon filter, which need to be routine maintenance and output by targeted central
exhaust system. The connection for your exhaust system is already installed.
1.4. Hazard Sources
1.5. Personal protective equipment
When working with the MCS II, it is necessary, according to your security policies applicable in
any case, to wear protective clothings to avoid direct contact with the biologic samples. The same
applies, for example, when cleaning the unit.
Check your exhaust system for correct functionality before you start working with
the MCS II and reagents.
Many reagents and reagent vapors are flammable! Inform yourself before working
with the reagents.
Eat, drink and otherwise consume of reagents or reagent vapors are forbidden. Do
not eat, drink or smoke in the environment of the device. In case of absorb or
inhalations a reagent immediate seek medical advice!
The use of solvents always represents a danger for health! Observe the safety
regulations applicable!
Always wear protective clothing (e.g. lab coat, gloves,) to prevent accidental
contact with biological samples.

6 Manual_MCS_II_2021-10-003.00_EN.docx
1.6. Transport and stocking
Observe the following notes for transport and stocking the MCS II.
1.7. Environmental conditions
The permissible ambient conditions for operation of the device are listed below. Operation at
other ambient conditions is not permitted.
•Operation is only allowed in enclosed rooms,
•Ambient temperature from +15°C to +40°C (without strong fluctuations),
•Only set it on a vibration-free, the weight of the device corresponding
laboratory bench,
•Relative air humidity max 80% non-condensing,
•The unit must not be expos ed to direct sunlight,
•Maximum height of 2000 m (according to EN 61010-1:2001),
•Mains voltage fluctuation is within + / - 10 % of rated voltage.
1.8. Safety measures on installation location
The MCS II must be installed on a stable, level and horizontally oriented base to ensure the safe
and reliable operation.
"
Protect from wetness
": The packaged unit must be protected from excessive
humidity and must be stored and transported in covered.
„Top“: The packaged unit must always be transported and stored so that the
arrows point upwards at any time.
The MCS II is supplied in a safety transport box. Transporting them always upright
and avoid shocks and extreme temperature fluctuations! For the storage of the
device an ambient temperature of +5 ° C to +50 ° C is permissible.
Don’t use the device in an explosive area.

Manual_MCS_II_2021-10-003.00_EN.docx 7
1.9. Intended Use
The exclusive application of the Slee MCS II is the cover slipping of pathological, histological or
cytological slides with biologics on it. The device may only be used for this purpose, so as not to
endanger the safety of people and the preservation of property values of replacement issues.
1.10. Approved Operators
Only persons who have been thoroughly trained by the operator and commissioned can handle
the MCS II. The operator is responsible for other people in the work area. The operating company
make the instruction manual accessible to the operator and make sure, that the operator have
read and understand the instruction manual.
Unauthorized modifications to the device are forbidden due to safety reasons.
When replacement damaged parts of the device only original spare parts must be
used.

8 Manual_MCS_II_2021-10-003.00_EN.docx
2. Information about MCS II
2.1. Technical Data
Model
MCS II
Coverslipping speed:
10 to 20 sec per slide, changeable 7-shift speed
Dispensing volume:
0.04 to 0.2 cm³, adjustable
Mountant container
Commercially avaible container or our standard
container
Coverglass:
Size – Standard:
24 x 40, 50, 55, 60 mm
Size – Option:
24 x 32, 36 mm
25 x 40, 50, 55, 60 mm
Dimensions (L/W/H)
500 x 540 x 640 mm
Weight:
59 kg
Power supply:
230 V / 50 -60 Hz / 460 VA
2.2. Shipment
The shipment includes:
•1x MCS II
•1x Mains supply 230V
•1x Xylol container
•1x 3 magazine
•1x coverglass container 50mm and 60mm
•1x nozzle for dispenser 1,5mm
•2x reservoir xylol
•1x fill bottle
•1x duck bill
•4x Fuses, fine
•1x Instruction manual MCS II

Manual_MCS_II_2021-10-003.00_EN.docx 9
3. Overview components of the MCS II
Protection hood
Operating
panel
Pull-out magazine
for basket loading
Power switch
Mains socket
Type plate

10 Manual_MCS_II_2021-10-003.00_EN.docx
Connection for
external exhaust-
system
Unloading station for
basket
Coverglass container
Holder for
covermedium and
xylol container
Dispenser for
dispense the
mounting media on
the coverglass
Loading station for
basket
Holder for
covermedium
Xylol container to
prevent the
dispenser-nozzle for
drying-out
Motion-head to put
the coverglass on
the slides

Manual_MCS_II_2021-10-003.00_EN.docx 11
3.1. Operating Panel Buttons
3.2. Type plate
Power: Switch on the MCS II
Start /Restart: Starting the program
Light: Covermedium remaining quantity
Stop: Stop the running program
Finger: Opening and closing the OT holders
Emergency: Immediately stop the running programn
Serial number of the
device
Rated voltage of the
device in V
Type of device
Device ouput in VA
Fuse type
Rated frequency of
the device in Hz

12 Manual_MCS_II_2021-10-003.00_EN.docx
4. Operation
4.1. Power-on the MCS II
Plug in the power cable into the power-socket (backside of the device). Switch the power-switch
in the “I”-position. Press the Power button to turn on the MCS II. When the system starts, the
standby screen appears.
After the device is started, the main screen is displayed on the screen
4.2. Main Screen (Setting 1)
Operation mode
with counter for
covered baskets
Program number
Actual used size of
cover glass
Cycle time for the
dispense process
Change the amount
of the mountting
medium
Buttons for entering
the different menus
Dispense method

Manual_MCS_II_2021-10-003.00_EN.docx 13
4.3. Setting 2
4.4. Conveyor operation
This button is used to switch to the screen for the individual operations of the conveyor belt
control. You can carry out the withdrawal or removal of the cage container. This button is
disabled while the unit is running (it can not be operated).
4.5. Operation menu
Use to change the values of the different parameter.
The menus
Maintentance
,
Test run
,
Maintenance menu
and
Language
change are only for service technican.
Change the length
of the conintuous
discharge between
10-40 mm
Change the position
of the intermittent
discharge between
0-30 mm
Change the
mounting speed of
the covering
between 60-120 rpm
Change the
discharge amount
between 1 - 10

14 Manual_MCS_II_2021-10-003.00_EN.docx
4.5.1.Program setting
4.5.1.1. Program setting 1
4.5.1.2. Program setting 2
Program 0
can not be edit. You can only edit program 1-4.
Change the number
of the program
between 1-4 which
you want to edit.
Change the cycle
time for the
complete covering-
process between 12-
20 sec
Change the amount
of discharge
between 0-250
Press this button to
save the changed
parameters
Change the number
of the program
between 1-4 which
you want to edit.
Change the length
oft he used cover
glass
Change the width of
the used cover glass
Press this button to
save the changed
parameters

Manual_MCS_II_2021-10-003.00_EN.docx 15
4.5.1.3. Program setting 3
4.5.2.Installation
This button is used to switch to the screen where the liquid is filled for the axis of the pump, as
well as the attachment and detachment of the xylene bottle.
4.5.3.Individual operations
This button is used to switch to the screen on which the individual operations are performed for
each individual axis.
Only use this menu when instructed by telephone by a service technician to rectify
faults.
Change the number
of the program
between 1-4 which
you want to edit.
Change the length
of the conintuous
discharge between
10-40 mm
Change the position
of the intermittent
discharge between
0-30 mm
Change the
mounting speed of
the covering
between 60-120 rpm
Change the
discharge amount
between 1 - 10
Press this button to
save the changed
parameters

16 Manual_MCS_II_2021-10-003.00_EN.docx
4.5.3.1. CG Head
You can use the CG head menu to control a single deck process by pressing and holding the
keys. The suction of the coverslips is activated with the [Suction ON] button. Press the [Suction
ON] button again to turn off the suction of the covers.
The [Positiv rotation] key forwards the DG head forward. The [Reverse rotation] key allows the
CG head to be reversed.
4.5.3.2. Pump operation
Press the [Pump] key to enter the Dispenser control menu.
You can use the pump menu to control the dispenser by pressing and holding the Suction /
Discharge buttons. Press and hold the [Suction] button to turn on the pump for the cover glass
suction, press the [Single discharge] key to start the application of the cover media.
The valve of the dispensing opening of the pump can be opened and closed with the [Valve
open] key. If the pump valve is left in the open state for more than 20 seconds, the pump valve
closes automatically. The current status of the pump valve can be determined using the [valve
open] key:
•[Valve open] is lit: Pump valve is open.
•[Valve open] does not light: Pump valve is closed.
If the pump valve remains open for a long time, there is a risk that the pump
(dispenser) will heat up strongly.
Individual operation
button
Solenoid valve
on/off button
Reset button
Individual operation
button
Single discharge
button
Limit lamps
Reset button
Valve open / close

Manual_MCS_II_2021-10-003.00_EN.docx 17
4.5.3.3. Elevator operation
Press “Elevator” to enter the elevator control menu. You can use the elevator menu to control
the lift by pressing and holding the “Up” / “Down” button. The elevator is controlled until you
release the buttons. Press “Single layer move” to raise / lower the elevator by one step.
4.5.3.4. Conveyor operation
Press “Conveyor” to enter the conveyor control menu.
Use “Container in” / “Container out” to control the conveyor belt axis. The conveyor belt is only
controlled until you release the buttons. Press “Positioning” for at least 2 seconds to move the
conveyor to the position where the slides are detected. If you press Positioning” for less than 2
seconds, positioning is not performed.
If no basket container with object carriers is used on the conveyor belt axis, the
positioning can not be performed correctly.
Individual operation
button
Limit lamp
Single move button
Reset button
Individual operation
button
Conveyor position
button

18 Manual_MCS_II_2021-10-003.00_EN.docx
4.5.3.5. Finger operation
Press “Finger” to enter the finger control (gripper) menu.
Use the Finger menu to control the finger by pressing and holding “Up” / “Down”. The finger is
controlled until you release the buttons.
4.5.3.6. Fan setting
This button is used to switch to the screen for the use and adjustment of the exhaust fan and
the drying fan.
4.6. Installation of external exhaust system
You can choose on which side the external exhaust
system can be installed. Remove the connection for
the external exhaust system on the left or right side.
Before you connect the adapter for the external
exhaust system connect the cable from the device
(P504-L) with the cable from your external exhaust
system (J504). For the installation on the right side
connect the cable (P504-R) with the cable from your
external exhaust system (J504).
Now connect the Adapter for the external exhaust
system (the picture shows the installation on the left
side). After this install the removed cover on the
other side of the device.
Individual operation
button
Limit lamp
Finger open / close
button
Reset button
On / off buttons for
the exhaust fan
On / off buttons for
the drying fan

Manual_MCS_II_2021-10-003.00_EN.docx 19
4.7. Loading Xylol
Fill the xylol in the xylol container between the min and max marks.
Take the fill bottle from the accessorie kit and fill the bottle with xylol. Now put the nozzle in the
small hole of the second xylol container and fill the second container with xylol to the marked
line in the picture.
Please refill the xylol bottle frequently to prevent the covering prcoess against
bubbles in the mounting media.
Check daily whether the cotton is soaked with xylene. If not, top up the xylene
until the cotton is completely saturated.
The level of the
container should
always be between
the two markings
Use the fill bottle
from accessorie kit
Put the nozzle in the
small hole and fill the
container to the red
line with xylol

20 Manual_MCS_II_2021-10-003.00_EN.docx
4.8. Loading mounting media
To fill the system with mounting media proceed as follow:
1. Purge the system with xylol if you fill the system for the first time.
2. Remove the cover from the mounting media bottle and connect the cover with the tube
from the MCS II. After this connect the bottle with the MCS II.
3. Close the bottom drawer and the hood.
4. Start the MCS II by pressing the ON switch.
5. Press “Operation menu” at the main display to go into the operation menu.
6. Press “Installation”.
7. Press “Start” for about 2-5 seconds to start the system. Whenever the button “Start” is
lighting blue, the system is operating.
8. Press “Finish” to stop the system.
9. If the button “Start” do not light up blue anymore, the system has finished the process.
10. Press “Return” to go to the operation menu.
If you loading the mounting media at the first time make sure that you purge the
system with xylol before you fill the system with mounting media.
To abort the process, press the button “finish” for about 2-5 seconds.
Should you put the MCS II back into operation after a longer service life, then rinse
the roofing system with xylene before filling in the roofing material.
If the pump valve remains open for a long time, there is a risk of overheating the
pump dispenser.
Table of contents
Other Slee Measuring Instrument manuals
Popular Measuring Instrument manuals by other brands

Leupold
Leupold RX-1000i Operation manual

Essilor Instruments
Essilor Instruments TEN 070 user manual
FMC
FMC INVALCO WCM 7300 Installation & operation manual
Flow-Rite
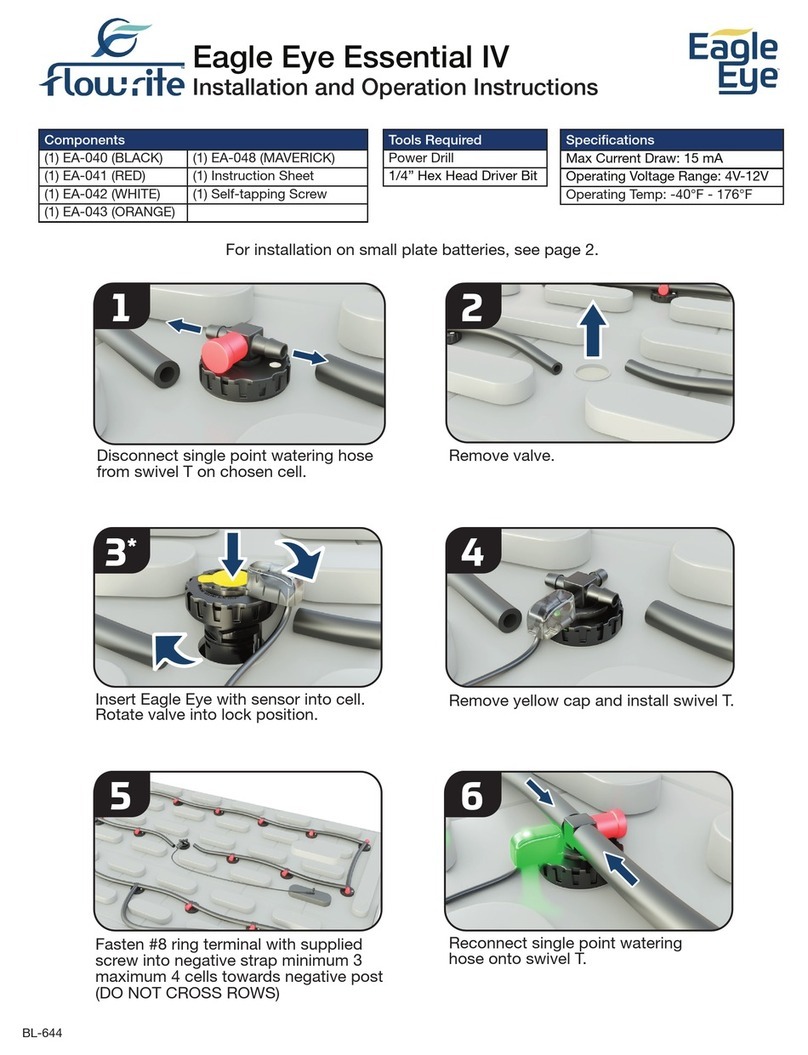
Flow-Rite Eagle Eye Essential IV Installation & operation instructions

RS PRO
RS PRO RS-3809 instruction manual

TOTALINE
TOTALINE MultiRef User and service manual

