SloanLED Symphony User manual

PAGE 1 OF 6
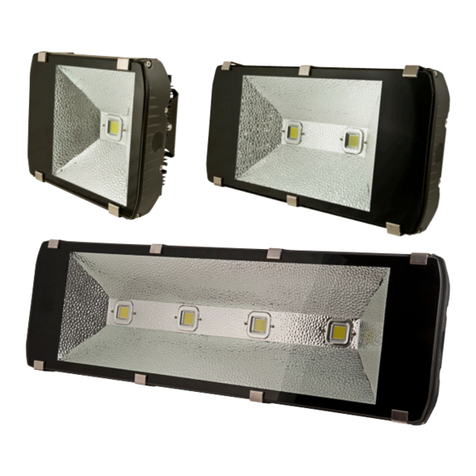
Symphony Floodlight
Installation Guide for Symphony Floodlight
WARNING, CAUTIONS, AND OPERATING INSTRUCTIONS
• Toreduceriskofdeath,personalinjuryorpropertydamagefromre,electrical
shock, falling parts, cuts/abrasions, and other hazards, read all warnings and
instructionsincludedwithandonxtureboxandallxturelabels.
• Before installing, servicing, or performing routine maintenance upon this
equipment,followthesegeneralprecautions.
• Commercial installation, service, and maintenance of luminaires should be
performedbyaqualiedlicensedelectrician.
• Installation: If you are unsure about installation or maintenance of luminaires,
consultaqualiedlicensedelectricianandcheckyourlocalelectricalcode.
• Topreventwiringdamageorabrasion,donotexposewiringtoedgesofsheet
metalorotherobjects.
• Do not make or alter any holes in an enclosure of wiring or electrical
componentsduringkitinstallation.
CAUTION: RISK OF INJURY
• Avoiddirecteyeexposuretolightsourcewhileitison.
• Account for small parts and destroy packing material, as these
maybehazardoustochildren.
• Suitableforwetlocations,.
WARNING: RISK OF FIRE OR ELECTRICAL SHOCK
• Turnoffelectricalpoweratfuseorcircuitbreakerbox
beforewiringxturetopowersupply.
• Turnoffpowerwhenperforminganymaintenance.
• Verify supply voltage is correct by comparing
withluminairelabelinformation.
• Make all electrical and grounded connections in accordance
with National Electrical Code and any applicable local code
requirements.
•
AllwiringconnectionsshouldbecappedwithULapprovedwireconnectors.
Knuckle Mounting Sliptter Mounting Yoke (U-Bracket) Mounting
Seal arm thread using teon tape or silicone
sealant. Secure Symphony Floodlight to a 0.5"
(13 mm) NPS hole in a junction box or landscape
post (heavy duty XC1 cover provided). Plug all
unused holes and seal threads with silicone.
Swivel arm on Symphony Floodlight allows
180° vertical aiming adjustment depending on
mounting location.
Sliptter mounting ts 2.375" (60 mm) O.D. tenon.
Place sliptter over tenon and secure xture with
set screws on side of sliptter. Pull out round plug
and adjust angle of xture. Loosen locking bolt
and swivel xture to desired angle. Tighten locking
bolt and re-attach round cover plate.
CAUTION: UL and cUL Listed or CSA Certied
liquid tight cord grip suitable for use with three
(3) conductor type STW exible cord shall be
used for connection to a wet location outlet box
provided by others.
To adjust angle of xture using yoke:
Loosen pivot bolts and angle locking screw.
Adjust xture to desired angle. Tighten pivot bolts
and angle locking screw.
Wire
Plug cover
Pivot bolts
Tenon
Set screws
Locking
bolt

PAGE 2 OF 6
Symphony Floodlight
Installation Guide for Symphony Floodlight
K1 SYM-F-NK-FRT-(CC) Arm front
K2 SYM-F-NK-BAK-(CC) Arm back
K3 SYM-F-NK-LOCK Mount lock
K4 SYM-F-NK-MGK Mount gasket
K5 402813
Screw combination, pan head M4 × 12 mm
K6 SYM-F-NK-SRGK Small ring gasket
K7 SYM-F-NK-RGK Ring gasket
K8 402816 Screw, socket head, M6 ×18 mm
K9 402856 Spring washer, M6
K10 402852 Flat washer, M6 × 12 ×1.6
K1
K4
K8
K9
K10
K6
K7
K5
K2
K3
Knuckle Mounting
4. Install lock (SYM-F-NK-LOCK) into arm-back.
1. Ensure input wires install with wire plug
(402883) as seen above.
2. Mount arm-front SYM-F-NK-FRT-[CC]) of
Knuckle to shell bottom with screws (402813)
and mount gasket (SYM-F-NK-MGK).
Pass input cable through hole inside of
arm-front as seen above. Slide input cable
through arm-back.
3. Assemble arm-front (SYM-F-NK-FRT-[CC])
and arm-back (SYM-F-NK-BAK-[CC]) with
screws (402816) and washers (402856,
402852). Adjust position and tighten up
screw (402816). Install lock (SYM-F-NK-
LOCK) into arm-back if needed.

PAGE 3 OF 6
Symphony Floodlight
Installation Guide for Symphony Floodlight
1. Mount arm-front (SYM-F-SP-FRT-[CC])
of Sliptter to shell bottom with screws
(402819), washers (402827), and mount
gasket (SYM-F-SP-MGK). Pass input
cable through hole inside of arm-front
as seen above.
2. Slide input cable through arm-back.
Assemble arm-front and arm-back with
screws (402821) and washers (402824,
402828). Adjust position and tighten up
screw (402821).
3. Plug screw cover (SYM-F-LX-SP-COVER).
Sliptter Mounting
S1 SYM-F-SP-FRT-(CC) Arm front
S2 SYM-F-SP-BAK-(CC) Arm back
S3 SYM-F-SP-MGK Mount gasket
S4 402819 Screw, socket head, M6 × 22 mm
S5 402827 Serrated washer, M6
S6 SYM-F-SP-SRGK Small ring gasket
S7 402977 2 x 50 mm O-ring
S8 SYM-F-SP-COVER Screw cover
S9 402821 Screw, socket head, M12 × 45 mm
S10 402824 Spring washer, M12
S11 402828 Flat washer, M12 x 24 × 2.2
S12 402847 Bolt, hex head, M8 × 30 mm
S13 402858 Hex nut, type 1, M8
S1
S3
S8
S9
S10
S11
S12
S13
S5
S4
S2
S6
S7

PAGE 4 OF 6
Symphony Floodlight
Installation Guide for Symphony Floodlight
Y1 SYM-F-SYK-FRT-(CC) Arm front
Y2 SYM-F-SYK-BAK-(CC) Arm back
Y3 402877
Screw combination, pan head M4 × 10 mm
Y4 402813
Screw combination, pan head M4 × 12 mm
Y5 402848 Screw, socket head, M8 × 20 mm
Y6 402857 Spring washer, M8
Y7 402853 Flat washer, M8 ×16 × 1.5
Y8 402858 Hex nut, Type 1, M8
Y1
Y3
Y5
Y6Y7Y8
Y4
Y2
Small Yoke Mounting
1. Mount arm-front (SYM-F-SYK-FRT-[CC])
to shell bottom with screws (402877).
Assemble arm-front and arm-back
(SYM-F-SYK-BAK-[CC]) with screws
(402848), washers (402857, 402853),
and nut (402858).
2. Adjust position with 402813 screws and
tighten up 402848 screws.

PAGE 5 OF 6
Symphony Floodlight
Installation Guide for Symphony Floodlight
Y1 SYM-F-LYK-FRT-(CC) Arm front
Y2 SYM-F-LYK-BAK-(CC) Arm back
Y3 402811 Screw, socket head, M6 ×14 mm
Y4 402827 Serrated washer, M6
Y5 402820 Bolt, hex head, M12 × 30 mm
Y6 402824 Spring washer, M12
Y7 402828 Flat washer, M12 × 24 × 0.5
Y8 402832 Hex nut, Type 1, M12
Y9 402879 Screw, pan head, M5 ×14 mm
Y10 402881 Spring washer, M5, SSTL Y11
Y11 402880 Flat washer, M5, SSTL
Y3
Y4
Y5
Y9Y10
Y11
Y6Y7Y8
Y1
Y2
Large Yoke Mounting
1. Ensure input cable installs with cable gland
(402807) as shown above.
2. Mount arm-front (SYM-F-LYK-FRT-[CC])
and arm-back (SYM-FL-LYK-BAK-[CC])
with screws (402820), washers (402824,
402828), and nut (402832). Adjust position
with 402879 screws and tighten up
402820 screw.


