SLOC SPR-203 Manual
SPR-203 Inbetriebnahme
© SLOC GmbH 2020 www.sloc.one Page 1 of 24
INITIAL SETUP SPR-203
Version: 1.0 06/10/2020

SPR-203 Initial Setup
© SLOC GmbH 2020 www.sloc.one Page 2 of 24
TABLE OF CONTENT
1. Introduction..........................................................................................................3
1.1. Commissioning steps..........................................................................................................3
1.2. Helpful documents ..............................................................................................................3
2. SLOC Device Management (SDM) .........................................................................4
2.1. First login to the SDM portal ...............................................................................................4
2.2. App Download & Installation...............................................................................................4
3. SLOC activating/deactivating................................................................................5
3.1. Activating: ............................................................................................................................5
3.2. Deactivating BLE Visibility:..................................................................................................5
3.3. Transport mode ...................................................................................................................5
4. SLOC Configuration..............................................................................................6
5. Check data transmission ....................................................................................13
5.1. Download and install demo app .......................................................................................13
5.2. Reading SPR-203 data with demo app.............................................................................13
6. Mounting............................................................................................................16
6.1. SPR-203..............................................................................................................................16
6.2. SPR-203 Reference............................................................................................................17
7. Read out the data via BLE ...................................................................................18
7.1. Package structure..............................................................................................................18
7.2. MAC - Adress .....................................................................................................................18
7.3. Type ....................................................................................................................................19
7.4. Loading status ...................................................................................................................19
7.5. Motion state.......................................................................................................................19
7.6. Lifting height ......................................................................................................................20
7.7. Distance in mm..................................................................................................................20
7.8. Acceleration (shock) .........................................................................................................20
7.9. Battery status in percent...................................................................................................21
7.10. Current position .................................................................................................................21
8. Legal regulations................................................................................................22
8.1. Declaration of conformity .................................................................................................22
8.2. Copyright ............................................................................................................................23
8.3. Disposal..............................................................................................................................23

SPR-203 Initial Setup
© SLOC GmbH 2020 www.sloc.one Page 3 of 24
1. Introduction
Thank you very much for choosing SLOC.
In this documentation you will learn how to put your product into operation and evaluate
the data.
We at SLOC are always trying to make our products as simple and intuitive as possible.
However, should you encounter any problems, we are at your disposal.
E-Mail Adress: sup[email protected]
1.1. Commissioning steps
The following steps must be completed to successfully configure the SLOC device:
1. Visit support.sloc.one
2. Download the commissioning documentation
3. Login/registration in the SDM portal (Chapter 2.1)
4. SDM app installation on the Android device (Chapter 2.2)
5. Wake up the SLOC with the magnet (Chapter 3)
6. Configuration of the SLOC with the SDM app (Chapter 4)
7. Check data transmission (Chapter 5)
8. Mounting the SLOC on the vehicle (Chapter 6)
9. Read out the data via BLE (Chapter 7)
1.2. Helpful documents
Download SLOC Software-Manual
SPR-203 Initial Setup
© SLOC GmbH 2020 www.sloc.one Page 4 of 24
2. SLOC Device Management (SDM)
SLOC Device Management consists of a web portal (https://sdm.sloc.one/) and an Android
app, which is needed for the configuration.
2.1. First login to the SDM portal
If you purchase your products through SLOC, you have been sent a registration email to
register in the SDM portal and assign a password.
If you purchase the product via an external platform, please use the e-mail address with
which the order was placed. You will find the password in the product packaging on the
enclosed info sheet. You will then receive a registration link and can assign your password.
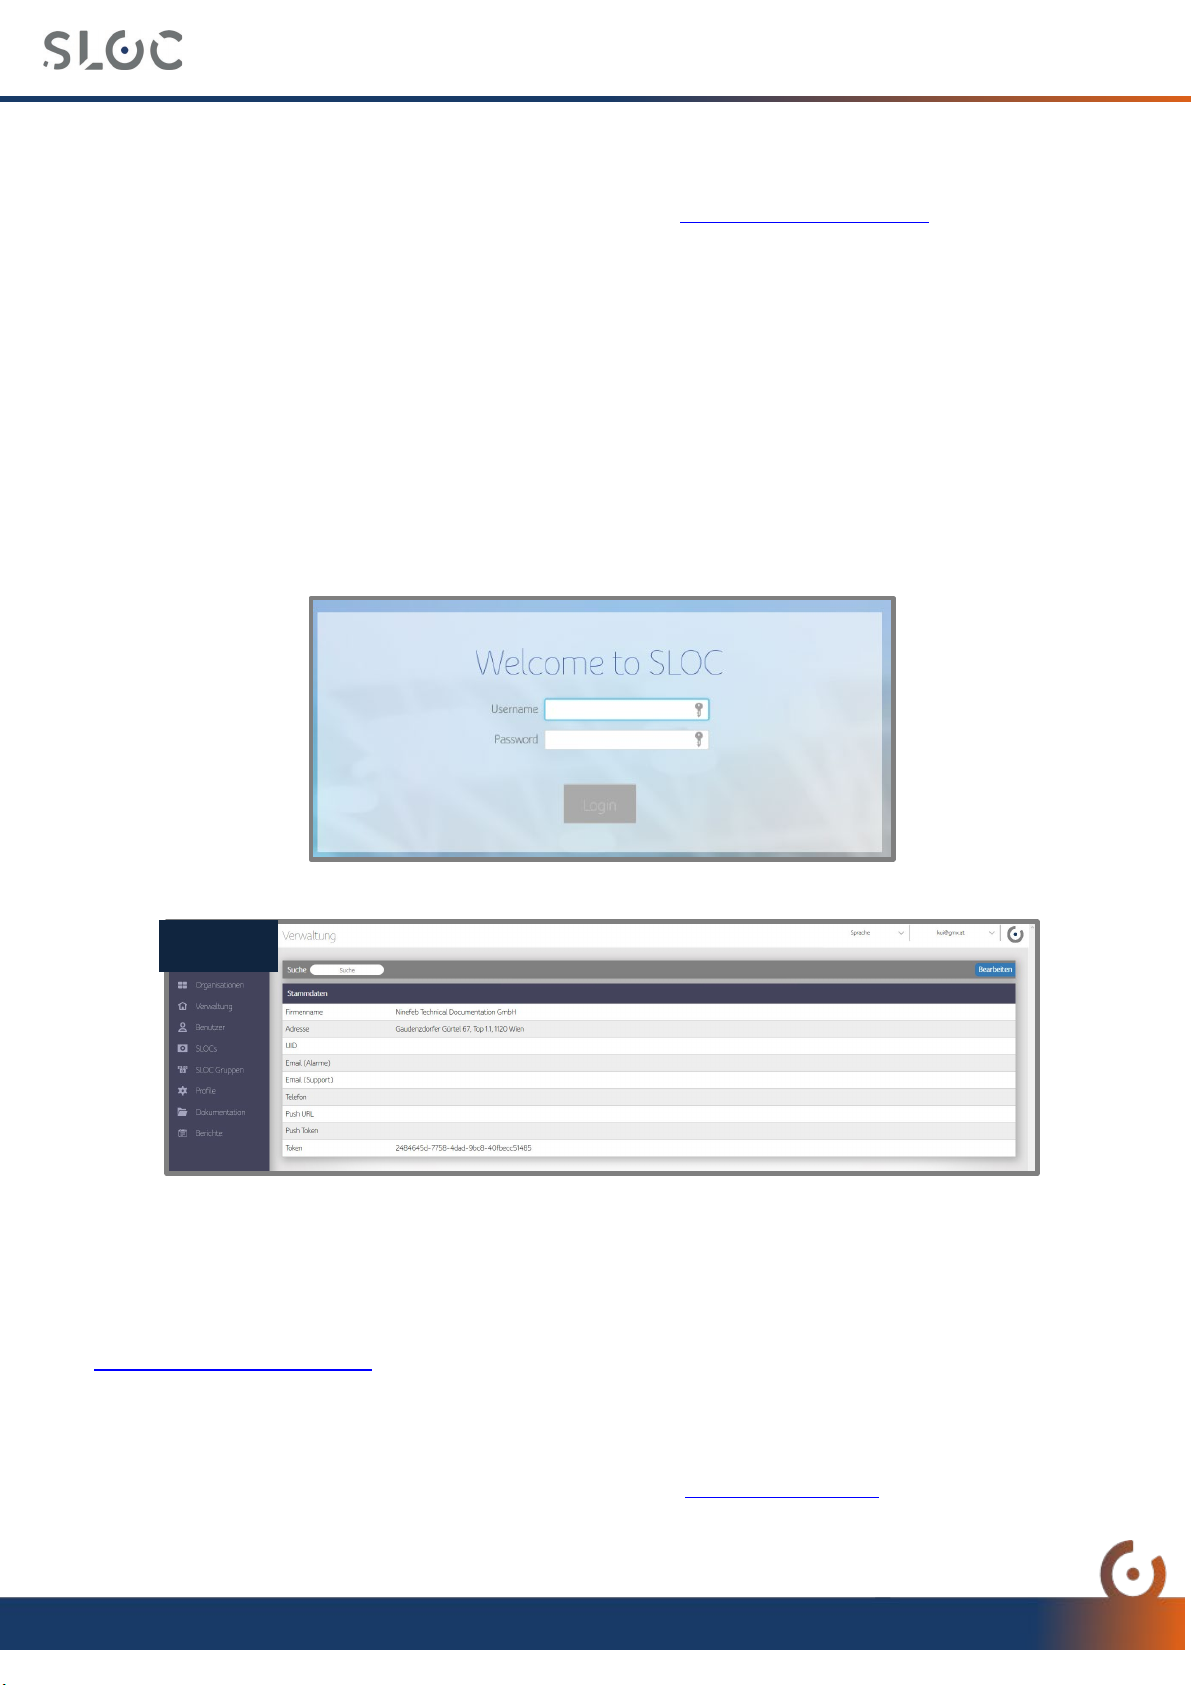
(Login Screen)
(SDM Portal Homepage)
2.2. App Download & Installation
The app can be downloaded to a smartphone/tablet via the SLOC Support Center
(https://support.sloc.one) on a smartphone/tablet by clicking on your product (SPR-203)
and then downloading the APK file. This can be done directly from the smartphone/tablet
or via a PC and USB cable. Afterwards the app can be installed.
For more information on APK installation, please refer to chapter 3 of the SLOC Software Manuals at support.sloc.one.

SPR-203 Initial Setup
© SLOC GmbH 2020 www.sloc.one Page 5 of 24
3. SLOC activating/deactivating
3.1. Activating:
To configure a SLOC, the transport mode of the SLOC must first be deactivated and/or the
BLE visibility must be activated.
To do this, the magnet (included in the scope of delivery) must be placed on that side of the
SLOC for at least 2s and, if necessary, moved back and forth on which the magnet symbol
is shown (see illustration).
3.2. Deactivating BLE Visibility:
BLE communication is automatically disabled after 60 seconds. After that it can be
reactivated with the magnet (see chapter 3.1).
3.3. Transport mode
The transport mode is the mode in which the SLOC is sent (i.e. the SLOC measures and
sends no data and consumes no power).
To put an activated SLOC back into transport mode, select the SLOC in the SDM app and
click the button "Transportmode on" under "ADVANCE".
Table of contents


