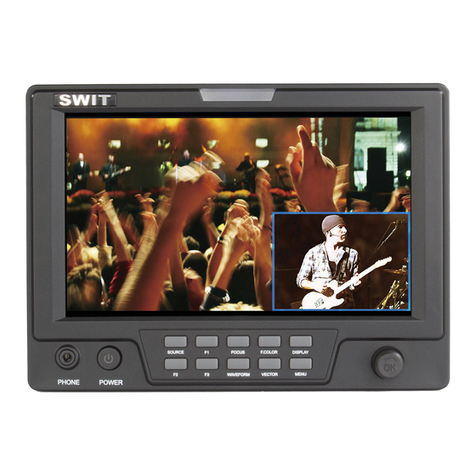
Small HD DP1 User manual

SmallHD DP1 User Manual
1
DP1 User
Manual

Table of Contents
Overview!4
•Key Features!4
•Key Specifications!4
Monitor Diagram!5
•Front!5
•Top!6
•Back!7
•Dimensions!8
Getting Started!9
•Powering the DP1!9
AC Power!9
Battery Specifics (v1.0)!9
•Menu/Button Interface Basics!11
Button Contexts!11
The Input Menu!13
Introduction to the Main Menu!14
•Connecting a Source!15
The Menu!16
•Picture Control Menu!16
•OSD Menu!18
•PIP Menu!19
Setting Color Temp Presets!20
Setting Picture Mode Presets!22
SmallHD DP1 User Manual
2

Using Overscan and Setting Presets!24
Additional Advanced Menu Options!28
•Power Modes!28
•Logo Show!28
•ADC Adjust!29
Various Calibration / Setups!30
•Configuration Settings for RED!30
•Crop!31
Specifications!33
•General!33
•Display!33
•Connectivity!34
•Physical!34
•SmallHD Battery Specifications!35
Warrantee!36
•2-Year Manufacturer Guarantee!36
•Customer Service!36
SmallHD DP1 User Manual
3

Overview
SmallHD, LLC represents the start of some much needed new thinking as it pertains
the high definition video industry. For years, field monitoring has been far behind the
capabilities of the video camera, creating uncertainty for the operator.
Introducing the DP1. Finally, a bridge between your eye and the cameraʼs lens.
Itʼs small, itʼs rugged, its Hi-Def, and itʼs affordable so everyone can take advantage
of the new generation of HD equipment.
Key Features
•Glossy, crisp high definition LCD screen with LED backlighting
•Extremely durable, lightweight, full-aluminum enclosure
•Versatile design utilizing 6 1/4-20 mounting points milled right into the chassis
•Full control of image scalability
•3 HD inputs
Key Specifications
•1280x768 resolution in only 8.9” of screen real estate
•178 degree viewing angle
•300 nits screen luminosity
•18bit RGB color reproduction
•HDMI, Component, VGA, S-video, Composite inputs
•1.6lbs (without battery)
•9” x 5.8” x 1.2” external dimensions
•12vDC power at 1 amp
•Power input standard 5.5mm OD x 2.1mm ID barrel plug
•Full range of NTSC / PAL / SECAM signal reproduction capability
SmallHD DP1 User Manual
4

Monitor Diagram
Front
SmallHD DP1 User Manual
5
8.9” 1280x768 LCD Display
Top 1/4-20 Mounting Point
Side 1/4-20 Mounting Point
Sunhood Mounting Port
Single bodied
anodized aluminum
enclosure

Monitor Diagram
Top
SmallHD DP1 User Manual
6
HDMI
VGA Composite S-video
YPbPr (Component)
Sunhood mounting ports
12vDC Power In
5.5mm OD 2.1mm ID Barrel Power Plug
Top 1/4-20 Mounting Point

Monitor Diagram
Back
SmallHD DP1 User Manual
7
1/4-20 Mount Points
#6 mounting points
for battery bracket
Power
Button
Right/Select Left/SelectMenu/Toggle Exit/Input Menu
For a full guide on button usage, refer to the
“Menu and Button Basics chapter.
Status Indicator
DP1 On and Functioning Properly
DP1 in Standby Mode
*Still consumes small amounts of
power in Standby mode
DP1 malfunctioning
(Try rebooting or call service dept.)
#6 mounting points
for battery bracket

Monitor Diagram
Dimensions
SmallHD DP1 User Manual
8
5.8”
9”
1.2”

Getting Started
Powering the DP1
AC Power
✦The DP1 comes packaged with an AC wall plug capable of converting
100-240v AC to the regulated 12v DC required by the DP1. Currently the DP1 is
only shipped with the US-style wall plug. An adapter may be needed for this
power supply to work in your country.
✦To use the AC power adapter, plug the adapter into a standard wall plug.
Plug the opposite end (the barrel plug) into the DP1.
✦The DP1 will automatically power on, no need to press the power button.
This happens by default, but can be changed in the advanced settings menu if
you so desire.
✦The LED in the center of the power button is the indicator of the DP1ʼs power
status. Refer to page 6 for details.
Battery Specifics (v1.0)
• The SmallHD battery is a custom battery built specifically for the DP1,
designed to be a lightweight, slim-profile, mobile powering solution. The DP1
can be powered with any 12v DC regulated power source, but the SmallHD
battery is an excellent compact option.
!Whatʼs in the Box?
• The battery is supplied with two (2) power cables that connect the battery to
the DP1, and one AC wall charger.
• The short cable is for use with the battery bracket.
• The longer cable is for mounting the battery without the battery bracket –
basically for whatever we havenʼt thought of.
!Whatʼs on the Battery?
• The SmallHD battery only has 2 ports and 1 status LED.
• (1) Mini-USB charge port (requires 17.5vDC in for charging)
• (1) Small barrel plug for regulated 12vDC out.
• The LED has three states: GREEN,RED and ORANGE.
• GREEN has two contextual meanings:
• When charging, green means the battery is fully charged.
• When powering, green mean the battery has between 100% and
10% battery life left.
• RED has two contextual meanings as well:
SmallHD DP1 User Manual
9

• When charging, red means the battery is in the process of
charging, and is not yet fully charged. (NOTE: If red LED flashes
during charge, this may indicate a charge failure or battery failure. In
this event, please contact SmallHD Customer Service.)
• When powering, red means the battery has less than 10% battery
life left.
• ORANGE indicates a circuitry failure within the battery. In this event,
please contact SmallHD Customer Service.
•NOTE: Mini-USB is just the plug style of the battery – it will NOT
charge via USB from your computer. Attempting to charge the
battery via standard USB connection will damage the battery and
VOID the Warranty. Always use the supplied charger to charge the
SmallHD battery.
• NOTE: Unplug the battery from the DP1 (and interconnect cable)
when not in use to avoid unwanted battery drain.
SmallHD DP1 User Manual
10
1
Status LED Indicator
2
Regulated 12vDC OUTPUT
3
Mini-USB 17.5vDC charge INPUT
2
3
1

Menu/Button Interface Basics
Though it is admittedly unconventional, the interface buttons have been deliberately
placed on the back of the unit for a couple of reasons:
•To minimize the size and weight of the DP1
•To maximize the effect of the sunhood (4-sided instead of 3-sided) while
maintaining easy access to the buttons.
This interface may seem odd at first, but a little guidance and 15 minutes of working
with the device will be all thatʼs needed to navigate the menu system with ease.
Button Contexts
All of the buttons on the DP1 are context-sensitive, which means each button (with
the exception of the power button), perform different functions based on where you are
in the menu system.
In order for this user guide to communicate effectively, the buttons will be numbered
and referred to from left to right, given a front-on view of the DP1. The “x-ray” diagram
below reveals the location, function and reference number of each button on the back of
the DP1 when viewing it from the front.
SmallHD DP1 User Manual
11
Button 3
(Power On/Off)
Button 2
(Left/Select)
Button 4
(Right/Select)
Button 1
(Exit/Input Menu)
Button 5
(Menu/Toggle)

NOTE: The outside buttons both have raised nubs on them, and the center power
button has a raised circular nub. These raised nubs enable you to find your starting
place on the buttons without looking, making “blind operation” easily attainable with a
little practice.
Button 1
This is the button to the far left (from the front), that does two things:
•On a blank screen, it opens up the input menu
•In any of the menus, pressing this button will deselect and eventually exit
whatever menu youʼre in. Think of it as a “go back” button.
Button 2 / Button 4
These are the two buttons to the left and right of the power button. These perform
several functions:
•In the Main Menu at the top level, they switch between sub-menus.
•When a menu option is selected and highlighted in yellow (by the “Main Menu”
button), it will adjust the corresponding value.
•They will select the highlighted input in the Input Menu.
Button 3 (Power On/Off)
This button powers the DP1 on and off. The DP1ʼs power status is indicated in the
center of this button (see the bottom of page 7 for more details).
Button 5
This is the button to the far right (from the front), that does three things based on
context:
•On a blank screen, pressing it once will bring up the main menu
•In the main menu, it will toggle (or “cycle”) between the listed menu items
•In the INPUT menu, it toggles (or “cycles”) between the inputs in the input list
SmallHD DP1 User Manual
12
1
2 3 4 5

The Input Menu
The input menu is accessed by pressing the far left
button (from the front). This is how to select the
appropriate input to display your deviceʼs signal.
•Press the Input Menu/Exit button (button 1) once
to bring up the input select dialog.
•Toggle through the inputs using the Menu/Toggle
button (button 5) until you highlight the desired input.
•Now press either the Right or Left Select buttons
to select the input.
Example:
SmallHD DP1 User Manual
13
12345
If you were on the HDMI input, and you wanted to select the SVIDEO input.
Considering the buttons were labeled 1-5 as pictured below, your button sequence
would be: 1-5-5-5-4 or 1-53-4
If you were at a blank screen, and wanted to just check which input you were on, the
button sequence would be: 1-1. The first press of button 1 (the Input/Exit button)
opens the INPUT select menu. Once within a menu context, the same button (button 1)
becomes the EXIT button, so another press exits the menu.

Introduction to the Main Menu
The Main Menu is where all the image and menu controls reside. This is where you
will come to change aspect ratios, calibrate colors, adjust image controls like sharpness,
saturation, scale and more. To start off, here is just a basic introduction of the main
menu, and how to manipulate it.
Accessing the Menu
The menu is accessed by pressing Button 5 (the far right button when viewing the
LCD screen). Pressing this button brings up the dialog below:
The Main Menu is divided into three sub-sections:
1. The Image Control Menu (selected and displayed below)
2. The OSD (On-Screen-Display) Menu
3. The PIP (Picture-in-Picture) Control Menu
Once in the Main Menu, the same button you used to access the menu now
becomes the button that toggles through this different menu options. For instance, from
a blank screen, pressing this button 5 times would land you on the “SATURATION”
option.
The first button press puts you on the icon with the monitor. This is where you would
use the left and right buttons to toggle between sub-menus (labeled “1”, “2”, and “3”
above). Pressing the button a second time brings you to “CONTRAST” (seen above).
Each subsequent press brings you further down the list. Pressing the Button 1 would
back out to the top level (back to the icon with the monitor on it), and then one more
time exits out of the menu completely.
SmallHD DP1 User Manual
14
1 2 3

Example:
If this seems complicated, spend a little time playing with the buttons. It wonʼt be
long before you will be able to navigate the menu system fluently.
Connecting a Source
1. Connect your video camera or other device to the appropriate input on the DP1
using the proper cable.
2. Power on your device.
3. Power on the DP1.
4. If you see a blue or black screen, then either your camera is not connected
properly, your camera is not powered on, or the DP1 is set to the wrong input.
5. To change to the proper input:
a. Press the Input/Exit button (button 1)
b. Press the Menu/Toggle button (button 5) until the correct input is highlighted.
c. Press the Left or Right Select buttons to select the highlighted input.
d. The screen will flash and sync up with the signal.
By default, the Scale option is set to FULL. Weʼre going to set it to 16:9. From a
blank screen, press the Menu/Toggle button (button 5) to bring up the main menu.
Pressing the menu button 8 additional times selects “SCALE”. Now pressing the Right/
Select button (button 4) changes “FULL” to “16:9”. Now press the Input/Exit button
(button 1) 2 times to exit the menu. The button sequence would be:
59- 4 - 12 (superscripts indicate number of multiple button presses)
SmallHD DP1 User Manual
15

The Menu
Picture Control Menu
Access the Picture Control Menu by pressing Button 5 one time. This is where you
will change and adjust basic picture/color settings and access saved color and picture
presets. This is also how you access the Advanced Menu, which is where you setup
color and picture presets, as well as control the custom overscan presets.
Contrast
Contrast is the difference between the darkest value and the lightest value. Setting
a high contrast value creates a very harsh looking image by reducing the steps you see
between black and white. When contrast is set too low, the image will appear washed
out and gray. The point of this setting is to try to match as closely as possible what your
camera sees so you have an accurate point of reference. We have found that 50 is
very close in most cases.
Brightness
Adjusting brightness essentially adjusts the “black point” of the display. The further
this value is increased, the lighter the darkest black of the LCD becomes, eventually
creating an inaccurate representation of the blacks your camera is recording. This
SmallHD DP1 User Manual
16

value can also be set too low, creating areas on the monitor far darker than the camera
is capable of producing.
Hue
There are a lot of scientific explanations for Hue, but to be brief, Hue shifts the entire
spectrum of color one way or another. When displaying color bars from your camera,
adjust Hue while in the DP1ʼs “Blue Only” mode for accurate calibration.
Saturation
Saturation either “saturates” or “desaturates” the color in the displayed image
depending on which way you slide the value. Setting Saturation to 0 will give you a
monochrome (black and white) images. Sliding it to 100 will give you a dreadful looking
“over-saturated” image. Setting proper saturation is essential for calibration.
Additionally, it can be useful to save a monochrome setting as a picture mode preset for
a quick B&W reference. (See page 22 for setting up picture mode presets).
Sharpness
The sharpness setting controls the edge sharpening algorithms of the DP1s
processor. The lower this number the “softer” the image appears, the higher the
number the “sharper” it appears. Changing this number to 100 isnʼt going to give you
the most accurate representation of what your camera is seeing but it will act as a
further focusing aid. We have found that a setting of 25 is very accurate. You can also
set up a picture mode preset for sharpness at a value of 100 for a quick focus assist
toggle (see instructions on page 22).
Color Temp
Toggling between the color temp options cycles between the color presets of the
DP1. Each of the presets are user-configurable, and will be covered in in the
“advanced” section beginning on page 21.
Picture Mode
Similar to the Color Temp presets, these are stored presets for the basic image
control options listed above (Contrast, Brightness, Saturation and Sharpness) that can
also be configured. This option cycles through each customized preset. See page 23
for details.
Scale
This toggles between the different scale options available. The scale options are:
•Full (tries to fill the entire screen of the DP1 no matter what signal)
•16x9
•4x3
•2.35:1
•1.85:1
SmallHD DP1 User Manual
17

•RED (specifically for RED camera users, used on conjunction with the RED
overscan preset)
Advanced
Opens the advanced menu. (Details begin on page 21).
OSD Menu
The OSD Menu is a simple menu that controls the functionality of the menu itself. It
also contains the factory reset option.
OSD Language
Sets the language of the OSD Menu.
OSD H-Position
Moves the Menu left and right.
OSD V-Position
Moves the Menu up and down.
OSD Duration
Adjusts the amount of time the Menu will remain visible while no buttons are being
pressed (before it disappears automatically).
OSD Halftone
Sets the transparency of the Menu.
Information
Gives general information about the PIP settings.
SmallHD DP1 User Manual
18

MEM-Recall
This is the FACTORY DEFAULT setting for the DP1. This will reset the DP1 to the
state it was in when you first received it.
PIP Menu
The DP1 is PIP capable. Which means it can display any 1 HD signal and 1 SD
signal simultaneously. The menu below is how the PIP function is configured.
Multi Window
Turns PIP on or off.
Sub Source
Selects which source besides the main source you want to display.
Size
Changes the size of the sub-source window
Border Color
Changes the color of the border of the sub-source window
Swap
Makes the sub-source the main image and puts the main image in the sub-source
window.
PIP Position
Moves the sub-source window into different corners of the display.
SmallHD DP1 User Manual
19

Setting Color Temp Presets
The Color Temp preset menu is accessed by going to the advanced menu through
the main menu. (Button Sequence: 510 - 4 - 52- 4)
SmallHD DP1 User Manual
20
1 Open the main menu and
select the ADVANCED menu.
2 Click down to the COLOR
TEMP option and select it.
3 This is the interface where
you will cycle through the different
color temp presets and save your
desired values to the chosen preset.
Table of contents
Other Small HD Monitor manuals

Small HD
Small HD CINE 7 User manual

Small HD
Small HD CINE 24 User manual
Small HD
Small HD 4K Monitor Dual Battery Plate User manual
Small HD
Small HD DP6-SLR User manual
Small HD
Small HD Action 5 User manual

Small HD
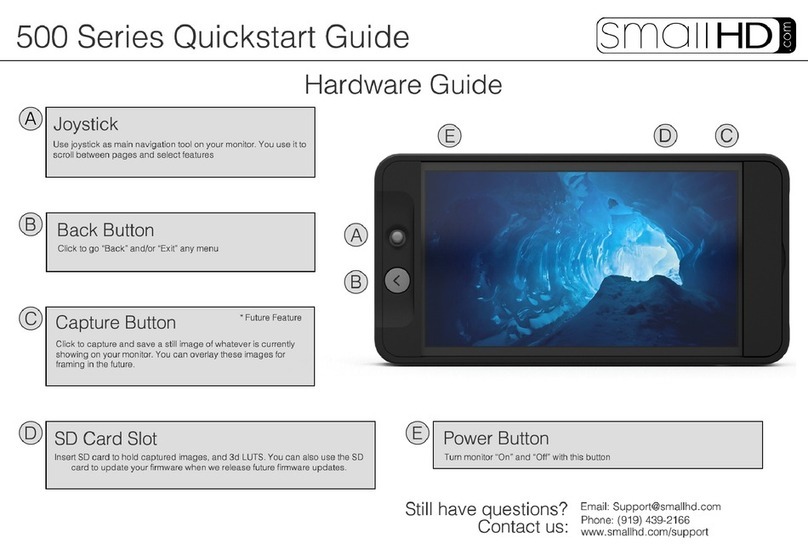
Small HD 500 Series User manual
Small HD
Small HD 703 Bolt User manual
Small HD
Small HD 500 Series User manual
Small HD
Small HD AC7 User manual
Small HD
Small HD RED DSMC3 User manual
