SMART Embedded Computing ATCA-F125 User manual

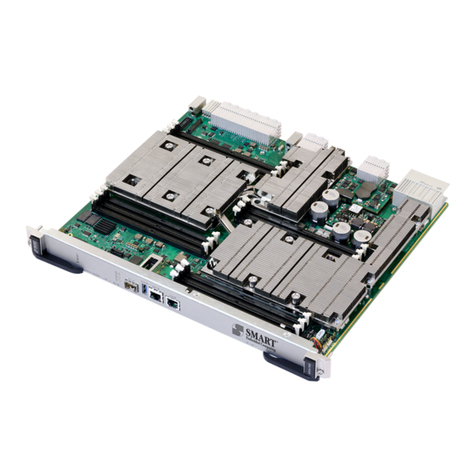
ATCA-F125 (6873M Artwork)
Installation and Use
P/N: 6806800J94P
November 2020

© 2020 SMART Embedded Computing™, Inc.
All Rights Reserved.
Trademarks
The stylized "S" and "SMART" is a registered trademark of SMART Modular Technologies, Inc. and “SMART Embedded
Computing” and the SMART Embedded Computing logo are trademarks of SMART Modular Technologies, Inc. All other names
and logos referred to are trade names, trademarks, or registered trademarks of their respective owners. These materials are
provided by SMART Embedded Computing as a service to its customers and may be used for informational purposes only.
Disclaimer*
SMART Embedded Computing (SMART EC) assumes no responsibility for errors or omissions in these materials. These
materials are provided "AS IS" without warranty of any kind, either expressed or implied, including but not limited to,
the implied warranties of merchantability, fitness for a particular purpose, or non-infringement. SMART EC further does
not warrant the accuracy or completeness of the information, text, graphics, links or other items contained within these
materials. SMART EC shall not be liable for any special, indirect, incidental, or consequential damages, including without
limitation, lost revenues or lost profits, which may result from the use of these materials. SMART EC may make changes to
these materials, or to the products described therein, at any time without notice. SMART EC makes no commitment to update
the information contained within these materials.
Electronic versions of this material may be read online, downloaded for personal use, or referenced in another document as a
URL to a SMART EC website. The text itself may not be published commercially in print or electronic form, edited, translated,
or otherwise altered without the permission of SMART EC.
It is possible that this publication may contain reference to or information about SMART EC products, programming, or services
that are not available in your country. Such references or information must not be construed to mean that SMART EC intends
to announce such SMART EC products, programming, or services in your country.
Limited and Restricted Rights Legend
If the documentation contained herein is supplied, directly or indirectly, to the U.S. Government, the following notice shall apply
unless otherwise agreed to in writing by SMART Embedded Computing.
Use, duplication, or disclosure by the Government is subject to restrictions as set forth in subparagraph (b)(3) of the Rights in
Technical Data clause at DFARS 252.227-7013 (Nov. 1995) and of the Rights in Noncommercial Computer Software and
Documentation clause at DFARS 252.227-7014 (Jun. 1995).
SMART Embedded Computing, Inc.
2900 S. Diablo Way, Suite 190
Tempe, Arizona 85282
USA
*For full legal terms and conditions, visit www.smartembedded.com/ec/legal

Table of Contents
ATCA-F125 (6873M Artwork) Installation and Use (6806800J94P) 3
About this Manual . . . . . . . . . . . . . . . . . . . . . . . . . . . . . . . . . . . . . . . . . . . . . . . . . . . . . . . . . . . . . . . 11
Safety Notes. . . . . . . . . . . . . . . . . . . . . . . . . . . . . . . . . . . . . . . . . . . . . . . . . . . . . . . . . . . . . . . . . . . . 15
Sicherheitshinweise . . . . . . . . . . . . . . . . . . . . . . . . . . . . . . . . . . . . . . . . . . . . . . . . . . . . . . . . . . . . . 21
1 Introduction. . . . . . . . . . . . . . . . . . . . . . . . . . . . . . . . . . . . . . . . . . . . . . . . . . . . . . . . . . . . . . . . . 29
1.1 Features . . . . . . . . . . . . . . . . . . . . . . . . . . . . . . . . . . . . . . . . . . . . . . . . . . . . . . . . . . . . . . . 29
1.2 Standard Compliances . . . . . . . . . . . . . . . . . . . . . . . . . . . . . . . . . . . . . . . . . . . . . . . . . . . . 30
1.3 Mechanical Data . . . . . . . . . . . . . . . . . . . . . . . . . . . . . . . . . . . . . . . . . . . . . . . . . . . . . . . . . 31
1.4 Ordering and Support Information . . . . . . . . . . . . . . . . . . . . . . . . . . . . . . . . . . . . . . . . . . . 31
1.5 Product Identification . . . . . . . . . . . . . . . . . . . . . . . . . . . . . . . . . . . . . . . . . . . . . . . . . . . . . 32
2 Hardware Preparation and Installation . . . . . . . . . . . . . . . . . . . . . . . . . . . . . . . . . . . . . . . . . . . 33
2.1 Overview . . . . . . . . . . . . . . . . . . . . . . . . . . . . . . . . . . . . . . . . . . . . . . . . . . . . . . . . . . . . . . . 33
2.2 Unpacking and Inspecting the Blade . . . . . . . . . . . . . . . . . . . . . . . . . . . . . . . . . . . . . . . . . 33
2.3 Requirements . . . . . . . . . . . . . . . . . . . . . . . . . . . . . . . . . . . . . . . . . . . . . . . . . . . . . . . . . . . 34
2.3.1 Environmental Requirements. . . . . . . . . . . . . . . . . . . . . . . . . . . . . . . . . . . . . . . . . . 34
2.3.2 Thermal Requirements. . . . . . . . . . . . . . . . . . . . . . . . . . . . . . . . . . . . . . . . . . . . . . . 36
2.3.3 Power Requirements . . . . . . . . . . . . . . . . . . . . . . . . . . . . . . . . . . . . . . . . . . . . . . . . 36
2.4 Rear Transition Modules . . . . . . . . . . . . . . . . . . . . . . . . . . . . . . . . . . . . . . . . . . . . . . . . . . . 37
2.5 Blade Configuration . . . . . . . . . . . . . . . . . . . . . . . . . . . . . . . . . . . . . . . . . . . . . . . . . . . . . . 38
2.5.1 SATA Drive Installation . . . . . . . . . . . . . . . . . . . . . . . . . . . . . . . . . . . . . . . . . . . . . . 38
2.6 Blade Installation and Removal . . . . . . . . . . . . . . . . . . . . . . . . . . . . . . . . . . . . . . . . . . . . . 39
2.6.1 Installing Blade. . . . . . . . . . . . . . . . . . . . . . . . . . . . . . . . . . . . . . . . . . . . . . . . . . . . . 39
2.6.2 Removing Blade. . . . . . . . . . . . . . . . . . . . . . . . . . . . . . . . . . . . . . . . . . . . . . . . . . . . 41
2.7 AMC Module Installation and Removal . . . . . . . . . . . . . . . . . . . . . . . . . . . . . . . . . . . . . . . . 43
2.8 Installing and Removing SFP Modules . . . . . . . . . . . . . . . . . . . . . . . . . . . . . . . . . . . . . . . . 45
2.8.1 Installing an SFP Module . . . . . . . . . . . . . . . . . . . . . . . . . . . . . . . . . . . . . . . . . . . . . 46
2.8.2 Removing an SFP Module . . . . . . . . . . . . . . . . . . . . . . . . . . . . . . . . . . . . . . . . . . . . 48
3 Controls, LEDs, and Connectors . . . . . . . . . . . . . . . . . . . . . . . . . . . . . . . . . . . . . . . . . . . . . . . 51
3.1 Overview . . . . . . . . . . . . . . . . . . . . . . . . . . . . . . . . . . . . . . . . . . . . . . . . . . . . . . . . . . . . . . . 51
3.2 Blade Layout . . . . . . . . . . . . . . . . . . . . . . . . . . . . . . . . . . . . . . . . . . . . . . . . . . . . . . . . . . . . 51

4 ATCA-F125 (6873M Artwork) Installation and Use (6806800J94P)
Table of Contents
3.3 Face Plate LEDs . . . . . . . . . . . . . . . . . . . . . . . . . . . . . . . . . . . . . . . . . . . . . . . . . . . . . . . . . 51
3.4 Reset Switch . . . . . . . . . . . . . . . . . . . . . . . . . . . . . . . . . . . . . . . . . . . . . . . . . . . . . . . . . . . . 53
3.5 Face Plate Connectors . . . . . . . . . . . . . . . . . . . . . . . . . . . . . . . . . . . . . . . . . . . . . . . . . . . . 53
3.6 Backplane Connectors . . . . . . . . . . . . . . . . . . . . . . . . . . . . . . . . . . . . . . . . . . . . . . . . . . . . 56
3.6.1 Zone 1 . . . . . . . . . . . . . . . . . . . . . . . . . . . . . . . . . . . . . . . . . . . . . . . . . . . . . . . . . . . 56
3.6.2 Zone 2 . . . . . . . . . . . . . . . . . . . . . . . . . . . . . . . . . . . . . . . . . . . . . . . . . . . . . . . . . . . 57
3.6.3 Zone 3 . . . . . . . . . . . . . . . . . . . . . . . . . . . . . . . . . . . . . . . . . . . . . . . . . . . . . . . . . . . 61
3.7 Module Connectors . . . . . . . . . . . . . . . . . . . . . . . . . . . . . . . . . . . . . . . . . . . . . . . . . . . . . . . 63
3.7.1 AMC Connector . . . . . . . . . . . . . . . . . . . . . . . . . . . . . . . . . . . . . . . . . . . . . . . . . . . . 64
3.7.2 SAS/SATA Connector . . . . . . . . . . . . . . . . . . . . . . . . . . . . . . . . . . . . . . . . . . . . . . . 66
3.7.3 Embedded USB Connector . . . . . . . . . . . . . . . . . . . . . . . . . . . . . . . . . . . . . . . . . . . 66
3.7.4 Processor COP Header . . . . . . . . . . . . . . . . . . . . . . . . . . . . . . . . . . . . . . . . . . . . . . 67
3.7.5 H8S Console and Programming Header . . . . . . . . . . . . . . . . . . . . . . . . . . . . . . . . . 67
3.8 Switches . . . . . . . . . . . . . . . . . . . . . . . . . . . . . . . . . . . . . . . . . . . . . . . . . . . . . . . . . . . . . . . 68
4 Functional Description. . . . . . . . . . . . . . . . . . . . . . . . . . . . . . . . . . . . . . . . . . . . . . . . . . . . . . . . 69
4.1 Block Diagram . . . . . . . . . . . . . . . . . . . . . . . . . . . . . . . . . . . . . . . . . . . . . . . . . . . . . . . . . . 69
4.2 Processor . . . . . . . . . . . . . . . . . . . . . . . . . . . . . . . . . . . . . . . . . . . . . . . . . . . . . . . . . . . . . . 70
4.3 Memory . . . . . . . . . . . . . . . . . . . . . . . . . . . . . . . . . . . . . . . . . . . . . . . . . . . . . . . . . . . . . . . . 70
4.3.1 Memory Interface . . . . . . . . . . . . . . . . . . . . . . . . . . . . . . . . . . . . . . . . . . . . . . . . . . . 71
4.3.2 Memory Sockets . . . . . . . . . . . . . . . . . . . . . . . . . . . . . . . . . . . . . . . . . . . . . . . . . . . 71
4.3.3 Memory Modules . . . . . . . . . . . . . . . . . . . . . . . . . . . . . . . . . . . . . . . . . . . . . . . . . . . 71
4.3.4 Persistent Memory . . . . . . . . . . . . . . . . . . . . . . . . . . . . . . . . . . . . . . . . . . . . . . . . . . 71
4.4 IPMI . . . . . . . . . . . . . . . . . . . . . . . . . . . . . . . . . . . . . . . . . . . . . . . . . . . . . . . . . . . . . . . . . . 72
4.4.1 Temperature Sensors . . . . . . . . . . . . . . . . . . . . . . . . . . . . . . . . . . . . . . . . . . . . . . . 74
4.5 FPGA . . . . . . . . . . . . . . . . . . . . . . . . . . . . . . . . . . . . . . . . . . . . . . . . . . . . . . . . . . . . . . . . . 74
4.5.1 Serial Configuration PROM . . . . . . . . . . . . . . . . . . . . . . . . . . . . . . . . . . . . . . . . . . . 75
4.6 Boot and User Flashes . . . . . . . . . . . . . . . . . . . . . . . . . . . . . . . . . . . . . . . . . . . . . . . . . . . . 76
4.6.1 Boot Flash Backup Recovery. . . . . . . . . . . . . . . . . . . . . . . . . . . . . . . . . . . . . . . . . . 77
4.7 Base Channel Interface . . . . . . . . . . . . . . . . . . . . . . . . . . . . . . . . . . . . . . . . . . . . . . . . . . . 78
4.7.1 Base Channel PHYs . . . . . . . . . . . . . . . . . . . . . . . . . . . . . . . . . . . . . . . . . . . . . . . . 81
4.7.2 ShMC Cross-Connect . . . . . . . . . . . . . . . . . . . . . . . . . . . . . . . . . . . . . . . . . . . . . . . 81
4.8 Fabric Channel Interface . . . . . . . . . . . . . . . . . . . . . . . . . . . . . . . . . . . . . . . . . . . . . . . . . . 82
4.9 SFP+ Modules . . . . . . . . . . . . . . . . . . . . . . . . . . . . . . . . . . . . . . . . . . . . . . . . . . . . . . . . . . 85
4.10 AMC Bay . . . . . . . . . . . . . . . . . . . . . . . . . . . . . . . . . . . . . . . . . . . . . . . . . . . . . . . . . . . . . . . 86
4.10.1 BCM5709S Dual Gigabit Ethernet MAC/PHY . . . . . . . . . . . . . . . . . . . . . . . . . . . . . 88
4.10.2 Channel Cross-Connect for BCM5709S . . . . . . . . . . . . . . . . . . . . . . . . . . . . . . . . . 89
4.10.3 Storage Hard Disk Drive . . . . . . . . . . . . . . . . . . . . . . . . . . . . . . . . . . . . . . . . . . . . . 90

Table of Contents
ATCA-F125 (6873M Artwork) Installation and Use (6806800J94P) 5
4.11 Telecom Clocking . . . . . . . . . . . . . . . . . . . . . . . . . . . . . . . . . . . . . . . . . . . . . . . . . . . . . . . . 90
4.11.1 Telecom Clocking Subsystem . . . . . . . . . . . . . . . . . . . . . . . . . . . . . . . . . . . . . . . . . 91
4.11.2 BITS/SSU Support . . . . . . . . . . . . . . . . . . . . . . . . . . . . . . . . . . . . . . . . . . . . . . . . . . 92
4.12 Reset Structure . . . . . . . . . . . . . . . . . . . . . . . . . . . . . . . . . . . . . . . . . . . . . . . . . . . . . . . . . . 93
4.12.1 Service Processor Core Reset Domain . . . . . . . . . . . . . . . . . . . . . . . . . . . . . . . . . . 94
4.12.1.1 Service Processor . . . . . . . . . . . . . . . . . . . . . . . . . . . . . . . . . . . . . . . . . . 94
4.12.1.2 Memory . . . . . . . . . . . . . . . . . . . . . . . . . . . . . . . . . . . . . . . . . . . . . . . . . . 95
4.12.1.3 On-board Flash . . . . . . . . . . . . . . . . . . . . . . . . . . . . . . . . . . . . . . . . . . . . 95
4.12.1.4 Persistent Memory . . . . . . . . . . . . . . . . . . . . . . . . . . . . . . . . . . . . . . . . . . 95
4.12.2 Ethernet Switch Resets . . . . . . . . . . . . . . . . . . . . . . . . . . . . . . . . . . . . . . . . . . . . . . 95
4.12.2.1 Broadcom BCM56334 . . . . . . . . . . . . . . . . . . . . . . . . . . . . . . . . . . . . . . . 95
4.12.2.2 Broadcom BCM56820 . . . . . . . . . . . . . . . . . . . . . . . . . . . . . . . . . . . . . . . 95
4.12.3 Physical Interconnect Devices . . . . . . . . . . . . . . . . . . . . . . . . . . . . . . . . . . . . . . . . . 96
4.12.4 AMC Bay . . . . . . . . . . . . . . . . . . . . . . . . . . . . . . . . . . . . . . . . . . . . . . . . . . . . . . . . . 96
4.12.5 Rear Transition Module . . . . . . . . . . . . . . . . . . . . . . . . . . . . . . . . . . . . . . . . . . . . . . 96
4.13 Interrupt Structure . . . . . . . . . . . . . . . . . . . . . . . . . . . . . . . . . . . . . . . . . . . . . . . . . . . . . . . . 96
5 U-Boot . . . . . . . . . . . . . . . . . . . . . . . . . . . . . . . . . . . . . . . . . . . . . . . . . . . . . . . . . . . . . . . . . . . . 101
5.1 Overview . . . . . . . . . . . . . . . . . . . . . . . . . . . . . . . . . . . . . . . . . . . . . . . . . . . . . . . . . . . . . . 101
5.2 Accessing U-Boot . . . . . . . . . . . . . . . . . . . . . . . . . . . . . . . . . . . . . . . . . . . . . . . . . . . . . . . 101
5.3 Configuring Boot Options . . . . . . . . . . . . . . . . . . . . . . . . . . . . . . . . . . . . . . . . . . . . . . . . . 102
5.3.1 Configuring U-Boot for Network Boot. . . . . . . . . . . . . . . . . . . . . . . . . . . . . . . . . . . 102
5.3.2 Configuring U-Boot to Boot from RAM Disk . . . . . . . . . . . . . . . . . . . . . . . . . . . . . . 103
5.3.3 Configuring U-Boot to Boot from Flash . . . . . . . . . . . . . . . . . . . . . . . . . . . . . . . . . 103
5.4 Selecting the Boot Flashes . . . . . . . . . . . . . . . . . . . . . . . . . . . . . . . . . . . . . . . . . . . . . . . . 104
5.5 Using the Persistent Memory Feature . . . . . . . . . . . . . . . . . . . . . . . . . . . . . . . . . . . . . . . 104
5.6 Memory Map . . . . . . . . . . . . . . . . . . . . . . . . . . . . . . . . . . . . . . . . . . . . . . . . . . . . . . . . . . . 105
5.7 Linux Devices . . . . . . . . . . . . . . . . . . . . . . . . . . . . . . . . . . . . . . . . . . . . . . . . . . . . . . . . . . 106
5.8 Power-On Self Test . . . . . . . . . . . . . . . . . . . . . . . . . . . . . . . . . . . . . . . . . . . . . . . . . . . . . 107
5.8.1 POST Routines . . . . . . . . . . . . . . . . . . . . . . . . . . . . . . . . . . . . . . . . . . . . . . . . . . . 108
5.8.2 Controlling the Execution of the POST . . . . . . . . . . . . . . . . . . . . . . . . . . . . . . . . . 109
5.9 ATCA-F125 Specific U-Boot Commands . . . . . . . . . . . . . . . . . . . . . . . . . . . . . . . . . . . . . 110
5.10 ATCA-F125-Specific U-Boot Environment Variables . . . . . . . . . . . . . . . . . . . . . . . . . . . . 110
5.11 Updating U-Boot . . . . . . . . . . . . . . . . . . . . . . . . . . . . . . . . . . . . . . . . . . . . . . . . . . . . . . . . 111
A Battery Exchange . . . . . . . . . . . . . . . . . . . . . . . . . . . . . . . . . . . . . . . . . . . . . . . . . . . . . . . . . . . 113
A.1 Replacing the Battery . . . . . . . . . . . . . . . . . . . . . . . . . . . . . . . . . . . . . . . . . . . . . . . . . . . . 113

6 ATCA-F125 (6873M Artwork) Installation and Use (6806800J94P)
Table of Contents
B Related Documentation . . . . . . . . . . . . . . . . . . . . . . . . . . . . . . . . . . . . . . . . . . . . . . . . . . . . . . 115
B.1 SMART Embedded Computing Documentation . . . . . . . . . . . . . . . . . . . . . . . . . . . . . . . . 115
B.2 Related Specifications . . . . . . . . . . . . . . . . . . . . . . . . . . . . . . . . . . . . . . . . . . . . . . . . . . . 115

List of Figures
ATCA-F125 (6873M Artwork) Installation and Use (6806800J94P) 7
Figure 1-1 Serial Number Locater . . . . . . . . . . . . . . . . . . . . . . . . . . . . . . . . . . . . . . . . . . . . . . 32
Figure 3-1 ATCA-F125 Face Plate . . . . . . . . . . . . . . . . . . . . . . . . . . . . . . . . . . . . . . . . . . . . . 51
Figure 3-2 Module Connectors Location . . . . . . . . . . . . . . . . . . . . . . . . . . . . . . . . . . . . . . . . . 63
Figure 4-1 Block Diagram . . . . . . . . . . . . . . . . . . . . . . . . . . . . . . . . . . . . . . . . . . . . . . . . . . . . 69
Figure 4-2 IPMI Block Diagram . . . . . . . . . . . . . . . . . . . . . . . . . . . . . . . . . . . . . . . . . . . . . . . . 73
Figure 4-3 FPGA SPI ROM Configuration . . . . . . . . . . . . . . . . . . . . . . . . . . . . . . . . . . . . . . . 76
Figure 4-4 Boot PROM Backup Recovery . . . . . . . . . . . . . . . . . . . . . . . . . . . . . . . . . . . . . . . 77
Figure 4-5 Base Channel Block Diagram . . . . . . . . . . . . . . . . . . . . . . . . . . . . . . . . . . . . . . . . 78
Figure 4-6 Standard ShMC Cross-Connect . . . . . . . . . . . . . . . . . . . . . . . . . . . . . . . . . . . . . . 81
Figure 4-7 Fabric Channel Block Diagram . . . . . . . . . . . . . . . . . . . . . . . . . . . . . . . . . . . . . . . 82
Figure 4-8 SFP+ Module Status and Control Interface . . . . . . . . . . . . . . . . . . . . . . . . . . . . . . 85
Figure 4-9 AMC Bay Connection Diagram . . . . . . . . . . . . . . . . . . . . . . . . . . . . . . . . . . . . . . . 87
Figure 4-10 Base Channel Cross Connect . . . . . . . . . . . . . . . . . . . . . . . . . . . . . . . . . . . . . . . . 89
Figure 4-11 Fabric Channel Cross Connect . . . . . . . . . . . . . . . . . . . . . . . . . . . . . . . . . . . . . . . 89
Figure 4-12 Telecom Clocking Subsystem . . . . . . . . . . . . . . . . . . . . . . . . . . . . . . . . . . . . . . . . 91
Figure 4-13 BITS/SSU Clock Flow . . . . . . . . . . . . . . . . . . . . . . . . . . . . . . . . . . . . . . . . . . . . . . 92
Figure 4-14 Reset Structure Block Diagram . . . . . . . . . . . . . . . . . . . . . . . . . . . . . . . . . . . . . . . 93
Figure 4-15 AMC Enable Logic . . . . . . . . . . . . . . . . . . . . . . . . . . . . . . . . . . . . . . . . . . . . . . . . . 96

List of Figures
8 ATCA-F125 (6873M Artwork) Installation and Use (6806800J94P)

List of Tables
ATCA-F125 (6873M Artwork) Installation and Use (6806800J94P) 9
Table 1-1 Standard Compliances . . . . . . . . . . . . . . . . . . . . . . . . . . . . . . . . . . . . . . . . . . . . . . . . 30
Table 1-2 Mechanical Data . . . . . . . . . . . . . . . . . . . . . . . . . . . . . . . . . . . . . . . . . . . . . . . . . . . . . 31
Table 2-1 Environmental Requirements . . . . . . . . . . . . . . . . . . . . . . . . . . . . . . . . . . . . . . . . . . . 35
Table 2-2 Power Requirements . . . . . . . . . . . . . . . . . . . . . . . . . . . . . . . . . . . . . . . . . . . . . . . . . 37
Table 3-1 Face Plate LEDs . . . . . . . . . . . . . . . . . . . . . . . . . . . . . . . . . . . . . . . . . . . . . . . . . . . . . 51
Table 3-2 Service Processor Ethernet RJ-45 Connector Pin Assignment (J9) . . . . . . . . . . . . . . 53
Table 3-3 Service Processor Serial RS-232 RJ-45 Connector (J1) . . . . . . . . . . . . . . . . . . . . . . 53
Table 3-4 Service Processor USB Connector (J10) . . . . . . . . . . . . . . . . . . . . . . . . . . . . . . . . . . 54
Table 3-5 SFP+ Connectors Pin Assignment (J4-J7) . . . . . . . . . . . . . . . . . . . . . . . . . . . . . . . . . 54
Table 3-6 Master/Slave Sync Connector (J12-U1) . . . . . . . . . . . . . . . . . . . . . . . . . . . . . . . . . . . 54
Table 3-7 Inter-Shelf Connectors (J12-L1, L2, L3, U2, U3) . . . . . . . . . . . . . . . . . . . . . . . . . . . . 55
Table 3-8 T1/E1 Port Connectors (J12-L4 and J12-U4) . . . . . . . . . . . . . . . . . . . . . . . . . . . . . . . 55
Table 3-9 Zone 1 Connector P1 Pin Assignment . . . . . . . . . . . . . . . . . . . . . . . . . . . . . . . . . . . . 56
Table 3-10 Connector P20 Pin Assignment . . . . . . . . . . . . . . . . . . . . . . . . . . . . . . . . . . . . . . . . . 57
Table 3-11 Connector P21 Pin Assignment . . . . . . . . . . . . . . . . . . . . . . . . . . . . . . . . . . . . . . . . . 57
Table 3-12 Connector P22 Pin Assignment . . . . . . . . . . . . . . . . . . . . . . . . . . . . . . . . . . . . . . . . . 58
Table 3-13 Connector P23 Pin Assignment . . . . . . . . . . . . . . . . . . . . . . . . . . . . . . . . . . . . . . . . . 59
Table 3-14 Connector P24 Pin Assignment . . . . . . . . . . . . . . . . . . . . . . . . . . . . . . . . . . . . . . . . . 59
Table 3-15 Connector P32 Pin Assignment . . . . . . . . . . . . . . . . . . . . . . . . . . . . . . . . . . . . . . . . . 60
Table 3-16 Connector P30 Pin Assignment . . . . . . . . . . . . . . . . . . . . . . . . . . . . . . . . . . . . . . . . . 61
Table 3-17 Connector P31 Pin Assignment . . . . . . . . . . . . . . . . . . . . . . . . . . . . . . . . . . . . . . . . . 62
Table 3-18 J8 AMC Bay Connector Pin Assignment . . . . . . . . . . . . . . . . . . . . . . . . . . . . . . . . . . . 64
Table 3-19 J11 SAS/SATA Connector Pin Assignment . . . . . . . . . . . . . . . . . . . . . . . . . . . . . . . . . 66
Table 3-20 P8 eUSB Header Pin Assignment . . . . . . . . . . . . . . . . . . . . . . . . . . . . . . . . . . . . . . . . 66
Table 3-21 P50 COP Header Pin Assignment . . . . . . . . . . . . . . . . . . . . . . . . . . . . . . . . . . . . . . . 67
Table 3-22 P9 H8S Console Header Pin Assignment . . . . . . . . . . . . . . . . . . . . . . . . . . . . . . . . . . 67
Table 3-23 Switch Settings . . . . . . . . . . . . . . . . . . . . . . . . . . . . . . . . . . . . . . . . . . . . . . . . . . . . . . 68
Table 4-1 Temperature Sensors . . . . . . . . . . . . . . . . . . . . . . . . . . . . . . . . . . . . . . . . . . . . . . . . . 74
Table 4-2 Boot PROM Backup Recovery Operation . . . . . . . . . . . . . . . . . . . . . . . . . . . . . . . . . . 77
Table 4-3 BCM56344 Base Channel Switch Connections . . . . . . . . . . . . . . . . . . . . . . . . . . . . . 79
Table 4-4 Fabric Channel Switch Connections . . . . . . . . . . . . . . . . . . . . . . . . . . . . . . . . . . . . . . 83
Table 4-5 Tested SFP+ Modules . . . . . . . . . . . . . . . . . . . . . . . . . . . . . . . . . . . . . . . . . . . . . . . . . 86
Table 4-6 AMC Bay Port Assignments . . . . . . . . . . . . . . . . . . . . . . . . . . . . . . . . . . . . . . . . . . . . 88
Table 4-7 Reset Signals . . . . . . . . . . . . . . . . . . . . . . . . . . . . . . . . . . . . . . . . . . . . . . . . . . . . . . . 94
Table 4-8 Interrupt Mapping . . . . . . . . . . . . . . . . . . . . . . . . . . . . . . . . . . . . . . . . . . . . . . . . . . . . 97
Table 5-1 Physical Address Map . . . . . . . . . . . . . . . . . . . . . . . . . . . . . . . . . . . . . . . . . . . . . . . . 105
Table 5-2 Linux Devices . . . . . . . . . . . . . . . . . . . . . . . . . . . . . . . . . . . . . . . . . . . . . . . . . . . . . . 106

List of Tables
10 ATCA-F125 (6873M Artwork) Installation and Use (6806800J94P)
Table 5-3 POST Result Format . . . . . . . . . . . . . . . . . . . . . . . . . . . . . . . . . . . . . . . . . . . . . . . . 107
Table 5-4 Post Results in SYS FW PROGRESS IPMI Sensor Reading Data . . . . . . . . . . . . . 107
Table 5-5 SYS FW PROGRESS IPMI Sensor - POST Error Event Codes . . . . . . . . . . . . . . . 108
Table 5-6 POST Routines . . . . . . . . . . . . . . . . . . . . . . . . . . . . . . . . . . . . . . . . . . . . . . . . . . . . . 108
Table 5-7 Environment Variable post_control . . . . . . . . . . . . . . . . . . . . . . . . . . . . . . . . . . . . . . 109
Table 5-8 ATCA-F125 Specific U-Boot Commands . . . . . . . . . . . . . . . . . . . . . . . . . . . . . . . . . 110
Table 5-9 ATCA-F125 Specific U-Boot Environment Variables . . . . . . . . . . . . . . . . . . . . . . . . . 110
Table B-1 SMART EC Documentation . . . . . . . . . . . . . . . . . . . . . . . . . . . . . . . . . . . . . . . . . . . 115
Table B-2 Specifications . . . . . . . . . . . . . . . . . . . . . . . . . . . . . . . . . . . . . . . . . . . . . . . . . . . . . . 115

ATCA-F125 (6873M Artwork) Installation and Use (6806800J94P) 11
About this Manual
Overview of Contents
This manual is divided into the following chapters and appendices.
Safety Notes on page 15 summarizes the safety instructions in the manual.
Sicherheitshinweise on page 21 is a German translation of the Safety Notes chapter.
Chapter 1, Introduction on page 29 gives an overview of the features of the product,
standard compliances, mechanical data, and ordering information.
Chapter 2, Hardware Preparation and Installation on page 33 outlines the installation
requirements, hardware accessories, and installation procedures.
Chapter3,Controls,LEDs, and Connectors on page 51 describes external interfaces of the
board. This include connectors, LEDs, and mechanical switches.
Chapter 4, Functional Description on page 69 includes a block diagram and functional
description of major components of the product.
Chapter 5, U-Boot on page 101describes the boot firmware.
Appendix A, Battery Exchange on page 113 contains the procedures for replacing the
battery.
Appendix B, Related Documentation on page 115 provides a listing of related product
documentation, manufacturer’s documents, and industry standard specifications.
Abbreviations
This document uses the following abbreviations:
Abbreviation Definition
ATCA Advanced Telecom Computing Architecture
AMC Advanced Mezzanine Card
IPMI Intelligent Platform Management Interface
IPMC Intelligent Platform Management Controller
JTAG Joint Test Action Group
PICMG PCI Industrial Computer Manufacturers Group
POST Power-on Self Test
PrAMC Processor Advanced Mezzanine Card
RTM Rear Transition Module

12 ATCA-F125 (6873M Artwork) Installation and Use (6806800J94P)
About this Manua
l
About this Manual
Conventions
The following table describes the conventions used throughout this manual.
Notation Description
0x00000000 Typical notation for hexadecimal numbers (digits are 0 through F), for
example used for addresses and offsets
0b0000 Same for binary numbers (digits are 0 and 1)
bold Used to emphasize a word
Screen Used for on-screen output and code related elements or commands.
Sample of Programming used in a table (9pt)
Courier + Bold Used to characterize user input and to separate it from system output
Reference Used for references and for table and figure descriptions
File > Exit Notation for selecting a submenu
<text> Notation for variables and keys
[text] Notation for software buttons to click on the screen and parameter
description
... Repeated item for example node 1, node 2, ..., node 12
.
.
.
Omission of information from example/command that is not necessary at
the time
.. Ranges, for example: 0..4 means one of the integers 0,1,2,3, and 4 (used
in registers)
| Logical OR
Indicates a hazardous situation which, if not avoided, could result in death
or serious injury
Indicates a hazardous situation which, if not avoided, may result in minor
or moderate injury

About this Manual
ATCA-F125 (6873M Artwork) Installation and Use (6806800J94P) 13
Summary of Changes
This manual has been revised and replaces all prior editions.
Indicates a property damage message
Indicates a hot surface that could result in moderate or serious injury
Indicates an electrical situation that could result in moderate injury or death
Indicates that when working in an ESD environment care should be taken
to use proper ESD practices
No danger encountered, pay attention to important information
Notation Description
Part Number Publication Date Description
6806800J94P November 2020 Updated Table 1-1 Standards Compliance for 62368-1
compliance.
6806800J94N December 2019
Rebrand to SMART Embedded Computing template.
Updated Freescale to NXP; updated Ordering
Information and Documentation. Updated Compliance
table for RoHS.
6806800J94M May 2016 Removed Declaration of Conformity.
6806800J94L March 2015 Updated Chapter 4 Functional Description on page 81.

14 ATCA-F125 (6873M Artwork) Installation and Use (6806800J94P)
About this Manua
l
About this Manual
6806800J94K August 2014 Removed instances of Stratum 3E and updated
Declaration of Conformity.
6806800J94J April, 2014 Re-branded to Artesyn template.
6806800J94H January, 2014 Updated Table 3-3 on page 53.
6806800J94G December, 2013 Replaced “Product Name Short” with ATCA-F125.
6806800J94F November, 2013 Updated title as ATCA-F125 (6873M Artwork) Table 1-3
on page 34, Table 2-1 on page 40.
6806800J94E October, 2013 Updated Table 2-2 on page 37.
6806800J94D December 2012 Updated Standard Compliances on page 16.
6806800J94C August, 2012
Updated Ordering Information on page 18, Figure "Serial
Number Locator" on page 20, Figure "Module
Connectors Location" on page 54, and Functional
Description on page 61
6806800J94B March, 2012
Updated Chapter 4, Functional Description, on page 61,
Chapter P, EMC, on page 118, and Chapter P,
Installation, on page 119.
6806800J94A June, 2011 Added Figure "Declaration of Conformity" on page 18.
Edited Table "Faceplate LEDs" on page 43.
Part Number Publication Date Description

ATCA-F125 (6873M Artwork) Installation and Use (6806800J94P) 15
Safety Notes
This section provides warnings that precede potentially dangerous procedures throughout
this manual. Instructions contained in the warnings must be followed during all phases of
operation, service, and repair of this equipment. You should also employ all other safety
precautions necessary for the operation of the equipment in your operating environment.
Failure to comply with these precautions or with specific warnings elsewhere in this manual
could result in personal injury or damage to the equipment.
SMART Embedded Computing (SMART EC) intends to provide all necessary information
to install and handle the product in this manual. Because of the complexity of this product
and its various uses, we do not guarantee that the given information is complete. If you
need additional information, ask your SMART EC representative.
The product has been designed to meet the standard industrial safety requirements. It must
only be used in its specific area of office telecommunication industry, industrial control, and
development. It must not be used in safety critical components, life supporting devices or
on aircraft.
Only personnel trained by SMART EC or persons qualified in electronics or electrical
engineering are authorized to install, remove or maintain the product. The information given
in this manual is meant to complete the knowledge of a specialist and must not be used as
replacement for qualified personnel.
Keep away from live circuits inside the equipment. Operating personnel must not remove
equipment covers. Only factory authorized service personnel or other qualified service
personnel is allowed to remove equipment covers for internal subassembly or component
replacement or any internal adjustment.
Do not install substitute parts or perform any unauthorized modification of the equipment or
the warranty may be voided. Contact your local SMART EC representative for service and
repair to make sure that all safety features are maintained.
SMART EC and our suppliers take significant steps to make sure that there are no bent pins
on the backplane or connector damage to the boards prior to leaving the factory. Bent pins
caused by improper installation or by inserting boards with damaged connectors could void
the SMART EC warranty for the backplane or boards.
This product operates with dangerous voltages that can cause injury or death. Use extreme
caution when handling, testing, and adjusting this equipment and its components.

16 ATCA-F125 (6873M Artwork) Installation and Use (6806800J94P)
Safety Notes
Safety Notes
EMC
FCC Class A
This equipment has been tested and found to comply with the limits for a Class A digital
device, pursuant to Part 15 of the FCC Rules, EN55022. These limits are designed to
provide reasonable protection against harmful interference when the equipment is
operated in a commercial environment. This equipment generates, uses, and can radiate
radio frequency energy and, if not installed and used in accordance with the instruction
manual, can cause harmful interference to radio communications.
Operation of this equipment in a residential area is likely to cause harmful interference in
which case the user is required to correct the interference at his own expense.
To ensure EMC protection use only shielded cables when connecting peripherals to assure
that appropriate radio frequency emissions compliance is maintained. Installed blades
must have the face plates installed and all vacant slots in the shelf must be covered.
For applications where this product is provided without a face plate, or where the face plate
has been removed, your system chassis/enclosure must provide the required
electromagnetic interference (EMI) shielding to maintain EMC compliance.
Board products are tested in a representative system to show compliance with the above
mentioned requirements. A proper installation in a compliant system maintains the required
performance.
As soon as you modify the product or change the default configuration you are responsible
for complying with all relevant regulatory standards.
VCCI
This is a Class A product based on the standard of the Voluntary Control Council for
Interference by Information Technology Interference (VCCI). If this equipment is used in a
domestic environment, radio disturbance can arise. When such trouble occurs, the user is
required to take corrective actions.
Installation
Damage of Circuits
Electrostatic discharge and incorrect installation and removal of the product can damage
circuits or shorten its life.
Before touching the product make sure that you are working in an ESD-safe environment
or wearing an ESD wrist strap or ESD shoes. Hold the product by its edges and do not
touch any components or circuits.

Safety Notes
ATCA-F125 (6873M Artwork) Installation and Use (6806800J94P) 17
Damage of the Product and Additional Devices and Modules
Incorrect installation or removal of additional devices or modules damages the product or
the additional devices or modules.
Before installing or removing additional devices or modules, read the respective
documentation and use appropriate tools.
Blade Damage
Incorrect installation of the blade can cause damage of the blade,
Only use handles when installing/removing the blade to avoid damage/deformation to the
face plate and/or PCB.
Damage to Blade/Backplane or System Components
Bent pins or loose components can cause damage to the blade, the backplane, or other
system components. Therefore, carefully inspect the blade and the backplane for both pin
and component integrity before installation.
Data Loss
Removing the blade with the blue LED still blinking causes data loss. Wait until the blue
LED is permanently illuminated before removing the blade.
System Damage
WARNING: The intra-building port(s) of the equipment or subassembly is suitable for
connection to intra-building or unexposed wiring or cabling only. The intra-building port(s)
of the equipment or subassembly MUST NOT be metallically connected to interfaces that
connect to the OSP or its wiring. These interfaces are designed for use as intra-building
interfaces only (Type 2 or Type 4 ports as described in GR-1089) and require isolation from
the exposed OSP cabling. The addition of Primary Protectors is not sufficient protection in
order to connect these interfaces metallically to OSP wiring.The intra-building port(s) of the
equipment or subassembly must use shielded intra-building cabling/wiring that is grounded
at both ends.
Operation
Blade Damage
High humidity and condensation on the blade surface causes short circuits. Do not operate
the blade outside the specified environmental limits. Make sure the blade is completely dry
and there is no moisture on any surface before applying power. Do not operate the blade
below -5°C.

18 ATCA-F125 (6873M Artwork) Installation and Use (6806800J94P)
Safety Notes
Safety Notes
Overheating and Blade Damage
Operating the blade without forced air cooling may lead to overheating and thus damage
of the blade. When operating the blade, make sure that forced air cooling is available in the
shelf.
Injuries or Short Circuits
Blade or power supply In case the ORing diodes of the blade fail, the blade may trigger a
short circuit between input line A and input line B so that line A remains powered even if it
is disconnected from the power supply circuit (and vice versa). To avoid damage or injuries,
always check that there is no more voltage on the line that has been disconnected before
continuing your work.
Configuration Switches/Jumpers
Product Malfunction
Switches marked as “Reserved” might carry production-related functions and can cause
the product to malfunction if their setting is changed.
Do not change settings of switches marked as “reserved”.
Product Damage
Setting/resetting the switches during operation can cause damage to the product.
Check and change switch settings before you install the product.
Product Damage
Too much force may damage the reset switch.
Use minimal force when pressing the reset switch.
Cabling and Connectors
Blade Damage
The RJ-45 connector(s) on the face plate are twisted-pair Ethernet (TPE) or E1/T1/J1
interfaces. Connecting an E1/T1/J1 line to an Ethernet connector may damage the product.
Make sure that TPE connectors near your working area are clearly marked as
network connectors.
Verify that the length of an electric cable connected to a TPE bushing does not
exceed 100 meters.
Make sure the TPE bushing of the system is connected only to safety extra low
voltage circuits (SELV circuits).
If in doubt, ask your system administrator.

Safety Notes
ATCA-F125 (6873M Artwork) Installation and Use (6806800J94P) 19
AMC Module
Limitation of Operating Temperature Range.
Installing AMC modules with small operating temperature ranges into the ATCA-F125 may
further restrict the operating temperature range of the ATCA-F125. Make sure that the
operating temperature of any installed AMC modules and the ATCA-F125 as a bundle are
within allowed limits
Poor Shelf Cooling and EMC Compliance Violation
An empty AMC bay may result in poor shelf cooling and strong EMC radiation and thus lead
to EMC compliance violation. Therefore, always cover empty or unused AMC bays with a
filler panel.
Hot Swap
Data Loss
Removing the product with the blue LED still blinking causes data loss.
Wait until the blue LED is permanently illuminated before removing the product.
SFP/SFP+ Modules
Personal Injury and Damage of the RTM and SFP/SFP+ Modules
Installing and using SFP/SFP+ modules which are not fully certified and which do not meet
all relevant safety standards may damage the RTM and the SFP/SFP+ modules and may
lead to personal injury.
Only use and install SFP/SFP+ modules which are fully certified and which meet all
relevant safety standards.
Personal Injury
Optical SFP/SFP+ modules may be classified as laser products. When installing and using
any of these SFP/SFP+ modules, the regulations which correspond to the respective laser
class apply to the whole RTM. Not complying to these regulations may lead to personal
injury.
When installing and using optical SFP/SFP+ modules which are classified as laser
products, make sure to comply to the respective regulations.
Eye Damage
Optical SFP/SFP+ modules may emit laser radiation when no cable is connected. This
laser radiation is harmful to your eyes.
Do not look into the optical lens at any time.

20 ATCA-F125 (6873M Artwork) Installation and Use (6806800J94P)
Safety Notes
Safety Notes
SFP/SFP+ Module Damage
The optical port plug protects the optical fibres against dirt and damage. Dirt and damage
can render the SFP/SFP+ module inoperable.
Only remove the optical plug when you are ready to connect a cable to the SFP/SFP+
module. When no cable is connected, cover the port with an optical port plug.
Battery
Data Loss
Installing another battery type than the one that is mounted at product delivery may cause
data loss since other battery types may be specified for other environments or may have a
shorter lifetime.
Only use the same type of lithium battery as is already installed.
PCB and Battery Holder Damage
Removing the battery with a screw driver may damage the PCB or the battery holder.
Do not use a screw driver to remove the battery from its holder.
Environment
Environmental Damage
Improperly disposing of used products may harm the environment.
Always dispose of used products according to your country’s legislation and
manufacturer’s instructions.
Table of contents
Other SMART Embedded Computing Motherboard manuals

SMART Embedded Computing
SMART Embedded Computing MVME7100ET User manual

SMART Embedded Computing
SMART Embedded Computing ATCA-7540 Series User manual

SMART Embedded Computing
SMART Embedded Computing MVME7100 User manual

SMART Embedded Computing
SMART Embedded Computing ATCA-7480 Series User manual

SMART Embedded Computing
SMART Embedded Computing ATCA-754 Series User manual

SMART Embedded Computing
SMART Embedded Computing MVME3100 Quick start guide