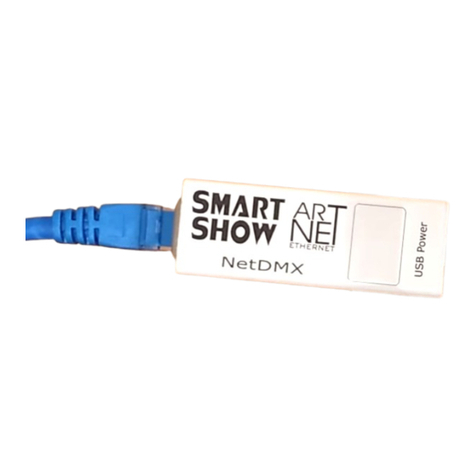
SMART SHOW Pixie Quick start guide

'Pixie' Installation & Use
Introduction
'Pixie' is a Wifi ArtNet to WS2811/12 (NRZ) Driver interface, and is capa le of receiving one DMX universe (512 channels) and converting to
a continuous NRZ data stream that will appear on the JST output connection. Network connection can e made y utilising a special Access-
Point Mode. Device IP, ArtNet, and LED Test are availa le directly from a second rowser interface once the Wireless network connection has
een made. Pixie can also e unlocked if a special unlock code is purchased which will allow access to an additional 3 configura le universes,
sACN(E1.31) receive, and the a ility to name the device on an ArtNet network
Specifications
Browser Configuration Server and UDP Client mode
Single Universe ArtNet II & III and sACN E1.31 decoding DMX512 data to WS2811/12 in NRZ Format
Radio Module : Wireless standard 802.11 /g/n, Frequency range 2.4-2.5 GHz
Power input : 5V USB Powered, or MAX 5V external power applied to RED wire of 3-Pin JST Connector
Parts Supplied
Pixie Interface 1 x 3 pin JST Ca le
Status LEDs
Network Select : Slow fingle flash RED=APMode, not connected – Slow dou le flash RED=APMode, connected
Network Connect : Medium single flash RED=ClientMode, not connected – Solid BLUE=ClientMode, connected
Data Streamin : BLUE OFF=streaming/data eing received that matches universe selection group
Unsuccessful network Connection : Equal On/Off slow flashing RED (after 60 seconds of failed attempts)
Access-Point Connection
On first power-up (when the device has not een set up efore), it will appear as an Access Point. If you check your list of wireless network
connections you will find the device in the list as 'Pixie xxyy' (where xxyy are the last two octets of the device mac). The device's LED will e
slowly flashing RED. On your PC, select the device from the list of wireless network connections and enter 'smartshow' for the password. Once
connected the device's LED will do a repeating slow dou le flash.
[Laptop/PC] <--- direct wifi connection ---> [Pixie in APMode : 192.168.4.1]
'Join A Network' Confi uration Pa e
To access the 'Join A Network' configuration page, type into the URL ar '192.168.4.1' and press return, the configuration interface should
appear as follows:
Network SSID & Password Settin s
Network SSID: Enter the name (SSID) of the wireless router for the network you wish to join
Network PASS: Enter the password (PASS) for the a ove network.
[Save SSID & Password] The a ove SSID and Password will e saved so that next time the device re oots, the connection will e
made automatically (unless the Network/Pass cannot e verified)
[Connect to Network] *READ DEVICE SETTINGS BELOW BEFORE PRESSING CONNECT* This will allow the device to connect
to the Network as specified a ove, the device will close down its Access-Point ('Join-A-Network') connection and restart as a network
client/node. While the device is making the network connection the LED will show a medium RED flash. When the device's LED
changes to a solid BLUE it confirms the connection to your chosen wireless Network.
Device Settin s & IP Confi uration
Device IP Address: It is possi le to set the IP Address of the Pixie to almost any value. Many ArtNet devices will use standard IP
addresses of 10.x.x.x or 2.x.x.x, only values of 0-254 can used, 255 is not allowed.
Note : If you change this IP address, the new IP address will be the one that will allow you access to this configuration page next
time you reboot. Also take care to only change to an IP address that you actually ha e access to.
Device SubNetMask: Normally this should e left at 255.255.255.0, which will cover most applications.
[Save Device Settin s] Saving the configuration will write the Device IP and Su NetMask values to the Pixie's internal memory, so
on next power-up the new settings will e used.
Resumin Network Connection
Once the device has connected to your chosen Network (Solid BLUE LED), then you should disconnect your Laptop/PC from the Pixie's AP-
Mode (it might automatically do this anyway), and then manually connect your Laptop/PC ack to your existing Network (Same SSID as
a ove)
[Laptop/PC] <--- wifi ---> [ROUTER] <--- wifi ---> [Pixie in C ientMode : 192.168.1.200]
Note : If the de ice's LED stays flashing medium speed RED then you ha e not been able to connect to your desired network (you may
ha e entered the SSID & PASS incorrectly). If you cycle the power to the de ice you will start in AP mode once again, the de ice will do this
until a confirmed network connection has been made.
Browser Confi uration Mode
To access the rowser configuration page, type into the URL ar the Network IP Address (this will e default value '192.168.1.200' unless
you have changed it from within the 'Join-a-Network' page) and press return. Note : Access to the Browser Configuration page is only
a ailable when ArtNet data is NOT streaming to the de ice o er the network, therefore access can only be granted when the De ices LED is
SOLID BLUE. The configuration interface should appear as follows:
Device Settin s & IP Confi uration
Network: The page should announce the currently connected network name as 'Connected to..'
IP Address: It is possi le to set the IP Address of the Pixie to almost any value. Many ArtNet devices will use standard IP addresses
of 10.x.x.x or 2.x.x.x, only values of 0-254 can used, 255 is not allowed. Note : If you change this IP address, the new IP address
will be the one that will allow you access to this configuration page next time you reboot. Also take care to only change to an IP
address that you actually ha e network access to.
SubNetMask: Normally this should e left at 255.255.255.0, which will cover most applications.
MAC Address: This is not adjusta le and is a unique num er created when the device was manufactured.
[Save] New IP configuration will not take place until the Pixie has its power cycled (or y pressing [Re oot]). Saving the
configuration will write the Device IP and Su NetMask values to the Pixie's internal memory. On the next power-up the new settings
will e used.
Art-Net Startin Universe
These values can e configured to match the requirements of your system. There are a total of 32,768 universes for ArtNet III
ArtNet Mode: Net: Range 0-127 SubNet: Range 0-15 Universe: Range 0-15
[SAVE]: New ArtNet settings will take immediate effect after they are saved.
Pixel Test
Connected Pixel colours can e tested y pressing uttons for either RGB or RGBW, clear ALL using OFF.
Startin Channel
Enter the first Channel that you require the pixels to start from, leave as zero to start at channel zero
Li htin Innovations | Software | Desi n
www.smartshow.li htin

'Pixie' Installation & Use
Unlock Code
If an unlock code has een purchased, you can enter it into this ox, and once [SAVE] has een pressed it will unlock the following
features :
DMX Protocol
Select either ArtNet or sACN (E1.31) to match the DMX Data Protocol coming from the host application
[SAVE] New DMX Protocol settings will take immediate effect after they are saved to the Pixie.
ArtNet Node Name
The device can e named (up to 8 characters) so that it can e identified on an ArtNet network
Universe Sizes & Pixel Order
Uni Size: If your application is una le to set the size of the Universe, then the universe size can e entered into the
oxes, one for each of the four universes. Pixel Order: If your application sends data out as RGB, then select RGB,
otherwise default is GRB, also RGBW (4 colour) selection is availa le
Output Power (Divisor)
The device can e set so that it can output full power (100%), half (50%) or a quarter power (25%)
Reboot
Pressing [Re oot] will restart the Pixie Device
Delete Connection
Pressing [Delete Connection] will remove the details of the currently connected network from the device, this may e required if you
want to move from one wireless router to another. The next time you power up the device it will go into Access-Point mode again
which will allow a new SSID & PASS to e entered (see Join-A-Network)
Recovery Mode : Resettin Network Connection
If you have previously connected to a network (wireless router) and you want to delete the network connection so you can join a different
network, you can do this in one of two ways:
A. Follow the instructions in the Browser configuration Mode, y accessing the page and press the [DELETE CONNECTION] utton,
this will instantly remove the current network SSID and Password, and the device will re oot automatically in AP mode waiting for
you to connect to it directly and Join-a-Network
B. If the previous router doesn't exist anymore (it has een removed, the device has een moved to another location, or perhaps
the router has died) then you won't e a le to access the Browser Configuration Mode (a ove), instead you will have to use the
special RECOVERY MODE. Once the Recovery Mode procedure is complete, the device will have removed its previous SSID and
Password and will re oot in AP mode.
Here are the steps :
1. Without the original wireless router switched on (or isible on networks), power up the Pixie
2. The LED will be flashing a medium speed single RED (searching for network)
3. Allow 60 seconds to elapse (fail to connect), the LED will now be flashing RED with Equal on and off times
5. Disconnect the power to the Pixie
6. Repeat the steps from 1 to 5 TEN TIMES
7. Once the TENTH unsuccessful connection elapses o er 60-seconds the de ice will reset
If at any time during the 10 power-up cycles the device happens to find the old wireless connection, this whole procedure will e
ignored and the device will reconnect to the existing network as usual.
Product Connections
The 3-wire Pixie JST ca le has the following connections:
BLACK : Ground - WHITE : Data Out - RED : 5V ONLY (5V power into the Pixie)
Lets Animate !
Open your LED animation application, Jinx is recommended and can e downloaded free of charge from http://www.live-leds.de/
1. Configure Jinx to use your Pixie device, y selecting it as an 'ArtNet' device type from the 'SetUp>OutputDe ices' menu
2. Universes/Devices can e added manually (see elow) or automatically using 'SCAN' (only availa le for ArtNet). If a scan is done
and 1 universe will e automatically added, you may need to edit the entry with the specific requirement of your set-up.
3. Ensure the Broadcast check ox is not checked
4. Enter the IP num er of your Pixie interface (as you have set in Pixie config)
5. Select the num er of data channels required for this universe, and set Net, Su Net and Starting Universe (as you have set in Pixie
config)
6. Click OK to save changes
7. Design your matrix size and shape within 'SetUp>MatrixOptions'
8. Patch your matrix to the Pixiies universe within 'SetUp>OutputPatch'. Be careful to select the correct colour order for your LEDs,
WS2812 are GRB, and NOT RGB, starting at channel zero.
9. 'SetUp>StartOutput' to start the show.
10. If you have configured and patched everything correctly the Devices BLUE LED will extinguish.
11. Ensure your WS2812 LED strip/matrix is connected to the JST outputs, following the correct connections.
12. Select the effect you want to see from the Channel Effects and have fun !
ArtNet/sACN Unicast, Multicast & Broadcast mode
It is recommended that Unicast mode is used when sending ArtNet/sACN data to Pixie. Broadcast mode should e avoided.
ArtNet Device Discovery & DHCP
There is limited a ility to discover IP addressing and device Information using ArtNetPoll, IP Scan is availa le on most software. If
unavaila le, addressing can e done manually as descri ed a ove. There is no DHCP function as IP addressing is Static, utilising client port
6454 for Artnet and 5568 for sACN.
Dimensions
Length : 45mm (plus JST ca le) – Width 16mm – Height 10mm
Software Compatibility
Pixie works with all free and commercial Art-Net/sACN compati le software. For free software, Jinx! is highly recommended, visit
http://www.live-leds.de/ for more information.
IMPORTANT : Please note that this is a 5V Device only, if the power input e ceeds 5V the Pi ie could be damaged internally
Technical Support
Art-Net™ Designed by and Copyright Artistic Licence Holdings Ltd
Li htin Innovations | Software | Desi n
www.smartshow.li htin
Table of contents
Other SMART SHOW Controllers manuals
Popular Controllers manuals by other brands
JUMO
JUMO IMAGO 500 Interface description
Enttec
Enttec Open DMX Ethernet user manual

Calpeda
Calpeda IDROMAT 3 Original operating instructions
Midi Solutions
Midi Solutions F8 operating instructions
Oracle
Oracle Acme Packet 4500 Hardware installation and maintenance guide
Kwikee
Kwikee 2000 installation instructions
