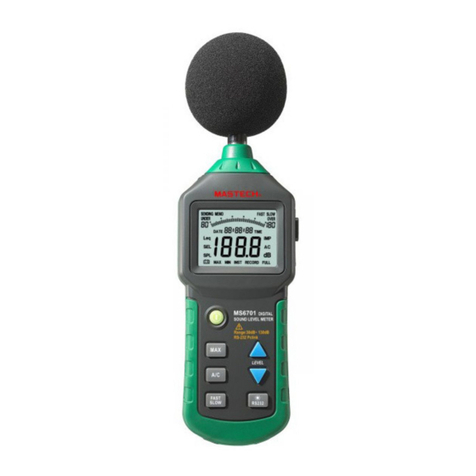
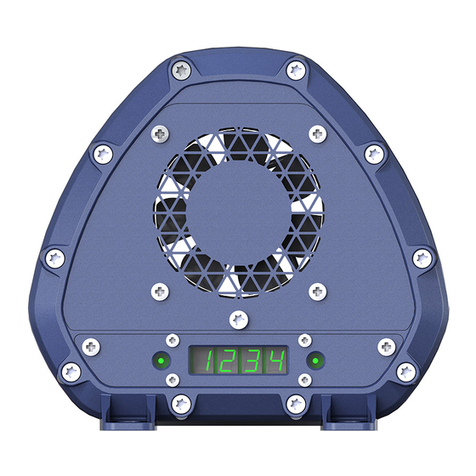
Smart temp SMT-IAQ3 User manual

SMT-IAQ3
Indoor Air Quality Monitor
Manual Ver 1.0

Page 2
Thank you for your purchase of the Smart Temp Australia P/L SMT-IAQ3 indoor air quality monitor
and controller. This device has been designed and built by Smart Temp Australia P/L to be an
exceptionally reliable and advanced control system. Great effort has been taken to ensure that the
SMT-IAQ3 is extremely easy to use and capable of monitoring and controlling indoor air quality in
safest and the most energy efficient manner possible.
This manual is comprehensive and detailed and as such is quite large. Fortunately, this document is
not a novel that you need read from cover to cover, simply use the parts of the manual that are of
interest to you and disregard the parts of the manual irrelevant to your needs.
Great care has been taken in the preparation of this manual. Smart Temp Australia P/L takes no
responsibility for errors or omissions contained in this document. It is the responsibility of the user to
ensure this monitor, or the equipment connected to it is operating to their respective specifications
and in a safe manner.
Due to ongoing product improvement Smart Temp Australia P/L reserves the right to change the
specifications of the SMT‐IAQ3 monitor (or its components) without notice.
All rights reserved. © Smart Temp Australia P/L 2020 Intellectual rights apply.
Smart Temp Australia P/L www.smarttemp.com.au

Page 3
LCD
Not all display elements or buttons shown may be active in your SMT-IAQ3. The display
is dynamic and functions not applicable will not be shown. The alarm mute button for
example, will not be shown until the alarm is sounding.

Page 4
User Operation
The SMT-IAQ3 requires very little user interaction. It will monitor the levels of carbon
dioxide, humidity and temperature in the local environment and is capable of initiating
alarms and corrective action if any of these exceed pre-set levels.
If enabled, the user can press the “Force Fresh Air”button which will bring in fresh air.
The “Force Fresh Air”button will flash when pressed to indicate that it is running.
The SMT-IAQ3 backlight can also change colour from green, to amber then red to visually
indicate the quality of the air in the room in a clear manner, if enabled.
If permitted, you may be able to mute the audible alarm by pressing the “Mute Alarm”
button when shown. If Active Ventilation is enabled, you can tap the “A”icon to briefly
display the outside air temperature.

Page 5
Terminal Layout
By using a small flat
blade screwdriver
placed in the bottom
centre of the
enclosure you can pry
the sensor enclosure
apart. Take care not
to drop the Display as
damage may occur.
When replacing the face on the sensor ensure all wiring
is free of the terminals on the base and will not foul on
the pins when you close the two halves.
Hook the top of the display into the top of the base and
swing the lower section in. Press firmly to snap the two
case halves together. DO NOT press on the glass display,
press on the plastic only.

Page 6
O-10V Output
The SMT-IAQ3 has 3 x 0-10V outputs. One each for carbon dioxide, temperature, and
relative humidity. All 0-10V outputs wiring is the same. Wire between the required
output and the 0V / Com terminals. The output voltage will increase with increasing
temperature, humidity, or carbon dioxide levels.
The output
voltage and scale
for each of the 3
0-10V outputs is
independently
adjustable from
within the installer
options menu.
(see installer
options starting
page 16)

Page 7
Relay
The SMT-IAQ3 has a single volt free relay with changeover contacts. The relay is rated to
carry 30V @1A Max. Any voltage applied to the relay common terminal will switch
between the normally open (NO) and normally closed (NC) terminals. This relay can be
set to respond to high levels of temperature, relative humidity or carbon dioxide as
selected in the installer options. Each sensor has its own selectable alarm threshold.
You can assign just one sensor, such as CO2 to the relay,
or multiple sensors such as Temp and RH to the relay.
The installer menu options will permit you to set this relay as a normally de-energised or
as a fail-safe normally energised relay. This will change the NO/NC wiring logic.
T1T2
A single universal input has been provided that will permit several
additional functions to be performed. This input can be used as a
remote temperature sensor input or as a volt free switch input that
will control many of the functions of the SMT-IAQ3. A complete list
of options available to this input is available in the installer options menu.

Page 8
Power
The SMT-IAQ3 can be powered from any AC or DC power supply from 12 to 30V AC or DC.
AC power is not polarity dependant however if powering the SMT-IAQ3 from DC power
ensure the positive voltage is applied to the top AC+ terminal.
Negative to the lower AC- terminal. Reverse polarity DC wiring will
not damage the SMT-IAQ 3, it simply will not power on.
Communications
The SMT-IAQ3 has an isolated RS-485 communications capability. You can select either
Modbus RTU or BACnet MSTP communications protocol from within the installer menu.
It is well beyond the scope of this small manual to detail the communications capabilities
and provide information on all data points available within the SMT-IAQ3. For
comprehensive information on the communications capability of the SMT-IAQ3 please
see the separate communications documentation.

Page 9
Power Up
When you first apply power to the SMT-IAQ3 it will briefly show all LCD elements and
then display the firmware version for a few seconds. During the next 180 seconds the
display will countdown from 180 to 0 to permit the CO2 and other sensors to stabilise.
During this countdown period no alarm conditions will be initiated. All 3 0-10V outputs
will be held at their respective “safety voltage”as defined in the installer menu (see page
17). And if the alarm relay is set as fail-safe it will energise. The LCD will also cycle its
colour backlight through green, amber, and red.
Once the countdown has reached zero, normal function will begin.
Important Notes
The CO2 sensor within the SMT-IAQ3 has an advanced learning self-calibrating function.
This calibration process takes place over an 8-day period. It is therefore essential that the
SMT-IAQ3 is continuously powered and not turned on and off at frequent intervals.

Page 10
Installation & Mounting
As the sensing devices are contained within the SMT-IAQ3 enclosure it is important to
locate it within the space to be monitored and controlled. If being used in a classroom or
a public hall it should be placed on a wall, approximately 1.5m off the floor (in the
breathing space) of the classroom, home, or office.
It should be kept out of direct sunlight or drafts that may affect the ability of the sensors
to measure the environment accurately.
The hole in the rear of the SMT-IQA3 case where wiring enters the rear of the case should
be taped over and blocked as any drafts travelling down the inside of the wall could
seriously affect the accuracy of the SMT-IAQ3 sensors.
Caution
DO NOT use any solvents or aggressive cleaning chemicals such as strong chlorine-based
cleaners in the air near the SMT-IAQ3 as these solvents, if used frequently may affect the
accuracy of the CO2 sensor.
This sensor should be protected from fine dust if possible. It is not suited (unless
modified) to monitoring the indoor air quality in a bakery for example where flour is
used. Other sensors from Smart Temp are more suitable for dusty environments.

Page 11
Advanced Installer Options Menu
The SMT-IAQ3 can be tuned to meet the needs of the specific application. Within this
advanced installer options menu, you can adjust how the SMT-IAQ3 responds to and
reports the levels of carbon dioxide, temperature, and humidity.
If you do not understand the importance of the changes you may make in this installer
options menu, it is strongly recommended that you call Smart Temp Australia P/L or an
authorised distributor for clarification and advice.
To enter the installer menu first tap then
press and hold the centre of the display.
After 10 seconds the display will change and
show the digits “15" (Fifteen) and the up /
down and the next buttons. Use the up (or
down) button to adjust the display to “21"
(twenty-one) or your previously saved PIN.
Press the next button to enter the menu. If
you are returned to the previous screen, you have entered the incorrect PIN. Try again

Page 12
To advance through the menu items tap the “Next”button and adjust the shown installer
option with the up / down button.
To exit the installer menu and save changes press and hold the “Next”button for 3
seconds.
After making changes in this menu DO NOT power down for
15 seconds or changes may be discarded.
1
PIN
This sets the PIN to enter the installer options menu for
future entry. Please record any changes made to the PIN as
it will affect how you enter the Installer options menu in
the future.
Default value is 21. Range from 00 to 99.
2
Display Temp
You can display the room Temp in Deg C, Deg F or hide the
display of room temperature
Default is deg C. Options are C, F or OFF.
3
Display RH
You can display or hide the room humidity display. Default
is On. Options are On or OFF
4
Display CO2
You can display the room CO2 in ppm or percentage to
alarm point or hide the CO2 display. 0% being displayed is
clean fresh air (400ppm) and 100% displayed being at
alarm point.
Default is ppm. Options are ppm, % or OFF

Page 13
5
Calibrate
Temp
Should you feel that the IAQ3 temperature sensor accuracy
has drifted you are permitted to apply a small, fixed offset.
Default is 0.0. Options are +/- 5 deg C or F on 0.1 steps.
6
Calibrate RH
Should you feel that the IAQ3 humidity sensor accuracy has
drifted you are permitted to apply a small, fixed offset.
Default is 0%. Options are +/- 25% 1% steps.
7
Calibrate
CO2
Should you feel that the IAQ3 CO2 sensor accuracy has
drifted you are permitted to apply a small, fixed offset.
Default is 0ppm. Adjustment is +/- 100ppm 1ppm steps.
Caution. The NDIR sensor fitted to the IAQ3 is extremely
stable and accurate. Investigate all other causes for
perceived errors before adjusting.
8
Temperature
Alarm Relay
You can set a temperature value that will turn on the volt
free alarm relay.
Default is OFF. Options are OFF, -20 to +120 (C or F)in 1 deg
steps.
9
RH Alarm Relay
You can set a Relative humidity value that will turn on the
volt free alarm relay.
Default is OFF. Options are OFF, then 0% to +100% in 1%
steps

Page 14
10
CO2 Alarm
Relay
You can set a carbon dioxide value that will turn on the volt
free alarm relay.
Default is OFF. Options are OFF, then 400ppm to 2000ppm
in 50 ppm steps.
11
Alarm Relay
Logic
You can drive the alarm relay as a normally energised or as
a normally de-energised (failsafe) relay. If normally
energised the alarm relay will energise on power up and
de-energise in an alarm condition or loss of power.
Default is 0 (normally de-energised)
Option is 0 - normally de-energised or 1 - Normally
energised
12
Beeper
The SMT-IAQ is fitted with a solid-state beeper. This beeper
can be used to acknowledge a button press as well as be
used for an alarm.
Default is 1 = beep on button press.
Options. 0= No beeper. 1 = beep on button press.
2 = beep on alarm. 3= Beep on button press & Alarm.
13
Beeper Mute
The beeper may be set to sound when in alarm condition. If
desired, you can show a beeper mute button when this
occurs.
Default is 0 = Do not permit mute.
Options. 1 = Toggle Mute. 2 = 1 hour mute. 2 = 3-hour mute.
4 = 12-hour mute.

Page 15
14
Show Force
Fresh Air
Button
The SMT-IAQ display can be set to show a “force fresh air”
button. If this button is pressed the CO2 sensor 0-10V
output will go to maximum voltage and the alarm relay (if
set for CO2) will engage.
Default is 0 = Do not show force fresh air button.
Adjustments. 1 = Show FFA. 2 = Show FFA & auto reset
after 1 hour. 2 = Show FFA and auto reset 4 hours.
15
T1 T2 input
Function
The remote inputs have multiple functions including.
0= Override onboard sensor with remote sensor.
1= Average onboard sensor with remote sensor.
2 = Force fresh air. 3= Remote mute. 4 = Simulate Smart
Temp sensor output. 5= report status to Mobus/BACnet.
6=Outside Air Sensor. 7= Pause all alarms (Unoccupied).
16
Active
Ventilation
Outside Air
Temperature
The SMT-IAQ3 active ventilation function uses the inside
and outside (if fitted) air temperature sensors to determine
if outside air is suitable to be used to ventilate the room.
The outside air temperature must be under this value to be
deemed suitable for the active ventilation function to
operate.
Default is OFF. Adjustment is OFF, then 5 deg to 100 deg in
1 deg steps.

Page 16
17
Active
Ventilation
Inside Air
Temperature
The SMT-IAQ3 active ventilation function uses the inside
and outside (if fitted) air temperature sensors to determine
if outside air is suitable to be used to ventilate the room.
This setting defines the inside air temperature threshold
that if exceeded (and if outside air is suitable) will begin the
active ventilation function.
Default is OFF. Adjustment is OFF, then 5 deg to 100 deg in
1 deg steps.
18
Active
Ventilation
Output
The SMT-IAQ3 can introduce fresh outside air into the
room when conditions are suitable. This option defines the
output(s) that control this function. The letter “A”will be
shown on the display when this function is enabled and
flash when it is working. (tap the “A”to see outside temp)
Default is 0 = Function off
Adjustments are 0= Function Off. 1 = Relay only. 2 = Temp
0-10V only. 3 = Relay and temp 0-10V.
19
Temp
Min
Value
This option permits you to select the lowest temperature
value to be used by the SMT-IAQ. Temperatures below this
value will be ignored. (See Graph on page 6).
Default is 5 deg. Adjustments are -20 to 150 in 1-degree
steps.

Page 17
20
Temp Max
Value
This option permits you to select the highest temperature
value to be used by the SMT-IAQ. Temperatures above this
value will be ignored. (See Graph on page 5).
Default is 5 deg. Adjustments are -20 to 150 in 1-degree
steps.
21
Temp
Low Voltage
This sets the minimum temperature 0-10V output voltage
when at the minimum temperature value (see Graph on
page 5).
Default is 0v. Adjustments are 0-10V in 0.5V steps.
22
Temp Max
Voltage
This sets the maximum temperature 0-10V output voltage
when at the maximum temperature value (see Graph on
page 5).
Default is 10v. Adjustments are 0-10V in 0.5V steps.
23
Temp Safety
Voltage
This sets a constant voltage to the temperature 0-10V
output.
This voltage will be present whenever the SMT-IAQ is
powered (see Graph on page 5).
Default is 0v. Adjustments are 0-10V in 0.5V steps.
24
RH
Min
Value
This option permits you to select the lowest RH value to be
used by the SMT-IAQ. RH below this value will be ignored.
(See Graph on page 5).
Default is 0 RH. Adjustments are 0 to 100 in 5% steps.

Page 18
25
RH Max
Value
This option permits you to select the highest RH value to be
used by the SMT-IAQ. RH above this value will be ignored.
(See Graph on page 6).
Default is 100%. Adjustments are 0-100% on 5% steps.
26
RH Low Voltage
This sets the RH 0-10V output minimum voltage when at
the minimum RH value (see Graph on page 6).
Default is 0v. Adjustments are 0-10V in 0.5V steps.
27
RH Max Voltage
This sets the RH 0-10V maximum output voltage when at
the maximum RH value (see Graph on page 6).
Default is 10v. Adjustments are 0-10V in 0.5V steps.
28
RH Safety
Voltage
This sets a constant voltage to the RH 0-10V output.
This voltage will be present whenever the SMT-IAQ is
powered (see Graph on page 6).
Default is 0v. Adjustments are 0-10V in 0.5V steps.
29
CO2
Min
Value
This option permits you to select the lowest CO2 value to
be used by the SMT-IAQ. CO2 levels below this value will be
ignored. (See Graph on page 6).
Default is 0ppm. CO2 Adjustments are 0 to 2000ppm in
50ppm steps.

Page 19
30
CO2 Max
Value
This option permits you to select the highest CO2 value to
be used by the SMT-IAQ. CO2 levels above this value will be
ignored. (see Graph on page 6).
Default is 2000ppm. Adjustments 0-2000ppm in 50ppm
steps
31
CO2 Low
Voltage
This sets the CO2 0-10V output minimum voltage when at
the minimum CO2 value (see Graph on page 5).
Default is 0v. Adjustments are 0-10V in 0.5V steps.
32
CO2 Max
Voltage
This sets the CO2 0-10V maximum output voltage when at
the maximum CO2 value (see Graph on page 5).
Default is 10v. Adjustments are 0-10V in 0.5V steps
33
CO2 Safety
Voltage
This sets a constant voltage to the CO2 0-10V output.
This voltage will be present whenever the SMT-IAQ3 is
powered (see Graph on page 5).
Default is 0v. Adjustments are 0-10V in 0.5V steps.
34
Back light
The back light can be set to provide an indication of the
current air quality by changing colour from green to amber
to red, or simply illuminate the display in green when a
button is pressed. Default is 1.
Adjustments. 0 = No Back light. 1 = Alarm. 2 = button press
only.

Page 20
35
Amber Temp
Backlight
Threshold
This option sets the threshold of where the backlight turns
from green to amber for temperature.
Default is OFF. Adjustment from Off, then 0 to 100 deg in 1
deg steps.
36
Red Temp
Backlight
Threshold
This option sets the threshold of where the backlight turns
from amber to red for high temperature.
Default is OFF. Adjustment from Off, then 0 to 100 deg in 1
deg steps.
37
Amber RH
Backlight
Threshold
This option sets the threshold of where the backlight turns
from green to amber for humidity.
Default is OFF. Adjustment from Off, then 0 to 100 % in 1 %
steps.
38
Red RH
Backlight
Threshold
This option sets the threshold of where the backlight turns
from amber to red for high temperature.
Default is OFF. Adjustment from Off, then 0 to 100 %in 1 %
steps.
39
Amber CO2
Backlight
Threshold
This option sets the threshold of where the backlight turns
from green to amber for high carbon dioxide.
Default is 650ppm. Adjustment from Off, then 0 to 2000
ppm in 50ppm steps.
Table of contents
