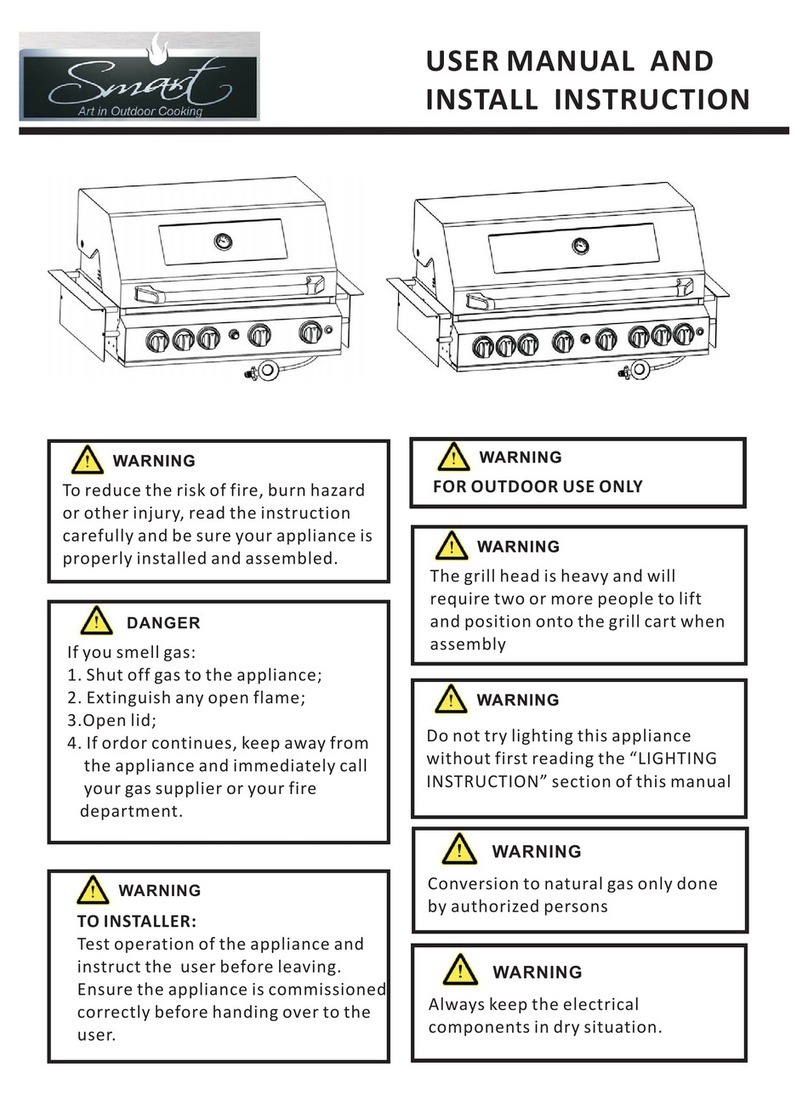
SMART 601WB-B Operating and maintenance instructions

USER MANUAL AND
INSTALL INSTRUCTION
To reduce the risk of fire, burn hazard
or other injury, read the instruction
carefully and be sure your appliance is
properly installed and assembled.
WARNINGWARNING WARNING
FOR OUTDOOR USE ONLY
WARNING
WARNING
The grill head is heavy and will
require two or more people to lift
and position onto the grill cart when
assembly
WARNING
If you smell gas:
1. Shut off gas to the appliance;
2. Extinguish any open flame;
3.Open lid;
4. If ordor continues, keep away from
the appliance and immediately call
your gas supplier or your fire
department.
DANGER
WARNING
Do not try lighting this appliance
without first reading the “LIGHTING
INSTRUCTION” section of this manual
WARNING
Conversion to natural gas only done
by authorized persons
WARNING
TO INSTALLER:
Test operation of the appliance and
instruct the user before leaving.
Ensure the appliance is commissioned
correctly before handing over to the
user.
WARNING
Always keep the electrical
components in dry situation.
WARNING

This appliance shall only be used in above ground open-air situations with natural ventilation,
without stagnant areas, where gas leakage and products of combustion are rapidly dispersed
by wind and natural convection.
Any outdoor enclosure in which the appliance is used shall comply with one of the following:
- An enclosure with walls on all sides, but at least one permanent opening at ground level and
no overhead cover. See Figure 1.
-Within a partial enclosure that includes an overhead cover and no more than two walls.
See Figure 2 & 3.
-Within a partial enclosure that includes an overhead cover and more than two walls, the
following shall apply:
*At least 25% of the total wall area is completely open; and
*At least 30% of the remaining wall area is open and unrestricted. See Figure 4 & 5.
- In the case of balconies, at least 20% of the total of the side, back and front wall areas shall be
and remain open and unrestricted.
The following diagrams provide a diagrammatic representation of outdoor areas. Rectangular
areas have been used in these figures - the same principles apply to any other shaped area.
Figure 1 - Enclosure with walls on all sides but Figure 2 - Partial Enclosure with overhead cover and no more than 2 walls
Figure 3 - Partial Enclosure with overhead cover and no more than2 walls Figure 4 - Open side at least 25% of total wall area
30 % or more in total of the remaining wall area is
open and unrestricted.
Figure 5 - Open side at least 25% of total wall area.
30 percent or more in total of the remaining wall area
is open and unrestricted
OUTDOOR USE ONLY

-
-
-
-
-
-
-
-
-“
Use spanner to tighten all gas fittings
Check all gas hose and line connection for damage, cuts or cracks each time for using the
appliance.
Always leak test with soapy water
Check all burners regularly for insect nets such as spiders, ants, etc. Nets are dangerous
and need to be fully cleaned.
Have the gas cylinder filled by an authorized gas supplier
Always wear protective gloves when handling hot component
Clean and maintain the appliance after each using.
USE grill at least 1.5 m from any wall or surface, combustible material, gasoline, flame
liquids or vapors
Burning off” the barbecue after every use (for approx 15 minutes) will keep excessive
food residue to a minimum.
PLEASE DO
Lean over appliance when lighting
Store combustible material, gasoline or flammable liquids or vapors within vicinity
of appliance
Use appliance with any cover on
Use plastic or glass utensils on the appliance.
Use the appliance in strong winds
Dismantle control valves
Test for gas leaks with a naked flame
Store spare gas cylinders in the cabinet
- Lay the gas cylinder down ( always keep upright)
Use appliance indoors
Modify the constructions of the appliance or the size of any burner, injector orifice or
any other components
Move the appliance during using
Obstruct any ventilation of the appliance
Allow the flexible gas supply hose or any electrical cord to come in contact with any
heated surface of the appliance
Use charcoal or any other solid fuel in this appliance
Disconnect any gas fittings while the appliance is in using
Use a rusty or dented gas cylinder with a damaged gas valve
Fill the gas cylinder beyond 80% cap
.
-
-
-
-
-
-
-
-
-
-
-
-
-
-
-
-
-
PLEASE DO NOT

GAS CYLINDER INFORMATION
-This appliance is designed to be used with a gas cylinder not exceeding (Australia 9KG);
The gas cylinder supply valve must be turned off when the appliance is not in use.
Gas cylinders must be stored outdoors, out of reach of children and must not be stored
in a building, garage or any other enclosed area.
The gas cylinder used must incorporate a safety collar to protect the valve assembly.
- Never store a spare cylinder under the barbecue shelves or inside the trolley housing.
- Any LPG cylinder not attached to the appliance for use should be stored outdoors and
well away from this appliance.
-
-
-
When disconnecting and removing the gas cylinder for the purpose of refilling, always observe the
following procedure.
Ensure that all gas control valves on the appliance and the gas cylinder are turned off before
disconnecting the regulator from the cylinder.
Do not smoke or use a naked flame near the appliance or gas cylinder while disconnecting the gas
line between the appliance and gas cylinder.
Remove the gas cylinder from the enclosure before disconnecting the regulator from the appliance.
Tighten all connections before placing the gas cylinder back in its enclosure.
The gas leak testing procedure should be conducted every time the gas cylinder is refilled
and reconnected to the appliance before using the appliance.
-
-
-
-
-
WARNING
Regulator
1. Check that all control knobs are in the 'Off' position.
2. Make sure the cylinder valve is off.
3. Remove the protective cap from the cylinder if present.
4. Leak test the connection with a soapy water solution.

Never use a naked flame to check for gas leaks.
Always use the following procedure to check for gas leaks.
1. In a small container, mix up a solution of water and detergent or soap.
2. Make sure that the gas supply valve on the gas cylinde is turned on.
3. Make sure that the gas control valves on the appliance are all turned off.
4 .Using a brush or spray bottle apply the solution to the gas line and each join in
the gas line.
5. Bubbling of the solution will indicate that there is a leak present.
6. Re-tighten or re-seal any joints that are leaking.
7. If a leak persists then contact your distributor or the manufacturer for assistance..
WARNING
Gas Leak Test
-Inspect the gas supply hose prior to turning on the ga. If there is evidence of cuts, wear, or
abrasion, it must be replaced prior to use.
-Only the pressure regulator and hose assembly supplied with the appliance should be use.
Never substitute regulator for those supplied with the appliance. Contact customer service
for proper replacement.
-Leak check the hose and regulator connections with a soap and water solution before
operating the appliance.
-DO NOT turn the gas at the LP gas cylinder unless the gas hose is properly connected to the
side burner gas pipe system and all burner are in the “OFF” position.
-Keep a spray bottle of soapy water near the appliance and check the connection before
each use.
SAFETY PRACTICE TO AVOID INJURY
When properly cared for, your appliance will provide safe, reliable service for many years.
However, extreme care must be used as the appliance intense heat that can increase accident
potential.
When using this appliance basic safety practices must be followed, including following:
-Do not repair or replace any part of the grill unless specifically recommended in this manual.
All other service should be referred to a qualified technician.
-The appliance is for outdoor use only.
-The appliance is not intended to be installed in or on recreational vehicles and /ore boats.
-Children should not be left alone or unattended in an area where the appliance is being used.
DO NOT allow children to sit, stand or play on or around the appliance at any time.
-Do not sore items of interest to children around or below the grill or cart. Do not allow children
to crawl inside the cart.
-Never let clothing, pot holders or other flammable materials come in contact with or too close
to any grate, burner or hot surface until it has cooled. the fabric could ignite ,causing serious
personal injury.

.
-
.
-For personal safety, wear proper apparel. Loose fitting garments or sleeves should never been
worn while using this appliance. Some synthetic fabrics are highly flammable and should be not
worn while cooking.
-Only certain types of glass, ceramic earthenware , or other glazed utensils are suitable for grill use.
Other types of material may shatter with sudden temperature changes. Use only low or medium
heat settings in accordance with the manufacture’s guidelines.
-Do not heat unopened food containers as a built-up of pressure may cause the containers to burst.
-Use a covered band when opening the grid lid.
-Never lean over an open grill.
When lighting a burner, always pay close attention to what you are doing. Make certain you are
aware of which burner you are lighting so that your body and clothing remain clear of open flames.
-DO NOT touch the grill rack, burner grate or immediate surroundings as these areas become
extremely hot and could cause burns. Use only dry potholders. Moist or damp potholders on hot
surfaces may cause steam burns.
-DO NOT use towel or bulky cloth in place of potholders.
-Grease is flammable, let hot grease cool before attempting to handle it. DO NOT allow grease
deposit to collect in the grease tray. CLEAN THE GREASE TRAY OFTEN.
-DO NOT use aluminum foil to line the grills rack or grill bottom.
When using the grill
For proper lighting and performance of the burners, keep the burner pot clean. it is necessary
to clean them periodically for optimum performance. The burners will only operate in one
position and must be mounted correctly for safe operation.
Exercise caution when cleaning the grill. To avoid steam burns, DO NOT use a wet sponge or
cloth to clean the grill while it is hot. Some cleaners produce noxious fumes or can ignite if applied
to a hot surface.
NEVER USE A DENTED OR RUSTY PROPANE GAS CYLINDER.
DO NOT use the grill to cook excessively fatty meats or other products which promote flare-ups.
DO NOT operate the grill under unprotected combustible constructions. USE only well ventilated
areas. Do not use in buildings, garages, sheds or other such enclosed areas.
This grill is designed for optimum performance without the use of briquettes.
DO NOT place briquettes on the flame tamers as this will block the vent to the grill burners.
Adding briquettes can damage ignition components.
Never use the grill in extremely windy conditions. If located in a consistently windy area, a
windbreak will be required.
WARNING

ELECTRICAL COMPONENTS
Electrical Groundings Instructions for Transformer- This appliance (Transformer) is equipped
with a plug and should be plugged directly into a properly grounded receptacle. When installed,
must be electrically grounded in accordance with local codes.
DO NOT cut or remove the grounding prong from this plug.
1.To protect against electrical shock, DO NOT immerse cord or plugs in water or other liquids.
2.Uplug from the outlet when not in use and before cleaning. Allow to cool before putting on or
taking off parts.
3.DO NOT operate any outdoor cooking gas appliance with a damaged cord, plug, or after the
appliance malfunctions or has been damaged in any manner.
4. DO NOT let the cord hange over the edge of a table or touch hot surface.
5. DO NOT use an outdoor cooking gas appliance for purpose other than intended.
6. When connecting, first connect plug to the outdoor cooking gas appliance then plug appliance
into the outlet.
7. Use only a Ground Fault Interrupt(GFI) protected circuit with this appliance.
WARNING
LIGHTING INSTRUCTION
This barbecue is designed for use outdoors, away from any flammable materials.
It is important that there are no overhead obstructions and that there is a minimum distance
of 1000mm from the side or rear of the appliance.
It is important that the ventilation openings of the cylinder compartment are not obstructed.
No modifications should be made to any part of this barbecue and repairs and maintenance
should only be carried out by an authorized person.
DO NOT let children operate or play near grill.
DO NOT use charcoal or ceramic briquettes in a gas grill
DO NOT light or use the side burner with the lid in the closed position.
DO NOT attempt to light burner with lid closed. A buildup of non-ignited gas inside a closed grill
is hazardous.
The side burner is designed for pot/Pan with diameter 60-260mm
Side burner lid can not be used as a work table. DO NOT put anything on the side burner lid
whiles it is not working
WARNING

To light the grill
1.Open the lid and make sure all the knobs are on the OFF position.
2.Push down the knob and turn the knob anticlockwise to HIGH position, then keep pressing the
igniter for 2-3 seconds ( a sound could be heard), thus the burner could be lit. If the burner does
not light, turn off the knob and wait for 5 minutes then repeat this process.
3.Adjust the heat by turning the knob to the High / Low position.
4.To light the other burners, repeat the same process for the adjacent burner and continue in
sequence until all the burners are lit.
5.To turn the barbecue OFF, turn the cylinder valve or regulator switch to the “OFF” position and
then turn all of the control knobs on the barbecue clockwise to the “OFF” position.
For Match- Lighting:
1.For Main burner, place the match into match holder chain and fire the match, then put the match
into the lighting hole on the right side of the fire box;
2. For side burner, place the fired match on the holes of the side burner head.
3 .Push down and turn the knob anticlockwise to HIGH position, then the burner can be lit.
If the burner does not light, turn off the gas tap and wait for 5 minutes then repeat. .
Before cooking for the first time, light on all the main burners and keep burning for 15 minutes. This
will “heat clean” the internal parts and dissipate odor from the painted finish. The color of cooking area
may get little change. It is normal and it is the nature of material.
While igniting main burner and infrared rear burner, make sure the lid is in open situation.
DO NOT IGNITE WITH SIDE BURNER LID CLOSED. DO NOT CLOSE SIDE BURNER LID WHEN
SIDE BURNER IS IN OPERATION.
While cooking with the hood closed and with all the burners on, makes sure all these burners
are in the LOW flame position.
WARNING
CARE AND MAINTENANCE
Stainless Steel
Cooking Grates
There are many stainless steel cleaners available. Always use the mildest cleaning process
first, scrubbing in the direction of the grain. DO NOT use steel wool as it will scratch the
surface. To touch up noticeable scratches in the stainless steel, and very lightly with dry 100
grit sand paper in the direction of the grain.
Grease specks can gather and bake onto the surface of the stainless steel, giving the appearance
of rust. For removal, use an abrasive pad with s stainless steel cleaner.
The easiest way to clean the grill is immediately after cooking is completed and the
flames have been turned off.
Wear a barbecue mitt to protect your hand from heat and steam.
Scrub the hot cooking grates by dipping a bristled barbecue brush in tap water. Cleaning will
be more difficult if the grill is allowed to cool.

Grease Pan
The grease pan should be empted, wiped down and washed after each use with a mild detergent
and warm water solution. Check the grease pan frequently and do not allow excess grease to
accumulate and flow out of the grease pan.
Extreme care should be taken when removing a burner. It must be correctly centered on the orifice
before any attempt is made to relight the grill. Frequency of cleaning with depend on how often
you use the grill.
Failure to properly place the burner over the orifice could cause a fire to occur behind and beneath
the valve panel, thereby damaging the grill and making it unsafe to operate.
Before cleaning, make sure the gas supply and control knobs are in the ‘OFF’ position and the
burners have cooled.
Follow these instructions to clean parts of burner assembly or if you have trouble igniting grill.
1.Turn gas off at control knobs and LPG Tank.
2.Remove cooking grates, grease tray and grease cup.
3.Remove screw at end of burner using a screwdriver.
4.Carefully lift each burner up and away from valve
openings.
5.Wire brush entire outer surface of burner to remove
food residue and dirt.
6.Clean any blocked ports with a stiff wire such as an
open paper clip.
7.Check burner for damage, due to normal wear and
corrosion some.
Grill Burner
We suggest following ways to clean the burner tubes
-Bend a stiff wire( a light weight coat hanger works well)
into a small hook. Run the hook through each burner tube
and burner several times
-Use a narrow bottle brush with a flexible handle (DO NOT use a
brass wire brush), run the brush through each burner tube and
burner several times.
-Wear eye protection: use an air hose to force air into the burner tube
and out the air ports. Check each port to make sure air comes out each hole
NATURAL HAZARD SPIDERS
FACT: sometimes spiders and other insects climb into the grill tubes
to the burners. The spiders spin webs build nests and lay eggs. The
webs or nests can be very small, but they are very strong and can
block the flow of gas.
Clean burners prior to use after storing, at the beginning of grilling
season or after a period of one month not being used.
Spider guards are on the air intakes in an effort to reduce this problem,
but it will not eliminate it! An obstruction can result in a “flashback”
(a fire in the burner tubes). The grill may still light, but the obstruction
does not allow full gas flow to the burners.
WARNING

ABNORMAL OPERATION
Any of the following are considered to be abnormal operation and may require service
Yellow tipping of the yellow flame
Sooting up of grills plates
Burners not igniting properly
Burners failing to remain alight
Burner extinguished by trolley doors
Gas valves, which are difficult to turn
-
-
-
-
-
-
WARNING
TECHNICAL DATA
Model No.
Gas Type:
Test Point Pressure:
otal Nominal Gas
Consumption:
Nominal Gas Consumption & Injector size:
Universal LP Gas
*Natural Gas
AGA Approval No
: 401WB-W
Universal LP Gas & Natural Gas
Universal LP Gas- 2.75 kpa
Natural Gas-1.0KPA
T
Universal LP Gas-65MJ/h
Natural Gas-55 MJ/h
* - Main Burners: 13MJ/h x 4 Injector size 0.98mm
-Back Burner: 13MJ/h Injector size 0.98mm
-Main Burners: 11MJ/h x 4 Injector size 1.50mm
-Back Burner: 11MJ/h Injector size 1.65mm
: AGA 8138 G
For Use outdoors only
Conversion of natural gas only to be done by
authorized person
The maximum cylinder size for use with this
appliance is 9kgs
The thread type of this appliance is G1/4B-19.
CAUTION
AC Adaptor Input: 230-240VAC, 50Hz
Output: 12VAC 2000mA
Cord 250V, 10A
Caution:
Always keep the cord and electrical
components in dry situation
For Electrical components

TECHNICAL DATA
Model No.
Gas Type:
Test Point Pressure:
otal Nominal Gas
Consumption:
Nominal Gas Consumption & Injector size:
Universal LP Gas
*Natural Gas
AGA Approval No
: 601WB-W
Universal LP Gas & Natural Gas
Universal LP Gas- 2.75 kpa
Natural Gas-1.0KPA
T
Universal LP Gas-91MJ/h
Natural Gas-77 MJ/h
* - Main Burners: 13MJ/h x 6 Injector size 0.98mm
-Back Burner: 13MJ/h Injector size 0.98mm
-Main Burners: 11MJ/h x 6 Injector size 1.50mm
-Back Burner: 11MJ/h Injector size 1.65mm
: AGA 8138 G
For Use outdoors only
Conversion of natural gas only to be done by
authorized person
The maximum cylinder size for use with this
appliance is 9kgs
The thread type of this appliance is G1/4B-19.
CAUTION
AC Adaptor Input: 230-240VAC, 50Hz
Output: 12VAC 2000mA
Cord 250V, 10A
Caution:
Always keep the cord and electrical
components in dry situation
For Electrical components

EXPANDED VIEW & PART LIST FOR MODEL 401WB-W

EXPANDED VIEW & PART LIST FOR MODEL 601WB-W

ASSEMBLY INSTRUCTIONS
1. Built -in bracket assembly.
M6x60
8pcs
2. Flame diffuser assembly
Tools required:
1.Phillips Head Screwdriver
2.Gloves

ASSEMBLY INSTRUCTIONS
3. Cooking grid/cooking plate assembly.
4. Warming rack assembly

ASSEMBLY INSTRUCTIONS
5. Transformer and cable connecting.
Warning:
The transformer need to be installed and fixed on the place where far
away from the appliance.
6. 1xAA battery ( Battery is not included).

ASSEMBLY INSTRUCTIONS
* For Rotisseries kit
.
Note:
2 Motor brackets needed for using

BUILT-IN INSTALLATION
.
1. Please follow following instruction to Install.
2. The minimum clearance of the sides of the BBQ to walls needs to be 50mm.
3. DO NOT block any ventilation of the BBQ.
4. The enclosure material for the cutout is not combustibles
5. Do Not place gas cylinder underneath the barbeque, keep required clearance.
6. Ensure Floor clearance are kept and cavity underneath the barbeque.
WARNING

NATURAL GAS CONVERSION
Tools required:
1. Socket head set screw driver (Included with the appliance)
2. Wretch
Gas piping
1. A minimum pipe with diameter 15mm is required for inlet piping. A lever operated
shut-off valve should be installed with 1 meter of the appliance for serving the appliance.
2. Where is not practical to install solid tube AGA certified to AS/NZS 1869 class A, stainless
steel brained hose could be installed. This hose assembly must comply with AS5601 Gas
installations, pipe sizing tables and shall not exceed 3 meters in length. The internal diameter
of the hose must not be less than 10mm.
3. All gas pipe connection must be sealed with a gas pipe compound resistant to natural gas
CONVERSIONS ONLY TO BE DONE BY AUTHORIZED PERSON
WARNING
NOTE TO INSTALLERS
1.The U-LPG injector is 0.98mm,
2.The NG injector for main burner is 1.50mm, for side and back burner is 1.65mm.
3.The grill is equipped with injector for both LPG and NG.
4. The grill is set for U-LPG by manufacturer
.
Instructions for converting the main burners
1. Unscrew and remove the rear panel pictured 2. Unscrew the main burner securing
screws and remove the burner sitting
it just beside.

3.With the burner removed, you will see the brass gas jet which is screwed into the end of
the valve. Using the socket driver supplied, unscrew the end LPG jet while retaining the
inner (NG) jet.
(1) (2)
(3) (4)
4.Assembly the burner back. Please make sure Please make sure the gas valve is located well
inside the main burner tube.
5. Repeat the above steps for the other main burners
Instruction for converting the rear burner
1. Remove the rear burner cover
This manual suits for next models
4
Table of contents
Other SMART Grill manuals
Popular Grill manuals by other brands

Broil King
Broil King Monarch 320 Assembly manual
NECESSITIES
NECESSITIES CBT1414A instructions

Bull Outdoor
Bull Outdoor BRAHMA 57568 owner's manual
Barbeques Galore
Barbeques Galore ALFRESCO BG229SB-G Instructions for assembly and use
Lagrange
Lagrange 229 001 Instruction book

Vermont Castings
Vermont Castings VANGUARD G53901 Assembly manual
EXPERT GRILL
EXPERT GRILL 720-0969D Operating instruction

Andrew James
Andrew James AJ001432 manual
BAR-BE-QUICK
BAR-BE-QUICK MBBQ0151 Simple Assembly Instructions
Weber
Weber Platinum 2200 LP Guide
better homes
better homes BG2294BZH-W Conversion instructions

Landmann
Landmann 520268 Assembly and operating instructions
