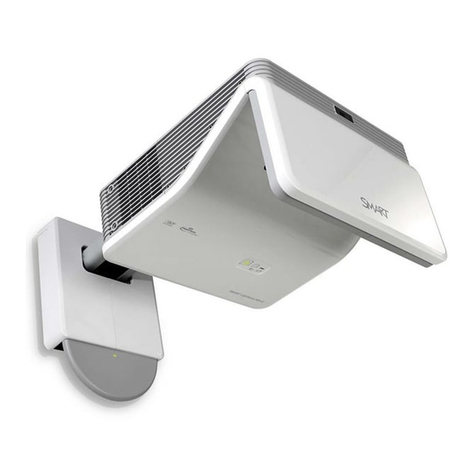
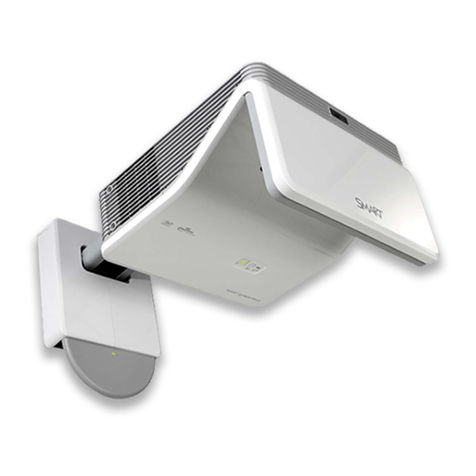
SMART LightRaise 60wi User manual

Product registration
If you register your SMART product, we’ll notify you of new features and software upgrades.
Register online at smarttech.com/registration.
Keep the following information available in case you need to contact SMARTSupport.
Serial number:
Date of purchase:
smarttech.com/kb/170295
FCC warning
This equipment has been tested and found to comply with the limits for a Class A digital device, pursuant to Part 15 of the FCC Rules. These limits are designed to provide
reasonable protection against harmful interference when the equipment is operated in a commercial environment. This equipment generates, uses and can radiate radio
frequency energy and, if not installed and used in accordance with the manufacturer’s instructions, may cause harmful interference to radio communications. Operation of
this equipment in a residential area is likely to cause harmful interference in which case the user will be required to correct the interference at his own expense.
FDA statement
Complies with FDA performance standards for laser products except for deviations pursuant to Laser Notice No. 50, dated June 24, 2007.
Trademark notice
LightRaise, SMARTNotebook, SMARTInk, SMARTBoard, smarttech, the SMART logo and all SMART taglines are trademarks or registered trademarks of
SMARTTechnologiesULC in the U.S. and/or other countries. Texas Instruments, BrilliantColor and DLP are trademarks of Texas Instruments. Blu-ray is a trademark of
the Blu-ray Disc Association. HDMI is a trademark or registered trademark of HDMI Licensing LLC. All other third-party product and company names may be trademarks
of their respective owners.
Copyright notice
© 2013SMARTTechnologiesULC. All rights reserved. No part of this publication may be reproduced, transmitted, transcribed, stored in a retrieval system or translated
into any language in any form by any means without the prior written consent of SMARTTechnologiesULC. Information in this manual is subject to change without notice
and does not represent a commitment on the part of SMART.
This product and/or use thereof covered by one or more of the following U.S. patents.
www.smarttech.com/patents
05/2013

I M P O R T A N T I N F O R M A T I O N
i smarttech.com/kb/170295
Important information
Read the following warnings carefully. Failure to read the warnings below or to follow the installation
instructions included with your SMART product could result in personal injury and damage to the
product and may void your warranty.
WARNING
lTo reduce the risk of fire or electric shock, do not expose the SMART product to rain or
moisture.
lTwo people are required to mount your SMART product because it may be too heavy for one
person to safely maneuver.
lUse the appropriate hardware for your wall type as referred to in the SMART accessory kit,
(part number 20-01623-20). Failure to do so could result in injury if the unit detaches from the
wall.
lEnsure that any cables extending across the floor to your SMART product are properly
bundled and marked to avoid a trip hazard.
lEnsure that all cabling on the wall is properly secured.
lDo not stare directly into the projector’s beam of light.
lDo not puncture, crush, heat or disassemble the pen battery, expose it to fire or any liquid,
short its terminals, or abuse the battery in any other way as this may cause the battery to
explode or ignite, and could cause a fire or personal injury.
lDo not disassemble the touch detection module. It has been designed to safely protect the
end-user in normal operation and installations.
lThe Touch Detection Module is a Class 1 laser product. To avoid eye damage from laser
radiation, do not turn on the system before installing the touch detection module. When
installation is complete, you’re unable to access the lasers and you can safely turn the system
on.
lIn accordance with IEC60825-1: 2007 international regulations, do not view the red laser beam
directly with optical instruments such as a magnifying lens.
lThe laser diodes, safely designed within the Touch Detection Module, are comprised of the
following diode specifications:
oFor red laser: 650nm (Typ.), 0.35mW (Max., CW)
oFor IR laser: 808nm (Typ.), 350mW (Max., CW)
I M P O R T A N T I N F O R M A T I O N
ii smarttech.com/kb/170295
lUse of controls or adjustments or performance of procedures other than those specified herein
may result in hazardous radiation exposure.
lKeep the interactive pen and pen holder out of reach of small children as there are small parts
that may pose a potential choking hazard.

iii smarttech.com/kb/170295
Contents
Important information i
Chapter 1: About your interactive whiteboard 1
Features 2
Optional accessories 5
Chapter 2: Installing your interactive projector 7
Choosing a surface 7
Choosing a location 11
Choosing a height 12
Routing the cables 13
Projector connections 15
Installing SMARTNotebook software 16
Aligning the interactive projector 16
Chapter 3: Using your interactive projector 17
How your interactive projector works 17
Interacting with your computer 18
Using the remote control 18
Adjusting projector settings 19
Focusing the image 30
Adjusting the image 30
Using your interactive pen 31
Chapter 4: Using the XCP 35
Connecting the XCP to the projector 36
XCP input connections 37
Using the XCPprojector controls 38
Chapter 5: Integrating other devices 41
Native video format 41
Video format compatibility 41
HD and SD signal format compatibility 43
Connecting peripheral sources and outputs 44
Chapter 6: Maintaining your interactive projector 45
Replacing the remote control battery 45
Replacing the CAT battery 46
Cleaning the projector and accessories 47

C O N T E N T S
iv smarttech.com/kb/170295
Replacing the projector lamp module 48
Resetting the lamp hours 52
Chapter 7: Troubleshooting your interactive projector 55
Determining projector status 56
Determining touch status 57
Determining interactive pen status 58
Determining curtain alignment tool (CAT) status 59
Determining XCP status 60
Troubleshooting your SMART product with the Connection Wizard 60
Troubleshooting pen and finger touch issues 62
Troubleshooting image issues 64
Troubleshooting projector errors 67
Troubleshooting audio issues 69
Troubleshooting XCP issues 69
Locating the serial number 70
Accessing the service menu 70
Chapter 8: Remotely managing your interactive projector 73
Accessing web page management 73
Home 74
Control panel 74
Network settings 75
E-mail alerts 77
Password settings 77
Simple Network Management Protocol (SNMP) 78
Chapter 9: Connecting your room control system to your interactive projector 79
Serial interface settings 79
Command inventory 81
Value-based command methods 82
Power state controls 83
Source selection controls 84
General source controls 85
Additional VGA source controls 86
Audio controls 87
Network controls 88
System controls 89
Appendix A: Hardware environmental compliance 95
Waste Electrical and Electronic Equipment and Battery regulations (WEEE and Battery
Directives) 95
Batteries 95
Mercury 95


Chapter 1
1 smarttech.com/kb/170295
Chapter 1: About your interactive
whiteboard
Features 2
Interactive projector 2
Projector boom 3
Touch Detection Module (TDM) 3
Curtain Alignment Tool (CAT) 3
Interactive touch and pen features 4
Pen holder 4
USB charger 4
Remote control 4
Optional accessories 5
LightRaise projector control (XCP) 5
XCP adapters 5
Wall-mounting kit 5
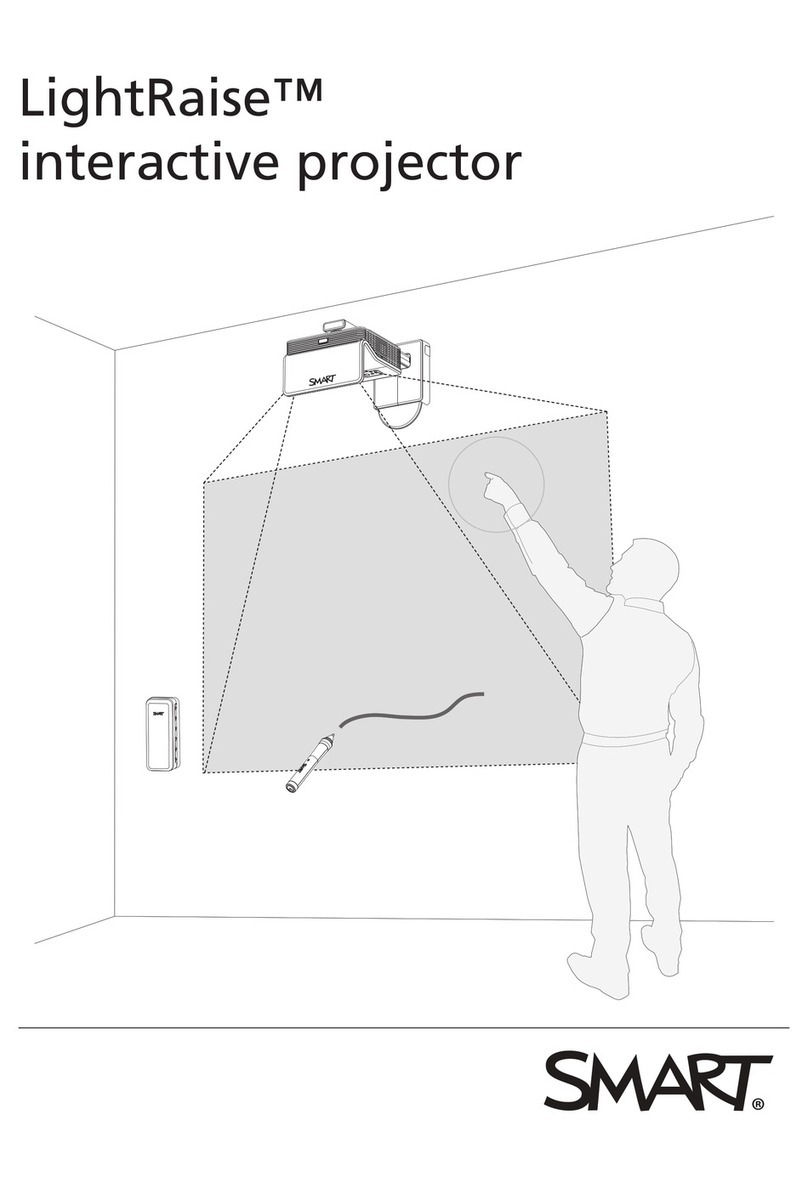
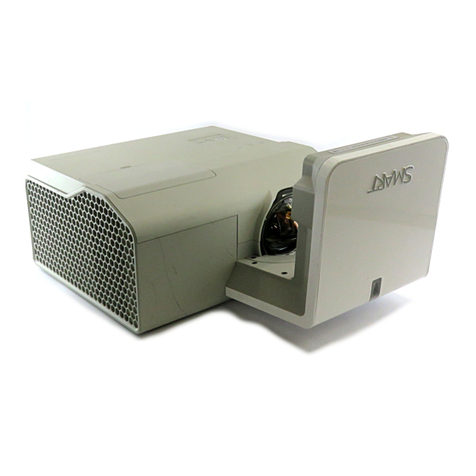
The LightRaise™ 60wi interactive projector is a wall-mounted, short-throw projector that transforms
any wall or dry-erase whiteboard into an interactive surface. It’s the only interactive projector that
provides touch and pen-enabled input, enabling two users to simultaneously write, draw and
manipulate content in SMARTNotebook™ collaborative learning software using a finger or the
interactive pens.
This chapter describes the features and components of your interactive projector.

C H A P T E R 1
About your interactive projector
2 smarttech.com/kb/170295
Features
Interactive projector
The features of your interactive projector include the following:
lA wall-mounted projection engine that uses DLP®
technology by TexasInstruments™, providing
BrilliantColor™ performance and quality Gamma 2.2
correction with Bright Room, Dark Room, sRGB, User
and SMART Presentation modes.
lFinger and pen touch interaction that enables you to tap,
swipe, gesture or draw with two fingers or the interactive
pens.
lTool awareness that automatically differentiates between finger touch and pen touch on the
surface. You can write with a pen, and then manipulate content with your finger without changing
tools.
lDual touch interaction that enables two people to draw and manipulate content on the surface at
the same time. The interactive surface can be touched simultaneously by two fingers, by two
pens or by one finger and one pen.
lHD ready, wide screen, 2500 lumens, maximum resolution supported 1080p
lNTSC, NTSC 4.43, PAL, PAL-N, PAL-M and SECAM video system compatibility
lWXGA 1280 × 800 native resolution
l16:10 native aspect ratio with support for 4:3 and 16:9 ratios with scaling
l3400:1 contrast ratio
l100" (254.0 cm) diagonal maximum interactive area size on a blank, vertical wall
l0.36:1 throw-ratio
lTwo built-in 10W speakers
N O T E
For further details about projector features, see the LightRaise 60wi interactive projector
specifications (smarttech.com/kb/170335).

C H A P T E R 1
About your interactive projector
3 smarttech.com/kb/170295
Projector boom
The projector is mounted to the wall by attaching the ball-joint to the
boom and the boom to the wall-mount plate. You can adjust the length
of the boom for different image sizes. It also includes the following
features:
lImage sizes from 67" to 100" diagonal (16:10)
lImage keystone, tilt and position
lImage vibration dampening (typically induced from doors closing)
lA padlock ring to prevent removal of the projector from the boom.
lTemplates and instructions for positioning the system safely.
See the SLR 60wi installation guide (smarttech.com/kb/170259) for more information on installing
and positioning the projector boom.
Touch Detection Module (TDM)
The TDM is mounts on the wall by attaching to the wall plate and enables your
system to differentiate between finger touch and pen touch. When it’s installed
and aligned, you can write with a pen and move objects with a finger at the
same time on the interactive surface.
The TDM provides a range of adjustments to accommodate varying projection surface thicknesses. It
also includes a conveniently placed multi-colored status light that provides system status information
feedback (see Determining touch status on page 57).
See the SLR 60wi installation guide (smarttech.com/kb/170259) for more information on installing
and aligning the TDM.
Curtain Alignment Tool (CAT)
The CAT is included with your interactive projector purchase and enables you to
align the system during installation.
See the SLR 60wi installation guide (smarttech.com/kb/170259) for more
information on using the CAT to align the system.

C H A P T E R 1
About your interactive projector
4 smarttech.com/kb/170295
Interactive touch and pen features
A computer vision-based SMART touch detection system tracks dual finger touch using an
infrared source, as well as dual interactive and synchronized infrared pen, on any reasonably
flat surface. This enables you to write or draw digital ink with the interactive pens or with your
fingers—up to two at a time. Because the projector is touch aware, you can even use one pen
to draw while simultaneously using your finger to manipulate content.
Features of the interactive pens include the following:
lActive tip switch
lPower switch
lPen automatically turns off when not in use to prolong battery life
lOne tri-colored status light: green (operational), amber (battery charging required), red (fault)
lSoftTouch texture for improved finger grip
lUSB mini-B connection for battery charging
Pen holder
Store the interactive pens in the pen holder when you’re not using them and when you’re
charging them. The holder is also a convenient place to store the remote control.
USB charger
Charge your interactive pen with the included USB charger (see
Charging the interactive pen on page 32). A fully charged pen will
operate for two days before requiring recharging.
Remote control
The projector remote control enables you to access on-screen
projector menus, to change projector settings and to turn the
projector on and off.
See Using the remote control on page 18 for more information.

C H A P T E R 1
About your interactive projector
5 smarttech.com/kb/170295
Optional accessories
These accessories aren’t included with your projector, but you can order them from your authorized
SMART reseller.
LightRaise projector control (XCP)
The optional XCP can be mounted on the wall beside the projected image, giving you a more
convenient location to access input ports and basic operation controls of your interactive
projector. You can connect a single USB cable to the SMART Connect port for an all-in-one
audio, video and data connection to your computer using DisplayLink™ technology;
alternatively, you can individually connect your video, audio and touch cables directly to the
XCP.
See Using the XCP on page 35 for more information on the XCP functionality and cabling.
XCP adapters
You can connect a single USB cable to the SMART Connect port for an all-in-one
audio, video and data connection to your computer. If you want to use a VGA or an
HDMI™ cable, you can also purchase the appropriate adapter to connect your
computer to the XCP.
Adapter Function
VGA + USB adapter Connects a VGA video source and has a separate USB connector for
data and audio.
HDMI + USB adapter Connects an HDMI video source and has a separate USB connector
for data and audio.
Wall-mounting kit
You can purchase an optional wall-mounting kit that contains an assortment of screws and wall
anchors for several different wall types.


Chapter 2
7 smarttech.com/kb/170295
Chapter 2: Installing your interactive
projector
Choosing a surface 7
Choosing a wall surface 8
Choosing a dry-erase board surface 8
Surface obstructions 10
Choosing a location 11
Choosing a height 12
Routing the cables 13
Projector connections 15
Installing SMARTNotebook software 16
Aligning the interactive projector 16
See the printed installation guide and mounting template that came with your LightRaise 60wi
interactive projector for information on installing your projector. You can access these documents by
visiting the LightRaise support page at smarttech.com/Support.
This chapter provides additional details to help you install your interactive projector.
Choosing a surface
Consider what your projection surface is when you’re selecting a location for your interactive
projector. You can install it so the image falls on an existing dry-erase board or a flat wall surface. A
dry-erase board is a flat surface that works well with your interactive projector and allows you to write
smoothly in digital ink.

C H A P T E R 2
Installing your interactive projector
8 smarttech.com/kb/170295
Choosing a wall surface
Consider the following factors when selecting a wall surface to project your image onto:
lSelect a wall that is straight and flat. All of the lines that you draw to install the interactive
projector must be straight and level on a plumb wall.
lSelect a white wall to maintain accurate color of the projected image.
lProject on a smooth, semi-gloss painted surface to reduce glare from the projector, to achieve
optimal touch quality and to reduce wear on the pen nib.
lAttach a dry-erase board to the wall if you’re projecting on a textured surface, such as a concrete
block wall. A dry-erase board is a flat surface that works well with your interactive projector and
allows you to write smoothly in digital ink.
C A U T I O N
Writing on the wall with the interactive pen might cause scratches or damage the wall surface. Test
the wall surface by writing on it with the pen before you install your interactive projector.
Choosing a dry-erase board surface
Consider the following factors when selecting a dry-erase board to project your image onto:

C H A P T E R 2
Installing your interactive projector
9 smarttech.com/kb/170295
lInstall the dry-erase board and the projector straight, level and plumb to the wall.
lSelect a dry-erase board with no bezel or with a bezel thickness of less than 3 mm above the
board surface. Bezels thicker than 3 mm above the board surface disrupt finger touch
performance.
I M P O R T A N T
Do not install map rails on any surface you select to project your image on. You must also
remove any existing map rails on the wall or dry-erase board before you use your interactive
projector.
lSelect a dry-erase board that is flat. See the following procedure for more information.
To measure the flatness of a dry-erase board
1. Place a six-foot carpenter’s level horizontally across the dry-erase board.
2. Locate where the level is furthest away from the board surface, and then measure the distance.
Measure the flatness of the surface on both sides of the dry-erase board.

C H A P T E R 2
Installing your interactive projector
10 smarttech.com/kb/170295
3. Repeat the above steps to measure the flatness of the board vertically and diagonally.
I M P O R T A N T
The overall finger touch performance is strongly influenced by the projection surface flatness.
oIf the distance is less than 5 mm in all directions, optimal finger touch performance will
likely be achieved.
oIf the distance is between 5 mm and 10 mm in any direction, good to adequate finger
touch performance will likely be achieved.
oIf the distance is between 10 mm and 15 mm in any direction, it is possible to achieve
adequate finger touch performance. However, there could be issues completing the
installation. A flatter board surface is recommended.
oIf the distance is greater than 15 mm in any direction, select a flatter surface.
Surface obstructions
There should be no objects that protrude into the keep out area between the bottom of the projector
mount and the projected image. Objects in this area should be moved or removed before you use your
interactive projector as they can cause parts of the projected image to lose finger touch function.

C H A P T E R 2
Installing your interactive projector
11 smarttech.com/kb/170295
Examples of common obstructions to watch out for include:
lCables or wires that hang into the projected image
lScrews or nails protruding from the wall or the dry-erase board
lWall protrusions or uneven wall surfaces
lMap rails on the wall or the dry-erase board
N O T E
See the SLR60wi surface evaluation guide (smarttech.com/kb/170402) more information on how to
choose a surface.
Choosing a location
SMART includes a mounting template with your interactive projector (smarttech.com/kb/170271).
Using this template ensures that you can do the following:
lDetermine where to install the projector in relation to the studs in the wall and the size of the
projection surface.
lMount the projector at a safe height for head space clearance, while maintaining enough space
for airflow and installation access above the unit.
Choose a location that’s far from bright light sources, such as windows and strong overhead lighting.
Bright light sources can cause distracting shadows on the projection surface and can reduce the
contrast of the projected image.

C H A P T E R 2
Installing your interactive projector
12 smarttech.com/kb/170295
Select an area with sufficient clearance to accommodate your interactive projector. For best
presentation alignment, mount your interactive projector in a location that’s central to your audience’s
viewing direction.
Choosing a height
The height of your projector depends on the size of the projected image and the available space for it.
If you have a dry-erase board as the projection surface, the height of the projector depends on the
width and height of the board. If the projection surface is a wall, the height of the projector depends on
the width and height of available wall space. Consider the general height of your user community and
ensure they’ll be able to touch all areas of the projected surface. When determining the size of the
projected image, ensure there is room to route the cables around the image and space to install the
pen holder.
To determine the height of the projector mounting bracket
1. Measure the width of the available surface space.
N O T E
oEnsure the available width of the projection surface is equal to or greater than the width in
the table.
oIf you’re using a dry-erase whiteboard as the projection surface, measure inside the
frame.
2. Measure the height of the available surface space.
N O T E
oEnsure the available height of the projection surface is equal to or greater than the height
in the table.
oIf you’re using a dry-erase board as the projection surface, measure inside the frame.
Other manuals for LightRaise 60wi
1
Table of contents
Other SMART Projector manuals

SMART
SMART Unifi 45 User guide

SMART
SMART SBA-L User manual

SMART
SMART UF55 User manual

SMART
SMART LightRaise SLR60wi Use and care manual

SMART
SMART UX80 User manual

SMART
SMART LightRaise 40wi User manual

SMART
SMART LightRaise SLR60wi User manual

SMART
SMART U100 Operating instructions

SMART
SMART LightRaise 60wi User manual

SMART
SMART UX80 User manual