SMART UF55 User manual

UF55/UF55w Projector User’s Guide
Part of the SMART BoardTM 600i3
Interactive Whiteboard System

FCC Warning
This equipment has been tested and found to comply with the limits for a Class A digital device, pursuant to Part 15 of the FCC Rules.
These limits are designed to provide reasonable protection against harmful interference when the equipment is operated in a commercial
environment. This equipment generates, uses and can radiate radio frequency energy and, if not installed and used in accordance with the
manufacturer’s instructions, may cause harmful interference to radio communications. Operation of this equipment in a residential area is
likely to cause harmful interference in which case the user will be required to correct the interference at his own expense.
Trademark Notice
SMART Board, smarttech and the SMART logo are trademarks or registered trademarks of SMART Technologies ULC in the U.S.
and/or other countries. All other third-party product and company names may be the trademarks of their respective owners. Windows
is either a registered trademark or a trademark of Microsoft Corporation in the U.S. and/or other countries. Apple, Macintosh, and iMac are
trademarks of Apple Computer, Inc., registered in the U.S. and other countries.
Copyright Notice
© 2008 SMART Technologies ULC. All rights reserved. No part of this publication may be reproduced, transmitted, transcribed,
stored in a retrieval system or translated into any language in any form by any means without the prior written consent of
SMART Technologies ULC. Information in this manual is subject to change without notice and does not represent a commitment on the
part of SMART.
Patent No. US5448263; US6141000; US6326954; US6337681; US6540366; US6741267; US6747636; US7151533; US7289113; US7283126; and
CA2058219. Other patents pending.
Printed in China. 10/2008
If you register your SMART product, we’ll notify you of new features and
software upgrades.
Register online at
www.smarttech.com/registration.
Keep the following information available, in case you need to contact
Technical Support:
Serial Number
Date of Purchase
Registration Benefits

1 English
Table of Contents ................................................................................... 1
Usage Notice..........................................................................................2
Precautions....................................................................................................2
Introduction.............................................................................................4
Product Features...........................................................................................4
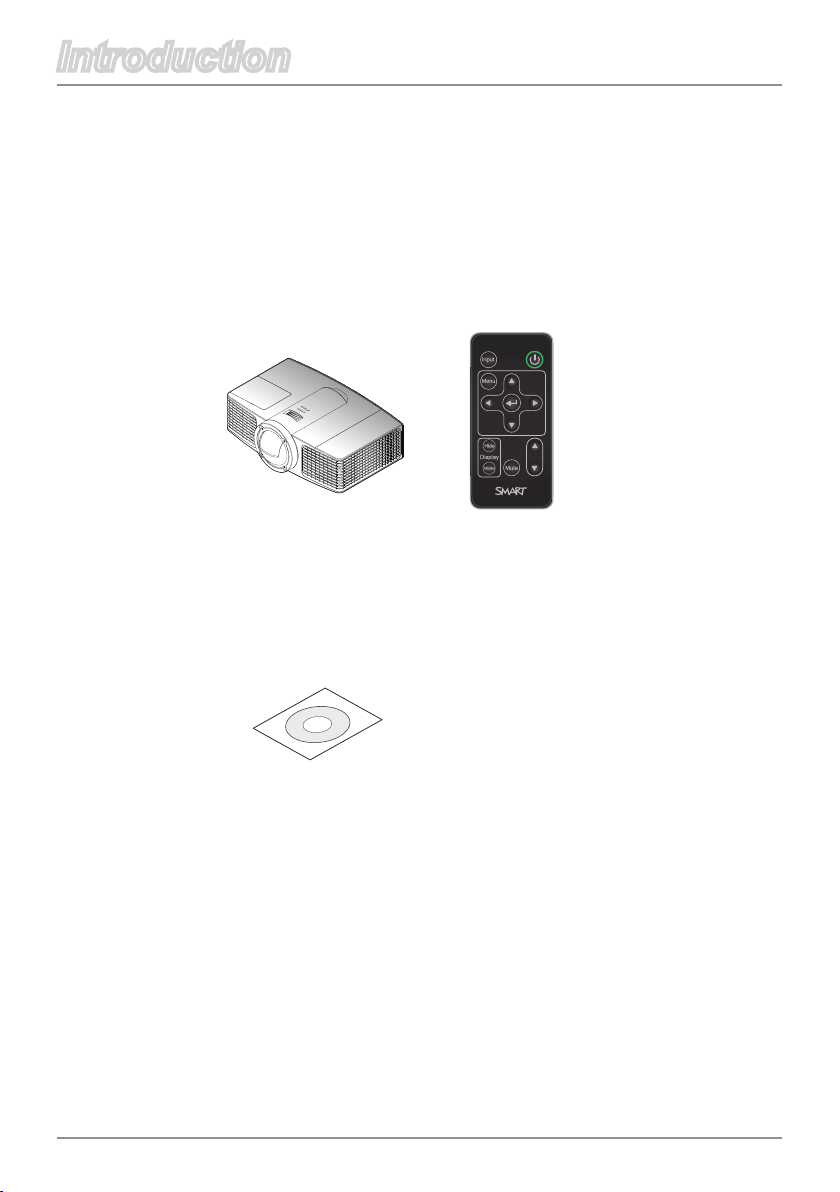
Projector Package Overview .........................................................................5
Product Overview ..........................................................................................6
Main Unit................................................................................................................ 6
Connection Ports ................................................................................................... 7
Remote Control...................................................................................................... 8
Installation ............................................................................................10
Connecting the Projector.............................................................................10
Opening and Closing the Input and Output Cover ............................................... 10
Turning On the Projector and Putting It into Idle Mode ............................... 11
Turning On the Projector...................................................................................... 11
Putting the Projector into Idle Mode..................................................................... 11
Adjusting the Projected Image.....................................................................12
Adjusting the Projector’s Focus ........................................................................... 12
User Controls .......................................................................................13
On-Screen Display Menus...........................................................................13
Using the OSD Menus ........................................................................................ 13
Image Adjustment ................................................................................................ 14
Audio Control ....................................................................................................... 18
Default Settings.................................................................................................... 19
Network Settings.................................................................................................. 24
Multi Languages................................................................................................... 25
Projector Information............................................................................................ 26
Web Management................................................................................................ 27
Appendices...........................................................................................42
Troubleshooting...........................................................................................42
Image Problems .................................................................................................. 42
Other Problems ................................................................................................... 44
Projector Status Indication .................................................................................. 45
Compatibility Modes ....................................................................................47
RS-232 Connector Pin Assignments ...........................................................49
Lens cleaning instruction.............................................................................50
Replacing the lamp......................................................................................51
Regulatory Compliance ........................................................................ 53
Customer Support ................................................................................54
Table of Contents

English 2 Usage Notice
Usage Notice
Precautions
Follow all warnings, precautions and maintenance as
recommended in this user’s guide.
Warning: Don’t look into the projector’s lens when the lamp is
on. The bright light may damage your eyes.
Warning: Toreducetheriskofreorelectricshock,don’t
expose this projector to rain or moisture.
Warning: Don’t open or disassemble the projector as this may
cause electric shock.
Warning: Take the projector down off the Boom before
replacing the lamp.
Warning: Beforereplacingthelamp,allowtheprojectortocool
down and then turn it off. Disconnect the projector
fromthepoweroutlet,andfollowallthelamp
replacement instructions.
Warning: This projector detects its own remaining lamp life.
Replace the lamp when lamp life warning messages
appear.
Warning: Whenyouswitchtheprojectoroff,ensurethatthe
cooling cycle is complete before disconnecting the
power. Allow 90 seconds for the projector to cool
down.
Warning: Cooling of the lamp during the ignition phase should
beavoided,becausethiscouldleadtoignition
failures. After a successful starting attempt keep the
lamp burning for at least 15 minutes to keep lamp
life.
Warning: Whenthelampisapproachingtotheendofitslife,
the message “Lamp is approaching the end of its
useful life in full power operation” appears on the
screen. Contact your local reseller or service center
to change the lamp as soon as possible.

3 English
Usage Notice
Usage Notice
Do
•Turn off the product before cleaning it.
•Use a soft cloth moistened with a mild detergent to clean the
display housing.
•Disconnect the power plug from the AC outlet if the product
isn’t being used for a long period of time.
•Allow 15 minutes before restarting the lamp. This will prolong
lamp life.
Don’t
•Block the ventilation slots and openings on the unit.
•Useabrasivecleaners,waxesorsolventstocleanthe
unit.
•Use under the following conditions:
- Inextremelyhot,coldorhumidenvironments.
Sea level to 6000 feet
Extremely hot: > 35℃
Extremely cold: < 5℃
6000 feet above
Extremely hot: > 30℃
Extremely cold: < 5℃
Extremely humid: > 70% R.H. (Relative Humidity)
- In areas susceptible to excessive dust and dirt.
- Nearanyappliancethatgeneratesastrongmagneticeld.
- In direct sunlight.

English 4 Introduction
Introduction
Product Features
This product is a single chip DLP®projector.
Outstanding features include:
DLP Technology
UF55:
•True XGA 0.55" 1024 × 768 resolution
•Aspect ratio: 4:3
•Short throw ratio: 0.6
UF55w:
•True WXGA 0.65" 1280 × 800 resolution
•Aspect ratio: 16:10
•Short throw ratio: 0.51
2000 ANSI Lumens (typical)
Computer compatibility:
Apple®Macintosh®,iMac®,andVESA®Standards:
UXGA,SXGA+,SXGA,WXGA,XGA,SVGA,VGA
Videocompatibility:
•NTSC,NTSC4.43
•PAL/PAL-M/PAL-N/SECAM
•SDTVcompatible(480i/p,576i/p)
•HDTVcompatible(720p,1080i)
Remote manager via network
Remote manager via RS-232

5 English
Introduction
Introduction
Remote Control
Projector Package Overview
This projector comes with all the items shown below.
Check to make sure your package is complete.
Contact your dealer immediately if anything is
missing.
Projector
Vol.
User’s Guide

English 6 Introduction
Introduction
1. Lamp cover
2. Focus
3. Projection Lens
4. IR Receiver
Main Unit
Product Overview
5. Input/Output (IO) cover
6. Diagnostic Indicator LED
7. Power Indicator LED
3
2
1
4
5
2
1
5
4
7
6

7 English
Introduction
Introduction
Connection Ports
1. Audio-LConnector(forS-VideoConnector)
2. Audio-RConnector(forS-VideoConnector)
3. Audio-LConnector(forCompositeVideoConnector)
4. Audio-RConnector(forCompositeVideoConnector)
5. Audio-2InputConnector(forVGA2-InConnector)
6. Audio-1InputConnector(forVGA1-InConnector)
7. Audio-Out Connector
8. USB Connector (for service)
9. Power Socket
10. RS-232 Connector
11. Networking Connector RJ45
12.VGA-OutConnector(MonitorLoop-ThroughOutput)
13.VGA1-InConnector
(PCAnalogSignal/ComponentVideoInput)
14.VGA2-InConnector
(PCAnalogSignal/ComponentVideoInput)
15.VideoInputConnector
16.S-VideoInputConnector
100V - 240V
50 Hz - 60 Hz
VideoS-video
Audio In Audio In
VGA Out
Audio 1 Audio Out Service Control
Computer (VGA) 2
Audio 2
Computer (VGA) 1
9
16
4 521 3 6 7 8
15 14 13 12 11
10

English 8 Introduction
Introduction
Remote Control
Use the remote control to control these functions:
1. Input Select input source.
2. Menu Display menus.
3. Hide Press to hide or display the image.
4. Mode Select a display mode: BrightClassroom,Dark
Classroom,sRGBorUser.
5. Mute Turn off the sound temporarily.
6. Power Turn on the power or enter Idle Mode.
7. Enter Accept the selected mode.
8. Menu selections and adjustments.
9. Set the projector ID number.
10. VOL. Adjust the volume.
Vol.
6
1
2
3
4
5
10
Remote control transmitter
8
Remote Control
SBP-10X/SBP-20W
Projector, UF55
Model No
.:
03-00131-20
9
7

9 English
Introduction
Introduction
3
V
O
L
T
S
CR2025
2
3
V
O
L
T
S
CR2025
2
1
M
3
V
O
L
T
S
CR2025
3
When you use the
remote control for
thersttime,there
is a plastic sheet
between the battery
and its contact.
Remove the sheet
before use.
To change the remote control’s battery
Procedure
1. Remove the battery holder by holding down the side release
rmlyandpullingoutthebatteryholder.
2. Insert a CR2025 coin cell battery.
Be sure to align the plus and minus ends of the battery
properly.
3. Replace the battery holder.

English 10 Installation
Installation
100V-240V
50 Hz -60 Hz
Audio InAudio InAudio 1Audio OutServiceControl
Audio2
4
Connecting the Projector
Opening and Closing the Input and Output
Cover
5
6
Cable management slot
100V-240V
50Hz -6 0 Hz
Audio InAudio InAudio 1Audio OutServiceControl
Audio2
3
Procedure
1. Pull the cable cover forward and leftward to remove the
cable cover from the slot.
2. Connect the power cord and the cable that you want to
connect to the projector.
3. Collect all cables in the cable management slot.
4. Clip the Input / Output IO cover rightward to the projector.
5. Fit the Input / Output IO cover with the rear cover backward
tightly
1
2

11 English
Installation
Installation
Turning On the Projector and Putting It
into Idle Mode
Turning On the Projector
1. Ensure that the power cord and video signal cable are
securely connected. The Power LED is solid Amber.
2. Turn on the lamp by pressing “ ” on the remote control.
The Power LED turns green.
The startup screen displays in approximately 10 seconds.
3. Turn on your source. Select Input on the remote control
toselectaninputsource(VGA-1,VGA-2,Compositeor
S-Video).
The projector detects the source you select and displays the
image.
•Ifyouconnectmultiplesourcesatthesametime,press
Input on the remote control to switch between inputs.
Putting the Projector into Idle Mode
1. Press “ ” on the remote control to turn off the projector
lamp. A message appears on the interactive whiteboard.
2. Press “ ”againtoconrmyourselection.Ifyoudon’t
press “ ”again,themessagedisappearsafter 10
seconds.
Caution! Don’t turn on the projector immediately after
entering Idle Mode.
Thersttimeyou
usetheprojector,
you can select your
preferred language
from the main menu
after the startup
screen displays.

English 12 Installation
Installation
Adjusting the Projector’s Focus
Tofocustheimage,rotatetheFocusRinguntiltheimageis
clear.
Focus Ring
Adjusting the Projected Image

13 English
User Controls
User Controls
The projector has multilingual On-Screen Display (OSD)
menus that allow you to make image adjustments and change
a variety of settings.
Using the OSD Menus
1. ToopentheOSDmenu,pressMenu on the remote control.
2 WhentheOSDdisplays,usethe buttons to select an item in
the main menu. Select an item and press the button to enter a
submenu.
3. Use the buttons to select the desired item in the submenu
and adjust the settings using the button.
4. Select the next item that you want to adjust in the submenu and
adjust it as described above.
Wheneachitemisadjusted,theprojectorsavesthenewsetting.
5. Press the intherstitemofeachsubmenutoreturntothe
main menu.
6. ToexittheOSDmenu,pressMenu again. The OSD menu closes.
On-Screen Display Menus
Main Menu
Submenu Setting

English 14 User Controls
User Controls
Display Mode
There are four factory presets optimized for various types of
images:
Bright Classroom: This mode is recommended for projecting in
a bright classroom.
Dark Classroom: This mode is recommended for projecting in a
dark classroom.
sRGB: This mode provides standardized accurate color.
User: This mode allows you to apply your own settings.
Brightness
To adjust the brightness of the image:
Press on the remote control to darken image.
Press on the remote control to lighten the image.
Contrast
The contrast controls the degree of difference between the lightest
and darkest parts of the picture. Adjusting the contrast changes the
amount of black and white in the image.
Press on the remote control to decrease the contrast.
Press on the remote control to increase the contrast.
Image
Adjustment

15 English
User Controls
User Controls
Frequency
Change the display data frequency to match the frequency of your
computer’sgraphiccard.Ifaickeringverticalbarappearsonyour
screen,usethisfunctiontomakeanadjustment.
Tracking
Synchronize the signal timing of the display with your computer’s
graphicscard.Iftheimageappearstobeunstableorickers,use
this function to correct it.
H-Position
Press on the remote control to move the image left.
Press on the remote control to move the image right.
V-Position
Press on the remote control to move the image down.
Press on the remote control to move the image up.
Frequency,
Tracking,
H-Position and
V-Position functions
are only supported
underAnalogVGA
(RGB) signal.
Image
Adjustment

English 16 User Controls
User Controls
Saturation
To adjust a video image from black and white to fully saturated color:
Press on the remote control to decrease the amount of
saturation in the image.
Press on the remote control to increase the amount of
saturation in the image.
Sharpness
To adjust the sharpness of the image:
Press on the remote control to decrease the sharpness.
Press on the remote control to increase the sharpness.
Tint
To adjust the color balance of red and green:
Press on the remote control to increase the amount of green
in the image.
Press on the remote control to increase the amount of red in
the image.
Saturation,
Sharpness and
Tint functions are
available only when
the video source is
connected.
Image
Adjustment

17 English
User Controls
User Controls
White Peaking
This adjustable item utilizes a new color-processing algorithm and
system level enhancements to enable higher brightness while
providingtrue,morevibrantcolorsinpicture.Therangeisfrom“0”
to“10”.Ifyoupreferamoreenhancedbrightness,selectahigher
setting.Forasmoother,morenaturalimage,adjusttowardthe
lower setting.
Degamma
Allows you to adjust the color performance of the display.
Color
AdjusttheRed,Green,Blue,Cyan,MagentaandYellowcolorsfrom
the factory default settings for advanced adjustment of the individual
colors.
Image
Adjustment

English 18 User Controls
User Controls
Volume
Press on the remote control to decrease the volume.
Press on the remote control to increase the volume.
Mute
Select On to mute the sound.
Select Off to turn off mute.
DisableVolumeControl
Select On to disable the volume adjustment.
Select Off to enable the volume adjustment.
Closed Captioning
Select On to turn on closed captions.
Select Off to turn off the captioning feature.
Closed Captioning Language
Choose the closed captioning language. This feature is only
supported in CC1 or CC2 mode.
CC1 language: American English.
CC2language(dependingontheTVchanneloftheuser):
Spanish,French,Portuguese,German,Danish.
Audio
Control
Other manuals for UF55
3
This manual suits for next models
2
Table of contents
Other SMART Projector manuals

SMART
SMART Unifi 45 User guide

SMART
SMART SBA-L User manual

SMART
SMART LightRaise SLR60wi Use and care manual

SMART
SMART LightRaise 40wi User manual

SMART
SMART LightRaise User manual

SMART
SMART LightRaise 60wi User manual

SMART
SMART LightRaise 40wi User manual

SMART
SMART UX80 User manual

SMART
SMART UF55 Guide

SMART
SMART U100 Operating instructions