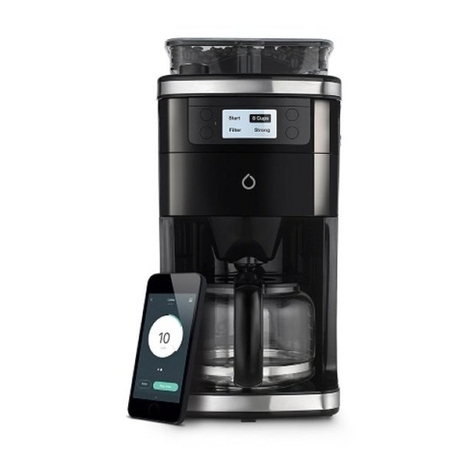
Smarter SMC10 User manual

1
Coee
Instruction manual
MODEL SMC10
Manuel utilisateurs
Manuale d’Istruzioni
Bedienungsanleitung
Folleto de instrucciones
Bedienungsanleitung
Download the ocial app
www.smarter.am/smarterapp
Available on iOS and Android

2

3
Safety
Intended use .......................................................................................................
General safety instructions .................................................................................
Installation
Before rst use ...............................................................
Specications and Requirements .................................................................................
Getting connected ...........................................................................................
Product features
Using the product ...........................................................12...................................................
Resetting ......................................................................................
Screen Notications .......................................................................................
App Notications ........................................................................................
Changing colour panels ....................................................
Troubleshooting
Frequently asked questions ....................................................................
Care and cleaning
Cleaning ............................................................................................................
De-scaling ............................................................................................................
Warranty and service
Smarter warranty ..............................................................................................
Customer service ..............................................................................................
Contents
4
4
6
8
10
12
14
15
16
17
18
19
19
20
21
Due to continued product improvement.
please refer to the application for accurate
and up-to-date instructions on using the
in-app product features.

4
• Do not position the power cord on sharp edges or leave it
trailing.
• Protect the power cord from heat and oil.
• Do not position the appliance above hot surfaces, hob
burners or inside a hot oven.
• Do not position the appliance on surfaces sensitive to
water. Drips could damage it.
• Do not unplug the appliance with wet hands or by pulling
on the power cord.
• In the event of a fault with the appliance, repairs must be
performed only by qualied technicians.
Follow all safety instructions in order to use the appliance
safely.
• Never try to put out a re or ames with water. Turn o the
appliance, remove the plug from the socket and smother the
ames with a re blanket or other appropriate cover.
• Do not modify this appliance.
• Do not try to repair the appliance yourself or without the
assistance of a qualied technician.
• If the power supply cable is damaged, contact technical
support immediately.
• The carafe and keep warm plate can get very hot during
operation. Do not touch the hot surfaces. Use the handle
when handling the carafe.
• The heating element surface is subject to residual heat after
use. Be careful.
• Do not use the carafe if the handle is loose.
• Do not operate the appliance on an inclined surface.
• Do not move appliance or carafe when the appliance is
switched on.
Intended use:
• Only use the appliance indoors.
• The appliance has been designed specically for domestic use. It
must only be used to heat water and make coee as described in
this manual. Do not use the appliance for anything other than its
intended use.
• Appliances can be used by persons with reduced physical, sensory
or mental capabilities or lack of experience and knowledge if they
have been given supervision or instruction concerning use of the
appliance in a safe way and if they understand the hazards involved.
• Children shall not play with the appliance.
General safety instructions.
• Do not immerse the appliance, the power cord or the plug in
water or any other liquid.
• Never wash the appliance in the dishwasher.
• Do not use the appliance when the power cord or the plug is dam-
aged or when the appliance has been dropped or is
damaged in any way.
Safety
Read all instructions carefully before using
the appliance.

5
• Unplug the appliance when it is not being used, before cleaning and
if you notice any fault. Let the appliance cool down before cleaning.
• Do not overll the water tank (maximum1.5 litres), otherwise water
may leak out.
• Only use the appliance with water. Never ll the tank with other
liquids.
• Do not remove the carafe when the machine is in cycle.
• Check that the tank lid is correctly closed before turning on.
• Only use the appliance with the carafe provided.
• Do not use with a carafe made by another manufacturer.
• Do not touch the automated bean door as moving parts may be
sharp.
• Do not touch the internal bean grinder as moving parts may be
sharp.
• Only use original spare parts. The use of spare parts not approved by
the manufacturer could lead to res, electric shocks or personal injury.
• Only place the base on level surfaces.
• Do not use metal implements or scouring pads to clean the appliance
or carafe.
• Do not use the product without the panels securely xed.
• Switch o the appliance and disconnect from power supply before
changing accessories or touching moving parts.
Only use this product as designed for its intented purpose.
• To prevent damage to the appliance do not use alkaline cleaning
agents when cleaning. Use a soft cloth and a mild detergent.
• Cleaning and maintenance must never be performed by children
unless they are older than 8 and supervised.
• This appliance shall not be used by children. Keep the appliance and
its cord out of reach of children.
• This appliance can be used by children aged from 8 years and
above if they have been given supervision or instruction
concerning use of the appliance in a safe way and if they under-
stand the hazards involved.
• Children shall not play with the appliance.
• This appliance is intended for use in a home environment. Every
other use is considered improper. It also can be used in:
• sta kitchen areas in shops, oces and other working
environments;
• farmhouses;
• by clients in hotels, motels and other residential-type
environments;
• bed and breakfast type environments.
Notice: Under the inuence of electrostatic phenomenon, the
bean and medium strength settings may be aected. This would
require the user to restart the appliance at the power source.
Network standby power: 1.1W
The manufacturer shall not be liable for damage to persons or
property caused by.
• Use of the appliance other than as envisaged.
• Not having read the user manual.
• Tampering with any part of the appliance.
• Use of non-original spare parts.
• Failure to observe the safety instructions.

6
Before using the product for the rst time, please ensure that the appliance
is clean and all packaging has been removed from the inside and outside of
the product.
When using the product for the rst time please ll the tank with water to
the maximum 12-cup water level, run a full cycle using the‘lter’ option and
empty the carafe after the full cycle. We recommend repeating this process a
minimum of three times. Rell with clean water and then use.
We recommend the use of ltered water for the best taste experience.
Please check that your voltage rating complies with that of the product and
your router is compatible with the connectivity requirements shown on the
rating label of the product or in this instruction manual.
Before rst use
This symbol indicates that this
appliance should not be disposed
of in normal household waste. It
should be taken to your designated
local authority waste centre.

7

8
Start/Stop button
Grind mode button
Cup selection button
Coee strength button
LCD Screen
Colour panels
1.5 litre capacity tank
Glass carafe
Keep warm plate
Washable lter
Bean compartment
Grind adjuster
A
B
C
D
E
F
G
H
I
J
K
L
In the box:
Smarter Coee (Black)
Glass carafe
Red and Cream colour panels
Instruction manual
A
BD
C
G
I
L
E
K
J
H
8
F

9
Specications
Voltage 220-240V
Frequency 50/60Hz
Power 900 - 1050W
please check that the voltage in
your country complies with that shown
on the base of the product.
Connectivity
Wireless 802.11b/g/n*
Security WPA/WPA2
Compatibility Android and iOS
*requires a 2.4ghz wireless
network router. No internet
access required.

10
Getting connected

11
Download
On your smartphone or tablet,
download the app from your
app store.
Search‘Smarter Coee’ or go to
www.smarter.am/smarterapp.
1
Plug in
Plug the Smarter Coee machine
into the power source and ll
with water.
Please make sure that it has been
cleaned and free of all packaging.
2
Connect
Open the app and follow the
in-app instructions to add a new
product.
You will need your wi router
password to connect.
3

12
Using the product
Adjust the coee strength
Adjust the coee strength between
weak, medium and strong to get the
perfect taste. Depending on which
strength you select the amount of
coee used per cycle will vary.
Select the cup amount
You can select between 1 and 12
cups by pressing the lower right
button on the coee machine
control panel. This feature can also
be controlled via the app.
Using whole beans
When using fresh beans, place a
maximum of 200g of coee beans into
the container on the top of the machine.
Select the ‘beans’option on the bottom
left button on the control panel.
Using pre-ground beans
To use pre-ground coee in the machine
open the door by pressing the chrome
button on the side of the machine. Pour
the coee into the removable lter and
close the door. Then select the ‘lter’
option on the screen by pressing the
bottom left button on the control panel.
Start a brewing cycle
Once your preferred settings are
shown on the screen press the
‘Start’ button to start the coee
brewing cycle.
START
Adjust the grind coarseness
By turning the knob on the top of the
machine, you can adjust the coarseness
of the beans after grinding. The ner the
beans, the smoother the coee.

13
Using the carafe
To start a brewing cycle, the carafe
must be present and placed
correctly in the coee machine.
Water level
You can view the water level via the
window at the side of the product
and also via the application. You will
be able to see if the water is empty,
low, half-full or full via the app.
Mulitple user access
Once setup on your wi network, you
can connect multiple devices to the
kettle by downloading the app and
simply connecting your wi network.
Emptying the tank
To empty the water tank, run a full 12-
cup cycle in ‘lter’ mode to run the tank
dry. There may be some residue water
left in the tank after this process. Please
ensure the carafe is present.
Relling the water tank
To rell the coee machine with water,
open the ap at the back of the machine
and use a jug to pour cool water up to
the 12-cup mark. Do not overll with
water. Excess water will ow out the back
of the machine.
Keep warm function
The coee machine will keep the
coee warm for up to 35 minutes after
a heating cycle has nished. These
settings can be adjusted within the
app features. The default setting is 5
minutes.

14
Default settings
Setting favourite/default settings on
the machine.
To adjust the default strength, cups
and coee type options, go into your
app settings and adjust the defaults.
The machine will then remember
those settings for when you use the
product manually.
Factory reset (including wi reset)
To reset the product including wi to
factory defaults on the machine, press and
hold the start button for 10 seconds. The
screen will then show a reset notication
on the screen.
Resetting the default settings
If you have changed the default screen
options on the machine and wish to
reset them, press and hold the start
button for 5 seconds and the screen
will show a reset notication and
sound two beeps to indicate a reset.
Resetting the product
reset
wi reset

15
Screen notications
Low water
If you select a larger amount of cups
than is available in the water tank, the
‘low water’ notication will appear to
alert you that there is not enough water
for the number of cups selected.
No water
If the water level is below 2 cups then
the machine will not allow any coee
to be brewed and the‘no water’
screen will appear. There must be
more than 2 cups of water in the tank.
1 to 12 cups can then be selected.
Brewing
During the coee cycle the‘brewing’
notication will appear. Settings can
then only be changed by pressing
the top left button to stop the cycle.
Ready! notication
Once the cycle is complete, the
‘ready!’ notication will appear on the
screen. Excess coee may pour for
a few seconds after the notication
until the pump is cleared.
Loading
After plugging the coee machine into
the power source, the ‘loading’screen
will appear for up to 10 seconds. If the
product has been set up on the wi
network and unplugged after use, it
may take up to 60 seconds for the wi
network to re-connect.
loading
no water
low water
ready!
brewing
No Carafe
To start a brewing cycle, the carafe
must be present and placed correctly
in the coee machine. If the carafe
is removed the‘no carafe’screen
will appear and it will stop the cycle
automatically.
no carafe

16
Notications
Brew ready
Receive a notication to your
smartphone or tablet when your
coee machine has nished
heating. You can then prompt the
machine to keep warm for up to 35
minutes
Customise your notications
You can customise which notications
you do and do not wish to receive via the
app. You can also set the notications to
prompt you to turn the coee machine
on or to automatically have the coee
machine start at a specic time.
Wake-up mode
Set alarms and schedule the
coee machine to grind and brew
at chosen times. Set the app to
sound an alarm to wake you in the
morning or just send a notication
to prompt you.
Home mode
Set your home location and the
coee machine can recognise your
homecoming and start brewing for
when you arive.
Water level alerts
Receive alerts when the water level
is low to prompt you to ll the coee
machine.
New features
New features are always being added
to the application. You can receive
notications when new features and
services become available to enable
you to get the best experience when
using your Smarter Coee machine.

17
Changing colour panels
Step 1: Press the release
buttons
Press the two push buttons
beneath the lower panel to
release.
Step 3: Open the lter door
Open the lter door by pressing
the OPEN button on the side
of the machine. Then remove
the lter and lter holder for
easy access to the upper panel
release buttons.
Replacing the panels
Ensure the replacement panels
are the correct way up and
push securely into place until
you hear a click.
Step 2: Remove the lower
panel
Once the release buttons are
pressed, the panel will unclip
and can be removed.
Step 4: Press the release buttons
Press the two push buttons beneath
the upper panel to release. These are
located on the far sides of the panel.
The panel will then unclip and can
be removed.
Step 5: Remove the upper panel
Once the release buttons are
pressed, the panel will unclip and
can be removed.

18
Troubleshooting
It keeps disconnecting from the
app.
Move your product into a dierent
location within your kitchen as the
wi range may aect its functioning.
This can be caused by thick walls
and other objects interfering with
the wi signal.
The carafe is in place but it is not
recognising it
Please remove the removable
coee lter and clean out any old
coee beans and insert the lter.
Error is coming up on the screen
Unplug from the power source
and plug back in. Press and hold
the start button for 10 seconds to
perform a full product reset.
If the problem still persists, please
contact the manufacturer.
It will not turn on
Check that the power source is
plugged in and the coee machine
is turned on.
The grinder is not working
Please ensure that the coee bean
compartment is not overlled. Do
not ll with more than 200g of
coee beans as this may cause it to
jam or block.
It stops before completing a cycle
Please check the water level is above
2 cups and that the carafe is properly
inserted.
There may be a limescale build-up in
the water pump. Perform a descale
cycle on the machine and run with
clean water 3 times.
No water is pumping through
There may be a limescale build-
up in the water pump. Perform
a descale cycle on the machine
and run with clean water 3 times.
See the descaling and cleaning
instructions.

19
sign up page
Care and cleaning
Descaling
Calcium deposits may form on the
interior parts of the coee machine.
To obtain the best performance from
your machine, clean periodically. The
cleaning interval will depend on the
hardness of the water you put into
the machine.
The use of a commercial descaler
is recommended while following
the manufacturer’s recommended
guidelines. Put the solution in the
water tank and start the coee
machine’s descaling cycle.
Alternatively use a solution of water
and white vinegar.
Descaling cycle
To activate the descaling cycle,
select this feature via the app.
Alternatively set the coee
machine to‘lter’, remove the lter
from the door and start a brewing
cycle. Please ensure that you
repeat the process with clean
water a minimum of three times
after descaling.
Cleaning the machine
Clean the machine with a soft
cloth. Ensure the outside of the
coee machine is always dry
before use. Do not let any water
near electrical components. The
carafe and machine are not
suitable for dishwashers. Hand
clean only.

20
Smarter Applications Ltd warrants that, the enclosed Product will be free from defects in material and workmanship, and agrees that it will, at its sole discretion,
either repair or replace any defective Product subject to the following terms and conditions:
1. This limited warranty extends only to you, the customer, as the end-user of the Product. You may have additional rights under applicable law. This limited
warranty does not aect such rights.
2. The warranty period is 24 (twenty four) months from the date on which you purchased the Product. You must notify the retailer, of any defects as soon as
possible after you have become aware of them.
3. The product is packaged and returned in a safe condition, in the original packaging and complete (where appropriate). You may be required to pay the cost of
returning any defective Product to Smarter, or the retailer from whom you purchased the Product. However, Smarter will pay the cost of delivering any repaired
or replaced Product back to you.
4. You are requested to keep your original proof of purchase, such as the receipt. You will need it to prove the date of purchase in respect of any warranty claims.
5. This limited warranty shall not apply in respect of the following:
i) Any deterioration due to normal wear and tear and all other externally exposed parts that are scratched or damaged due to normal customer use.
ii) If you make further use of such goods after giving sucient notice of a defect/fault. This also includes if the defect arose because of your failure to follow our
written/oral instructions on installation or use of the Product.
iii) If you alter or repair the product without prior written consent by us, this will void the warranty.
iv) Defects caused by the Product being subjected to any of the following: inadequate cleaning, rough handling, corrosion, misuse,
spillage of food or liquid, inuence from chemical products or other acts beyond Smarters’reasonable control, unless the defect was caused directly by defects in
materials or workmanship.
v) Defects caused by employing the Product to other than its intended use.
Warranty
All smarter products are covered by our 24 month warranty.
Table of contents
Languages:
Other Smarter Coffee Maker manuals
