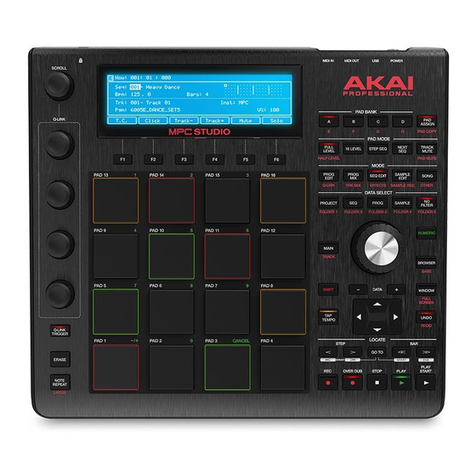
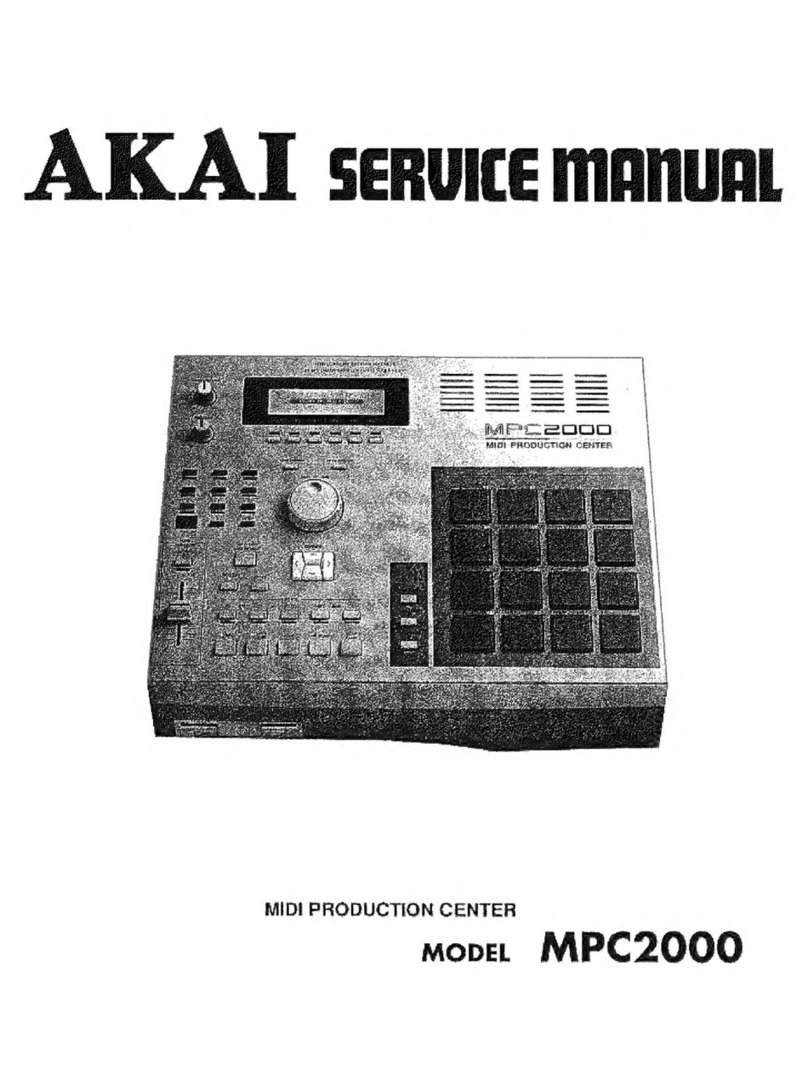
Akai MPC4000 User manual

WARNING
Reference Manual
To prevent fire or shock hazard, do not
expose this appliance to rain or moisture.

The lightning flash with arrowhead symbol, within an equilateral triangle, is
intended to alert the user to the presence of uninsulated “dangerous voltage”
within the product’s enclosure; that may be of sufficient magnitude to
constitute a risk of electric shock to persons.
The exclamation point within an equilateral triangle is intented to alert the user
to the presence of important operating and maintenance (servicing) instruc-
tions in the literature accompanying the appliance.
THE SYMBOLS ARE RULED BY UL STANDARDS (U.S.A.)
5B-En
WARNING!!
To prevent fire or shock hazard, do not expose this appliance to rain or moisture.
1-En
CAUTION: TO REDUCE THE RISK OF ELECTRIC SHOCK
DO NOT REMOVE COVER (OR BACK).
NO USER-SERVICEABLE PARTS INSIDE.
REFER SERVICING TO QUALIFIED SERVICE PERSONNEL.
CAUTION
RISK OF ELECTRIC SHOCK
DO NOT OPEN
Lithium battery
This product uses a lithium battery for memory backup.
The lithium battery should only be replaced by qualified service personnel.
Improper handling may cause risk of explosion. 24A-En
Important Notice
The material in this document is copyright to AKAI professional M.I. Corp., and may not be
quoted or reproduced in any form without written permission from the company.
LIMITED SOFTWARE WARRANTY POLICY
All the software provided with, or purchased especially for, AKAI professional products has
been tested for functionality. AKAI professional M.I. Corp. will make its best efforts to correct
reported software defects for future releases subject to technical practicabilities.
AKAI professional M.I. Corp. makes no warranty or representation either expressed or im-
plied with respect to the system's performance or fitness for a particular purpose.
In no event will AKAI professional M.I. Corp. be liable for direct or indirect damages arising
from any defect in the software or its documentation. Further, AKAI professional M.I. Corp.
will not accept any liability for any programs, sounds, audio recording or sequences stored in
or used with AKAI professional products, including the cost of recovery of such data.
The warranties, remedies and disclaimers above are exclusive and take precedence over all
others, oral or written, express or implied, to the extent permitted by law in the geographical
area of the product's use. No employee of AKAI professional M.I. Corp., agent, distributor or
employee of an agent or distributor is authorised to offer any variation from this policy.
3/5/2002

WARNING: WHEN USING ELECTRIC PRODUCTS, BASIC PRECAUTIONS SHOULD ALWAYS
BE FOLLOWED, INCLUDING THE FOLLOWING:
WARNING
The MPC4000 is designed to be used in a standard household environment.
Power requirements for electrical equipment vary from area to area. Please ensure that your MPC4000
meets the power requirements in your area. If in doubt, consult a qualified electrician orAKAI profes-
sional dealer.
120 VAC @ 60 Hz for USA and Canada
220~240 VAC @ 50 Hz for Europe
240 VAC @ 50 Hz for Australia
PROTECTING YOURSELF AND THE MPC4000
• Never touch the AC plug with wet hands.
• Always disconnect the MPC4000 from the power supply by pulling on the plug, not the cord.
• Allow only an AKAI professional dealer or qualified professional engineer to repair or reas-
semble the MPC4000. Apart from voiding the warranty, unauthorized engineers might touch
live internal parts and receive a serious electrical shock. There are no user serviceable parts
inside.
• Do not put, or allow anyone to put any object, especially metal objects, into the MPC4000.
• Use only a household AC power supply. Never use a DC power supply.
• If water or any other liquid is spilled into or onto the MPC4000, disconnect the power, and call
your dealer.
• Make sure that the unit is well-ventilated, and away from direct sunlight.
• To avoid damage to internal circuitry, as well as the external finish, keep the MPC4000 away
from sources of direct heat (stoves, radiators, etc.).
• Avoid using aerosol insecticides, etc. near the MPC4000. They may damage the surface, and
may ignite.
• Do not use denatured alcohol, thinner or similar chemicals to clean the MPC4000. They will
damage the finish.
• Modification of this equipment is dangerous, and can result in the functions of the MPC4000
being impaired. Never attempt to modify the equipment in any way.
• Make sure that the MPC4000 is always well-supported when in use (either in a specially-
designed equipment rack, or on a firm level surface).
• In order to assure optimum performance of your MPC4000, select the setup location carefully,
and make sure the equipment is used properly.Avoid setting up the MPC4000 in the following
locations:
1. In a humid or dusty environment
2. In a room with poor ventilation
3. On a surface which is not horizontal
4. Inside a vehicle such as a car, where it will be subject to vibration
5. In an extremely hot or cold environment

For U.K. customers only WARNING
THIS APPARATUS MUST BE EARTHED
IMPORTANT
This equipment is fitted with an approved non-rewireable UK mains plug.
To change the fuse in this type of plug proceed as follows:
1) Remove the fuse cover and old fuse.
2) Fit a new fuse which should be a BS1362 5 Amp A.S.T.A or BSI approved type.
3) Refit the fuse cover.
If the AC mains plug fitted to the lead supplied with this equipment is not suitable for your type of
AC outlet sockets, it should be changed to an AC mains lead, complete with moulded plug, to the
appropriate type. If this is not possible, the plug should be cut off and a correct one fitted to suit the
AC outlet. This should be fused at 5Amps.
If a plug without a fuse is used, the fuse at the distribution board should NOT BE GREATER than
5 Amp.
PLEASE NOTE: THE SEVERED PLUG MUST BE DESTROYED TO AVOID A POSSIBLE
SHOCK HAZARD SHOULD IT BE INSERTED INTOA 13 AMP SOCKET
ELSEWHERE.
The wires in this mains lead are coloured in accordance with the following code:
GREEN and YELLOW —Earth
BLUE —Neutral
BROWN —Live
As the colours of the wires in the mains lead of this apparatus may not correspond with the coloured
markings identifying the terminals in your plug, please proceed as follows:
The wire which is coloured GREEN and YELLOW must be connected to the terminal which is
marked with the letter E or with the safety earth symbol or coloured GREEN or coloured
GREEN and YELLOW.
The wire which is coloured BLUE must be connected to the terminal which is marked with the
letter N or coloured BLACK.
The wire which is coloured BROWN must be connected to the terminal which is marked with
the letter L or coloured RED.
THIS APPARATUS MUST BE EARTHED
Ensure that all the terminals are securely tightened and no loose strands of wire exist.
Before replacing the plug cover, make certain the cord grip is clamped over the outer sheath of the
lead and not simply over the wires.
6D-En

FCC WARNING
This equipment has been tested and found to comply with the limits for a Class B digital device
pursuant to Part 15 of the FCC rules. These limits are designed to provide reasonable protec-
tion against harmful interference in a residential installation. This equipment generates, uses,
and can radiate radio frequency energy and, if not installed and used in accordance with the
instructions, may cause harmful interference to radio communications. However, there is no
guarantee that interference will not occur in a particular installation. If this equipment does
cause harmful interference to radio or television reception, which can be determined by turn-
ing the equipment off and on, the user is encouraged to try to correct the interference by one
or more of the following measures:
•Reorient or relocate the receiving antenna.
•Increase the separation between the equipment and receiver.
•Connect the equipment into an outlet on a circuit different from that to which the receiver is
connected.
•Consult the dealer or an experienced radio/TV technician for help.
21B-En
AVIS POUR LES ACHETEURS CANADIENS DU MPC4000
Le présent appareil numérique n’ément pas de bruits radioélectriques dépassant les limites
applicables aux appareils numériques de la Class B prescrites dans le Règlement sur le
brouillage radioélectrique édictépar le ministère des Communications du Canada. 27-F
This digital apparatus does not exceed the Class B limits for radio noise emissions from digital
apparatus set out in the Radio Interference Regulations of the Canadian Department of Com-
munications. 27-En
VENTILATION
Do not prevent the unit’s ventilation, especially by placing the unit on soft carpet, in a narrow
space, or by placing objects on the unit’s chassis—top, side, or rear panels.Always keep the
unit’s chassis at least 10 centimeters from any other objects. 31C-En
CHANGES OR MODIFICATIONS NOT EXPRESSLYAPPROVED BYTHE MANUFACTURER
FOR COMPLIANCE COULD VOID THE USER’S AUTHORITY TO OPERATE THE EQUIP-
MENT. 32-En
COPYRIGHT NOTICE
The AKAI professional MPC4000 is a computer-based device, and as such contains and uses
software in ROMs. This software, and all related documentation, including this Operator’s Manual,
contain proprietary information which is protected by copyright laws. All rights are reserved. No
part of the software or its documentation may be copied, transferred or modified. You may not
modify, adapt, translate, lease, distribute, resell for profit or create derivative works based on the
software and its related documentation or any part thereof without prior written consent from
AKAI professional M.I. Corp., Yokohama, Japan.

Contents
v
Contents
MPC4000Reference Manual . . . . . . . . . . . . . . . . . . . . . . . . . . . 1
How to use this reference manual . . . . . . . . . . . . . . . . . . . . . . . . . . . . . . 1
Main mode . . . . . . . . . . . . . . . . . . . . . . . . . . . . . . . . . . . . . . . . . 4
Main page. . . . . . . . . . . . . . . . . . . . . . . . . . . . . . . . . . . . . . . . . . . . . . . . . 4
Recording/playing a sequence. . . . . . . . . . . . . . . . . . . . . . . . . . . . . . . 4
■
Recording a sequence . . . . . . . . . . . . . . . . . . . . . . . . . . . . . . . . . 9
■
Customizing the metronome sound. . . . . . . . . . . . . . . . . . . . . . 12
■
Inserting a tempo change in the middle of a sequence . . . . . . . 13
■
Cutting/inserting/copying measures of a sequence. . . . . . . . . . 14
■
Transposing the entire sequence . . . . . . . . . . . . . . . . . . . . . . . . 15
■
Copying a sequence. . . . . . . . . . . . . . . . . . . . . . . . . . . . . . . . . . 16
■
Deleting a sequence. . . . . . . . . . . . . . . . . . . . . . . . . . . . . . . . . . 17
■
Copying a track. . . . . . . . . . . . . . . . . . . . . . . . . . . . . . . . . . . . . 18
■
Deleting a track. . . . . . . . . . . . . . . . . . . . . . . . . . . . . . . . . . . . . 19
■
Customizing the default settings for a sequence. . . . . . . . . . . . 20
■
Applying timing correction to an already-recorded track. . . . . 21
■
Rewriting the velocity of note events . . . . . . . . . . . . . . . . . . . . 22
■
Rewriting the duration of note events. . . . . . . . . . . . . . . . . . . . 23
■
Transposing a recorded track . . . . . . . . . . . . . . . . . . . . . . . . . . 24
■
Customizing the default settings for each track number. . . . . . 25
■
Changing the track number. . . . . . . . . . . . . . . . . . . . . . . . . . . . 26
■
Separating a track by MIDI channels . . . . . . . . . . . . . . . . . . . . 27
■
Erasing all muted tracks . . . . . . . . . . . . . . . . . . . . . . . . . . . . . . 28
■
Making program change transmission settings. . . . . . . . . . . . . 28
■
Performing auto punch-in/out. . . . . . . . . . . . . . . . . . . . . . . . . . 29
■
Using the Simul Play function . . . . . . . . . . . . . . . . . . . . . . . . . 30
■
Naming the external devices connected
to the MIDI OUT connectors . . . . . . . . . . . . . . . . . . . . . . . . . . 31
TR list/Out 1 page . . . . . . . . . . . . . . . . . . . . . . . . . . . . . . . . . . . . . . . . . 32
Listing the track output destinations (Out 1). . . . . . . . . . . . . . . . . . . 32
TR list/Out 2 page . . . . . . . . . . . . . . . . . . . . . . . . . . . . . . . . . . . . . . . . . 34
Listing the track output destinations (Out 2). . . . . . . . . . . . . . . . . . . 34
TR list/PARAMS page . . . . . . . . . . . . . . . . . . . . . . . . . . . . . . . . . . . . . . 35
Listing the track parameters. . . . . . . . . . . . . . . . . . . . . . . . . . . . . . . . 35
Sequence edit mode. . . . . . . . . . . . . . . . . . . . . . . . . . . . . . . . 37
Sequence edit page. . . . . . . . . . . . . . . . . . . . . . . . . . . . . . . . . . . . . . . . . 37
Using the graphic editor to edit a sequence. . . . . . . . . . . . . . . . . . . . 37
■
Step-recording note events . . . . . . . . . . . . . . . . . . . . . . . . . . . . 41
■
Deleting MIDI events . . . . . . . . . . . . . . . . . . . . . . . . . . . . . . . . 42
■
Moving MIDI events. . . . . . . . . . . . . . . . . . . . . . . . . . . . . . . . . 43
■
Copying/cutting MIDI events . . . . . . . . . . . . . . . . . . . . . . . . . . 45
■
Pasting MIDI events . . . . . . . . . . . . . . . . . . . . . . . . . . . . . . . . . 46
■
Simultaneously editing values in a selected region. . . . . . . . . . 47
■
Inserting continuously-variable events . . . . . . . . . . . . . . . . . . . 49

Contents
vi
Step edit mode. . . . . . . . . . . . . . . . . . . . . . . . . . . . . . . . . . . . . 52
Step edit page . . . . . . . . . . . . . . . . . . . . . . . . . . . . . . . . . . . . . . . . . . . . . 52
Using the event list to edit a sequence . . . . . . . . . . . . . . . . . . . . . . . . 52
■
Copying/cutting MIDI events . . . . . . . . . . . . . . . . . . . . . . . . . . 56
■
Pasting MIDI events . . . . . . . . . . . . . . . . . . . . . . . . . . . . . . . . . 57
Song mode . . . . . . . . . . . . . . . . . . . . . . . . . . . . . . . . . . . . . . . . 64
Song page . . . . . . . . . . . . . . . . . . . . . . . . . . . . . . . . . . . . . . . . . . . . . . . . 64
Creating a song. . . . . . . . . . . . . . . . . . . . . . . . . . . . . . . . . . . . . . . . . . 64
MISC mode . . . . . . . . . . . . . . . . . . . . . . . . . . . . . . . . . . . . . . . . 73
Setup page. . . . . . . . . . . . . . . . . . . . . . . . . . . . . . . . . . . . . . . . . . . . . . . . 73
Making other settings. . . . . . . . . . . . . . . . . . . . . . . . . . . . . . . . . . . . . 73
Sync page . . . . . . . . . . . . . . . . . . . . . . . . . . . . . . . . . . . . . . . . . . . . . . . . 75
Making synchronization-related settings . . . . . . . . . . . . . . . . . . . . . . 75
■
Synchronizing the MPC4000 to an external device . . . . . . . . . 76
■
Synchronizing an external device to the MPC4000 . . . . . . . . . 77
MIDI mode . . . . . . . . . . . . . . . . . . . . . . . . . . . . . . . . . . . . . . . . 78
Routing page. . . . . . . . . . . . . . . . . . . . . . . . . . . . . . . . . . . . . . . . . . . . . . 78
Changing the routing of MIDI events . . . . . . . . . . . . . . . . . . . . . . . . 78
Filter page . . . . . . . . . . . . . . . . . . . . . . . . . . . . . . . . . . . . . . . . . . . . . . . . 80
Filtering the incoming MIDI events. . . . . . . . . . . . . . . . . . . . . . . . . . 80
Event page. . . . . . . . . . . . . . . . . . . . . . . . . . . . . . . . . . . . . . . . . . . . . . . . 82
Monitoring MIDI events . . . . . . . . . . . . . . . . . . . . . . . . . . . . . . . . . . 82
Save mode . . . . . . . . . . . . . . . . . . . . . . . . . . . . . . . . . . . . . . . . 84
Save page . . . . . . . . . . . . . . . . . . . . . . . . . . . . . . . . . . . . . . . . . . . . . . . . 84
Saving data to a storage device . . . . . . . . . . . . . . . . . . . . . . . . . . . . . 84
■
Saving all sequences and songs. . . . . . . . . . . . . . . . . . . . . . . . . 86
■
Saving an individual sequence. . . . . . . . . . . . . . . . . . . . . . . . . . 88
■
Saving samples . . . . . . . . . . . . . . . . . . . . . . . . . . . . . . . . . . . . . 89
■
Saving programs . . . . . . . . . . . . . . . . . . . . . . . . . . . . . . . . . . . . 91
■
Saving multis. . . . . . . . . . . . . . . . . . . . . . . . . . . . . . . . . . . . . . . 93
Disk utility page . . . . . . . . . . . . . . . . . . . . . . . . . . . . . . . . . . . . . . . . . . . 96
Managing files on a storage device . . . . . . . . . . . . . . . . . . . . . . . . . . 96
■
Deleting a file from a storage device. . . . . . . . . . . . . . . . . . . . . 97
■
Formatting a storage device. . . . . . . . . . . . . . . . . . . . . . . . . . . . 98
Load mode . . . . . . . . . . . . . . . . . . . . . . . . . . . . . . . . . . . . . . . 101
Load page . . . . . . . . . . . . . . . . . . . . . . . . . . . . . . . . . . . . . . . . . . . . . . . 101
Loading data from a storage device . . . . . . . . . . . . . . . . . . . . . . . . . 101
■
Loading an ALL file . . . . . . . . . . . . . . . . . . . . . . . . . . . . . . . . 103
■
Loading an individual sequence . . . . . . . . . . . . . . . . . . . . . . . 105
■
Loading samples . . . . . . . . . . . . . . . . . . . . . . . . . . . . . . . . . . . 105
■
Loading programs . . . . . . . . . . . . . . . . . . . . . . . . . . . . . . . . . . 107
■
Loading multis. . . . . . . . . . . . . . . . . . . . . . . . . . . . . . . . . . . . . 109
■
Finding a file . . . . . . . . . . . . . . . . . . . . . . . . . . . . . . . . . . . . . . 111
Global mode . . . . . . . . . . . . . . . . . . . . . . . . . . . . . . . . . . . . . 113
Global page. . . . . . . . . . . . . . . . . . . . . . . . . . . . . . . . . . . . . . . . . . . . . . 113
Making overall settings for the MPC4000. . . . . . . . . . . . . . . . . . . . 113
■
Setting the internal clock. . . . . . . . . . . . . . . . . . . . . . . . . . . . . 115

Contents
vii
■
Returning the MPC4000 to the factory-set condition. . . . . . . 116
Memory page . . . . . . . . . . . . . . . . . . . . . . . . . . . . . . . . . . . . . . . . . . . . 117
Viewing the amount of free memory. . . . . . . . . . . . . . . . . . . . . . . . 117
Configuration page. . . . . . . . . . . . . . . . . . . . . . . . . . . . . . . . . . . . . . . . 119
Setting the digital output sync source and the SCSI ID etc. . . . . . . 119
Foot switch page. . . . . . . . . . . . . . . . . . . . . . . . . . . . . . . . . . . . . . . . . . 121
Making foot switch settings. . . . . . . . . . . . . . . . . . . . . . . . . . . . . . . 121
Multi mode . . . . . . . . . . . . . . . . . . . . . . . . . . . . . . . . . . . . . . . 123
List page. . . . . . . . . . . . . . . . . . . . . . . . . . . . . . . . . . . . . . . . . . . . . . . . 123
Selecting a multi . . . . . . . . . . . . . . . . . . . . . . . . . . . . . . . . . . . . . . . 123
■
Creating a new multi. . . . . . . . . . . . . . . . . . . . . . . . . . . . . . . . 124
■
Copying a multi. . . . . . . . . . . . . . . . . . . . . . . . . . . . . . . . . . . . 125
■
Deleting a multi. . . . . . . . . . . . . . . . . . . . . . . . . . . . . . . . . . . . 126
■
Assigning a multi number to a multi. . . . . . . . . . . . . . . . . . . . 127
Mix page. . . . . . . . . . . . . . . . . . . . . . . . . . . . . . . . . . . . . . . . . . . . . . . . 128
Editing the mix parameters of each part . . . . . . . . . . . . . . . . . . . . . 128
■
Adding parts to a multi . . . . . . . . . . . . . . . . . . . . . . . . . . . . . . 130
■
Deleting a part from a multi . . . . . . . . . . . . . . . . . . . . . . . . . . 130
■
Assigning a program to each part . . . . . . . . . . . . . . . . . . . . . . 131
MIDI page . . . . . . . . . . . . . . . . . . . . . . . . . . . . . . . . . . . . . . . . . . . . . . 132
Making MIDI-related settings for each part . . . . . . . . . . . . . . . . . . 132
■
Using program change messages
to switch programs for the parts . . . . . . . . . . . . . . . . . . . . . . . 133
Span page . . . . . . . . . . . . . . . . . . . . . . . . . . . . . . . . . . . . . . . . . . . . . . . 134
Specifying the range of notes played by each part . . . . . . . . . . . . . 134
Mixer mode . . . . . . . . . . . . . . . . . . . . . . . . . . . . . . . . . . . . . . 136
Part page. . . . . . . . . . . . . . . . . . . . . . . . . . . . . . . . . . . . . . . . . . . . . . . . 136
Adjusting the mix parameters for each part. . . . . . . . . . . . . . . . . . . 136
Effect mode . . . . . . . . . . . . . . . . . . . . . . . . . . . . . . . . . . . . . . 137
Select page . . . . . . . . . . . . . . . . . . . . . . . . . . . . . . . . . . . . . . . . . . . . . . 137
Specifying the effect type and routing. . . . . . . . . . . . . . . . . . . . . . . 137
■
Switching the effects to stereo input. . . . . . . . . . . . . . . . . . . . 138
Edit page. . . . . . . . . . . . . . . . . . . . . . . . . . . . . . . . . . . . . . . . . . . . . . . . 139
Editing the effect parameters. . . . . . . . . . . . . . . . . . . . . . . . . . . . . . 139
Mix page. . . . . . . . . . . . . . . . . . . . . . . . . . . . . . . . . . . . . . . . . . . . . . . . 152
Adjusting the effect output level . . . . . . . . . . . . . . . . . . . . . . . . . . . 152
■
Applying effects to each part . . . . . . . . . . . . . . . . . . . . . . . . . 153
Record mode . . . . . . . . . . . . . . . . . . . . . . . . . . . . . . . . . . . . . 155
Record page . . . . . . . . . . . . . . . . . . . . . . . . . . . . . . . . . . . . . . . . . . . . . 155
Recording a sample . . . . . . . . . . . . . . . . . . . . . . . . . . . . . . . . . . . . . 155
■
Recording a new sample . . . . . . . . . . . . . . . . . . . . . . . . . . . . . 157
■
Applying Q-FX while you sample . . . . . . . . . . . . . . . . . . . . . 160
Sample mode. . . . . . . . . . . . . . . . . . . . . . . . . . . . . . . . . . . . . 163
List page. . . . . . . . . . . . . . . . . . . . . . . . . . . . . . . . . . . . . . . . . . . . . . . . 163
Viewing the sample list . . . . . . . . . . . . . . . . . . . . . . . . . . . . . . . . . . 163
■
Copying a sample . . . . . . . . . . . . . . . . . . . . . . . . . . . . . . . . . . 164
■
Deleting a sample . . . . . . . . . . . . . . . . . . . . . . . . . . . . . . . . . . 165
Trim/Loop page . . . . . . . . . . . . . . . . . . . . . . . . . . . . . . . . . . . . . . . . . . 166

Contents
viii
Trimming or looping a sample. . . . . . . . . . . . . . . . . . . . . . . . . . . . . 166
■
Making various settings for a sample . . . . . . . . . . . . . . . . . . . 169
■
Setting various points while the sample plays. . . . . . . . . . . . . 170
■
Automatically detecting the start/end points . . . . . . . . . . . . . . 170
■
Automatically detecting the loop points . . . . . . . . . . . . . . . . . 171
■
Applying crossfading. . . . . . . . . . . . . . . . . . . . . . . . . . . . . . . . 172
■
Resampling with Q-FX . . . . . . . . . . . . . . . . . . . . . . . . . . . . . . 173
Region page . . . . . . . . . . . . . . . . . . . . . . . . . . . . . . . . . . . . . . . . . . . . . 176
Dividing a sample . . . . . . . . . . . . . . . . . . . . . . . . . . . . . . . . . . . . . . 176
■
Dividing a sample into multiple regions . . . . . . . . . . . . . . . . . 177
■
Adjusting the region start/region end points . . . . . . . . . . . . . . 178
■
Using the divided samples to create a sequence/program . . . . 179
■
Adjusting the tempo of a sample. . . . . . . . . . . . . . . . . . . . . . . 181
■
Using commands to edit a sample. . . . . . . . . . . . . . . . . . . . . . 183
Program mode . . . . . . . . . . . . . . . . . . . . . . . . . . . . . . . . . . . . 191
List page . . . . . . . . . . . . . . . . . . . . . . . . . . . . . . . . . . . . . . . . . . . . . . . . 191
Viewing a list of programs in internal memory . . . . . . . . . . . . . . . . 191
■Creating a new program. . . . . . . . . . . . . . . . . . . . . . . . . . . . . . 192
■Assigning a program change number to a program. . . . . . . . . 193
■Copying a program . . . . . . . . . . . . . . . . . . . . . . . . . . . . . . . . . 194
■Deleting a program . . . . . . . . . . . . . . . . . . . . . . . . . . . . . . . . . 195
■Converting the program type. . . . . . . . . . . . . . . . . . . . . . . . . . 196
■Merging two programs . . . . . . . . . . . . . . . . . . . . . . . . . . . . . . 197
Key group mix page . . . . . . . . . . . . . . . . . . . . . . . . . . . . . . . . . . . . . . . 198
Editing the mix parameters of a program. . . . . . . . . . . . . . . . . . . . . 198
■Adding new key groups (Key group programs) . . . . . . . . . . . 200
■Copying a key group (Key group programs). . . . . . . . . . . . . . 201
■Deleting a key group (Key group programs). . . . . . . . . . . . . . 201
■Sorting the key groups displayed in the sample list
(Key group programs) . . . . . . . . . . . . . . . . . . . . . . . . . . . . . . . 202
■Copying note number parameters to another note number
(Drum programs). . . . . . . . . . . . . . . . . . . . . . . . . . . . . . . . . . . 203
■Making program modulation settings . . . . . . . . . . . . . . . . . . . 204
■Viewing information on samples. . . . . . . . . . . . . . . . . . . . . . . 206
Pitch page . . . . . . . . . . . . . . . . . . . . . . . . . . . . . . . . . . . . . . . . . . . . . . . 207
Specifying the tuning or zone of a key group or note number. . . . . 207
■Specifying the key range of a key group
(Key group programs) . . . . . . . . . . . . . . . . . . . . . . . . . . . . . . . 208
■Specifying mute groups. . . . . . . . . . . . . . . . . . . . . . . . . . . . . . 209
Edit 1 page . . . . . . . . . . . . . . . . . . . . . . . . . . . . . . . . . . . . . . . . . . . . . . 211
Adjusting the pitch, filter, and amp . . . . . . . . . . . . . . . . . . . . . . . . . 211
■Filter types. . . . . . . . . . . . . . . . . . . . . . . . . . . . . . . . . . . . . . . . 214
Edit 2 page . . . . . . . . . . . . . . . . . . . . . . . . . . . . . . . . . . . . . . . . . . . . . . 215
Adjusting the program LFOs and auxiliary envelope . . . . . . . . . . . 215
Zone page . . . . . . . . . . . . . . . . . . . . . . . . . . . . . . . . . . . . . . . . . . . . . . . 219
Editing the zone 1–4 parameters . . . . . . . . . . . . . . . . . . . . . . . . . . . 219
■Switching between zones. . . . . . . . . . . . . . . . . . . . . . . . . . . . . 221
MISC. page. . . . . . . . . . . . . . . . . . . . . . . . . . . . . . . . . . . . . . . . . . . . . . 223
Editing parameters common to the entire program . . . . . . . . . . . . . 223

Contents
ix
■Making portamento settings (Key group programs). . . . . . . . 225
■Specifying the temperament of a program
(Key group programs). . . . . . . . . . . . . . . . . . . . . . . . . . . . . . . 226
Assign page . . . . . . . . . . . . . . . . . . . . . . . . . . . . . . . . . . . . . . . . . . . . . 227
Assigning note numbers to pads (Drum programs). . . . . . . . . . . . . 227
The Q-LINK function . . . . . . . . . . . . . . . . . . . . . . . . . . . . . . . . 229
Q-LINK setup page . . . . . . . . . . . . . . . . . . . . . . . . . . . . . . . . . . . . . . . 229
Assigning parameters to the Q-LINK knobs/sliders . . . . . . . . . . . . 229
■Assigning parameters to the Q-LINK knobs/sliders. . . . . . . . 231
Q-Link sequence page . . . . . . . . . . . . . . . . . . . . . . . . . . . . . . . . . . . . . 232
Recording and playing movements of the Q-LINK knobs and sliders . . . 232
■Recording and playing knob/slider movements . . . . . . . . . . . 233
Track Mute function . . . . . . . . . . . . . . . . . . . . . . . . . . . . . . . . 235
Track Mute page. . . . . . . . . . . . . . . . . . . . . . . . . . . . . . . . . . . . . . . . . . 235
Using pads to mute tracks . . . . . . . . . . . . . . . . . . . . . . . . . . . . . . . . 235
■Using the pads to control track muting. . . . . . . . . . . . . . . . . . 236
Edit page. . . . . . . . . . . . . . . . . . . . . . . . . . . . . . . . . . . . . . . . . . . . . . . . 238
Editing track mute operations that were recorded in a sequence. . . 238
■Editing mute operations that you recorded . . . . . . . . . . . . . . . 239
Next Sequence function . . . . . . . . . . . . . . . . . . . . . . . . . . . . 240
Next Sequence page . . . . . . . . . . . . . . . . . . . . . . . . . . . . . . . . . . . . . . . 240
Using the pads to switch sequences. . . . . . . . . . . . . . . . . . . . . . . . . 240
■Using the pads to switch sequences . . . . . . . . . . . . . . . . . . . . 241
Pad Assign Functions . . . . . . . . . . . . . . . . . . . . . . . . . . . . . . . 243
Current page. . . . . . . . . . . . . . . . . . . . . . . . . . . . . . . . . . . . . . . . . . . . . 243
Changing the note number and sample assignment for each pad . . 243
Sensitivity page . . . . . . . . . . . . . . . . . . . . . . . . . . . . . . . . . . . . . . . . . . 246
Adjusting the sensitivity of the pads . . . . . . . . . . . . . . . . . . . . . . . . 246
Other popup windows . . . . . . . . . . . . . . . . . . . . . . . . . . . . . . 247
Name/Rename popup window . . . . . . . . . . . . . . . . . . . . . . . . . . . . . . . 247
Inputting a name . . . . . . . . . . . . . . . . . . . . . . . . . . . . . . . . . . . . . . . 247
Locate popup window . . . . . . . . . . . . . . . . . . . . . . . . . . . . . . . . . . . . . 248
Performing auto locate operations and making transport settings. . 248
Appendix: Installing storage devices (for service engineers) . . 251
Check the included items . . . . . . . . . . . . . . . . . . . . . . . . . . . . . . . . . . . 251
Opening the top panel. . . . . . . . . . . . . . . . . . . . . . . . . . . . . . . . . . . . . . 251
Installing a drive. . . . . . . . . . . . . . . . . . . . . . . . . . . . . . . . . . . . . . . . . . 253
Cable connections. . . . . . . . . . . . . . . . . . . . . . . . . . . . . . . . . . . . . . . . . 254

How to use this reference manual
1
MPC400 Reference Manual
This reference manual explains the pages that appear in the display, the major popup win-
dows, and typical procedures for each mode and function of the MPC4000.
* Adobe and Adobe Acrobat are trademarks of Adobe Systems Incorporated.
How to use this reference manual
To learn about a specific mode or page
→Use the index or bookmarks to find the name of the mode (function) or page.
Since the reference manual is organized by mode/page, you can quickly find the mode
(function) or page you are looking for.
You can use Adobe Acrobat Reader’s bookmark function to go directly to the desired
mode or page.
Bookmark

MPC400 Reference Manual
2
To learn which page to use for a specific function
→Use the table of contents to find the subtitle of the page.
The explanation in each page has a subtitle that describes the function and use of that
page. In the table of contents, look for the appropriate subtitle to see which mode or page
you should use.
InAdobeAcrobat Reader, you can click an entry in the table of contents to go directly to
that mode or page.
Instructions on how to access that page are given at the beginning of the explanation for
each page.
Subtitle
Subtitle
Subtitle
How to access
this page

How to use this reference manual
3
To learn the procedure for a specific use
→Look for the procedure in the table of contents.
The explanation of each page begins with a summary of how that page can be used.
Search the table of contents to find the desired procedure.
InAdobeAcrobat Reader, you can click an entry in the table of contents to go directly to
that mode or page.

Main mode
4
Main mode
Main page
Recording/playing a sequence
You can use the pads or an external MIDI keyboard to record performance data (MIDI
events) in a sequence, or play back a recorded sequence.
To access this page........[MAIN] key
APosition bar block
BNow block
CSequence block
DTrack block
ESimul block
Functions
• [F2] key (TR LIST)
Displays the TR List (Track List) Out 1 page.
• [F3] key (TRACK –)
Selects the previous-numbered track for operations.
• [F4] key (TRACK +)
Selects the next-numbered track for operations.
• [F5] key (MUTE)
Mutes the currently selected track.
• [F6] key (SOLO)
Mutes all other tracks, and plays only the currently-playing track.
Position bar block
This bar indicates the current location within the sequence.
ABar display
This bar indicates the current location within the sequence.
Bsymbols
These symbols indicate the loop region that you specified in the loop region field of the
sequence block.
Csymbol
This symbol indicates the punch-in point. This will appear if auto punch-in is enabled.
Dsymbol
This symbol indicates the punch-out point. This will appear if auto punch-out is enabled.
2
1
3
4
5
134
2

Main page
5
Now block
This indicates the current location within the sequence.
ANow field
Shows the current location within the sequence, in units of measures/beats/ticks. When
thecursorisateachfield,youcan movethecurrentlocation in units of measures/beats/10
ticks/1 tick.
BTime field
Shows the time of the current location within the sequence. If loop playback is occurring,
this shows the time from when playback began until now.
CTC field
Selects the unit for timing correction (quantization).You can choose from the following
units.
1/8...........................8th note (minimum unit 480 ticks)
1/8[3]......................8th note triplets (minimum unit 320 ticks)
1/16.........................16th note (minimum unit 240 ticks)
1/16[3]....................16th note triplets (minimum unit 160 ticks)
1/32.........................32nd note (minimum unit 120 ticks)
1/32[3]....................32nd note triplets (minimum unit 80 ticks)
1/64.........................64th note (minimum unit 60 ticks)
1/64[3]....................64th note triplets (minimum unit 40 ticks)
OFF[96]..................1/96th note resolution (minimum unit 10 ticks)
OFF ........................Timing correction will not be used (minimum unit 1 tick)
DSwing field
Specifies the amount of swing, in a range of 50–75 (%). The value of this field indicates
the length of the upbeats in proportion to the length of one beat.As you increase this
value, note events located on the upbeats will be moved further back, producing a greater
sense of swing.
This field will be displayed only if the Timing Correct field is set to 1/8, 1/16, 1/32, or
1/64. If you move the cursor to the TC field (3) or the Swing field (4) and press the
[WINDOW] key, the Timing Correct popup window will
appear, allowing you to apply timing correction to note events that have
already been recorded.
EMetronome field
Switches the metronome on/off.
If you move the cursor to this field and press the [WINDOW] key, the Metronome popup
window will appear, allowing you to make various settings for the metronome.
1 3
2
45

Main mode
6
Sequence block
Here you can select the sequence that you want to record or play back, and make various
settings for the sequence such as the number of measures and the time signature.
ASeq field
Selects the sequence that will be recorded or played. If you turn the [JOG] dial to select a
different sequence while a sequence is playing, playback will switch to the newly selected
sequence when the current sequence has been played to the end. (This is called the Next
Sequence function.) The sequence to be played next is shown in the Simul Play block.
If you move the cursor to this field and press the [WINDOW] key, the Sequence popup win-
dow will appear, allowing you to copy or delete a sequence, or specify the initial settings.
BTempo field
According to the setting of the SEQ/MASTER field (4), this field sets either the tempo
specific to that sequence or the tempo that is common to all sequences.
If you move the cursor to this field and press the [WINDOW] key, the Tempo Change
popup window will appear, allowing you to insert tempo changes into the sequence.
CInit field
Displays the base tempo that will be used when using the Tempo Change function. This
field will be displayed only if the Tempo Change field is turned on in the Tempo Change
popup window.
DSEQ/MASTER field
Selects the tempo source for the sequence.
If you select SEQ, the tempo specific to that sequence will be used.
If you select MASTER, the tempo currently displayed in theTempo field will apply to all
sequences.
If you move the cursor to this field and press the [WINDOW] key, the Tempo Change
popup window will appear.
ELoop field
Turns looping on/off. If this field is on, pressing the [PLAY START] key will make the
sequence play back from the loop-start location.
FLoop region field
Specifies the loop region in measure units. Specify the loop-start at the left of the “–”,
and the end of the loop region in the right field.
GTime signature field
Displays the time signature of the sequence. When you turn the [JOG] dial, the Change
Time Signature popup window will appear, allowing you to specify the time signature of
the sequence.
HBars field
Modifies the number of measures in the sequence. When you turn the [JOG] dial, the
Change Bars popup window will appear, allowing you to specify the number of measures
in the sequence.
IA.PUNCH field
Turn auto punch-in/out on/off.
1 5 76
9
2
3
48
J
K

Main page
7
If you move the cursor to this field and press the [WINDOW] key, theAuto Punch In/Out
popup window will appear, allowing you to specify the punch-in/punch-out points.
JSync field
Turns synchronization with external devices on/off. If you move the cursor to this field
and press the [WINDOW] key, the Sync In/Out popup window will appear, allowing you
make synchronization-related settings.
KSequence Trans. field
Transposes the playback pitch of all INST type tracks in the sequence. (This does not
affect the note events recorded in the tracks.) Positive settings will cause a # to appear at
the left of the field, and negative settings will cause a b to appear.
If you move the cursor to this field and press the [WINDOW] key, the Transpose Perma-
nent popup window will appear, allowing you to convert the pitch of the note events
recorded in the INST tracks.
Track block
Here you can select the track that you want to record, and specify the output destination
and other settings for the recorded MIDI events.
ATrk field
Selects the track that your operations will affect. If you press the [WINDOW] key, the
Track popup window will appear, allowing you to assign a name to the track, erase/copy
a track, or specify default settings.
BType field
Selects one of the following two types for the currently selected track.
DRUM....................The currently selected track will be used as a DRUM type track.You
can use the matrix display to edit the note events recorded in this
type of track.
INST.......................The currently selected track will be used as an INST type track.You
can use the piano roll display to edit the note events recorded in this
type of track.
CMute field
Switches muting on/off for the currently selected track.A symbol indicates tracks for
which muting is on, and a symbol indicates tracks for which muting is off.
If you press the [WINDOW] key, the EraseAll Muted Tracks popup window will appear,
allowing you to erase all currently muted tracks.
DOut1 field
Selects the output destination of the track.You can select the following output destinations.
PART......................A specific part of the sampler section.
MIDI A–D..............[MIDI OUT A]–[MIDI OUT D] connector
INT-A/INT-B..........Virtual MIDI portA or B of the sampler section
Hint: Synchronization-related settings can also be made in the MISC. mode Sync page.
1 6 8 J9
2
3
45 7

Main mode
8
Depending on the value you select, one of the following fields will appear at the right of
the PART field.
If you select PART
If you select OUT-A–D
If you select INT-A/B
EOut2 field
Selects the second output destination of the track.You can choose from the same output
destinations as the Out1 field, or OFF.
FPgm change field
Specifies the program change number that will be sent to the output destination of the
track. The program change number you specify here will be transmitted when you press
the [PLAY START] key, or when the sequence is switched while using the Next Sequence
function or Song function. If this setting is OFF, a program change will not be transmitted.
If you move the cursor to this field and press the [WINDOW] key, the Program Change
popup window will appear.
GTrans. field
Transposestheplayback of the selected track upwardor downwardin a range of –12–+12
semitones. (The note events recorded in the track will not be affected.) This field will be
displayed only if the track type is INST.
If you move the cursor to this field and press the [WINDOW] key, the Transpose Perma-
nent popup window will appear, allowing you to rewrite the pitches of the note events
recorded in the track.
HDuration field
This lets you apply a relative adjustment during playback to the duration (note length) of
the note events recorded in the selected track. (This does not affect the note events recorded
in the track.)The range is 1–200%. With a setting of 100% the durations will be unchanged.
If you move the cursor to this field and press the [WINDOW] key, the Edit Duration
popup window will appear, allowing you to rewrite the durations of the note events
recorded in the track.
OUT1 field display Field Content
PART Part field (left of field) Selects the destination part number.
Program field (right of field) Displays the program name assigned to
the part.
MIDI A–D Ch field Selects MIDI channel 1–16 orANY as the
output destination.
Device field Displays the device name for the MIDI
channel selected in the Ch field.
INT-A/B Ch field Selects MIDI channel 1–16 orANY as the
output destination.
Hint: If you select ANY for the Ch field, the MIDI channel that was input to the track will also be used
as the output channel.
Ifyou pressthe[WINDOW]keyatthe Devicefield,theDeviceListpopupwindowwill appear,allowing
you to edit the device name.

Main page
9
IVelocity field
This lets you apply a relative adjustment during playback to the note-on velocities of the
note events recorded in the selected track. (This does not affect the note events recorded in
the track.) The range is 1–200%. With a setting of 100%, the velocities will be unchanged.
Ifyoumovethecursorto this field and press the [WINDOW] key,theEditVelocity window
will appear, allowing you to rewrite the velocities of the note events recorded in the track.
JTrack monitor
The indicators ( ) and bars in this area provide a realtime display of the state of MIDI
event transmission and reception for this track. When a MIDI event is transmitted or
received, the will blink. When a note event is transmitted or received, the height of
the bar will indicate the velocity value.
Simul Play block
This lets you play the currently selected sequence simultaneously with another
sequence/song.
ASimul play field
Switches the Simul Play function on/off. If this is on, the SEQ/SONG field will be dis-
played at the right of this field.
BSEQ/SONG field
Selects the type of data that will be played simultaneously.
CSequence/song number
Turn the [JOG] dial to select the data that will be played simultaneously.You can select
any sequence or song that is loaded into the memory of the MPC4000.
■Recording a sequence
Here’s how to use the pads or your MIDI keyboard to record a performance into a
sequence track.
1. Access the Main page.
2. Move the cursor to the Seq field, and turn the [JOG] dial to select an empty
sequence.
The empty sequence will have default settings of time signature = 4/4, number of mea-
sures = 2, and tempo = 120.
3. To change the number of measures, move the cursor to the Bars field, and turn
the [JOG] dial.
The Change Bars popup window will appear.
Hint:IfyouselectanothersequenceintheSeqfieldwhileSimulPlayisoccurring,thecurrentsequence
will play to the end, and then playback will switch to the next-selected sequence (the Next Sequence
function). The sequence to be played back next will be displayed in the Simul Play block.
1 2 3

Main mode
10
ACurrent bars field
Displays the current number of measures.
BNew bars field
Specifies the number of measures to which the sequence will be changed.
C[F1] key (CANCEL)
Cancels the operation and closes the popup window.
D[F4] key (BAR EDIT)
Displays the Edit Bars popup window, where you can edit the sequence in units of measures.
E[F6] key (DO IT)
Finalizes the changes you have made.
4. Move the cursor to the New bars field, turn the [JOG] dial to select the number
of measures, and press the [F6] key (DO IT) to finalize the setting.
When you finalize the number of measures, the popup window will close.
5. To change the time signature of the sequence, move the cursor to the time
signature field, and turn the [JOG] dial.
The Change Time Signature popup window will appear.
AMeasure number
Displays the measure numbers within the sequence.
BTime signature field
Specifies the time signature of the sequence.
C[F1] key (CANCEL)
Cancels the operation and closes the popup window.
D[F6] key (DO IT)
Executes the time signature change.
6. Move the cursor to the time signature field, turn the [JOG] dial to specify the
time signature, and press the [F6] key (DO IT).
You can set the time signature in a range of 1/4–16/4, 1/8–16/8, 1/16–16/16, or
1/32–32/32. When you execute, the popup window will close.
12
345
1
34
2
Other manuals for MPC4000
2
Table of contents
Other Akai Recording Equipment manuals

Akai
Akai MPC 60 User manual

Akai
Akai MPC 5000 Technical manual

Akai
Akai S5000 User manual

Akai
Akai S1100 User manual

Akai
Akai S1000 Series User manual

Akai
Akai MPC 2000XL User manual

Akai
Akai M-6 User manual

Akai
Akai SYNTHSTATION49 User manual

Akai
Akai DR16 pro User manual

Akai
Akai Deep Impact SB1 User manual
Popular Recording Equipment manuals by other brands

TimeLine
TimeLine Micro Lynx VSG Option Card installation guide

SMC Networks
SMC Networks EX250 Series Operation manual

Extron electronics
Extron electronics NetPA AT Series Setup guide

Dixon
Dixon FloTech FT295 Maintenance & Operating Instructions

CATHEXIS
CATHEXIS SAM-3204 Installation and user manual

Pioneer
Pioneer RG-2 operating instructions