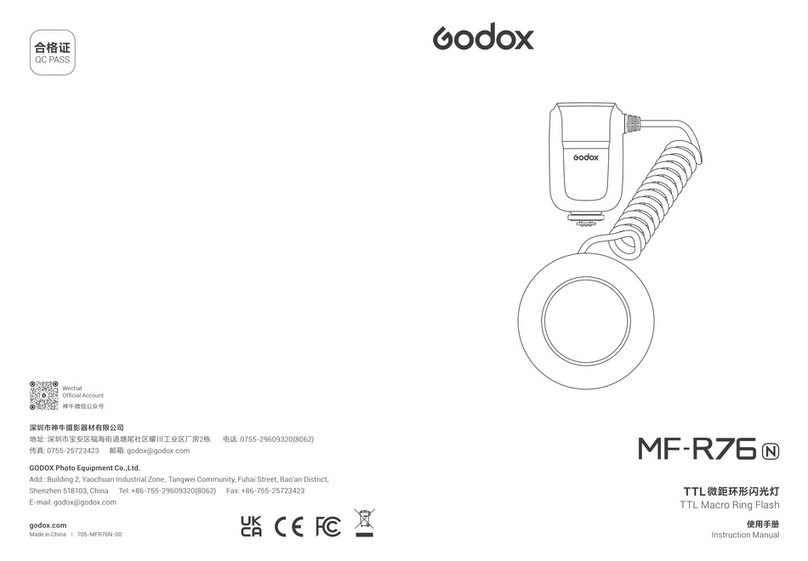
smdv B500 TTL User manual

Transmitter (Option)
User Guide

2
3 p Part Reference
4 p Battery
5 p Using AC-Power Pack / Power ON/OFF
6 p Overheating Warning / Channel Setting
7 p Group Setting
8 p TTL Mode / TTL + HSS Mode
9 p M Mode / M + HSS Mode
10 p RPT(Multi) Mode
11 p LED Modeling Light
12 p Sound / Reset
13 p Optical Slave S1/S2
14 p Disconnect The Reflector / Umbrella Installation
15 p Specification / Contents
16 p Trouble Shooting / Warranty
Table of contents

3
Battery
Handle Reflector and Front Glass
Flash TubeLCD Display
Light Sensor
(-) Down
(+) Up
Power
TTL / M / RPT
Mode Button
RPT-Times
Hss, RPT-Hz
Battery Status
Indicator
Ready Signal
Test
LED Modeling Light
Sound On / OffGroup
Slave Selector
Channel
Camera Brand
Indicator
Part Reference

4
Battery
Checking the Battery Status
To check the battery status, press ‘Battery Check’
button. Please check before using it.
If the battery does not remain enough, please use it
after charging.
Charging the Battery
Connect the charger to the battery
then charge until the full charge(ALL 4 LED lights
are on) is indicated on the battery LED.
It will take about 3 hours to charge the totally
drained battery to 100%.
Battery Setting
Mount the battery onto the battery compartment then
push it completely until the locking lever clicks
in place as indicated direction of the arrow.
To remove the battery, slide the locking button in the
direction of arrow A then remove the battery.
*The battery performance may be reduced depending
on the period and number of battery use.
To avoid any shooting troubles with low battery,
charge the battery always before using.
*This battery is possible to purchase additionally.

5
Using AC-Power Pack
Power ON / OFF
In addition to batteries, B500 flash can be used as AC power without batteries using separate
an AC-Power Pack.
AC-Power Pack (Option)
Press and hold the Power button
for 2seconds to turn on the B500 Power.
Press and hold this button for 2seconds
again to power off.

6
Overheating Warning
If the temperature icon blinks, it means
that it is over-heated and the flash stops
working.
If the internal temperature of the flash rises too high
due to continuous flashes, the overheating warning
lamp will be on, beeping and pause motion.
If this is the case, turn off the power,
cool it sufficiently, and then use it again.
Channel Setting
Setting Press Channel button then set the channel by pressing buttons
when the channel number is blinking.
The B500 and B-control Transmitter should be set to the same channel.
If setting channel of flash and TX are different from each other,
it does not work.

7
Group Setting
You can control up to four separate groups of B500 flashes in
combination with different flash output setting. You can control
this setting on the B-Control Transmitter wirelessly.
Set the same channel on all the flashes and B-Control Transmitter.
Then set the different Group on each flash. Press the desired Group button on the B-Control
Transmitter then select the desired mode and flash output level. You can set the mode and flash
output level individually by pressing each group button on the B-control Transmitter.
Press the camera shutter button.
All the flash will fire with individually selected setting value.
When you press and hold the Group button, desired Group turns OFF.
Then that flash group would not light.
Flash sync and RPT shooting all work regardless of group setting.
GR ABCD
GR ABCD
GR ABCD
GR ABCD

Set the transmitter to TTL mode and press the button to switch to TTL + mode.
You can fire the flash on TTL HSS mode at high speed sync up to 1/8000 sec.
In Nikon mode, if the shutter speed increases without pressing the button, it automatically set to the
HSS mode. However, the sync speed must be set to 250 (FP) or 300 (FP)(Fuji-FP Mode) in the camera settings.
8
TTL Mode
TTL (HSS) Mode
The Flash will calculate the correct flash exposure then fire the exact flash output to the subject.
The B-Control TX should be required to operate TTL mode and TTL HSS. Mount the B-control TX
onto your camera’s hot shoe then turn in on and select and match the same channel.
Set the B-control TX on the TTL mode. Both on the LCD of B500 and B-Control TX are displayed ”TTL”
Press the camera shutter button to fire the flash. Press the button to change the M mode to fix the
same flash output level from TTL mode you fired. Now you are able to fire the same output level continuously.
B-Control Transmitter
(Option)
TTL
B-Control Transmitter
(Option)
TTL+HSS
M

Set the transmitter to M mode and press the button to switch to M + mode.
You can fire the flash on TTL HSS mode at high speed sync up to 1/8000sec.
In Nikon mode, if the shutter speed increases without pressing the button, it automatically set to the
HSS mode. However, the sync speed must be set to 250 (FP) or 300 (FP)(Fuji-FP mode) in the camera settings.
9
M Mode
M (HSS) Mode
You can set desired flash output by pressing button manually.
You can control the flash output wirelessly with B-control Transmitter.
Set the flash on M mode manually or with B-control Transmitter’s button.
Select desired flash output level.
B-Control Transmitter
(Option)
Wireless flash Output
Up/Down
B-Control Transmitter
(Option)
M

10
RPT(Multi) Mode
You can get a multiple images in a single photo with RPT shooting.
Press button 2seconds on the B-Control Transmitter.
Set the desired output level by pressing the button.
Press the button. It will start to blink then select the desired Times by pressing button.
Press the button then it will start to blink. Set the desired Hz value by pressing button.
(For Fuji, please note that the test operation produces a set number of lightings due to the camera characteristics.)
You can set the RPT remotely using the B-control transmitter.
Maximum Stroboscopic Flashes
1/4
1
7
14
30
60
90
99
99
6
14
30
60
90
99
99
5
12
30
60
90
99
99
4
10
20
50
80
99
99
4
8
20
50
80
99
99
3
6
20
40
70
90
90
3
5
10
30
60
80
80
2
4
8
20
50
70
70
2
4
8
20
40
70
70
2
4
8
16
30
40
40
2
4
8
12
20
40
40
2
4
8
20
40
60
60
2
4
8
18
35
50
50
2 3 4 5 10 11
1/8
1/16
1/32
1/64
1/128
1/256
FLASH
OUTPUT
Hz 6
~
7
8
~
9
12
~
14
15
~
19
20
~
50
51
~
99

There are three selectable modeling light modes.
Press the button on the transmitter, then select the desired modeling light mode as follow.
In case of Nikon and Fuji, modeling is turned off according to the waiting time(sleep mode)for the LCD.
11
LED Modeling Light
Operating characteristics of the three modes
Modeling light on PROP will be changed according to the flash’s brightness.
A second press of the Modeling Selection button will display.
Modeling light will be fully brighten.
AF-ON Mode (Battery Saving mode)
Modeling light on AF-On mode turns on when camera shutter is half-pressed.
AF-On function is recommended in dark environment which help the camera to get
auto focus with this light. It will be automatically off after few seconds.
PROP

Press Sound button to select sound on/off.
When Buzzer sound selected, the user
will be notified in a Buzzer sound whenever
the flash action changes.
12
Sound
Reset
Simple Reset
On B-Control Transmitter, Press button for 2seconds, both of B-control and B500
will return to factory defaults as shown the pictures.
M
On B500 (B-Control), Press button( button) for 2seconds, the unit will return to factory defaults
which are; M mode, 1/4, Channel no.1, Group A, Sound On, LED Modeling OFF.
M
MODE
If the default setting is not operated correctly, disconnect and connect the battery again.

13
Optical Slave S1 / S2
Press ‘SLAVE’ button to select Optical Slave.
An Optical Slave mode is that allows light to be emitted at the same time as other flash
fires outside. *When use the optical slave function, light sensor on top of the flash should not be covered.
: It will fire whenever it sees main flash fires. If you are using an exclusive transmitter(B-Control),
you do not need to use this mode.
: Only fire in response to the second actual TTL signal from the main TTL flash. If you are using
an exclusive transmitter(B-Control), you do not need to use this mode.
External flash TTL Mode
External flash M Mode
Light Sensor

14
Disconnect The Reflector
Umbrella Installation
To remove a dedicated reflector, pull the lock button under the flash head in the direction of the arrow,
then turn the reflector to remove it.
Be sure to use a product with 8mm rod diameter when using the Umbrella. Push the Umbrella rod
into the above position and tighten the opposite tightening screw to secure it.
*B500 Head Mount is Bowens type.

15
Specification
Contents
.Body Size : 130 x 300 x 135 (mm)
.Body Weight : 2.2 kgs
.Battery : Lithium Ion (10.8V, 5000mAh)
.Battery Charging Time : 2 hr 40 min
.Battery Charger : DC
.Battery Status Indicator : LCD
.Battery Weight : 0.4 kgs
.Maximum Watt : 500W
.Channel : 80 (2.4GHz)
.Group : A/B/C/D 4 groups
.Guide no. : ISO 100 (with reflector) 1M - F32
.Color Termperature : 5600 ± 200K
.Recycle Time : 0.05 ~ 2.2 sec
.Compatible Cameras : Canon E-TTL / Nikon i-TTL / Fujifilm
.Number of Flashes at Full Power : 300 times (with 1 battery)
.Flash Duration : 1/200 ~ 1/10,000 sec
.Exposure Compensation Step At TTL Mode : -0.3 ~ +3.0
.Flash Output Control At M Mode : 1/1 ~ 1/256 ± 0.3
.Flash Mode : TTL / M / TTL+HSS / M+HSS / RPT(Multi)
.RPT (Multi Flash) : Up to 99times, 99Hz
.Modeling Lamp : LED 17W(Light intensity/Full LED/AF focus On/OFF)
.Sync Speed : 1/8000 sec
.Optical Slave Flash : S1 (Mono-Light Sync) / S2 (TTL Light sync)
.Slave Unit Compatible : B-Control
.Sound : ON / OFF Button
.Over-temp. indicator : Red temp. icon +Warning alarm
B500 + Battery ManualB500 Battery Charger

16
Symptom Solution
If it does not Power On
If it powers on but does not operate
If same channel but does not operate
OFF is displayed on LCD
If unable to reset
Check battery state of charge (Pls refer to the p.4)
Make sure that both the Transmitter and Flash are set to the
same channel
Please confirm that the group is set to the same.
Reset the B-Control and B500. (Pls refer to the p.7)
“OFF” status caused by A long press on Group button.
Press the related Group button for 2seconds to release “OFF”
(Pls refer to the p.8)
Remove the battery and mount it again (Pls refer to the p.12)
Trouble Shooting
Warranty
SMDV guarantees to the original purchaser an individual product factory warranty against manufacturer
defects in materials and workmanship for a 1-year product from the date of purchase (Defects of products
not exceeding 40,000 times of flashes)
This warranty is limited to the repair or replacement of a product or component that should become
defective under normal use, as outlined in the product description and product manual.
If, during the applicable warranty period, the product is found to be defective by SMDV. We will repair
or replace the defective product with an equivalent model without charge for labor or parts.
This warranty will not cover deterioration or malfunction resulting from accident, act of nature, abuse,
misuse, neglect, unauthorized product repair, shipping of the product, opening of or modification or failure
to follow instructions supplied with product.
THIS WARRANTY IS EXPRESSLY MADE IN LIEU OF ALL OTHER WARRANTIES, EXPRESS OR IMPLIED,
INCLUDING WITHOUT LIMITATION, WARRANTIES OF MERCHANTABILITY AND FITNESS
FOR A PARTICULAR PURPOSE.
To obtain a replacement during the time of this warranty, please return the defective items with proof
of purchase to the place of purchase.
#1532, Nakdongdae-ro, Sasang-gu, Busan, South Korea
Tel. +82 51 324 0788 / Fax. +82 51 301 0788
Table of contents

