Smeg Dishwasher SA682X User manual

INSTRUCTION MANUAL
DISHWASHER

Contents
25
1. Safety and operating instructions __________________________ 26
2. Installation and hook-up _________________________________ 28
2.1 Water supply connection _____________________________________________________ 28
2.2 Electrical connection ________________________________________________________ 29
3. Description of the controls _______________________________ 30
3.1 Front panel ________________________________________________________________ 30
3.2 Washing programs__________________________________________________________ 32
4. Operating instructions___________________________________ 34
4.1 Using the water softening system ______________________________________________ 34
4.2 Using the rinse aid and detergent dispensers _____________________________________ 36
4.3 General warnings and recommendations ________________________________________ 38
4.4 Using the baskets___________________________________________________________ 39
5. Cleaning and maintenance _______________________________ 42
5.1 General warnings and recommendations ________________________________________ 42
Thank you for choosing this product.
We advise you to carefully read all the instructions contained in this manual, in order to understand
how to operate your dishwasher safely and correctly.
The manual is divided into paragraphs, which provide a step by step description of the dishwasher
functions, with clear instructions accompanied by detailed illustrations.
Recommendations are given for the correct use of the baskets, spray arms, containers, filters,
washing programs, and for operating the controls.
Follow the recommended cleaning procedures to ensure that your dishwasher always remains in
perfect working order.
This manual provides a quick and easy reference for answering all your questions concerning the
use of your new dishwasher.
INSTALLATION INSTRUCTIONS: these are intended for the qualified technician who must carry
out the installation, hook-up and testing of the appliance.
USER INSTRUCTIONS: these consist of recommendations for using the appliance, a description of
its controls and of the correct cleaning and maintenance procedures.

Safety instructions
26
1. Safety and operating instructions
THIS MANUAL FORMS AN INTEGRAL PART OF THE APPLIANCE: IT MUST ALWAYS BE KEPT INTACT TOGETHER
WITH THE DISHWASHER. BEFORE USING THE APPLIANCE, CAREFULLY READ ALL THE INSTRUCTIONS
CONTAINED IN THIS MANUAL. INSTALLATION MUST BE PERFORMED BY A QUALIFIED TECHNICIAN, IN
COMPLIANCE WITH THE REGULATIONS IN FORCE. THIS APPLIANCE IS INTENDED FOR DOMESTIC USE, AND
COMPLIES WITH THE EEC DIRECTIVES 72/23, 897336 (INCLUDING 92/31) CURRENTLY IN FORCE, INCLUD ING THE
PREVENTION AND ELIMINATION OF RADIO FREQUENCY INTERFERENCE. THE APPLIANCE IS DESIGNED FOR
THE FOLLOWING PURPOSE: WASHING AND DRYING OF DISHES; ANY OTHER USE SHALL BE CONSIDERED
IMPROPER. THE MANUFACTURER DECLINES ALL RESPONSIBILITY FOR USES OTHER THAN THOSE
DESCRIBED ABOVE.
THE NAME PLATE FEATURING THE TECHNICAL DATA, SERIAL NUMBER AND MARKINGS IS VISIBLY POSITIONED
ON THE INNER EDGE OF THE DOOR. THE NAME PLATE ON THE INNER EDGE OF THE DOOR MUST NEVER BE
REMOVED.
DO NOT LEAVE THE DISCARDED PACKAGING MATERIALS UNSUPERVISED WITHIN THE HOME. SEPARATE THE
VARIOUS MATERIALS WHICH MAKE UP THE PACKAGING AND TAKE THEM TO THE NEAREST SORTED WASTE
COLLECTION CENTRE.
THE APPLIANCE MUST BE PROVIDED WITH AN EARTH CONNECTION IN ACCORDANCE WITH THE ELECTRICAL
SAFETY REGULATIONS IN FORCE.
THE MANUFACTURER DECLINES ALL RESPONSIBILITY FOR DAMAGE TO PERSONS OR PROPERTY RESULTING
FROM THE FAILURE TO EARTH THE APPLIANCE OR FROM A DEFECTIVE EARTH CONNECTION.
IF THE APPLIANCE IS NOT CONNECTED TO THE ELECTRICAL POWER SUPPLY BY MEANS OF A PLUG, IT IS
NECESSARY TO INSTALL AN ISOLATION SWITCH WITH A CONTACT OPENING GAP OF AT LEAST 3 MM.
THE PLUG ON THE POWER CORD AND THE CORRESPONDING SOCKET OUTLET MUST BE OF THE SAME TYPE,
AND MUST CONFORM TO THE REGULATIONS IN FORCE. CHECK THAT THE VOLTAGE AND FREQUENCY OF THE
ELECTRICAL POWER SUPPLY MATCH THE RATINGS ON THE NAME PLATE. AVOID USING ADAPTORS OR SHUNT
CONNECTIONS.
NEVER UNPLUG THE APPLIANCE BY PULLING THE POWER CORD.
•AFTER INSTALLATION, THE PLUG MUST REMAIN ACCESSIBLE.
•IN THE EVENT OF DAMAGE TO THE POWER CORD, HAVE IT REPLACED BY A QUALIFIED TECHNICIAN.
IF THE APPLIANCE IS INSTALLED ON A CARPETED OR COVERED FLOOR, ENSURE THAT THE OPENINGS ON ITS
UNDERSIDE ARE NOT OBSTRUCTED.
ALWAYS SWITCH OFF THE DISHWASHER AFTER EACH USE TO AVOID WASTING ELECTRICITY.
OBSOLETE APPLIANCES MUST BE RENDERED UNUSABLE. CUT OFF THE MAINS POWER CORD AFTER
UNPLUGGING IT FROM THE WALL OUTLET, AND MAKE SAFE ANY COMPONENTS WHICH MIGHT BE DANGEROUS
FOR CHILDREN (LOCKS, DOORS, ETC.). THE APPLIANCE MUST THEN BE TAKEN TO A SORTED WASTE
COLLECTION CENTRE.
IN THE EVENT OF A FAULT, DISCONNECT THE DISHWASHER FROM THE ELECTRICAL POWER SUPPLY AND
SHUT OFF THE WATER TAP. THEN CALL IN A QUALIFIED TECHNICIAN.

Safety instructions
27
DO NOT USE APPLIANCES WHICH HAVE BEEN DAMAGED DURING TRANSIT! IF IN DOUBT, CONSULT YOUR
DEALER.
THE APPLIANCE MUST BE INSTALLED AND CONNECTED IN ACCORDANCE WITH THE INSTRUCTIONS PROVIDED
BY THE MANUFACTURER OR BY A QUALIFIED TECHNICIAN.
THE APPLIANCE IS INTENDED FOR USE BY ADULTS. DO NOT ALLOW CHILDREN TO COME NEAR OR PLAY WITH
THE DISHWASHER. KEEP CHILDREN AWAY FROM DETERGENTS AND FROM THE OPEN DISHWASHER DOOR.
THE PACKAGING MATERIALS (PLASTIC BAGS, POLYSTYRENE, METAL BARS, ETC.) MUST NOT BE LEFT WITHIN
THE REACH OF CHILDREN.
KEEP CHILDREN AWAY FROM THE OPEN DISHWASHER. THE APPLIANCE MAY CONTAIN RESIDUES OF
DETERGENT WHICH CAN CAUSE IRREVERSIBLE DAMAGE TO THE EYES, MOUTH, AND THROAT, AS WELL AS
POSSIBLE DEATH BY SUFFOCATION.
DO NOT INTRODUCE SOLVENTS SUCH AS ALCOHOL OR TURPENTINE WHICH MAYCAUSE AN EXPLOSION.
DO NOT LOAD DISHES THAT ARE SOILED WITH ASH, WAX OR PAINTS.
LEANING OR SITTING ON THE DISHWASHER DOOR WHEN OPEN MAY CAUSE THE APPLIANCE TO OVERTURN,
PUTING PEOPLE AT RISK.
DO NOT UNDER ANY CIRCUMSTANCES TOUCH THE HEATING ELEMENT IMMEDIATELY AFTER THE END OF A
WASHING PROGRAM.
OVER TIME, THE DISHWASHER HEATING ELEMENTS MAY CHANGE COLOUR, IN PART OR OVERALL. THIS IS
PERFECTLY NORMAL AND DOES NOT IN ANY WAY AFFECT THE OPERATION OF THE APPLIANCE.
DO NOT DRINK THE WATER RESIDUES WHICH MAY BE PRESENT INSIDE THE DISHES OR DISHWASHER AT THE
END OF THE WASHING PROGRAM AND BEFORE THE DRYING CYCLE.
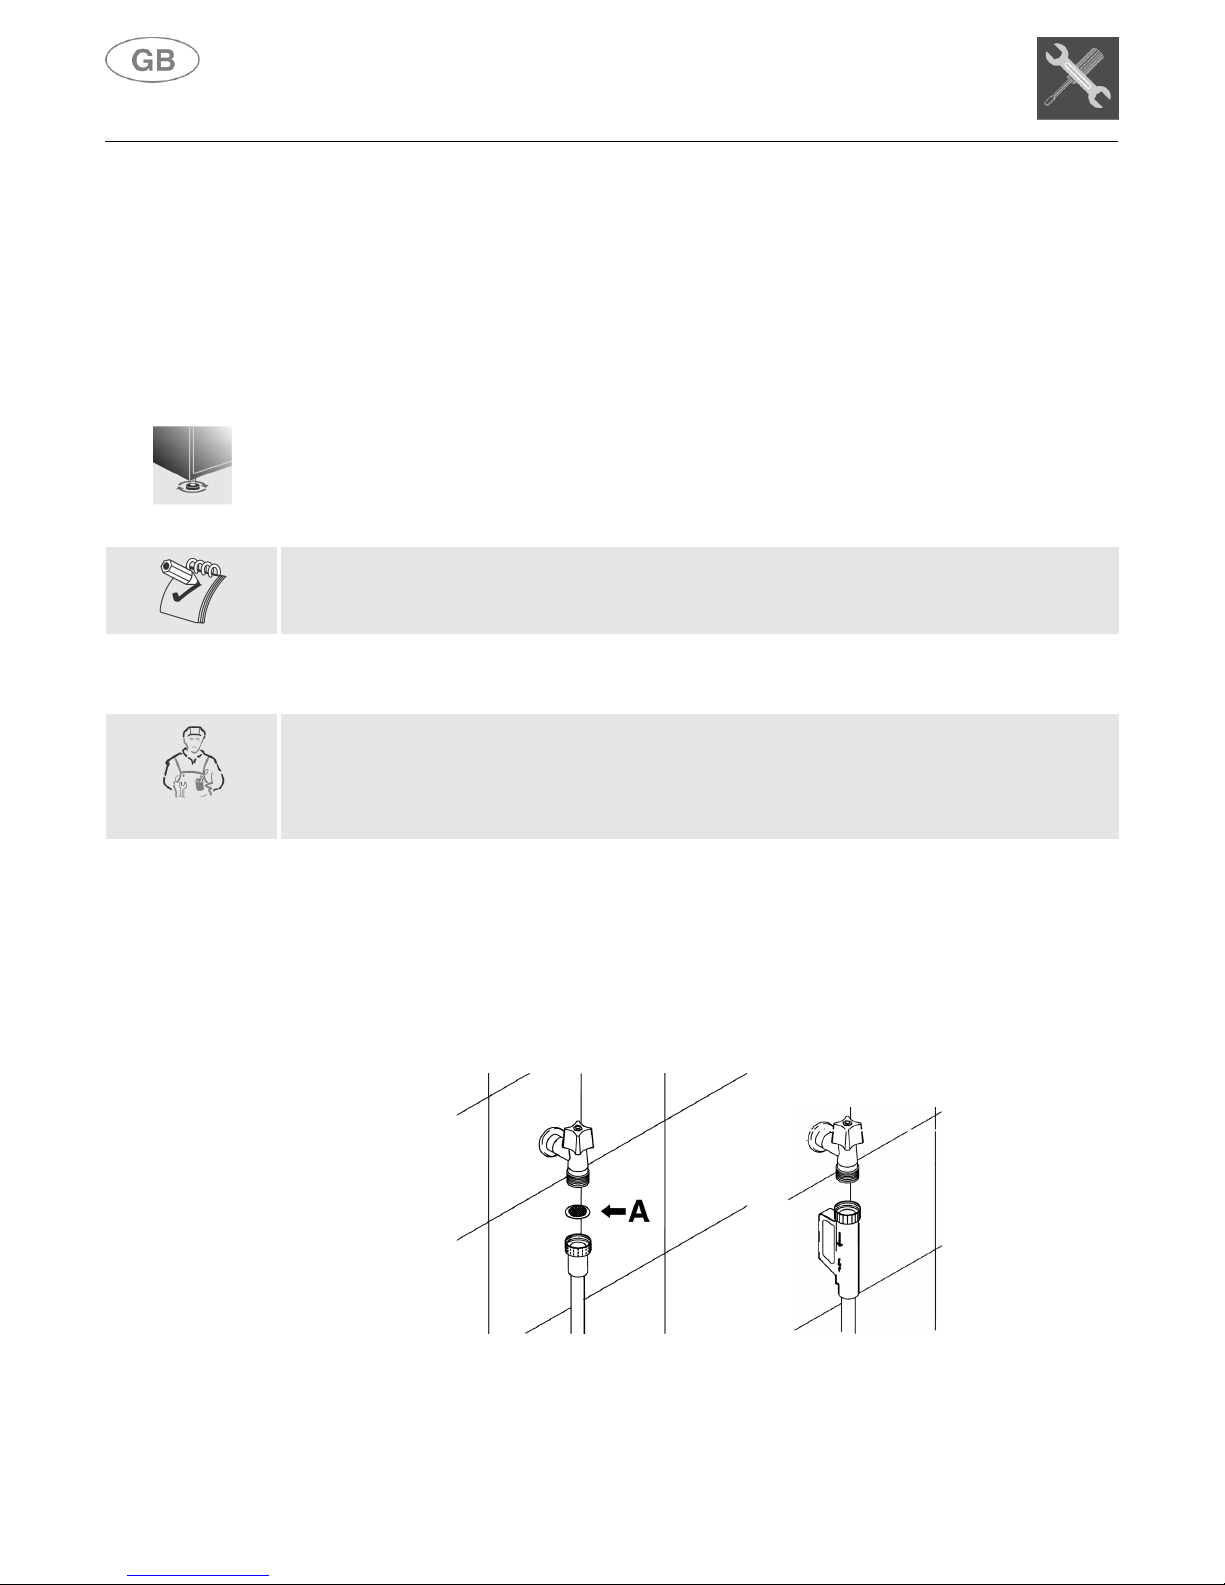
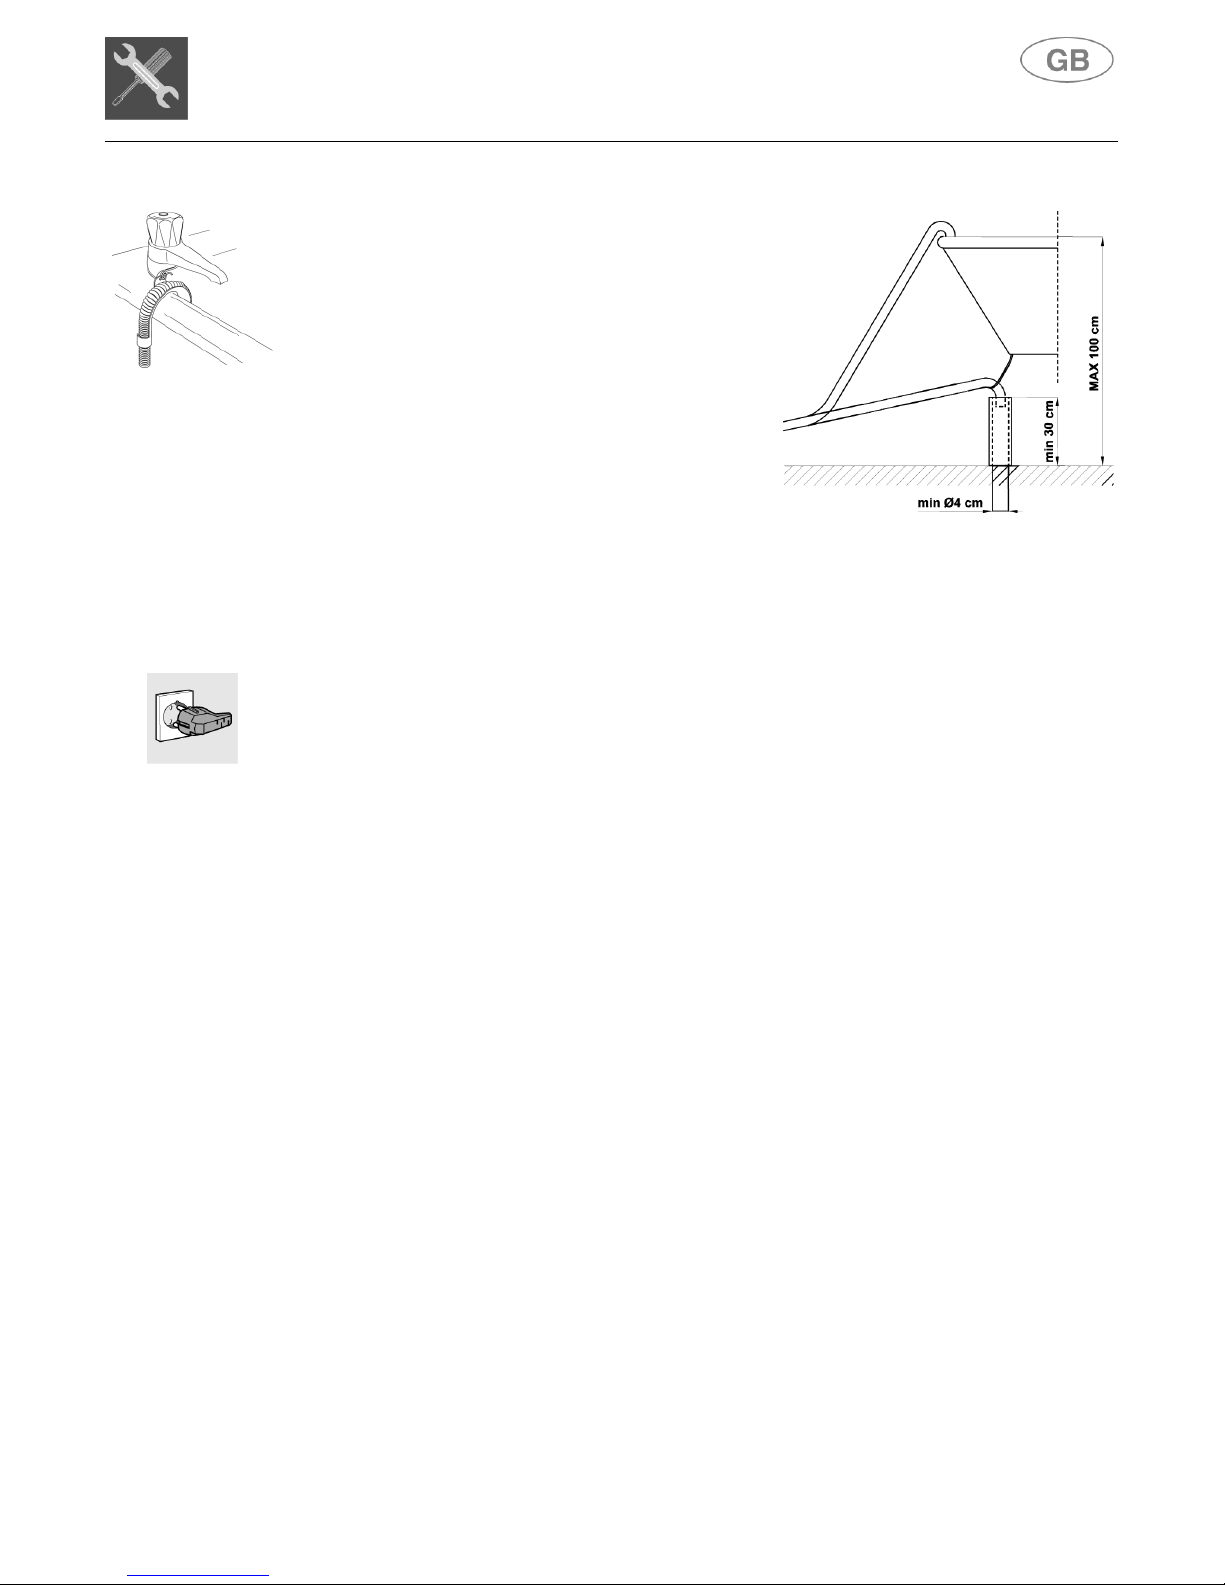
AQUASTOP MODELS
THE AQUASTOP DEVICE PREVENTS FLOODING IN THE EVENT OF A WATER LEAK. WHEN THE AQUASTOP
DEVICE IS TRIPPED, CALL IN A QUALIFIED TECHNICIAN TO IDENTIFY AND REPAIR THE FAULT.
IN MODELS EQUIPPED WITH THE AQUSTOP DEVICE, THERE IS A SOLENOID VALVE INSIDE THE WATER INTAKE
HOSE. DO NOT CUT THE HOSE AND DO NOT ALLOW THE SOLENOID VALVE TO DROP INTO WATER. IN THE
EVENT OF DAMAGE TO THE WATER INTAKE HOSE, DISCONNECT THE APPLIANCE FROM THE ELECTRICAL
POWER SUPPLYAND FROM THE WATER SUPPLY.
IMMEDIATELY AFTER INSTALLING THE DISHWASHER, PERFORM A QUICK TEST OF THE APPLIANCE FOLLOWING
THE INSTRUCTIONS BELOW. IF THE DISHWASHER FAILS TO OPERATE CORRECTLY, DISCONNECT IT FROM THE
ELECTRICAL POWER SUPPLY AND CALL THE NEAREST TECHNICAL SERVICE CENTRE.
DO NOT ATTEMPT TO REPAIR THE APPLIANCE.
THE DISHWASHER MEETS ALL THE REQUIREMENTS SET OUT BY THE REGULATIONS IN FORCE CONCERNING
SAFETY AND ELECTRICAL EQUIPMENT. ANY TECHNICAL CHECKS SHOULD BE CONDUCTED EXCLUSIVELY BY A
TRAINED AND AUTHORISED TECHNICIAN: REPAIRS CARRIED OUT BY UNAUTHORISED PERSONS WILL
INVALIDATE THE WARRANTY, AS WELL AS POSING A POTENTIAL HAZARD TO THE USER.
The manufacturer declines all responsibility for damage to persons or property resulting from failure to
observe the above precautions, from tampering with even a single component of the appliance, or from the use
of non original spare parts.

Installation instructions
28
2. Installation and hook-up
Remove the polystyrene basket retainers.
Position the appliance in the desired place of installation. The back or sides of the dishwasher may
be placed up against walls or other furniture units.
If the dishwasher is installed near a heat source, fit the special insulating panel to prevent
overheating and malfunction of the appliance.
To ensure stability, install integrated or built-under dishwashers only under continuous worktops,
and screw them to the adjacent units.
To facilitate the installation procedure, the intake and drain hoses can be positioned in any
direction; make sure that the hoses are not kinked, crushed or pulled too tightly.
Level the appliance on the floor using its adjustable feet. This operation is essential for ensuring
correct operation of the dishwasher.
Some models are equipped with only one adjustable foot at the rear, which can be adjusted by
turning the screw on the lower front part of the appliance.
2.1 Water supply connection
Preventing the risk of clogging or damage: if the water pipe is new or has not been used for a
long time, before connecting to the water supply check that the water is clear and free of impurities,
to prevent damage to the appliance.
The dishwasher must always be connected to the water system with new hoses; old or used hoses
must never be reused.
CONNECTING TO THE WATER SUPPLY
Connect the intake hose to a cold water supply with 3/4” gas thread, inserting the filter Asupplied
with the dishwasher.
Take care to screw the hose firmly into place with your hands and then complete by
tightening about 1/4 of a turn with pliers. In dishwashers equipped with the ACQUASTOP
device, the filters is already fitted inside the threaded ring.
The dishwasher can also be connected to a hot water supply not exceeding 60°C. Supplying the
appliance with hot water cuts down the washing time by approximately 20 minutes, but slightly
reduces its effectiveness. Make the connection to the domestic hot water supply using the same
procedure described for connecting to the cold water supply.
This manual suits for next models
1
Table of contents
Other Smeg Dishwasher manuals

Smeg
Smeg Dishwasher DDW104 User manual

Smeg
Smeg Universale LVS533PXIN User manual

Smeg
Smeg CW521D User manual

Smeg
Smeg STL362DQ User manual

Smeg
Smeg ST4512IN User manual

Smeg
Smeg ST146 User manual

Smeg
Smeg PL662EB User manual

Smeg
Smeg PL19K User manual

Smeg
Smeg DWAFI4510-2 User manual

Smeg
Smeg FML6068PX User manual