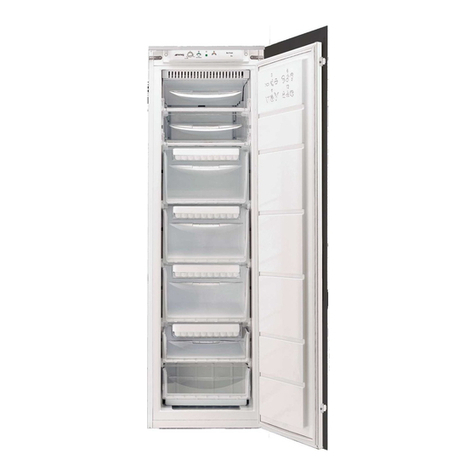
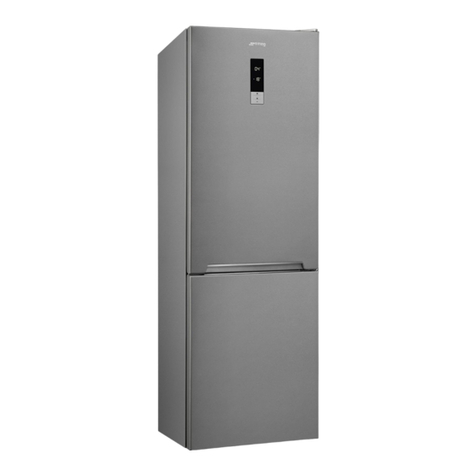
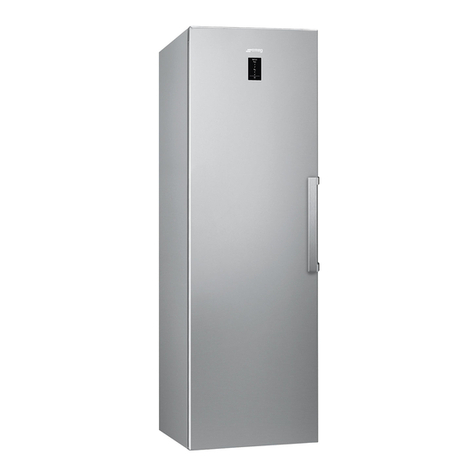
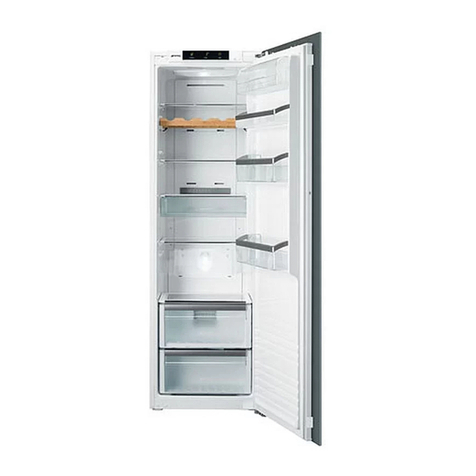
Smeg VR105NE Quick start guide

Congelatore
Installazioneeuso
Freezer
Installationanduse
Congélateur
Installationetemploi
Einbautiefhühlgeräte
InstallationundGebrauch
Vriekast
Installatieengebruik

I
GB
F
D
NL
Congelatore 1
Installazione e uso
Freezer 8
Instructionsforinstallationanduse
Congélateur 15
Instructionspourl'installationetl'emploi
Einbautiefhühlgeräte 22
Installation-undGebrauchshinweise
Vriekast 33
Gebruiksaanwijzingenvoorplaatsing en gebruik

1I
La sicurezza , una buona abitudine
Installazione
4. Sconsigliamodiricorrere a prolungheemultiple.Seilcon-
gelatore è installato tra i mobili, controllate che il cavo non
subisca piegature o compressioni pericolose.
5. Non tirate mai il cavo né il congelatore per staccare la
spina dalla presa a muro: è molto pericoloso.
6. Non toccate le parti interne raffreddanti soprattutto con
le mani bagnate poiché potreste scottarvi o ferirvi. Né met-
tere in bocca cubetti di ghiaccio appena estratti dal freezer
poiché rischiate di ustionarvi.
7. Prima di procedere a qualsiasi operazione di pulizia stac-
care l'apparecchio dalla rete di alimentazione (disinserendo
la spina o l'interruttore generale dell'appartamento).
8. Prima di farvi ritirare il vecchio congelatore, mettete fuori
uso l’eventuale serratura per evitare che i bambini, giocan-
do, possano rimanere chiusi dentro l’apparecchio.
9. In caso di guasto, prima di chiamare il servizio-assistenza,
controllate al capitolo “C’è qualche problema?” per verifi-
care se è possibile eliminare l’eventuale inconveniente. Non
tentate di riparare il guasto, cercando di accedere alle parti
interne.
La messa a terra
Primadiprocederealcollegamentoelettrico,controllateche
ilvoltaggioindicatosulla targhetta caratteristiche corrispon-
da a quella del vostro impianto di casa, e che la presa sia
dotata di una regolare messa a terra, come prescrive la leg-
ge sulla sicurezza degli impianti 46/90. Se manca la messa a
terra, l’azienda declina ogni responsabilità. Non usate prese
multiple o adattatori.
La potenza è insufficiente?
La presa elettrica deve essere in grado di sopportare il carico
massimodipotenzadell’apparecchio,indicatasullatarghet-
ta caratteristiche .
Prima di collegarlo
Dopoiltrasportoposizionare l’apparecchio verticalmente ed
attendere almeno 3 ore prima di collegarlo alla presa, per
consentire un corretto funzionamento.
Per garantire un buon funzionamento e un consumo
contenuto di elettricità è importante che l’installazio-
ne sia eseguita correttamente.
L’aerazione
Il compressore emette calore e richiede perciò una buona
aerazione: l’apparecchio va quindi installato in un ambiente
servito da un’apertura (finestra o porta-finestra) che assicuri
il necessario ricambio dell’aria. E che non sia troppo umido.
Lontano dal calore
Installate l’apparecchio lontano almeno 60 cm da stufe, cal-
daie, caloriferi, cucine con forno, camini e caminetti e ad
almeno 3 cm dalla parete
In piano
Il pavimento deve essere ben in piano; se non è livellato, è
possibile regolare gli appositi piedini posti anteriormente.
1. Questo apparecchio non va installato all’aperto, nemme-
no se lo spazio è riparato da una tettoia; è molto pericoloso
lasciarlo esposto alla pioggia e ai temporali.
2. Deve essere usato soltanto da adulti ed esclusivamente
per conservare i cibi, seguendo le istruzioni d’uso scritte in
questo manuale.
3. Nontoccate né manovrate mai l’apparecchioapiedinudi
o con le mani o piedi bagnati.
ATTENZIONE
Leggete attentamente le avvertenze contenute nel presen-
telibrettoinquantoforniscono importanti indicazioni riguar-
danti la sicurezza di installazione, d’uso e di manutenzione.
Questa apparecchiatura è conforme alle se-
guenti Direttive Comunitarie:
- 73/23/CEE del 19/02/73 (Basse Tensioni) e successive
modificazioni;
-89/336/CEEdel03/05/89(CompatibilitàElettromagnetica)
e successive modificazioni.

2
I
Vano utilizzabile per il congelamento e
la conservazione
Vani per la conservazione
Quadro comandi con luci spia
Sistema per l'eliminazione dell'acqua di
sbrinamento
Visto da vicino
B
A
C
D
B
A
C

3I
La lampada gialla ‘’c’’
Quadro comandi tipo “A”.
Quando è accesa (spostare l’interruttore verso sinistra) per-
mette il funzionamento continuo del compressore per rag-
giungere le basse temperature necessarie al congelamento
rapido delle derrate fresche. Spostando l’interruttore verso
destra (lampada gialla coperta) il congelamento funziona
secondo la regolazione del termostato.
Quadro comandi tipo “B”.
Quando è accesa (posizione “S”) permette il funzionamen-
toin continuo del compressoreperraggiungerelebassetem-
perature necessarie al congelamento delle derrate fresche.
Quando è spenta consente al congelatore di funzionare se-
condo la regolazione del termostato (posizione “N”).
La lampada rossa ‘’d’’
Si accende quando la temperature all’interno dell’apparec-
chio è insufficiente per conservare delle derrate.
Quadro comandi
I congelatori da incasso possono avere 2 diversi tipi di qua-
drocomandi che sono rappresentatinella figura1;prendete
in considerazione il tipo corrispondente a quello presente
sull’apparecchio da voi acquistato.
Il termostato ’’a’’
Regola automaticamente la temperatura all’interno dell’ap-
parecchioRuotando la manopola dalla posizione 1allaposi-
zione5 è possibile otteneretemperaturesemprepiùfredde.
Per effettuare la regolazione del termostato ruotare la ma-
nopola servendosi di una moneta.
La lampada verde ‘’b’’
Quadro comandi tipo “A”.
Quandoè accesa (spostarel’interruttoreverso destra) indica
chel’apparecchioè collegato alla retedi alimentazione. Spo-
stando l’interruttore verso sinistra (lampada verde coperta),
l’apparecchio è disinserito dalla rete di alimentazione.
Quadro comandi tipo “B”.
Quando è accesa indica che l’apparecchio è collegato alla
rete di alimentazione.
ATTENZIONE
Dopo il trasporto, posizionare l’apparecchio vertical-
mente ed attendere circa 3 ore prima di collegarlo alla
presa di corrente per favorire un buon funzionamen-
to.
Per un funzionamento ottimale ed economico ricorda-
tevi di porre la manopola per la regolazione della tem-
peratura sulla posizione di temperatura media.
Una volta collegato l'apparecchio alla rete di alimentazione,
accertarsi che la lampada verde sia accesa e provvedere ad
accendere anche quella gialla.
Quandolalampadarossasi sarà spenta, provvedere allo spe-
gnimento della lampada gialla; a questo punto l'apparec-
chio è pronto per essere adoperato.
Come avviare il congelatore
a
A
B
cdb
adbc
Fig. 1

4
I
Come utilizzarlo al meglio
Per congelare bene
-Un alimento scongelato,anchesolo parzialmente, non deve
mai essere ricongelato: lo dovete cuocere per consumarlo
(entro 24 ore) oppure per ricongelarlo.
- Per la preparazione dei cibi da congelare consultare un
manuale specializzato.
-Gli alimenti freschida congelarenon devonoessereposti a
contattocon quelli già congelati o surgelatima vanno messi
nelvano superioredove la temperatura scendesottoi -18°C
ed è l’ideale per congelar bene i cibi. Non bisogna infatti
dimenticare che la buona conservazione degli alimenti con-
gelati dipende dalla velocità di congelazione.
- Durante la congelazione evitate di aprire la porta del con-
gelatore.
- Congelate soltanto la quantità, in kg, indicata sulla tar-
ghetta delle caratteristiche.
- Effettuare l’operazione di congelamento accendendo la
lampadagiallae dopo questa operazione introdurrei cibi da
congelare nel vano superiore avendo cura che gli stessi sia-
no disposti, il più possibile, a contatto diretto con i piani
raffreddanti e che non siano messi a contatto con eventuali
derrate già congelate nello stesso vano.
- L’introduzione di notevoli quantitativi di cibi da congelare
può riscaldare momentaneamente la temperatura all’inter-
no dello scomparto freezer (accensione della lampada ros-
sa). Tale situazione, essendo transitoria, non pregiudica la
buona conservazione degli alimenti già stivati.
- Dopo 24 ore, terminato il congelamento, provvedere allo
spegnimento della lampada gialla.
Attenzione: .questa operazione non va dimenticata se si
vogliono evitare inutili sprechi di energia.
-Per ottenereuna conservazione e unasuccessivascongela-
zione ottimali è consigliabile dividere i cibi in piccole porzio-
ni così si congeleranno rapidamente e in modo omogeneo.
Sulle confezioni riportate le indicazioni sul contenuto e sulla
data di congelamento.
- Non aprite la porta del congelatore in caso di mancanza di
correnteo di un guasto, ritarderetecosì l’aumento della tem-
peraturaalsuo interno.Inquesto modo i surgelatie iconge-
lati si conserveranno senza alterazioni per circa 9-14 ore.
- Non mettete nel congelatore bottiglie piene: potrebbero
rompersipoiché, gelandosi, tuttiiliquidi aumentano di volu-
me.
- Riempite le bacinelle dei cubetti di ghiaccio fino a circa 3/4
della loro altezza.
Conservazione
Per ottenere una buona conservazione di alimenti surgelati
o di cibi congelati non posizionare mai l’indice della mano-
pola del termostato al di sotto di 1, qualunque sia la tempe-
ratura ambiente.
Per temperature ambiente fino a 25°-27°C l’indice della
manopola va posizionato tra 1 e 2 mentre per temperature
ambiente fino a 32°C tra 2 e 3.
I tempi massimi di conservazione dei cibi congelati sono ri-
portati nelle tabelle “Guida all’utilizzo dello scomparto con-
gelatore”.
Osservaresemprescrupolosamentele istruzioniriportatesulle
confezioni dei cibi surgelati e in assenza di esse non conser-
vare per più di 3 mesi dalla data di acquisto.
All’acquistodiprodottisurgelatioccorresincerarsicheglistessi
siano conservati a temperatura adeguata e che l’involucro
sia intatto.
Per mantenere inalterata la qualità del cibo surgelato è op-
portuno trasportarlo in appositi contenitori e riporlo al più
presto all’interno dell’apparecchio.
Qualorauna confezione presentassetraccedi umidità e anor-
malirigonfiamenti è probabileche sia stata precedentemen-
te conservata a temperatura inadeguata e che il contenuto
si sia nel frattempo deteriorato.

5I
Come tenerlo in forma
Prima di procedere a qualsiasi operazione di pulizia
staccare l'apparecchio dalla rete di alimentazione
(disinserendo la spina o l'interruttore generale dell'ap-
partamento).
Sbrinamento
E’ opportuno, di tanto in tanto, togliere la brina che ricopre
i ripiani dell’apparecchio.
Attenzione a non usare, per tale operazione, oggetti metal-
lici appuntiti .che possono provocare forature al circuito re-
frigerante con conseguente irreparabile danneggiamento
dell’apparecchio, ma servirsi del raschietto in plastica forni-
to in dotazione.
Per ottenere il completo sbrinamento dell’apparecchio (da
effettuare una o due volte l’anno) spegnere la lampada ver-
de e lasciare aperta la porta fino al completo scioglimento
dellabrina. L'acqua di sbrinamento puòessereraccolta usan-
do l'apposito sistema situato in fondo all'apparecchio "D"
come illustrato in fig. 2.
Per accelerare le operazioni di sbrinamento si può introdur-
re all’interno dell’apparecchio una o più bacinelle di acqua
tiepida.
Durante l’operazione di sbrinamento è opportuno avvolge-
re i cibi messi in conservazione con più fogli di carta e siste-
marli in luoghi freschi. Poiché l’inevitabile aumento di tem-
peratura ne abbrevia la durata è consigliabile consumarli a
breve scadenza.
Lampada spia verde spenta
Avete controllato se:
••
••
•non manchi la corrente;
••
••
•l'interruttore generale dell'appartamento non è disinseri-
to;
Lampada allarme rossa sempre accesa
Avete controllato se:
••
••
•la porta non chiude bene o la guarnizione è rovinate;
••
••
•la porta viene aperta molto spesso;
••
••
•la manopola di regolazione della temperatura non è in
posizione corretta;
••
••
•sulle pareti interne la brina non è eccessiva
Il motore funziona di continuo.
Avete controllato se:
••
••
•la lampada gialla non sia accesa (condizione di funziona-
mento continuo);
••
••
•il termostato è nella posizione corretta.
C'è qualche problema?
L’apparecchio emette troppo rumore.
Avete controllato se:
••
••
•Il congelatore è posto ben in piano:
••
••
•è stato installato tra mobili o oggetti che vibrano ed emet-
tono rumori;
••
••
•il gas refrigerante interno produce un leggero rumore an-
che quando il compressore è fermo (non è un difetto).
Se,nonostantetutti i controlli,l’apparecchio non funziona e
l’inconvenienteda voi rilevato continua ad esserci,chiamate
il Centro di Assistenza più vicino, comunicando queste in-
formazioni:il tipo di guasto, ilmodello con la sigla ei relativi
numeri scritti sulla targhetta delle caratteristiche.
Non ricorrete mai a tecnici non autorizzati e rifiutate
sempre l’installazione di pezzi di ricambio non origi-
nali.
Fig. 2
Pulizia e manutenzioni particolari
La pulizia dell’apparecchio va effettuata periodicamente
impiegando bicarbonato di sodio sciolto in acqua tiepida.
Evitare in ogni caso l’uso di prodotti abrasivi, detergenti o
saponi; dopo il lavaggio risciacquare con acqua pulita ed
asciugare con cura.
Effettuate tali operazioni, riaccendere la lampada verde e
riportare la manopola termostato nella posizione di funzio-
namento desiderata.
Dopo 2 o 3 ore di funzionamento l’apparecchio è di nuovo
pronto per la conservazione dei cibi surgelati o congelati.

6
I
Carni e pesci
Guida all'utilizzo dello scomparto congelatore
Tipo Confezionamento Frollatura
(giorni) Conservazione
(mesi) Scongelamento
Arrosto e bollito di
manzo Avvolto in foglio di alluminio 2 / 3 9 / 10 Non necessario
Agnello Avvolto in foglio di alluminio 1 / 2 6 Non necessario
Arrosto di maiale Avvolto in foglio di alluminio 1 6 Non necessario
Arrosto e bollito di
vitello Avvolto in foglio di alluminio 1 8 Non necessario
Bistecche e braciole di
maiale Ogni fetta avvolta in politene e quindi in
foglio di alluminio in numero di 4-5 6Non necessario
Fettine e cotolette di
agnello o manzo Ogni fetta avvolta in politene e quindi in
foglio di alluminio in numero di 4-5 6Non necessario
Cartne macinata In contenitori di alluminio ricoperti con
politene Freschissima 2 Lentamente in frigorifero
Cuore e fagato In sacchetti di politene 3 Non necessario
Salsicce In fogli di politene o alluminio 2 A seconda dell'uso
Polli e tacchini Avvolti in fogli di alluminio 1 / 3 9 Lentamente in frigorifero
Anatre e oche In fogli di alluminio 1 / 4 6 Lentamente in frigorifero
Anatre selvatiche,
fagiani e pernici In fogli di alluminio 1 / 3 9 Lentamente in frigorifero
Conigli e lepri In fogli di alluminio 3 / 4 6 Lentamente in frigorifero
Cervo e capriolo In fogli di alluminio o politene 5 / 6 9 Lentamente in frigorifero
Pesci grossi In fogli di alluminio o politene 4 / 6 Lentamente in frigorifero
Pesci piccoli In buste di politene 2 / 3 Non necessario
Crostacei In buste di politene 3 / 6 Non necessario
Molluschi In contenitori di alluminio o plastica
ricoperti con acqua e sale 3Lentamente in frigorifero
Pesci cotti In fogli di alluminio o politene 12 In acqua calda
Pesci fritti In sacchetti di politene 4 / 6 Direttamente in padella

7I
Frutta e verdura
Tipo Preparazione Scottatura Confezionamento Conservazione
(mesi) Scongelamento
Mele e pere Sbucciare e tagliare a
pezzetti 2' In contenitori, ricoperti
di sciroppo 12 Lentamente in frigorifero
Albicocche, pesche,
ciliege e prugne Snocciolare e pelare 1' / 2' In contenitori, ricoperti
di sciroppo 12 Lentamente in frigorifero
Fragole, more e
mirtilli Pulire, lavare e
lasciare asciugare In contenitori, ricoperti di
zucchero 10 / 12 Lentamente in frigorifero
Frutta cotta Tagliare, cuocere e
passare
In contenitori,
aggiungere 10% di
zucchero 12 Lentamente in frigorifero
Succhi di frutta Lavare, tagliare e
schiacciare In contenitori, zucchero
a piacere 10 / 12 Lentamente in frigorifero
Cavolfiori Spezzare e scottare in
acqua e succo di
limone 2' In sacchetti di politene 12 Non necessario
Cavolo e cavolini Pulire e lavare
(spezzettare) 1' / 2' In sacchetti di politene 10 / 12 A temperatura ambiente
Piselli Sbucciare e lavare 2' In sacchetti di politene 12 Non necessario
Fagiolini Lavare e tagliare a
pezzetti 2In sacchetti di politene 10 / 12 Non necessario
Carote, peperoni e
rape Tagliare e fette,
pelare, lavare 3' / 4' In sacchetti di politene 12 Non necessario
Funghi e asparagi Lavare e tagliare 3' / 4' In sacchetti o contenitori 6 A temperatura ambiente
Spinaci Lavare e tagliuzzare 2' In sacchetti di politene 12 A temperatura ambiente
Verdure varie per
minestra Lavare e tagliare a
pezzetti 3' In sacchetti in piccole
porzioni 6 / 7 A temperatura ambiente
Cibi vari Preparazione Scottatura Confezionamento Conservazione
(mesi) Scongelamento
Pane In sacchetti di politene 4 A temperatura ambiente
e nel forno
Torte In fogli di politene 6 A temperatura ambiente
e cuocere a 100/200°C
Panna In contenitori di plastica 6 A temperatura ambiente
o nel frigorifero
Burro Nel suo incarto originale
avvolto in alluminio 6In frigorifero
Cibi cotti, minestrone Suddiviso in contenitori
di plastica o di vetro 3 / 6 A temperatura ambiente
e in acqua calda
Uova Congelare senza guscio
in piccoli contenitori 10 A temperatura ambiente
o nel frigorifero

8
GB
ATTENTION
Read your handbook carefully since it contains instructions
which will ensure safe installation, use and maintenance of
your appliance.
Your freezer is built to International standards (EN60) and
has been awarded the European approval mark (IMQ) for
complianceto UK electricalsafetyrequirements.Italsomeets
theECstandardsonthepreventionand eliminationofradio
interference (EC directive 87/308 - 02.06.89).
1. This appliance is designed to be used indoors and under
no circumstances should it be installed outside.
2. The appliance should be used only by adults exclusively
for storing foodstuffs in compliance with the instructions
provided in the handbook. Under no circumstances should
children be allowed to operate, or tamper with, this prod-
uct.
3. For electrical safety, do not attempt to operate this appli-
ance with wet hands or feet.
4. Do not operate this appliance connected to an extension
lead. If a longer supply cable is required, this must be re-
placed with one of the same specifications in compliance
Safety a good habit to get into
withthecurrent electrical regulations. Thisoperation should
becarried out by a qualified person. Ensurethat the cable is
not trapped or damaged during the installation.
5. Never pull the cable or the appliance to remove the plug
from the socket.
6. Do not touch the internal cooling elements, especially if
your hands are wet, since you could burn or hurt yourself.
Do not eat ice cubes straight out of the freezer.
7. Before doing any cleaning, disconnecttheappliancefrom
theelectricity (by pulling out theplug orturning offthe gen-
eral switch in your home).
8.Beforedisposing of youroldappliance,remembertobreak
or remove the lock as a safety measure to protect children
who might lock themselves inside the appliance when play-
ing.
9. If your appliance is not operating properly, before calling
your after-sales service read the chapter on “Trouble Shoot-
ing” which might help you resolve the problem. Do not at-
temptto repairthe fault by interveningonthe internal com-
ponents.
Installation
in compliance with all current electrical regulations. If the
system is not earthed, the manufacturer declines all liability
for consequent damages or losses. Do not use adapters of
multiple sockets.
FOR ENGLISH MARKET ONLY
This appliance is fitted with a continental 2-pim plug for
factory testing. Before installation the plug should be cut
off. The appliance is designed to be installed in a switched
spur outlet fused at13 Ampere. If the installation requires a
13 Ampere plug type to be fitted it should be conform to
BS1363.
Check the power load
Theelectricalsocketmustsupportthemaximumpowerload
of the appliance shown on the data plate.
Before plugging the appliance to the mains
Standtheappliance upright and wait at least 3 hoursbefore
plugging the appliance into the mains to ensure proper per-
formance.
Proper installation of the appliance is essential to en-
sure the best and most efficient performance of your
appliance.
Ventilation
Thecompressorproduceheatandthereforerequireadequate
ventilation; the appliance should therefore be installed only
in a room with doors or windows in order to ensure proper
air circulation. Remember that the room should not be too
humid.
Install the appliance away from heat
sources
The appliance should be installed at least 60 cm away from
cookers, boilers, cookers with ovens, fireplaces and chim-
neys and at least 3 cm away from the wall.
Levelling
The floor should be perfectly level; if not, you can adjust the
feet at the front of the appliance.
Earthing
Beforemaking the electrical connection, check that the volt-
age shown on the data plate, that you will find on the bot-
tom left hand side of the appliance next to the crisper, cor-
respondsto that of yourhomeandthatthesocketisearthed
9GB
Compartment for freezing and storage
Storage compartments
Control Panel
Defrost water drain system
A closer look
B
A
C
D
B
A
C

10
GB
a
A
B
cdb
adbc
Fig. 1
Control Panel
Recessed freezers have 2 different types of control panel as
shown in figure 1; corresponding with the one on the
appliance your have purchased.
Thermostat ’’a’’
This regulates the temperature inside the appliance
automatically. Turn the knob from setting 1 to 3 for
increasingly colder temperatures.To adjust the thermostat,
use a coin to turn the knob.
Green Light ’’b’’
Type “A” control panel.
When the light is on (move the switch to the right) this
indicates that the appliance is connected to the mains.
When the switch is moved to the left (green light covered),
the appliance is disconnected from the mains.
Type “B” control panel.
When lit it shows the appliance is connected to the mains.
Yellow Light ’’c’’
Type “A” control panel.
When this light is on (move the switch to the left), the
compressor will operate continuously to reach the lower
temperatures necessary for freezing fresh foods quickly.
By moving the switch to the right (yellow light covered) the
freezer is operated by the thermostat.
Type “B” control panel.
When lit (on setting “S”)thecompressorruns continuously
to reach the low temperatures necessary for freezing fresh
foods. When off, the freezer is operated by the thermostat.
Red Light ’’d’’
Thislight goesonwhen the temperatureinsidethe appliance
is not sufficient to preserve foodstuffs.
Setting up tour appliance
ATTENTION
After transport stand the appliance upright and wait
at least 3 hours before plugging the appliance into the
mains to ensure proper performance.
Use these average temperature settings to ensure op-
timum performance and save energy.
Oncethe appliance has been connectedtothemains, ensure
that the green light is on and turn the yellow light on as
well.
When the red light is off, turn off the yellow light: the
appliance is now ready for use.

11 GB
Using your freezer
Freezing
- Remember that you should never re-freeze products you
have allowed to thaw, even if only partially: cook the food,
then either eat (within 24 hours) or re-freeze it.
- When freezing fresh foods, remember that they should
nottouch other previouslyfrozenordeepfrozenfoods. Place
the food that you wish to freeze in the top compartment
where the temperature will fall below -18°C, ideal for
freezing food properly. Remember that proper conservation
depends on the speed of freezing.
- Do not open the freezer door during freezing.
- Freeze only the quantities (in kg) shown on the data plate.
Important: never freeze more than the nominal amount of
food .indicated on the rating plate at one time.
- If a large amount of food is introduced for freezing at one
time, the freezer temperature may momentarily increase
inside the compartment (red light on). Since this is just a
transient situation, the foods already stored in the freezer
will not be harmed.
- After 24 hours, freezing will be completed, turn off the
yellow light.
Important: .Remember to carry out this last step in order
to save energy.
- For the best conservation and defrosting, remember to
freeze small portions; this will ensure rapid and uniform
freezing. Mark the freezing date and description of the
contents on the package, as shown in the table.
- In the case of power failure or breakdown, do not open
the freezer door. This will help maintain the temperature
inside the freezer ensuring that foods are conserved for at
least 9-14 hours.
- Do not store full bottles in the freezer since they could
explode when they freeze. (Remember that liquids increase
in volume when frozen).
- Fill the ice trays so that they are no more than 3/4 full.
Preservation of Foodstuffs
To preserve frozen and deep-frozen foods well, never set
the thermostat below 1, no matter what the room tempe-
rature is.
For room temperatures from 25°C to 27°C the knob should
be set between 1 and 2 while for room temperatures of up
to 32°C, set between 2 and 3.
The maximum storage times for frozen foods are indicated
in the tables “Guide for using the freezer.
Always follow the instructions on the packages of deep
frozen foods carefully and if there are no instructions
neverkeep the food for more than 3 months from the date
of purchase.
Whenbuying deep-frozenfoods, ensurethat they have been
stored at appropriate temperatures and that the wrapping
is intact.
To keep the quality of the deep-frozen food unlatered,
transfer it to special containers and then place it inside the
storage compartment as soon as possible.
Ifapacking shows signs of moistureand abnormalswelling,
it has probably been stored at the wrong temperature and
the contents have been spoiled.

12
GB
Caring for your appliance
Before doing any cleaning, disconnect the appliance
from the electricity (by pulling out the plug orturning
off the general switch in your home).
Defrosting
Thefrostshould beremovedfromthe walls oftheappliance
periodically.
Never use sharp metal objects to remove frost because they
could pierce the cooling circuit and damage the freezer
beyong repair.
Use the plastic scraper provided for this purpose.
To defrost the appliance completely (this should be done
once or twice a year), turn off the green light and leave the
door open until the frost has completely thawed.
A defrost water collection system is situated at the bottom
of this appliance “D” as shown in figure 2.
To speed up defrosting, place one or more basins of warm
water inside the appliance.
Whendefrosting,removethefrozenfoodfromtheappliance,
wrapit in newspaper and store in a coolplace. Since the rise
in temperature will shorten the storage life of the food, it
should be used as soon as possible.
Fig. 2
Trouble shooting
The appliance is noisy.
Check that:
••
••
•The appliance is perfectly level;
••
••
•Theappliance has been installed betweencabinetsorother
items that vibrate or are noisy.
••
••
•Remember that the refrigerating gas in the cooling circuit
causes a slight bubbling sound, even when the compressor
is not running (this is quite normal).
If after making these checks you still find your appliance
doesn’t work properly, call a Service Centre, and describe
the problem. Make sure that you know the model code
and the relative numbers printed on the data plate located
on the bottom left hand side of the appliance next to the
crisper.
Never call unauthorized personnel and insist on the
use of original spare parts.
Green Light Off
Check that:
••
••
•there is no power failure
••
••
•the general switch or circuit breaker in your home is not
disconnected
Red Light always On
Check that:
••
••
•the door is shut properly and that the door seals are not
damaged;
••
••
•thethermostattemperatureknob is on the correctsetting;
••
••
•there is not too much frost on the inside walls.
Compressor operates continuously
Check that:
••
••
•the yellow light is not on (continuous operating function);
••
••
•the thermostat is in the correct position.
Cleaning and maintenance
Therefrigeratorshouldbecleaned periodicallywitha solution
ofbicarbonate of soda andwarmwater.Neveruse abrasives,
detergents or soaps; after washing, rinse with clean water
and dry with care.
When these operations have been completed, turn on the
green light and set the thermostat knob to the appropriate
operating position.
After 2 or 3 hours, the appliance will once again be ready
for preserving frozen and deep-frozen foods.

13 GB
Guide for using the freezer
Meat and fish
Food Wrapping Tenderising
(days) Storage
(months) Thawing Time
Beef Roast Tinfoil 2 / 3 9 / 10 Not required.
Lamb Tinfoil 1 / 2 6 Not required.
Pork Roast Tinfoil 1 6 Not required.
Veal Roast Tinfoil 1 8 Not required.
Veal/Pork Chops Each piece wrapped in cling wrap and then
in tinfoil (4 to 6 slices) 6Not required.
Veal/Lamb Cutlets Each piece wrapped in cling wrap and then
in tinfoil (4 to 6 slices) 6Not required.
Minced Meat In aluminium containers covered with cling
wrap. Freshly
minced 2Slowly in refrigerator.
Heart and Liver Plastic Baggies 3 Not required.
Sausages Cling Wrap or Tinfoil 2 As necessary.
Chicken and Turkey Tinfoil 1 / 3 9 Very slowly in refrigerator.
Duck and Goose Tinfoil 1 / 4 6 Very slowly in refrigerator.
Pheasant, Partrige and
Wild Duck Tinfoil 1 / 3 9 Very slowly in refrigerator.
Hare and Rabbit Tinfoil 3 / 4 6 Very slowly in refrigerator.
Venison Tinfoil or Cling Wrap 5 / 6 9 Very slowly in refrigerator.
Large Fish Tinfoil or Cling Wrap 4 / 6 Very slowly in refrigerator.
Small Fish Plastic Baggies 2 / 3 Not required.
Crustaceans Plastic Baggies 3 / 6 Not required.
Shellfish Store in salted water in aluminium
containers or plastic containers. 3Very slowly in refrigerator.
Boiled Fish Tinfoil or Cling Wrap 12 In hot water.
Fried Fish Plastic Baggies 4 / 6 Directly in pan.

14
GB
Fruit and vegetable
Food Preparation Blanching
Time Wrapping Storage
(months) Thawing Time
Apples and Pears Peel and cut into slices. 2' In Containers (cover
with syrup) 12 In refrigerator very
slowly.
Apricots, Peaches,
Cherries and Plums Peel and pit. 1' / 2' In Containers (cover
with syrup) 12 In refrigerator very
slowly.
Strawberries
Blackberries and
Raspberries Rinse and fry. In Containers (cover
with sugar) 10 / 12 In refrigerator very
slowly.
Cooked Fruit Cut, cook and strain. In Containers (add
10% sugar) 12 In refrigerator very
slowly.
Fruit Juice Wash, cut and crush. In Containers (sugar
to taste) 10 / 12 In refrigerator very
slowly.
Cauliflower
Remove leaves, cut head into
small pieces and blanch in
water and a little lemon
juice.
2' Plastic Baggies 12 Not required.
Cabbage and Brussel
Sprouts Wash and cut into small
pieces. 1' / 2' Plastic Baggies 10 / 12 At room temperature.
Peas Shell and wash. 2' Plastic Baggies 12 Not required.
French Beans Wash and slice if required. 2 Plastic Baggies 10 / 12 Not required.
Carrots, Peppers and
Turnips Peel, wash and slice if
necessary. 3' / 4' Plastic Baggies 12 Not required.
Mushrooms and
Asparagus Wash, peel and cut up. 3' / 4' Plastic Baggies or
Containers 6At room temperature.
Spinach Wash and mince. 2' Plastic Baggies 12 At room temperature.
Vegetable for Soups Wash and cut up in small
pieces. 3' Plastic Baggies or
Containers 6 / 7 Not required.
Various Foods Preparation Blanching
Time Wrapping Storage
(months) Thawing time
Bread Plastic Baggies 4 At room temperature
and in the oven.
Cakes Plastic Baggies 6 About 10 minutes at
room temperature, cook
at 100/200°C.
Cream Plastic Containers 6 At room temperature or
in refrigerator.
Butter In original wrapping
or tinfoil 6In refrigerator.
Boiled Food or
Vegetable Soup Plastic or Glass
Containers 3 / 6 At room temperature or
in hot water.
Eggs Freeze without shells
in small containers 10 At room temperature or
in refrigerator.

15 F
La sècuritè, une bonne habitude
1. Cetappareilne doit pas êtreinstallé en plein air mêmes’il
s’agit d’un endroit abrité; il est très dangereux de le laisser
exposé à la pluie et aux intempéries.
2. Seuls les adultes doivent l’utiliser et exclusivement pour
conserver les aliments en suivant le mode d’emploi qu’indi-
que ce manuel.
3. Il ne faut ni toucher ni utiliser l’appareil pieds nus ou avec
les mains ou les pieds mouillés.
4. Nous déconseillons d’utiliser des rallonges et des fiches
multiples. Il faut vérifier que le câble ne soit ni plié, ni
dangereusement comprimé.
Installation
ATTENTION
Lire attentivement les avertissements contenus dans ce li-
vret car ils fournissent des indications importantes pour la
sécurité de l’installation, de l’utilisation et de l’entretien.
Ce congélateur a été construit conformément aux normes
internationales de sécurité qui ont pour but de protéger le
consommateur. Cet appareil a en effet obtenu le label IMQ
que les techniciens de l’Institut Italien de Qualité n’accor-
dent qu’aux appareils conformes aux normes du CEI: Co-
mité Electrotechnique Italien.
5. Il est très dangereux de tirer le câble ou le congélateur
pour débrancher la fiche.
6.Netouchez jamais lespartiesinternes refroidissantesavec
les mains mouillées, vous pourriez vous brûler ou vous bles-
ser. Ne mettez jamais dans la bouche les glaçons qui vien-
nent de sortir du freezer, vous pourriez vous brûler.
7. Avant de procéder à toute opération de nettoyage, dé-
brancher l'appareil du réseau d'alimentation ( en débran-
cher la fiche ou l'interrupteur général de l'habitation).
8. Avant de rendre le réfrigérateur usé, il faut mettre hors
d’usage la serrure pour éviter que les enfants, en jouant,
puis sent rester enfermés dans l’appareil.
9. En cas de panne, avant de téléphoner au service Après-
Vente, nous conseillons de vérifier grâce au chapitre “Que
faire?”que l’inconvénient puisse êtrefacilement éliminé. Ne
tentez pas de réparer la panne en essayant d’accéder aux
composants internes.
La mise à terre
Avant d’effectuer la liaison électrique, vérifiez que le vol-
tageindiquésurla plaquettedescaractéristiquescorresponde
à celui de votre appartement et que la prise soit équipée
d’une régulière mise à terre ainsi que prescrit la loi sur la
sécuritédesinstallations 46/90. S’il n’y a pas de miseàterre,
la maison décline toute responsabilité.
N’utilisez pas de dérivateurs ou d’adapteurs.
La puissance est-elle suffisante?
La prise électrique doit pouvoir supporter le maximum de
charge de puissance de l’appareil qui est indiqué sur la pla-
quette des caractéristiques.
Avant de brancher l’appareil
Après le transport et avant de brancher l’appareil, il est con-
seillé d’attendre environ 3 heures pour obtenir un fonction-
nement optimal.
Pour garantir un bon fonctionnement et une consom-
mation contenue d’électricité, il est important que l’ap-
pareil soit correctement installé.
L’aération
Le compresseur produit de la chaleur et impliquent donc
une bonne aération.
L'appareil doit être installé dans une pièce pourvue de fenê-
tre ou de porte-fenêtre qui garantisse le changement de
l'air et peu d'humiditè.
Loin de la chaleur
L’appareil doit être installé à une distance d’au moins 60cm
de poêles, chaudières, radiateurs, cuisinière avec fours et
cheminées et au moins à 3cm de la paroi.
Sur une surface plane
Si le sol n’est pas nivelé, on peut régler les pieds antérieurs

16
F
Vu de près
Compartiment à utiliser pour la congelation et
la conservation
Compartiments à utiliser pour la conservation
Tableau des commandes
Systèmepour l’écoulementde l’eaude dégivrage
B
A
C
D
B
A
C

17 F
a
A
B
cdb
adbc
Fig. 1
Tableau des commandes
Les congélateur à encastrement peuvent avoir 2 différents
types de tableau des commandes qui sont représentés à la
figure 1; prenez en considération le type correspondant à
celui qui se trouve sur l’appareil que vous avez acheté.
Le thermostat ’’a’’
Il règle automatiquement la température à l’intérieur de
l’appareil.Entournant le bouton de la position1àlaposition
5, on peut obtenir des températures de plus en plus froides.
Pour effectuer le réglage du thermostat, tourner le bouton
à l’aide d’une pièce de monnaie.
Le voyant vert ’’b’’
Tableau des commandes type “A”.
Quand il est allumé (interrupteur déplacé vers la droite) il
indiquequel’appareilest branché auréseaud’alimentation.
Endéplaçant l’interrupteurversla gauche (voyantvertcaché),
l’appareil est débranché du réseau d’alimentation.
Tableau des commandes type “B”.
Lorsqu’ilest allumé, cela veut direque l’appareilest connecté
au réseau d’alimentation.
Le voyant jaune ’’c’’
Tableau des commandes type “A”.
Quand il est allumé (interrupteur déplacé vers la gauche) il
indique que le compresseur fonctionne de façon continue
pour atteindre les basses températures nécessaires à la
congélation rapide des denrées fraîches. En déplaçant
l’interrupteur vers la droite (voyant jaune caché) le
congélateur fonctionne suivant le réglage du thermostat.
Tableau des commandes type “B”.
Lorqu’ilestallumé (position“S”)ilpermet lefonctionnement
continuel du compresseur pour atteindre les basses
températures nécessaires à la congélation des denrées
fraiches. Lorsqu’il est éteint il permet au congélateur de
fonctionner selon le réglage du thermostat (position “N”).
Le voyant rouge ’’d’’
Il s’allume pour indiquer que la température à l’intérieur de
l’appareil est insuffisante pour la conservation des aliments.
ATTENTION
Après le transport et avant de brancher l’appareil, il
est conseillé d’attendre environ 3 heures pour obtenir
un fonctionnement optimal.
Pour obtenir un fonctionnement optimal et économi-
que, souvenez-vous de placer la commande du ther-
mostat sur la position de la température moyenne.
Avant de placer les denrées dans le réfrigérateur, nettoyez
lAprèsavoirreliél’appareilau réseau d’alimentation, vérifier
que le voyant vert est bien allumé et allumer également le
voyant jaune.
Une fois le voyant rouge éteint, éteindre le voyant jaune: à
présent, l’appareil est prêt à être utilisé.
Mise en service du congélateur

18
F
Pour bien congeler
- Un aliment décongelé même seulement en partie, ne doit
jamais être recongelé: il faut le cuire pour le consommer
dans les 24 heures.
-Pourleconditionnement des aliments à congeler, consulter
une brochure spécialisée.
- Les aliments frais que l’on doit congeler ne doivent pas
être mis à contact avec ceux qui sont déjà congelés ou
surgelésmais ilfautles placer danslecompartiment supérieur
où la température parvient à -18°C, ce qui est l’idéal pour
biencongeler les aliments. Eneffetil ne fautpas oublier que
la bonne conservation des aliments congelés dépend de la
vitesse de congélation.
- Pendant la congélation, évitez d’ouvrir la porte du
congélateur.
- Congelez seulement la quantité indiquée en Kg. sur la
plaquette des caractéristiques.
- Pour congeler, allumer le voyant jaune puis introduire les
aliments à congeler dans le compartiment supérieur en
veillant à ce que ces derniers soient disposés le plus possible
au contact direct des surfaces réfrigérantes et à ce qu’ils ne
soient pas placés au contact des denrées déjà congelées.
- L’introduction de quantités importantes d’aliments à
congelerpeutfairemonter momentanément la température
à l’intérieur du compartiment freezer (allumage du voyant
rouge). Cette situation étant momentanée, elle ne
compromet pas la bonne conservation des aliments déjà
stockés.
- Au bout de 24 heures, une fois la congélation terminée,
éteindre le voyant jaune.
Attention:il ne faut pas oublier d’effectuer cette opération
pour éviter tout gaspillage d’énergie.
-Pour obteniruneconservation etunecongélation optimales,
nous conseillons de séparer les aliments en petites portions
carainsiilsse congèlerontrapidement etde façonhomogène.
Surlespaquetsécrivez les indications concernantle contenu
etla datedecongélation, en suivantlesinstructions indiquées
dans le tableau.
- En cas de panne de courant, évitez d’ouvrir la porte du
congélateur, vous empêcherez ainsi que la température
s’élèveà l’intérieur.Les produitscongeléset surgeléspourront
être ainsi conservés sans altération pendant 9/14 heures.
- N’introduisez pas dans le congélateur de bouteilles
contenant des boissons gazeuses: elles pourraient se briser
étant donné qu’en gelant tous les liquides augmentent leur
volume.
- Remplissez les bacs à glaçons jusqu’ à 3/4 de leur hauteur.
Conservation
Pour assurer une bonne conservation des produits surgelés
ou des aliments congelés, ne jamais placer le repère du
bouton du thermostat sur une position inférieure à 1, quelle
que soit la température ambiante. Pour des températures
ambiantes allant jusqu’à 25-27°C, le repère du thermostat
devraêtre placé entre1et2alorsquepourdestempératures
ambiantes allant jusqu’à 32°C, il devra être placé entre 2 et
3.
Lesdurées maximum de conservation des alimentscongelés
sont indiquées sur les tableaux “Guide pour l’utilisation du
congélateur”..
Suivez toujours attentivement les instructions qui figurent
sur l’emballage des produits surgelés et au cas oû aucune
indication ne figurerait sur l’emballage, il est conseillé de ne
pas conserver ces aliments plus de trois mois après la date
d’achat.
Lorsqu’onachète des aliments surgelés, il fauts’assurerqu’ils
aientbienété conservésàunetempératureadéquate et que
l’emballage soit intact.
Pourconserver aux aliments surgelésleursqualités naturelles,
il est conseillé de les transporter dans des récipients ou dans
dessachets prévus à cet effetet de les introduireau plus vite
dans votre congélateur.
Si l’emballage présente des traces d’humidité ou bien s’il est
gonflé de façon anormale, cela signifie qu’il n’a
probablement pas été conservé à la température adéquate
et que son contenu s’est détérioré.
Comment l'utiliser au mieux
This manual suits for next models
1
Table of contents
Languages:
Other Smeg Freezer manuals

Smeg
Smeg CO205F User manual

Smeg
Smeg UKC7280FP1 User manual

Smeg
Smeg FC34XPNF User manual

Smeg
Smeg UKVI144A User manual

Smeg
Smeg WCP32SB User manual

Smeg
Smeg FA120A User manual

Smeg
Smeg CVB20LP1 User manual

Smeg
Smeg Built In Freezer VR115B User manual

Smeg
Smeg CO100 User manual

Smeg
Smeg FAB28AWL1 User manual
Popular Freezer manuals by other brands

Glastender
Glastender DI-FR Operation manual

Schaub Lorenz
Schaub Lorenz SL FE225WE user manual

OCEANAIRE
OCEANAIRE CAC series Engineering, installation and service manual

Delta
Delta ERD124 user manual

Thermo Forma
Thermo Forma Power Plus 8500 Series Operating and maintenance manual

Waeco
Waeco COOLFUN CD 28 instruction manual