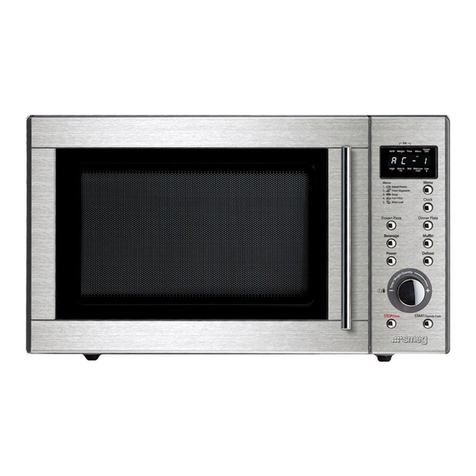
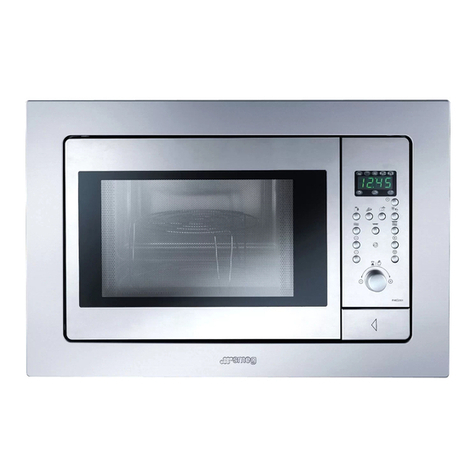
Smeg MOE25X User manual

MOE25X
IT
EN
FR
DE
NL
ES
PT
RU
PL
MANUALE D’USO
FORNI A MICROONDE
INSTRUCTION MANUAL
MICROWAVE OVENS
MANUEL D’UTILISATION
FOURS A MICRO-ONDES
GEBRAUCHSANWEISUNG
MIKROWELLENHERD
GEBRUIKSAANWIJZING
MAGNETRON OVEN
MANUAL DE USO
HORNOS MICROONDAS
РУКОВОДСТВО ПО ЭКСПЛУАТАЦИИ
МИКРОВОЛНОВАЯ ПЕЧЬ
INSTRUKCJA UŻYTKOWNIKA
KUCHENKA MIKROFALOWA
MANUAL DE UTILIZAÇÃO
FORNOS MICROONDAS

ITALIANO
1Gentile Cliente, desideriamo ringraziarLa per la fiducia accordataci.
Scegliendo un nostro prodotto, Lei ha optato per soluzioni in cui la ricerca estetica, abbinata ad una
progettazione tecnica innovativa, offre oggetti unici che diventano elementi d’arredo.
AugurandoLe di apprezzare appieno le funzionalità del Suo elettrodomestico, Le porgiamo i nostri più cordiali
saluti.
1
ENGLISH
1Dear customer, we would like to thank you for your confidence in us.
By choosing one of our products, you have opted for solutions where research for beauty meets innovative
technical design to provide unique objects which become pieces of furniture.
We hope you get the most out of your household appliance.
Kindest regards.
1
FRANÇAIS
1Cher Client, nous souhaitons vous remercier pour la confiance que vous nous accordez.
En choisissant l’un de nos produits, vous avez opté pour des solutions dont la recherche esthétique, associée à
une conception technique innovante, offre des objets uniques qui deviennent des éléments de décoration. Tout en
vous souhaitant d'apprécier pleinement les fonctions de votre appareil électroménager, nous vous présentons nos
salutations les plus cordiales.
1
DEUTSCH
1Sehr geehrter Kunde, wir danken Ihnen für Ihr Vertrauen.
Mit der Wahl eines unserer Produkte haben Sie sich für Lösungen entschieden, deren Ästhetik und innovativer
technischer Entwurf Einrichtungsgegenstände von besonderem Design schaffen.
In der Hoffnung, dass Sie die Funktionen Ihres Haushaltsgerätes voll und ganz genießen und schätzen werden,
verbleiben wir mit freundlichen Grüßen.
1
NEDERLANDS
1Geachte klant, we danken u hartelijk voor het in ons gestelde vertrouwen.
Door voor een van onze producten te kiezen hebt u gekozen voor oplossingen met een esthetiek en innovatief
technisch ontwerp die resulteren in unieke voorwerpen die een onderdeel van uw meubilair zullen worden.
We hopen dat u de functionaliteiten van uw huishoudtoestel ten volle zal waarderen.
Met hoogachting
1
ESPAÑOL
1Estimado Cliente, deseamos darle las gracias por la confianza que ha depositado en nosotros.
Al elegir uno de nuestros productos, usted ha optado por soluciones en que la búsqueda estética, combinada
con una proyectación técnica innovadora, ofrece objetos únicos que se convierten en elementos de decoración.
Deseándole que pueda apreciar plenamente las funcionalidades de su electrodoméstico, le enviamos nuestros
saludos más cordiales.
1
PORTUGUÊS
1Caro Cliente, queremos agradecer-lhe pela confiança que em nós deposita.
Ao escolher um produto nosso, optou por soluções em que a procura estética, combinada com uma concepção
técnica inovadora, oferece objetos únicos que se transformam em elementos de decoração. Desejando-lhe que
desfrute totalmente das funcionalidades do seu eletrodoméstico, enviamos-lhe os nossos mais sinceros
cumprimentos.
1
РУССКИЙ
1Уважаемый клиент! Благодарим вас за оказанное нам доверие.
Приобретенная вами продукция нашей марки предоставляет решения, в которых изысканная эстетика в
сочетании с инновационным техническим дизайном воплощена в уникальные изделия, идеально
сочетающиеся с элементами интерьера.
Надеемся, что вы в полной мере оцените разнообразные функции вашего электроприбора. Выражаем
вам наше глубокое уважение.
1
POLSKI
1Szanowni Klienci, dziękujemy za okazane nam zaufanie.
Wybierając jeden z naszych produktów, wybrali Państwo rozwiązanie, które łącząc walory estetyczne z
innowacyjnym wzornictwem technicznym, oferuje unikatowe przedmioty wyposażenia wnętrz.
Mamy nadzieję, że będą Państwo mogli w pełni korzystać z funkcjonalności tego urządzenia.
Serdecznie pozdrawiamy.
1
Contents
25
EN
1 Instructions 26
1.1 General safety instructions 26
1.2 Instructions for using microwaves 27
1.3 To Reduce the Risk of Injury to Persons Grounding Installation 29
1.4 Manufacturer liability 29
1.5 Appliance purpose 30
1.6 Identification plate 30
1.7 Disposal 30
1.8 This user manual 31
1.9 How to read the user manual 31
2 Description 32
2.1 Names of Oven Parts and Accessories 32
2.2 Specifications 33
3 Use 34
3.1 Turntable Installation 34
3.2 Utensils 34
3.3 Materials you can use in microwave oven 35
3.4 Materials to be avoided in microwave oven 36
3.5 Operation Instructions 36
4 Cleaning and maintenance 44
4.1 Instructions 44
5 Installation 45
5.1 Countertop Installation 45
We advise you to read this manual carefully, which contains all the instructions for
maintaining the appliance’s aesthetic and functional qualities.
For further information on the product: www.smeg.com

Instructions
26
1 Instructions
IMPORTANT SAFETY INSTRUCTIONS
PLEASE READ CAREFULLY AND RETAIN FOR FUTURE USE.
1.1 General safety instructions
Risk of personal injury
• WARNING: If the door or the
door seal is damaged, the oven
must not be used until it has been
repaired by a competent person.
• WARNING: It is hazardous for
anyone other than a competent
person to carry out any service or
repair operation which involves
the removal of a cover which
offers protection against exposure
to microwave energy.
• WARNING: Liquids and other
foods must not be heated in
sealed containers since they are
liable to explode.
• WARNING: During use the
appliance and its accessible parts
become very hot.
• Never touch the heating elements
during use.
• Keep children under eight years
of age at a safe distance if they
are not constantly supervised.
• This appliance may be used by
children aged at least 8 and by
people of reduced physical and
mental capacity, or lacking in
experience in the use of electrical
appliances, as long they are
supervised or instructed by adults
who are responsible for their
safety.
• Children must never play with the
appliance.
• The appliance must never be
cleaned by unsupervised children.
• Switch off the appliance
immediately after use.
• If smoke is emitted, switch off or
unplug the appliance and keep
the door closed in order to stifle
any flames.
• Never attempt to extinguish a
flame or fire with water.
• Have qualified personnel carry
out installation and assistance
interventions according to the
standards in force.
• Do not modify this appliance.
• Do not insert pointed metal
objects (cutlery or utensils) into the
slots in the appliance.
• Do not try to repair the appliance
yourself or without the intervention
of a qualified technician.
• If the power supply cable is
damaged, contact technical
support immediately and they will
replace it.

Instructions
27
EN
Risk of damaging the appliance
• Do not use abrasive or corrosive
detergents on glass parts (e.g.
powder products, stain removers
and metallic sponges).
• Use wooden or plastic utensils.
• Do not use a steam jet to clean
the appliance.
• Do not obstruct ventilation
openings and heat dispersal slots.
• Never leave the appliance
unattended during cooking
operations where fats or oils
could be released.
• Do not use the appliance to heat
rooms for any reason.
• Do not rest any weight or sit on
the open door of the appliance.
• Take care that no objects are
stuck in the doors.
1.2 Instructions for using
microwaves
• Check the appliance visually
during the cooking of foods in
plastic or paper containers.
• Use the microwave only for the
preparation of food for
consumption. Other types of
applications are strictly forbidden
(e.g. drying clothes, warming
slippers, sponges, wet cloths or
the like, dehydrating foods)
because they can lead to the risk
of injury or fire.
• Clean the appliance constantly
and remove any food residue.
• Do not use the microwave to dry
food.
• Do not use the microwave to heat
oils or fry.
• Do not use the appliance to heat
foods or beverages containing
alcohol.
• Baby food should not be heated
in sealed containers. Remove the
cover or the teat (in the case of
baby bottles). Always check the
preparation's temperature once
heating has completed, it should
not be too high. For an even
temperature and to avoid
scalding stir or shake the contents.
• Do not heat eggs in their shells or
whole hard boiled eggs; they
may explode even after the

Instructions
28
heating process has completed.
• Before cooking food with a hard
skin or peel (e.g. potatoes,
apples, etc.) it is necessary to
puncture the skin.
• Do not heat food contained within
food packages.
• Do not use the microwave
functions when the oven is empty.
• Use cookware and utensils that
are suitable for use in a
microwave oven.
• Do not use aluminium containers
to cook food.
• Do not use dishes with metallic
decorations (gold-plated or
silver).
• The appliance operates in the
2.4GHz ISM band.
• In compliance with the provisions
relating to electromagnetic
compatibility the appliance
belongs to group 2 and class B
(EN 55011).
The instructions for use for fixed
appliances and built-in appliances
being used equal or higher than
900 mm above the floor and having
detachable turntables shall state that
care should be taken not to displace
the turntable when removing
containers from the appliance. This is
not applicable for appliances with
horizontal bottom hinged door.
This appliance complies with the
standards and directives currently in
force concerning safety and
electromagnetic compatibility. It is
however recommended for
pacemaker wearers to maintain a
minimum distance of 20-30 cm
between the microwave when it is
operating and the pacemaker.
Consult the pacemaker manufacturer
for more information.

Instructions
29
EN
1.3 To Reduce the Risk of Injury to
Persons Grounding Installation
1. A short power-supply cord is provided to
reduce the risks resulting from becoming
entangled in or tripping over a longer
cord.
2. If a long cord set or extension cord is
used:
• The marked electrical rating of the cord
set or extension cord should be at least
as great as the electrical rating of the
appliance.
• The extension cord must be a grounding-
type 3-wire cord.
• The long cord should be arranged so
that it will not drape over the counter top
or tabletop where it can be pulled on by
children or tripped over unintentionally.
1.4 Manufacturer liability
The manufacturer declines all liability for
damage to persons or property caused by:
• Use of the appliance other than the one
envisaged;
• Non-observance of the user manual
provisions;
• Tampering with any part of the
appliance;
• Use of non-original spare parts.
Power voltage
Danger of electrocution
• Electric Shock Hazard Touching some of
the internal components can cause
serious personal injury or death. Do not
disassemble this appliance.
• Electric Shock Hazard
• Improper use of the grounding can result
in electric shock.
• Do not plug into an outlet until appliance
is properly installed and grounded.
• This appliance must be grounded. In the
event of an electrical short circuit,
grounding reduces the risk of electric
shock by providing an escape wire for
the electric current.
• This appliance is equipped with a cord
having a grounding wire with a
grounding plug. The plug must be
plugged into an outlet that is properly
installed and grounded.
• Consult a qualified electrician or
serviceman if the grounding instructions
are not completely understood or if
doubt exists as to whether the appliance
is properly grounded.
• If it is necessary to use an extension
cord, use only a 3-wire extension cord.

Instructions
30
1.5 Appliance purpose
• This appliance is intended for cooking
food in the home environment. Every
other use is considered inappropriate. It
cannot be used:
• in employee kitchens, shops, offices
and other working environments.
• in farms/agritourism establishments.
• by guests in hotels, motels and
residential environments.
• in bed and breakfast establishments.
• The appliance is not designed to
operate with external timers or with
remote-control systems.
1.6 Identification plate
• The identification plate bears the
technical data, serial number and brand
name of the appliance. Do not remove
the identification plate for any reason.
1.7 Disposal
This appliance must be disposed of
separately from other waste
(Directives 2002/95/EC, 2002/
96/EC, 2003/108/EC). The appliance
does not contain substances in quantities
sufficient to be considered hazardous to
health and the environment, in accordance
with current European directives.
To dispose of the appliance:
• Cut the power supply cable and remove
it along with the plug (if present).
• Deliver the appliance to the appropriate
recycling centre for electrical and
electronic equipment waste, or return it to
the retailer when purchasing an
equivalent product, on a one for one
basis.
Our appliances are packed in non-
polluting and recyclable materials.
• Deliver the packing materials to the
appropriate recycling centre.
Power voltage
Danger of electrocution
• Disconnect the main power supply.
• Disconnect the power cable from the
electrical system.
Plastic packaging
Danger of suffocation
• Do not leave the packaging or any part
of it unattended.
• Do not let children play with the
packaging plastic bags.

Instructions
31
EN
1.8 This user manual
This user manual is an integral part of the
appliance and must therefore be kept in its
entirety and within the user’s reach for the
whole working life of the appliance.
• Read this user manual carefully before
using the appliance.
1.9 How to read the user manual
This user manual uses the following reading
conventions:
1. Use instruction sequence.
• Single use instruction.
Instructions
General information on this user
manual, on safety and final
disposal.
Description
Description of the appliance and its
accessories.
Use
Information on the use of the
appliance and its accessories,
cooking advice.
Cleaning and maintenance
Information for proper cleaning and
maintenance of the appliance.
Installation
Information for the qualified
technician: Installation, operation
and inspection.
Safety instructions
Information
Advice

Description
32
2 Description
2.1 Names of Oven Parts and Accessories
1 Control panel
2 Turntable shaft
3 Turntable ring assembly
4 Glass tray
5 Observation window
6 Door assembly
7 Safety interlock system
8 Grill Rack (Only be used in grill function
and be placed on the glass tray)
1
234
5
8
6
7
7

Description
33
EN
2.2
Specifications
Model: MOE25X
Rated Voltage: 230V~50 Hz
Rated Input Power
(Microwave): 1450 W
Rated Output Power
(Microwave): 900 W
Rated Input Power
(Grill): 1100 W
Oven Capacity: 25 L
Turntable Diameter: Ø 315 mm
External Dimensions: 514x428x304 mm
Net Weight: Approx. 16,2 kg

Use
34
3 Use
Remove the oven and all materials from the
carton and oven cavity.
Your oven comes with the following
accessories:
• Glass tray.
• Turntable ring assembly.
• Instruction Manual.
3.1 Turntable Installation
1. Hub (underside)
2. Glass tray
3. Turntable shaft
4. Turntable ring assembly
• Never place the glasstray upside down.
The glass tray should never be restricted.
• Both glass tray and turntable ring
assembly must always be used during
cooking.
• All food and containers of food are
always placed on the glass tray for
cooking.
• If glass tray or turntable ring assembly
cracks or breaks, contact your nearest
authorized service center.
3.2 Utensils
See the instructions on ”Materials you can
use in microwave oven”. There may be
certain non-metallic utensils that are not safe
to use for microwaving. If in doubt, you can
test the utensil in question following the
procedure below.
Utensil Test:
1. Fill a microwave-safe container with 1
cup of cold water (250 ml) along with
the utensil in question.
2. Cook on maximum power for 1 minute.
3. Carefully feel the utensil. If the empty
utensil is warm, do not use it for
microwave cooking.
4. Do not exceed 1 minute cooking time.
2 1
3
4
Caution
Personal Injury Hazard
It is hazardous for anyone other than a
competent person to carry out any service
or repair operation that involves the
removal of a cover which gives protection
against exposure to microwave energy.

Use
35
EN
3.3 Materials you can use in microwave oven
Utensils Remarks
Aluminum foil
Aluminum foil Shielding only. Small smooth pieces can be used to cover thin parts
of meat or poultry to prevent overcooking. Arcing can occur if foil is too close to
oven walls. The foil should be at least 1 inch (2.5cm) away from oven walls.
Browning dish
Follow manufacturer's instructions. The bottom of browning dish must be at least
3/16 inch (5mm) above the turntable. Incorrect usage may cause the turntable
to break.
Dinnerware Microwave-safe only. Follow manufacturer's instructions. Do not use cracked or
chipped dishes.
Glass jars Always remove lid. Use only to heat food until just warm. Most glass jars are not
heat resistant and may break.
Glassware Heat-resistant oven glassware only. Make sure there is no metallic trim. Do not
use cracked or chipped dishes.
Oven cooking bags Follow manufacturer's instructions. Do not close with metal tie. Make slits to allow
steam to escape.
Paper plates and cups Use for short-term cooking/warming only. Do not leave oven unattended while
cooking.
Paper towels Use to cover food for reheating and absorbing fat. Use with supervision for a
short-term cooking only.
Parchment paper Use as a cover to prevent splattering or a wrap for steaming.
Plastic
Microwave-safe only. Follow the manufacturer's instructions. Should be labeled
"Microwave Safe". Some plastic containers soften, as the food inside gets hot.
"Boiling bags" and tightly closed plastic bags should be slit, pierced or vented
as directed by package.
Plastic wrap Microwave-safe only. Use to cover food during cooking to retain moisture. Do
not allow plastic wrap to touch food.
Thermometers Microwave-safe only (meat and candy thermometers).
Wax paper Use as a cover to prevent splattering and retain moisture.

Use
36
3.4 Materials to be avoided in microwave oven
3.5 Operation Instructions
Clock Setting
When the microwave oven is electrified, the
screen will display “0:00”, buzzer will ring
once.
1. Press once to select clock
function, the hour figures will flash.
2. Turn to adjust the hour figures, the
input time should be within 0-23.
3. Press , the minute figures
will flash.
4. Turn to adjust the minute figures,
the input time should be within 0-59.
5. Press to finish clock
setting. “:” will flash, and the time will
light.
Utensils Remarks
Aluminum tray May cause arcing. Transfer food into microwave-safe dish
Food carton with metal
handle May cause arcing. Transfer food into microwave-safe dish.
Metal or metal- trimmed
utensils Metal shields the food from microwave energy. Metal trim may cause arcing.
Metal twist ties May cause arcing and could cause a fire in the oven.
Paper bags May cause a fire in the oven.
Plastic foam Plastic foam may melt or contaminate the liquid inside when exposed to high
temperature.
Wood Wood will dry out when used in the microwave oven and may split or crack
Clock/Timer
Clock/Timer
1) If the clock is not set, it would not
function when powered.
2) During the process of clock
setting, if you press
, the oven will go
back to the previous status
automatically.
Clock/Timer
Stop/Clear

Use
37
EN
Microwave Cooking
1. Press once, once, the
screen will display “90W”.
2. Press for times or turn
to choose the power you want, and
“90W”, “270W”, “450W”, “720W” or
“900W” will display for each added
press. Then press
to confirm,
and turn to set cooking time from
0:05 to 95:00.
3. Press again to
start cooking.
Example: If you want to use microwave
power to cook for 20 minutes, you can
operate the oven as the following steps:
1. Press once, the screen
displays “90W”.
2. Press once again or turn
to choose medium low.
3. Press to
confirm, and the screen displays
“270W”.
4. Turn to adjust the cooking time until
the oven displays “20:00”.
5. Press to start
cooking.
Pad instructions
Microwave
Microwave
Start/+30Sec./Confirm
Microwave
The step quantities for the
adjustment time of the coding
switch are as follow:
• 0-1 min: 5 seconds
• 1-5 min: 10 seconds
• 5-10 min: 30 seconds
• 10-30 min: 1 minute
• 30-95 min: 5 minutes
Microwave
Start/+30Sec./Confirm
Order Display Microwave Power Grill Power
1 90W 10%
2 270W 30%
3 450W 50%
4 720W 80%
5 900W 100%
Microwave

Use
38
Grill or Combi. Cooking
1. Press once, the LED will
display “G“.
2. Press for times or turn
to choose the power you want, and “G”,
“C-1” or “C-2” will display for each
added press. Then press
to confirm,
and turn to set cooking time from
0:05 to 95:00.
3. Press again to
start cooking.
Example: If you want to use 55% microwave
power and 45% grill power (C-1) to cook
for 10 minutes, you can operate the oven as
the following steps.
1. Press once, the screen
displays “G”.
2. Press once angain or turn
to choose combi 1 mode.
3. Press to
confirm, and the screen displays “C-1”.
4. Turn to adjust the cooking time until
the oven displays “10:00”.
5. Press to start
cooking.
Pad instructions
Grill/Combi.
Grill/Combi.
Start/+30Sec./Confirm
Grill/Combi.
Grill/Combi.
Start/+30Sec./Confirm
Order Display Microwave Power Grill Power
1 G 0% 100%
2 C-1 55% 45%
3 C-2 36% 64%
Grill/Combi.

Use
39
EN
Quick Start
1. In waiting state, press
to start
cooking with 100% power, each added
press will increase 30 seconds cooking
time up to 95 minutes.
2. In microwave, grill, combi, cooking or
time defrost state, each press of
can increase
30 seconds of cooking time.
3. In waiting state, turn anti-clockwise
to set cooking time with 100%
microwave power, then press
to start
cooking.
Defrost By Weight
1. Press , once, and the
oven will display “dEF1”.
2. Turn to select the weight of food
from 100 to 2000 g.
3. Press to start
defrosting.
Defrost By T i m e
1. Press , twice, and the oven
will display “dEF2”.
2. Turn to select the defrost time. the
MAX time is 95 minutes.
3. Press to start
defrosting.
Kitchen Timer
1. Press once, the screen will
display 00:00.
2. Turn to enter the correct time.(The
maximum cooking time is 95 minutes.)
3. Press to
confirm setting.
4. When the kitchen time is reached the
buzzer will ring 5 times. If the clock has
been set (24-hour system), the screen
will display the current time.
Start/+30Sec./Confirm
Weight Defrost
Start/+30Sec./Confirm
Time Defrost
Start/+30Sec./Confirm
The kitchen Time is different from
24-hour system. Kitchen Timer is a
timer.
Clock/Timer
Start/+30Sec./Confirm

Use
40
Multi-section cooking
At most 2 sections can be set for cooking. In
multi-section cooking, if one section is
defrosting, then defrosting shall be placed
in the first section.
Example: If you want to defrost food for 5
minutes and then cook with 80% microwave
power for 7 minutes, operate it as the
following:
1. Press , once, and the oven
will display “0:00”.
2. Turn to select the defrost time till
“5:00” display.
3. Press once, the screen
displays “90W”.
4. Press once again or turn
to choose 270W.
5. Press to
confirm, and the screen displays
“270W”.
6. Turn to adjust the cooking time till the
oven displays “7:00”.
7. Press to start
cooking and buzzer will sound once for
the first section, defrosting time counts
down; buzzer will sound once again
entering the second cooking. When
cooking finish, buzzer sounds five times.
Auto Menu
1. Turn right to choose the menu, and
“A-1” to “A-10” will display, which
means pizza, meat, vegetable, pasta,
popcorn.
2. Press to
confirm.
3. Turn to choose the default weight as
the menu chart.
4. Press to start
cooking.
Example: If you want to use "Auto Menu" to
cook fish for 350g.
1. Turn clockwise till "A-4" displays.
2. Press to
confirm.
3. Turn to select the weight of fish till
“350” displays.
4. Press to start
cooking.
Time Defrost
Microwave
Microwave
Start/+30Sec./Confirm

Use
41
EN
The automatic menu procedure:
Menu Weight Display
A-1
PIZZA
200g 200
400g 400
A-2
POTATO
200g 200
400g 400
600g 600
A-3
MEAT
250g 250
350g 350
450g 450
A-3
FISH
250g 250
350g 350
450g 450
A-5
VEGETABLE
200g 200
300g 300
400g 400
A-6
BEVERAGE
1 (about 120ml) 1
2 (about 2400ml) 2
3 (about 360ml) 3
A-7
PASTA
50g 50
100g 100
A-8
POPCORN
50g 50
100g 100
A-9
CAKE 1 CUP 1
A-10
CHICKEN
400g 400
600g 600
1000g 1000
1200g 1200

Use
42
Inquiring Function
1. In states of microwave, grill and
combination cooking, press
or , the
current power will be displayed for 3
seconds. After 3 seconds, the oven will
turn back to the former state.
2. In cooking state, press to
inquire the time and the time will display
for 3 seconds.
Lock-out Function for Children
1. Lock: In waiting state, press
for 3 seconds, there will
be a long beep denoting entering the
children-lock state. The lock indicator will
light and current time will display if the
time has been set Otherwise, “ ”
will display.
2. Lock quitting: In locked state, press
for 3
seconds, there will be a long “beep”
denoting that the lock is released.
Microwave
Grill/Combi.
Clock/Timer
Stop/Clear
Start/+30Sec./Confirm
Other manuals for MOE25X
2
Table of contents
Other Smeg Microwave Oven manuals