Smeg Portofino CPF9IPBL User manual

Contents
3
EN
1 Instructions 4
1.1 General safety instructions 4
1.2 Identification plate 8
1.3 Manufacturer liability 8
1.4 Appliance purpose 8
1.5 This user manual 8
1.6 How to read the user manual 9
2 Description 10
2.1 General Description 10
2.2 Cooktop 11
2.3 Control panel 11
2.4 Other parts 12
2.5 Available accessories 12
3 Use 14
3.1 Instructions 14
3.2 First use 15
3.3 Using the accessories 16
3.4 Using the cooktop 16
3.5 Using the storage compartment 17
3.6 Using the oven 17
3.7 Cooking advice 19
3.8 Programmer clock 21
4 Cleaning and maintenance 26
4.1 Instructions 26
4.2 Cleaning the appliance 26
4.3 Removing the door 27
4.4 Cleaning the door glazing 28
4.5 Removing the internal glass panes 28
4.6 Pyrolytic cycle 31
4.7 Extraordinary maintenance 33
5 Installation 35
5.1 Clearances above and around domestic appliances 35
5.2 Gas connection 36
5.3 Adaptation to different types of gas 39
5.4 Positioning 40
5.5 Electrical connection 46
5.6 Access to the terminal board (depending on the model) 47
5.7 For the installer 49
We advise you to read this manual carefully, which contains all the instructions for
maintaining the appliance's aesthetic and functional qualities.
For further information on the product: www.smeg.com

Instructions
4
1 Instructions
1.1 General safety instructions
Risk of personal injury
• During use the appliance
becomes hot. Care should be
taken to avoid touching heating
elements inside the oven.
• Protect your hands by wearing
oven gloves when handling food
inside the oven cavity.
• Never try to put out a fire or flames
with water: turn off the appliance
and smother the flames with a fire
blanket or other appropriate
cover.
• This appliance is not intended for
use by persons (including children)
with reduced physical, sensory or
mental capabilities, or lack of
experience and knowledge,
unless they have been given
supervised or instructions by a
responsible person for their safety.
• Young children should be
supervised to ensure that they do
not play with the appliance.
• Keep children under eight years of
age at a safe distance if they are
not constantly supervised.
• Do not allow children younger
than 8 years old to come near the
appliance when in operation.
• Cleaning and maintenance must
not be carried out by unsupervised
children.
• Make sure that the flame-spreader
crowns are correctly positioned in
their housings with their respective
burner caps.
• Be aware of how rapidly the
cooking zones heat up. Do not
place empty pans on the heat.
Danger of overheating.
• Fats and oils can catch fire if they
overheat. Do not leave the
appliance unattended while
preparing foods containing oils or
fats. If fats or oils catch fire, never
put water on them. Place the lid on
the pan and turn off the relevant
cooking zone.
• CAUTION - The cooking process
has to be supervised. A short term
cooking process has to be
supervised continuously.
• WARNING - Accessible parts will
become hot when in use. To avoid
burns young children should be
kept away.

Instructions
5
EN
• When in use, do not place metal
objects, such as dishes or cutlery,
on the surface of the cooktop as
they may overheat.
• Do not insert pointed metal objects
(cutlery or utensils) into the slots in
the appliance.
• Do not pour water directly onto
very hot trays.
• Keep the oven door closed during
cooking.
• If you need to move food or at the
end of cooking, open the door 5 cm
for a few seconds, let the steam
come out, then open it fully.
• Do not open the storage
compartment (if present) when the
oven is on and still hot.
• The items inside the storage
compartment could be very hot
after the oven has been used.
• DO NOT USE OR STORE
FLAMMABLE MATERIALS IN THE
STORAGE COMPARTMENT (IF
PRESENT) OR NEAR THE
APPLIANCE.
• WARNING - Ensure the
appliance is switched off before
replacing the lamp to avoid the
possibility of electric shock.
• NEVER USE AEROSOL CANS
NEAR THE APPLIANCE WHILE IT
IS IN OPERATION.
• Switch the appliance off
immediately after use.
• DO NOT MODIFY THIS
APPLIANCE.
• Before carrying out any work on
the appliance (installation,
maintenance, positioning or
moving), wear personal protective
equipment.
• Before carrying out any work on
the appliance, disconnect the
mains power supply.
• Have authorised persons carry out
installation and assistance
interventions according to the
standards in force.
• Do not try to repair the appliance
yourself or without the intervention
of authorised persons.
• Do not pull the cable to remove
the plug.
• If the power supply cable is
damaged, contact technical
support immediately and they will
replace it.

Instructions
6
Risk of damaging the appliance
• Do not use abrasive or corrosive
detergents (e.g. scouring
powders, stain removers and
metallic sponges) on glass parts.
• Use wooden or plastic utensils.
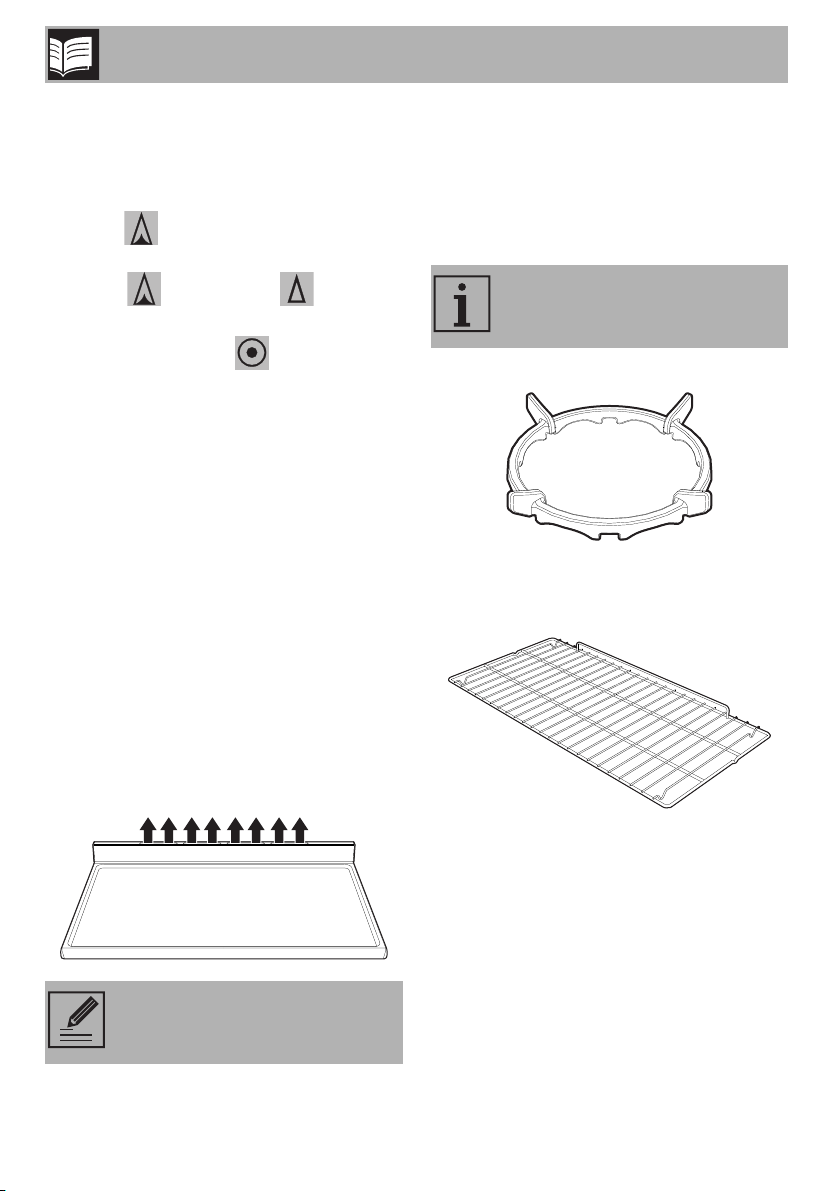
• Racks and trays must be inserted
as far as they will go into the side
guides. The mechanical safety
locks that prevent them from being
removed must face downwards
and towards the back of the oven
cavity.
• Do not seat on the appliance.
• Do not use steam jets to clean the
appliance.
• During the automatic cleaning
cycle, the outer door window
could become hotter than normal.
• Excess spillage must be removed
before cleaning cycle begins.
• Do not obstruct ventilation
openings and heat dispersal slots.
• Never leave the appliance
unattended during cooking
operations in which fats or oils
could be released that could
overheat and catch fire. Be very
careful
• Danger of fire - Do not store items
on the cooking surface.
• DO NOT USE THE APPLIANCE
TO HEAT ROOMS FOR ANY
REASON.
• Do not spray any spray products
near the oven.
• Do not use plastic kitchenware or
containers when cooking food.
• Do not put sealed tins or
containers in the oven.
• Remove all trays and racks which
are not required during cooking.
• Do not cover the bottom of the
oven cavity with aluminium or tin
foil sheets.
• Do not place pans or trays directly
on the bottom of the oven cavity.
• If you wish to use greaseproof
paper, place it so that it will not
interfere with the hot air circulation
inside the oven.
• Do not use the open door to rest
pans or trays on the internal glass
panel.
• The cooking vessels or griddle
plates should be placed inside the
perimeter of the cooktop.
• All cookware must have smooth,
flat bottoms.
• If any liquid does boil over or spill,
remove the excess from the
cooktop.
• Take care not to spill acidic
substances such as lemon juice or
vinegar onto the cooktop.
• Do not put empty pans or frying
pans on switched on cooking
zones.

Instructions
7
EN
• Do not use steam jets to clean the
appliance.
• Do not use harsh abrasive
cleaners or sharp metal scrapers
to clean the oven glass door since
they can scratch the surface, which
may result in shattering of the
glass.
• Do not use cleaning products
containing chlorine, ammonia or
bleach on steel parts or parts with
metallic surface finishes (e.g.
anodizing, nickel- or chromium-
plating).
• Do not use abrasive or corrosive
detergents (e.g. scouring
powders, stain removers and
metallic sponges) on glass parts.
• Do not wash the removable
components such as the cooktop
pan stands, flame-spreader
crowns and burner caps in a
dishwasher.
• Never use the oven door to lever
the appliance into place when
fitting.
• Avoid exerting too much pressure
on the oven door when open.
• Do not use the handle to lift or
move the appliance.
Installation
• THIS APPLIANCE MUST NOT BE
INSTALLED IN BOATS OR
CARAVANS.
• The appliance must not be
installed on a stand.
• Position the appliance into the
cabinet cutout with the help of a
second person.
• If this appliance is installed on a
base, measures must be taken to
prevent the appliance from
slipping from the base.
• To prevent overheating, the
appliance must not be installed
behind a decorative door or a
panel.
• The gas connection should be
carried out by authorised persons.
• Installation with flexible hose must
be carried out so that the length of
the piping does not exceed 2 metres
when fully extended as regards
flexible steel hoses and 1.5 metres
in case of rubber hoses.
• The hoses should not come into
contact with moving parts and
should not be crushed in any way.
• If required, use a pressure
regulator that complies with
current regulations.

Instructions
8
• After carrying out any operation,
check that the tightening torque of
gas connections is between 10 Nm
and 15 Nm.
• At the end of the installation, check
for any leaks with a soapy
solution, never with a flame.
• Have the electrical connection
performed by authorised persons.
• The appliance must be connected
to earth in compliance with
electrical system safety standards.
• If the electrical supply is restricted,
means of all-pole disconnection
must be accessible and
incorporating in the fixed wiring in
accordance with the wiring rules.
• Use cables withstanding a
temperature of at least 90°C.
• The tightening torque of the screws
of the terminal supply wires must
be 1.5 - 2 Nm.
For this appliance
• Ensure that the appliance is
switched off before replacing the
bulb.
• Do not rest any weight or sit on the
open door of the appliance.
• Take care that no objects are stuck
in the doors.
1.2 Identification plate
• The identification plate bears the
technical data, serial number and
brand name of the appliance. Do
not remove the identification plate
for any reason.
1.3 Manufacturer liability
• The manufacturer declines all
liability for damage to persons or
property caused by:
• use of the appliance other than
the one envisaged;
• non-observance of the user
manual provisions;
• tampering with any part of the
appliance;
• use of non-original spare parts.

Instructions
9
EN
1.4 Appliance purpose
• This appliance is intended for
cooking food in the home
environment. Every other use is
considered improper.
• The appliance is not designed to
operate with external timers or with
remote-control systems.
1.5 This user manual
This user manual is an integral part of
the appliance and must therefore be
kept in its entirety and in an
accessible place for the whole
working life of the appliance.
Read this user manual carefully
before using the appliance.
1.6 How to read the user manual
This user manual uses the following reading
conventions:
1. Sequence of instructions for use.
• Standalone instruction.
Instructions
General information on this user
manual, on safety and final
disposal.
Description
Description of the appliance and its
accessories.
Use
Information on the use of the
appliance and its accessories,
cooking advice.
Cleaning and maintenance
Information for proper cleaning and
maintenance of the appliance.
Installation
Information for authorised persons:
installation, operation and
inspection.
Safety instructions
Information
Advice

Description
10
2 Description
2.1 General Description
1 Backguard
2 Cooktop
3 Control panel
4 Oven light
5 Seal
6 Door
7 Fan
8 Storage compartment
Rack/tray support frame shelf

Description
11
EN
2.2 Cooktop
AUX = Auxiliary burner
SR = Semi-rapid burner
R= Rapid burner
UR2 = Ultra rapid burner
2.3 Control panel
1 Temperature knob
This knob allows you to select the cooking
temperature.
Turn the knob clockwise to the required
value, between the minimum and maximum
setting.
2 Programmer clock
Useful for displaying the current time, setting
programmed cooking operations and
programming the minute minder timer.
3 Door lock indicator light
It comes on when the automatic (pyrolytic
function) cleaning cycle is activated.
4 Function knob
The oven's various functions are suitable for
different cooking modes. After selecting the
required function, set the cooking
temperature using the temperature knob.

Description
12
5 Cooktop burner knobs
Useful for lighting and adjusting the cooktop
burners.
Press and turn the knobs anti-clockwise to
the value to light the relative burners.
Turn the knobs to the zone between the
maximum and minimum setting to
adjust the flame.
Return the knobs to the position to turn
off the burners.
2.4 Other parts
Shelves
The appliance features shelves for
positioning trays and racks at different
heights. The insertion heights are indicated
from the bottom upwards (see 2.1 General
Description).
Cooling fan
The fan cools the oven and comes into
operation during cooking.
The fan causes a steady outflow of air from
above the door which may continue for a
brief period of time even after the appliance
has been turned off.
Interior lighting
The appliance interior lighting comes on:
• When the door is opened
• When any function is selected.
2.5 Available accessories
WOK ring
Useful when using a wok.
Rack
Useful for supporting containers with food
during cooking.
Do not obstruct ventilation
openings and heat dispersal slots.
Some models are not provided
with all accessories.

Description
13
EN
Tray
Useful for collecting fat from foods placed
on the rack above.
Deep tray
Useful for collecting fat from foods placed
on the rack above.
The accessories intended to come
into contact with food are made of
materials that comply with the
provisions of current legislation.
Supplied and optional accessories
can be requested to Authorised
Assistance Centres. Use only
original accessories supplied by
the manufacturer.

Use
14
3 Use
3.1 Instructions
High temperature inside the oven
during use
Danger of burns
• Keep the oven door closed during
cooking.
• Protect your hands wearing heat
resistant gloves when moving food
inside the oven.
• Do not touch the heating elements inside
the oven.
• Do not pour water directly onto very hot
trays.
• Do not allow children younger than 8
years old to come near the appliance
when in operation.
• If you need to move food or at the end
of cooking, open the door 5 cm for a
few seconds, let the steam come out,
then open it fully.
Improper use
Danger of burns
• Make sure that the flame-spreader
crowns are correctly positioned in their
housings with their respective burner
caps.
• Oils and fat could catch fire if
overheated. Be very careful.
Improper use
Risk of damage to surfaces
• Do not cover the bottom of the oven
cavity with aluminium or tin foil sheets.
• If you wish to use greaseproof paper,
place it so that it will not interfere with the
hot air circulation inside the oven.
• Do not place pans or trays directly on
the bottom of the oven cavity.
• Do not use the open door to rest pans or
trays on the internal glass pane.
• Do not pour water directly onto very hot
trays.
• Make sure that the flame-spreader
crowns are correctly positioned in their
housings with their respective burner
caps.
• The cooking vessels or griddle plates
should be placed inside the perimeter of
the cooktop.
• All pans must have smooth, flat bottoms.
• If any liquid does boil over or spill,
remove the excess from the cooktop.
High temperature inside the
storage compartment
Danger of burns
• Do not open the storage compartment
when the oven is on and still hot.
• The items inside the storage
compartment could be very hot after
using the oven.

Use
15
EN
Escaping gas may cause an explosion.
If you smell gas or notice any faults in the
gas installation:
• Immediately shut off the gas supply or
close the gas cylinder valve.
• Immediately extinguish all naked flames
and cigarettes.
• Do not use any light or appliance
switches and do not pull any plugs out of
sockets. Do not use any telephones or
mobile phones within the building.
• Open windows and ventilate the room.
• Call the aftersales service or the gas
supplier.
Abnormal operation
Any of the following are considered to be
abnormal operation and may require
service:
• Yellow tipping of the hotplate burner
flame.
• Sooting up of cooking utensils.
• Burners not igniting properly.
• Burners failing to remain alight.
• Burners extinguishing whilst in operation.
• Gas valves with are difficult to turn.
In case the appliance fails to operate
correctly, contact the Authorised Assistance
Centre in your area.
3.2 First use
1. Remove any protective film from the
outside or inside of the appliance,
including accessories.
2. Remove any labels (apart from the
technical data plate) from the
accessories and from the oven cavity.
3. Remove all the accessories from the
appliance and clean them (see 4
Cleaning and maintenance). Heat the
empty oven at the maximum temperature
to burn off any residues left by the
manufacturing process.
High temperature inside the oven
during use
Danger of fire or explosion
• Do not spray any spray products near
the oven.
• Do not use or leave flammable materials
near the oven or the storage
compartment.
• Do not use plastic kitchenware or
containers when cooking food.
• Do not put sealed tins or containers in
the oven.
• Do not leave the oven unattended
during cooking operations where fats or
oils could be released.
• Remove all trays and racks which are
not required during cooking.

Use
16
3.3 Using the accessories
Racks and trays
Racks and trays have to be inserted into the
side guides until they come to a complete
stop.
• The mechanical safety locks that prevent
the rack from being taken out
accidentally have to face downwards
and towards the oven back.
Ring reducers
The ring reducers have to be placed on the
cooktop grids. Make sure they are placed
properly.
3.4 Using the cooktop
All the appliance's control and monitoring
devices are located together on the front
panel. The burner controlled by each knob
is shown next to the knob. The appliance is
equipped with an electronic ignition device.
Simply press the knob and turn it anti-
clockwise to the maximum flame symbol,
until the burner lights. If the burner does not
light in the first 15 seconds, turn the knob to
and wait 60 seconds before trying
again. After lighting, keep the knob pressed
in for a few seconds to allow the
thermocouple to heat up. The burner may
go out when the knob is released: in this
case, the thermocouple has not heated up
sufficiently. Wait a few moments and repeat
the operation. Keep the knob pressed in
longer.
Gently insert racks and trays into
the oven until they come to a stop.
Clean the trays before using them
for the first time to remove any
residues left by the manufacturing
process.
In case of an accidental switching
off, a safety device will be tripped,
cutting off the gas supply, even if
the gas cock is open. Return the
knob to and wait at least 60
seconds before lighting it again.

Use
17
EN
Correct positioning of the flame-
spreader crowns and burner caps
Before lighting the cooktop burners, make
sure that the flame-spreader crowns are
correctly positioned in their housings with
their respective burner caps. Make sure that
the holes in the flame-spreader crowns 1
are aligned with the thermocouples 2and
igniters 3.
Practical tips for using the cooktop
For better burner efficiency and to minimise
gas consumption, use pans with lids and of
suitable size for the burner, so that flames
do not reach up the sides of the pan. Once
the contents come to the boil, turn down the
flame far enough to ensure that the liquid
does not boil over.
3.5 Using the storage compartment
The storage compartment is at the bottom of
the cooker. To open it, pull the handle
towards you. It can be used to store
cookware or metallic objects necessary
when using the appliance.
3.6 Using the oven
Switching on the oven
To switch on the oven:
1. Select the cooking function using the
function knob.
2. Select the temperature using the
temperature knob.
Cookware diameters:
• Auxiliary: 12 - 14 cm.
• Semi-rapid: 16 - 24 cm.
• Rapid: 18 - 26 cm.
• Ultra-rapid: 18 - 28 cm.
Ensure that the programmer clock
shows the cooking duration
symbol , otherwise it will not
be possible to turn on the oven.
Press the keys and at the
same time to reset the programmer
clock.

Use
18
Preheating stage
Cooking functions are always preceded by
a preheating stage, which allows the
appliance to heat up to cooking
temperature.
The indicator light comes on to indicate that
the oven is heating up.
The indicator light turns off to indicate that
the food can be placed inside the oven and
cooking will start automatically.
Functions list
Convection
As the heat comes from above and
below at the same time, this system
is particularly suitable for certain
types of food. Traditional cooking,
also known as convection cooking,
is suitable for cooking just one dish
at a time. Perfect for all types of
roasts, bread and cakes and in any
case particularly suitable for fatty
meats such as goose and duck.
Super fan forced
The combination of the fan with just
the lower heating element allows
cooking to be completed more
rapidly. This system is
recommended for sterilising or for
finishing off the cooking of foods
which are already well-cooked on
the surface, but not inside, which
therefore need a little more heat.
Perfect for any type of food
Grill
The heat coming from the grill
element gives perfect grilling results
above all for thin and medium
thickness meat and, in combination
with the rotisserie (where fitted),
gives the food an even browning at
the end of cooking. Perfect for
sausages, spare ribs and bacon.
This function enables large
quantities of food, particularly meat,
to be grilled evenly.
Fan grill
The air produced by the fan softens
the strong heatwave generated by
the grill, grilling perfectly even very
thick foods. Perfect for large cuts of
meat (e.g. pork hock).
Fan assisted
The operation of the fan, combined
with traditional cooking, ensures
consistent cooking even with
complex recipes. Perfect for biscuits
and cakes, even when
simultaneously cooked on several
levels. (For multiple-level cooking,
we recommend using the 2nd and
4th shelf.)
Supercook
The combination of fan assisted
cooking and traditional cooking
allows different foods to be cooked
on several levels extremely quickly
and efficiently, without odours and
flavours mingling. Perfect for large
volumes that call for intense
cooking.

Use
19
EN
3.7 Cooking advice
General advice
• Use a fan assisted function to achieve
consistent cooking at several levels.
• It is not possible to shorten cooking times
by increasing the temperature (the food
could be overcooked on the outside and
undercooked on the inside).
Advice for cooking meat
• Cooking times vary according to the
thickness and quality of the food and to
consumer taste.
• Use a meat thermometer when roasting
meat, or simply press on the roast with a
spoon. If it is hard, it is ready; if not, it
needs another few minutes cooking.
Advice for cooking with the Grill and the
Fan grill
• Meat can be grilled even when it is put
into the cold oven or into the preheated
oven if you wish to change the effect of
the cooking.
• With the Fan grill function, we
recommend that you preheat the oven
before grilling.
• We recommend placing the food at the
centre of the rack.
Fan forced
The combination of the fan and the
circular heating element
(incorporated in the rear of the
oven) allows you to cook different
foods on several levels, as long as
they need the same temperatures
and same type of cooking. Hot air
circulation ensures instant and even
distribution of heat. It will be
possible, for instance, to cook fish,
vegetables and biscuits
simultaneously (on different levels)
without odours and flavours
mingling.
Rotisserie
The rotisserie works in combination
with the central grill heating element
and allows food to be perfectly
browned.
Eco
Using the grill and the lower heating
element in combination is
particularly suitable for cooking on
a single shelf, as it provides low
energy consumption. Ideal for
cooking meat, fish and vegetables.
Not recommended for desserts
which must rise.
Pyrolytic cycle
Setting this function, the oven
reaches temperatures up to 500°C,
destroying all the grease which
forms on the internal walls.
Cooking (and preheating) times
are longer with the ECO function.
When using the ECO function,
avoid opening the door during
cooking.

Use
20
• With the Grill function, we recommend
that you turn the temperature knob to the
maximum value near the symbol to
optimise cooking.
• Foods should be seasoned before
cooking. Foods should also be coated
with oil or melted butter before cooking.
• Use the oven tray on the first bottom shelf
to collect fluids produced by grilling.
• Grilling processes should never last more
than 60 minutes.
Advice for cooking desserts/pastries and
biscuits
• Use dark metal moulds: they help to
absorb the heat better.
• The temperature and the cooking time
depend on the quality and consistency
of the dough.
• To check whether the dessert is cooked
right through: at the end of the cooking
time, put a toothpick into the highest point
of the dessert. If the dough does not stick
to the toothpick, the dessert is cooked.
• If the dessert collapses when it comes
out of the oven, on the next occasion
reduce the set temperature by about
10°C, selecting a longer cooking time if
necessary.
• While cooking desserts or vegetables,
excessive condensation may form on the
glass. In order to avoid this, open the
door very carefully a couple of times
while cooking.
Advice for defrosting and proving
• Place frozen foods without their
packaging in a lidless container on the
first shelf of the oven.
• Avoid overlapping the food.
• To defrost meat, use the rack placed on
the second level and a tray on the first
level. In this way, the liquid from the
defrosting food drains away from the
food.
• The most delicate parts can be covered
with aluminium foil.
• For successful proving, a container of
water should be placed in the bottom of
the oven.
To save energy
• Stop cooking a few minutes before the
time normally used. Cooking will
continue for the remaining minutes with
the heat which has accumulated inside
the oven.
• Reduce any opening of the door to a
minimum to avoid heat dispersal.
• Keep the inside of the appliance clean
at all times.

Use
21
EN
3.8 Programmer clock
Value decrease key
Clock key
Value increase key
Setting the time
On the first use, or after a power failure, the
digits will be flashing on the
appliance’s display.
1. Hold down the clock key for two
seconds. The dot between the hours and
the minutes flashes.
2. The time can be set using the value
increase or value decrease
key. Hold down the key to increase or
decrease rapidly.
3. Wait 7 seconds. The dot between the
hours and the minutes stops flashing.
4. The symbol on the display indicates
that the appliance is ready to start
cooking.
Ensure that the programmer clock
shows the cooking duration
symbol , otherwise it will not
be possible to turn on the oven.
Press key to reset the
programmer clock.
If the time is not set, the oven will
not switch on.
To change the time, hold down the
value increase key and value
decrease key at the same time
for two seconds, then set the time.

Use
22
Timed cooking
1. Keep the clock key pressed until the
symbol appears.
2. Press the clock key again. The
symbol and will appear on
the display alternating with the current
time.
3. Use the value increase and value
decrease keys to set the required
minutes of cooking.
4. Select a cooking function and
temperature.
5. Wait approx. 5 seconds without pressing
any key in order for the function to
activate. The current time and the
and symbols will appear on the
display.
At the end of cooking the heating elements
will be deactivated. On the display, the
symbol turns off, the symbol
flashes and the buzzer sounds.
6. To turn off the buzzer just press any key
of the programmer clock.
7. Press the clock key to reset the
programmer clock.
Programmed cooking
1. Set the cooking time as described in the
previous point “Timed cooking”.
2. Hold down the menu key for two
seconds.
3. Press the menu key again. The
display will show the digits
and the text in sequence,
while the symbol flashes. (for
example, the current time is 17:30).
Timed cooking is the function
which allows a cooking operation
to be started and then ended after
a specific length of time set by the
user.
It is not possible to set a cooking
time of more than 10 hours.
To reset the set program, hold
down the value increase and
value decrease keys at the
same time and switch off the oven
manually.
Programmed cooking is the
function which allows a cooking
operation to be started at a set
time and then ended after a
specific length of time set by the
user.
This manual suits for next models
8
Table of contents
Other Smeg Oven manuals
Popular Oven manuals by other brands

Zanussi
Zanussi ZOB 345 Instruction booklet

Hendi
Hendi BASIC 4 Instructions for use and maintenance

Siemens
Siemens HB43AB.21B instruction manual

AEG
AEG COMPETENCE B 8100 User instructions

Cuisinart
Cuisinart CSO-300NXA INSTRUCTION AND RECIPE BOOKLET

Euro Appliances
Euro Appliances Valencia EV45EMWB Operation manual