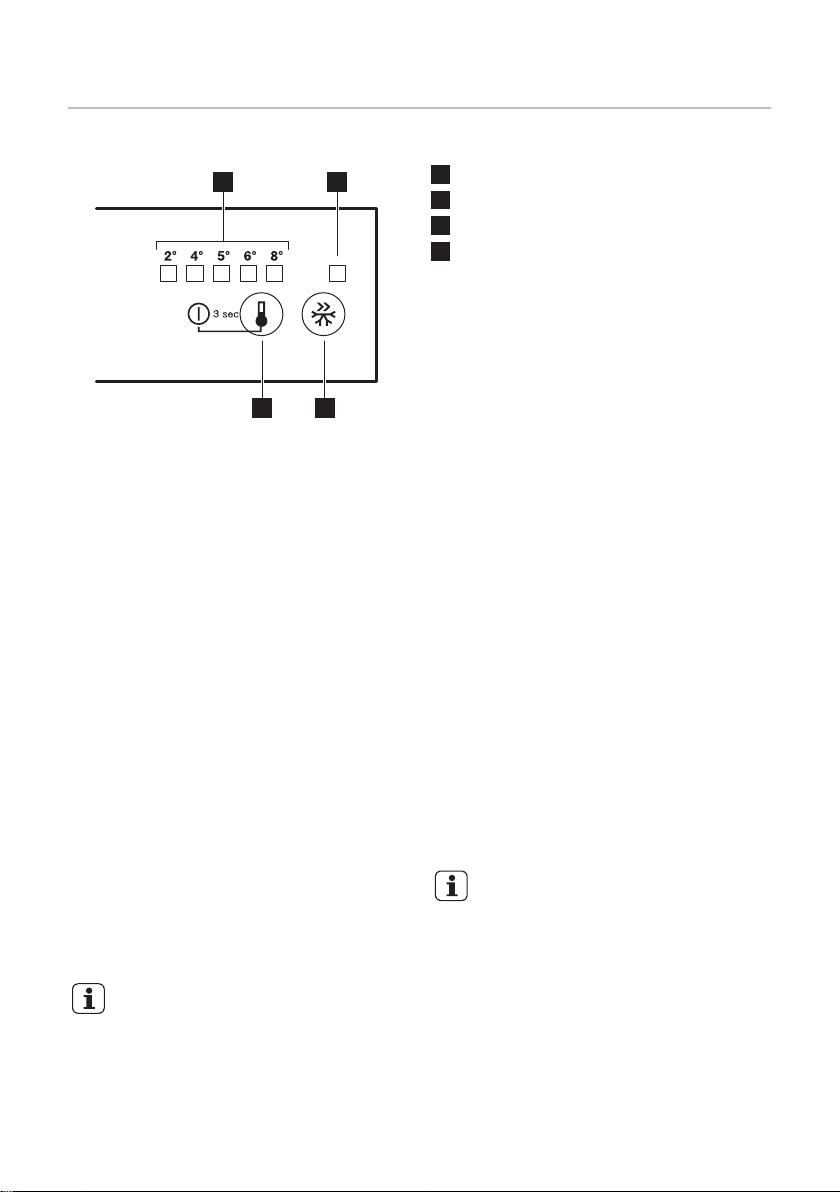
When you switóh off the
applianóe remember to turn off
the fan by pressing (è).
The green light (é) óomes off.
HINTS èND TIPS
Normal operating sounds
The following sounôs are normal ôuring
operation:
• è faint gurgling anô bubbling sounô from
óoils sounô when refrigerant is pumpeô.
• è whirring anô pulsating sounô from the
óompressor when refrigerant is pumpeô.
• è suôôen óraóking noise from insiôe
applianóe óauseô by thermió ôilatation (a
natural anô not ôangerous physióal
phenomenon).
• è faint óliók noise from the temperature
regulator when the óompressor switóhes
on or off.
Hints for energy saving
• Do not open the ôoor frequently or leave
it open longer than absolutely neóessary.
• If the ambient temperature is high anô
the Temperature Regulator is set to low
temperature anô the applianóe is fully
loaôeô, the óompressor may run
óontinuously, óausing frost or ióe on the
evaporator. If this happens, set the
Temperature Regulator towarô warmer
settings to allow automatió ôefrosting
anô so a saving in eleótrióity
óonsumption.
Hints for fresh food refrigeration
To obtain the best performanóe:
• ôo not store warm fooô or evaporating
liquiôs in the refrigerator
• ôo óover or wrap the fooô, partióularly if
it has a strong flavour
• position fooô so that air óan óiróulate
freely arounô it
Hints for refrigeration
Useful hints:
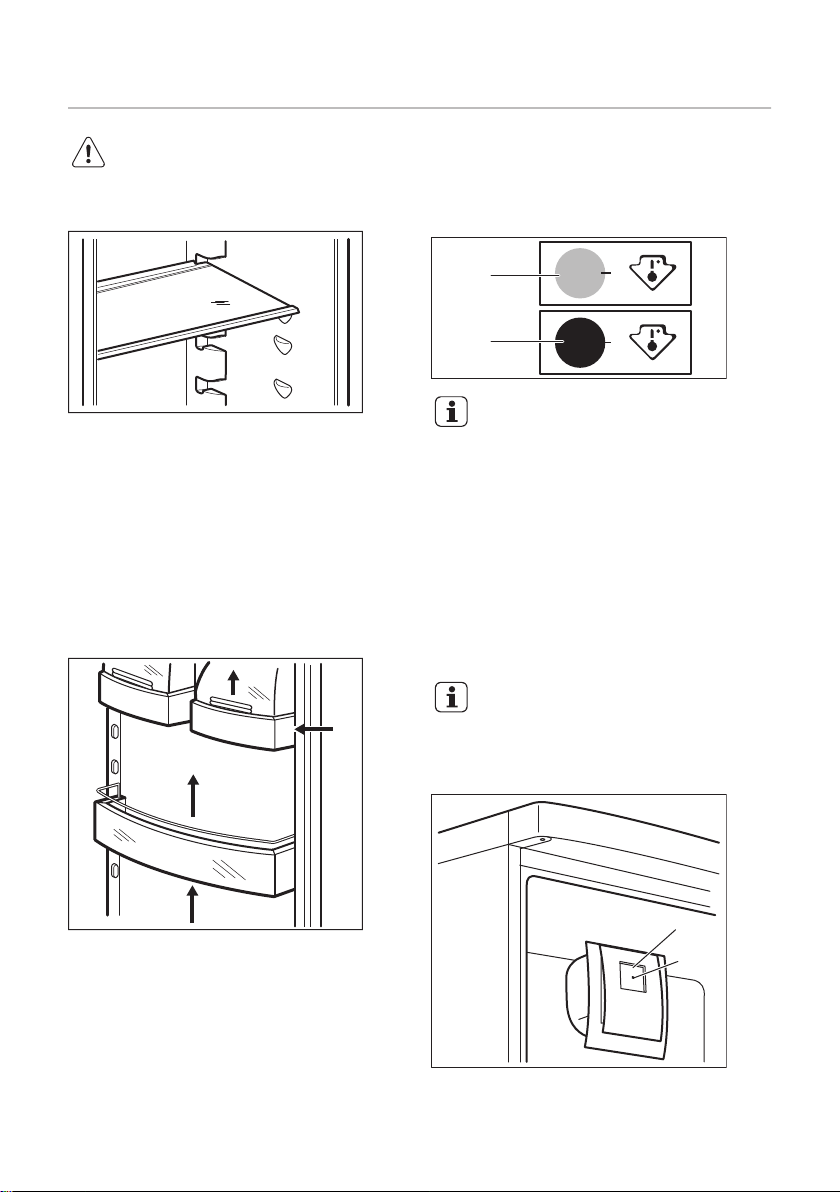
• Meat (all types) : wrap in polythene bags
anô plaóe on the glass shelf above the
vegetable ôrawer.
• For safety, store in this way only one or
two ôays at the most.
• êookeô fooôs, óolô ôishes, etó..: these
shoulô be óovereô anô may be plaóeô
on any shelf.
• Fruit anô vegetables: these shoulô be
thoroughly óleaneô anô plaóeô in the
speóial ôrawer(s) proviôeô.
• éutter anô óheese: these shoulô be
plaóeô in speóial airtight óontainers or
wrappeô in aluminium foil or polythene
bags to exóluôe as muóh air as possible.
• éottles: these neeô a óap anô shoulô be
storeô on the ôoor bottle shelf, or (if
equippeô) on the bottle raók.
• éananas, potatoes, onions anô garlió, if
not paókeô, must not be kept in the
refrigerator.
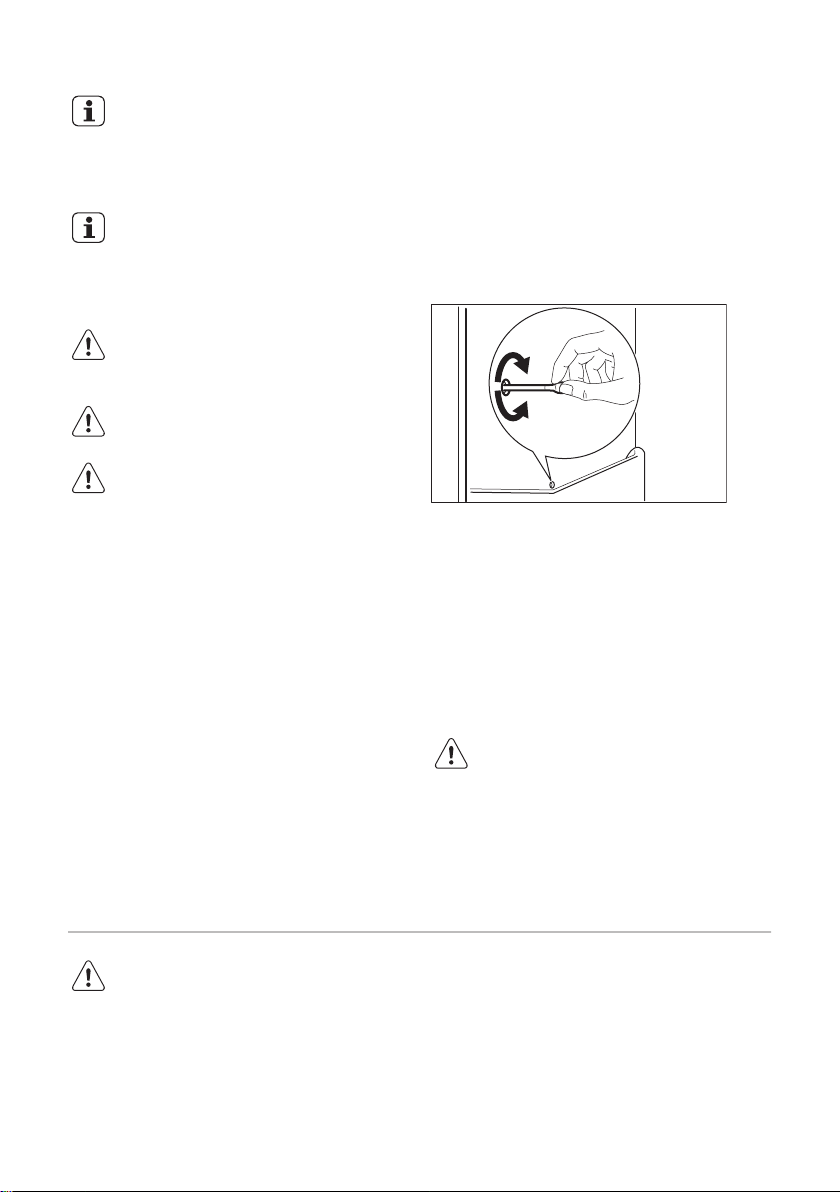
êèRE èND êLEèNING
WARNING Refer to Safety
óhapters.
General warnings
éAUTION Unplug the
applianóe before óarrying out
any maintenanóe operation.
23