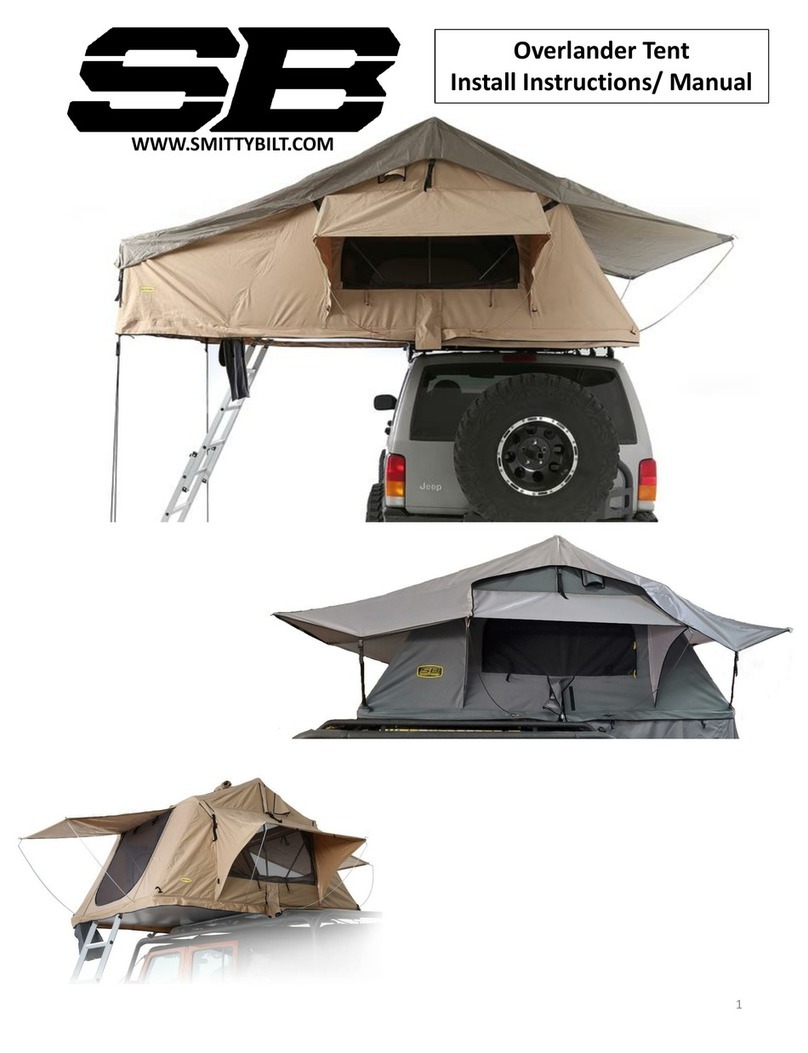
Smittybilt 2983 User manual

Hardshell Overland Tent
Part # 2983
WWW.SMITTYBILT.COM
Parts list: Qty
Window rod short
4
Window rod long
4
M8 carriage bolt
8
M8 flat washer
8
M8 nylock nut
8
Shoe bag
1
Ladder
1
Mounting strap
4
Lantern kit
1
Periodically check torque
of all hardware.
Periodically check torque
of all hardware.
The Smittybilt Overlander Tents are designed to mount easily on most roof rack systems or on an
aftermarket rack/crossbar system. Generally, most OE roof racks will have a capacity of 150-200 lbs while
vehicle is in motion(dynamic rating). However, when the vehicle is parked and you are utilizing your Smittybilt
Overlander Tent you are applying a static load which is easier to support and most rack systems can generally
handle this static load with ease. Always check with the manufacturer of your vehicle and your roof rack
system to determine the applicable weight limitations as they vary from vehicle to vehicle. Not all factory
roof racks or aftermarket racks can adequately and safely accommodate a roof top tent. Rack not only has to
have the proper weight capacity for downward loads, but it must properly support upward and shock loads.
If you need a roof rack system or more carrying capacity you may check with your local supplier for
Smittybilt, Thule, Yakima, or a variety of aftermarket racks to suit your needs.
Check local and state laws regarding roof mounted load capacities. Many states have a limit of 165lbs
while vehicle is in motion, and therefore most vehicle manufactures will built their roof racks to meet that
limit.
Tent must be supported by a minimum of 3 cross bars to evenly distribute the load.
Tent will clamp to the front and rear crossbar to hold position. The center cross bar must
support the load in the center of the tent, no clamps needed.
2
Read instruction manual entirely before assembling and installing this product.
Product may vary from image.
Note: Actual pictures may vary from specific vehicle/ product.

3
Hardshell Overland Tent
Part # 2983
WWW.SMITTYBILT.COM
Step 1. Install the square
head carriage bolts into
the access holes on the
tent base. Do this for both
sides of the tent base, 4
bolts will be used per side.
Position bolts so there is
one bolt on each side of
the cross bar that it will be
mounted to. Fig 1.
Step 2. Secure to cross
bar using the mounting
strap by placing it under
the crossbar and secure
using flat washers and
nylock nuts. Tighten
hardware evenly, do not
over tighten. Fig 2.
Step 3. Periodically check
torque of mounting
hardware. Hardware will
slightly loosen over the
first few hundred mile as
the tent base conforms to
the crossbars.
Mounting Tent to cross bars
Periodically check torque
of all hardware.
Fig 1
Fig 2

4
Hardshell Overland Tent
Part # 2983
Set Up
WWW.SMITTYBILT.COM
Step 1. Open all eight(8) stainless
steel latches. Then secure latch
making sure the hook is disconnected.
Fig 1. This ensures that the hook does
not grasp on the catch when trying to
open the tent.
Step 2. Push upward on the front
or rear of tent lid. Then repeat for
the other side. The gas struts will
open tent into position. Fig 2.

Hardshell Overland Tent
Part # 2983
Ladder adjustment
WWW.SMITTYBILT.COM
For the most adjustment, press in the top most steps buttons and then collapse ladder. If
more or less adjustment is needed. The second thru the eighth step can be adjusted in
smaller increments. Depress the ladder buttons and collapse the ladder slightly, then
release buttons and compress ladder till it stops in the half adjustment position. Ensure
that all sections of the ladder are fully locked before use. Ladder should be solid when
putting downward pressure on it. Ladder is at ideal length when the steps are parallel
with the ground.
Ensure ladder is level on a flat, non-slip solid surface. Tie down ladder to vehicle if
needed to prevent movement.
6
Second from the top rung shown
in the half way locked position.
Top rung fully collapsed, second
from the top half way collapsed in
the locked position.

Hardshell Overland Tent
Part # 2983
Window setup
WWW.SMITTYBILT.COM
7
Step 1. Insert window
rod into window rod
holes. (Fig 1) Then
bend the rod upward
and attach to the
grommet on the
corner of the
window.(Fig 2)
Note: front and rear
windows use the long
rods. Side entrance
uses the short rods.
Fig 1
Step 2. Tie down side flaps with the loop
and toggle. (Fig 3)
Reverse steps to fold down windows.
Fig 2
Fig 3

Hardshell Overland Tent
Part # 2983
Storage solutions
WWW.SMITTYBILT.COM
8
Interior top hooks
for holding lanterns
Interior pockets for light weight item storage such as phone, keys,
flashlights, etc.
Shoe bag can be attached to the left side of the ladder on either side
of the tent. Install bag by connecting the toggle and loops. Do not
overload shoe bag, as damage to bag or tent may occur.

9
Hardshell Overland Tent
Part # 2983
Closing the tent
WWW.SMITTYBILT.COM
Fig 1
Step 1. Install the elastic cords on the inside of the tent. They will attach
to the loops on inside of each entrance. They are used to help pull the
fabric “IN” while collapsing the tent. Fig 1.
Step 2. Remove all window rods, store them in the window rod bag and
then store inside tent. Detach shoe bag and store in tent if clean and dry.
Step 3. Detach ladder, store ladder inside center of the tent.
Note: Make sure there is nothing that may interfere with the support
arms when tent is collapsed.

10
Hardshell Overland Tent
Part # 2983
Closing the tent
WWW.SMITTYBILT.COM
Step 4. Pull down on pull strap till you can
reach the roof. Then pull down the roof till it
is almost closed. Repeat for opposite side.
Step 5. Tuck in any fabric so it does not get
caught between the top and bottom half of
the shell.
Step 6. Hook up latches and secure latches,
starting in the front first, then work your way
back. Latches may need to be adjusted to
close the tent completely.
Note: Temperature, fabric position, and tent
shell flex may cause the latches to fit too
loose or too tight. Adjust latches accordingly.
Ensure the top half fits into the bottom half.
You may have to push in on the top half for it
to line up while closing the latches.

12
Hardshell Overland Tent
Part # 2983
Care Instructions
WWW.SMITTYBILT.COM
1. Clean fabric only with cold water and a soft brush - do not use soap or detergent, this will remove the
waterproofing compounds.
2. Do not expose to petrol, oil orsolvents.
3. New poly/cotton fabric will initially experience some weeping through the seams. This will reduce over time as
the fabric cures.
4. Well worn products may be re-proofed using a good quality waterproofing solution. This is highly
recommended. Generally this is re-applied every 1-2 years depending on how much you use or clean the tent and
what environments your tent has been used in. Some waterproofing agents may also contain UV inhibitors. 303
protectant fabric guard, Star Brite, Rain guard, Nikwax and Kiwi all offer polycotton safe waterproofing solutions.
5. It is recommended to season your tent before your first trip. You can season the tent fabric by setting up tent
on a level surface before actual use. Do a full set up, use all window rods. Make sure all windows and zippers are
completely closed. Do not have the rain fly installed and remove all internal contents. With a hose, wet down the
tent lightly. Then focus on all the areas that have been stitched and water log the fabric the best you can. Let tent
dry completely on its own, do not use heat or compressed air to dry tent, let it dry naturally, avoid direct sunlight,
this may take a day or so. Repeat this process two more times if necessary. This process allows the canvas and
threads to shrink and expand as much as they can effectively sealing the seams. Do not be alarmed if the tent
leaks for the first or second time you season the canvas as this is normal as the thread and canvas contract and
expand together. Liquid seam sealer can be applied after the 3rd seasoning. Season the rain fly by hanging it up
and spraying both sides of the fabric with water in the same procedure as the tent.
6. Zippers can be lubed with a silicon spray or bee’s wax, this keeps them lubed and helps with water resistance.
Clean zippers with a soft brush.
7. If the fabric needs deep cleaning, use a mild detergent mixture( 1 cup Lysol all-purpose cleaner to 1 gallon of
warm water) use with a soft brush to clean fabric as needed. Rinse off the tent with a rinse solution of ( 1 cup
lemon juice, 1 cup sea salt to 1 gallon of warm water). Final rinse with cool water. Allow to dry completely
before storage. Re-proof tent if needed.
8. Stainless hardware will stain less than zinc coated hardware but it still needs routine maintenance. After you
check torque on bolts, wipe down with a cloth and break-free clp. If staining occurs, remove stains with steel
wool or scotch brite pad, then wipe down with break-freeCLP.
9. The ABS plastic shell needs to be routinely washed to prevent contaminants of building up. Wash with regular
car wash soap. Use of a UV protectant that is safe for ABS should be applied regularly. Trinova, Autoglym
Plastic and trim conditioner, 303 aerospace protectant, or Meguiar’s ultimate work well. Always test a small
area in an inconspicuous area before applying product to entiretent.
10. Mattress cover may be removed for hand washing only using a detergent for delicates only. Hand wash using
warm water. Rinse well with cool water and allow to air dry out of direct sunlight.

14
Hardshell Overland Tent
Part # 2983
WWW.SMITTYBILT.COM
Limited Warranties
Smittybilt’s products are covered under various limited warranties only. Note that the duration of the limited
warranty differs according to the material and finish of the product purchased. Overland hard shell tents carry a
5 year warranty from date of purchase. Subject to the duration and conditions of the limited warranty stated
below, Smittybilt warrants to the original retail purchaser that its products are free from defects in material and
workmanship. Smittybilt shall not be responsible for the natural wear and breakdown of materials that occurs
with extended use, such as UV damage or worn zippers, abuse, misuse, storm damage, or improper care. All
other warranties and representations express or implied, are hereby disclaimed, including fitness for
merchantability and buyer’s intended use or purpose. All parts are sold “AS IS” except for the limited warranties
granted herein. Buyer assumes all risks as to the selection, suitability and performance of all goods and
products selected. This limited warranty does not cover damage or impairment in any part due to misuse,
improper installation, accident or contact with on-road or off-road hazards, product modification, improper or
inadequate cleaning and/or maintenance. Smittybilt is not responsible for items damaged during shipping. This
warranty is not transferable from the original buyer. For the original Buyer to be eligible for the limited warranty
coverage, the Buyer must provide proof of purchase. Smittybilt strongly recommends returning the warranty
registration card.
Customer’s remedy hereunder shall be limited only to repair or replacement (at Smittybilt’s option) of any
defective part(s) returned to Smittybilt at customer’s expense. The determination of whether or not a returned
part is defective or subject to coverage under the limited warranties stated herein shall be made at Smittybilt’s
sole discretion. Any returns must be made freight pre-paid by consumer.
To assure product quality, Smittybilt reserves the right to change product design, material, specification and
finishes without prior notice to customers. This limited warranty gives you specific legal rights and you may also
have other rights, which may vary from state to state. Some states do not allow limitations on how long an
implied warranty lasts, so the above limitations may not apply as to you. Also, some states do not allow the
exclusion or limitation of incidental or consequential damages, so the above limitations or exclusions may not
apply to you. Smittybilt reserves the right to discontinue product lines and substitute products, or provide other
remedies than those listed in this limited warranty for those discontinued products.
Warning
Rollover and other types of vehicle accidents may result in serious injury or death to you, your passengers and
others sharing the road. Smittybilt accessories are decorative and are not intended to reduce or avoid injury or
damage in the event of an accident. The weight and location of Smittybilt accessories may affect your vehicles’
handling, stability and performance, creating an increased risk of accident or rollover. Before installing any
accessory, check state laws and assure that the accessory will not obscure any lights or interfere with proper
operation on your vehicle’s safety equipment. Consult your owner’s manual and the Smittybilt instructions, or
additional safety information. Smittybilt products, nor the warnings contained herein, are not a substitute for
your safe driving. Don’t drink and drive, always use seat belts and don’t drive faster than conditions permit.
Table of contents
Other Smittybilt Tent manuals


