manuals.online logo
Brands
  1. Home
  2. •
  3. Brands
  4. •
  5. aluSKY
  6. •
  7. Tent
  8. •
  9. aluSKY aluSKYcrown User manual

aluSKY aluSKYcrown User manual

VERANDA / CANOPY / WINTERGARTEN
NL / FR / EN / DE
aluSKYcrown
Montagehandleiding
Notice de pose
Mounting instructions
Montageanleitung
E_MH_Mounting_instructions_aluSKY lux_aluSKYcrown 18/06/2018
2/16
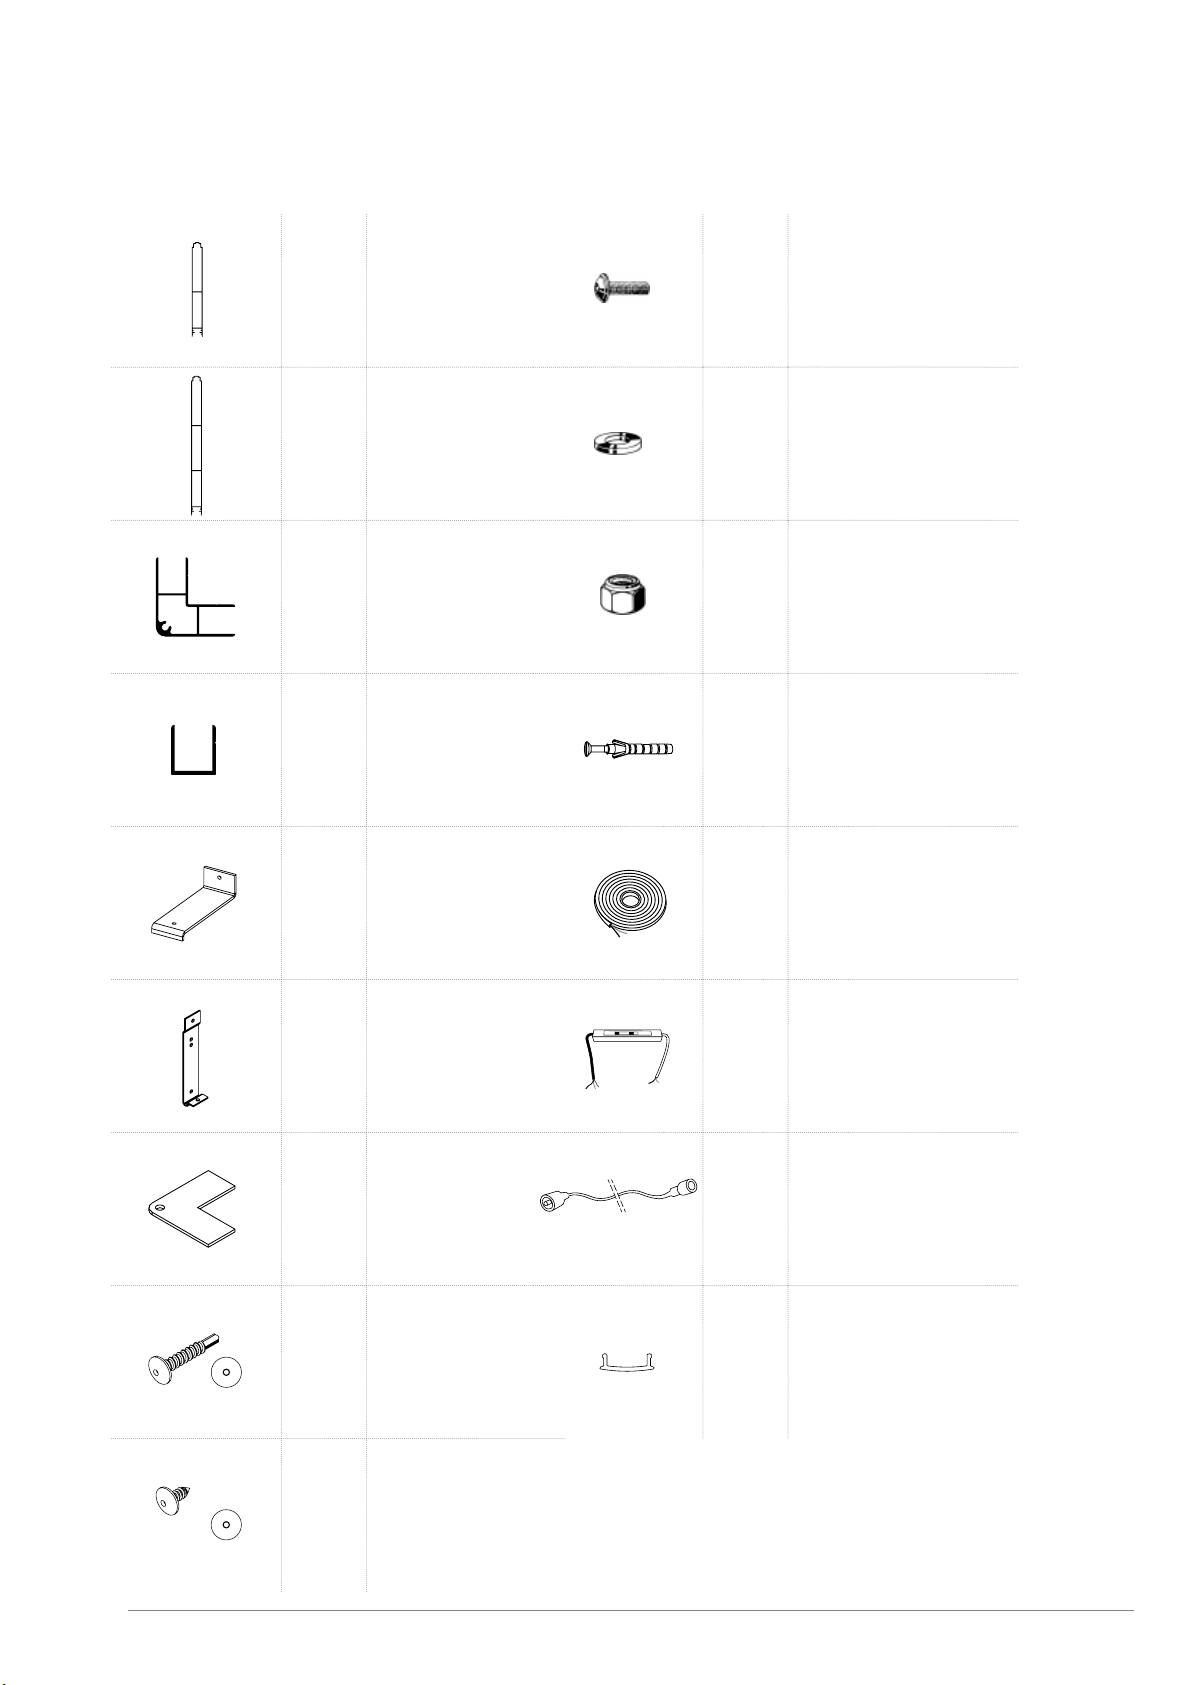
aluSKYcrown is een kroonlijst die geplaatst wordt op een aluSKYlux-dak. De montage van aluSKYcrown dient te
gebeuren tijdens de montage van het aluSKYlux-dak en vooraleer de beglazing in het dak geplaatst wordt. Bij
montage van aluSKYcrown op een bestaand aluSKYlux-dak, moeten de platen of de beglazing tijdelijk
gedemonteerd worden.
aluSKYcrown est un bandeau horizontal destiné à être monté sur une toiture aluSKYlux. L’installation de la
aluSKYcrown doit être eectuée durant l’installation de la toiture aluSKYlux et avant que le vitrage ne soit placé
sur le toit. Lors de montage d’une aluSKYcrown sur une toiture aluSKYlux existante, il faut démonter
temporairement les panneaux ou le vitrage.
aluSKYcrown is a cornice that is mounted on a aluSKlYlux roof. The assembly of the aluSKYcrown must be
carried out during the assembly of the aluSKYlux roof and before the glazing is installed in the roof. If the
aluSKYcrown is to be assembled on an existing aluSKYlux roof , the sheets or glazing must be demounted
temporarily.
aluSKYcrown ist eine Attika, die auf ein aluSKYlux-Dach montiert wird. Die Montage der aluSKYcrown muss
gleichzeitig mit der Montage vom aluSKYlux-Dach ausgeführt werden und vor die Verglasung ins Dach
installiert wird. Bei der Montage einer aluSKYcrown auf ein bestehendes aluSKYlux-Dach müssen die Platten
oder die Verglasung zeitweilig demontiert werden.
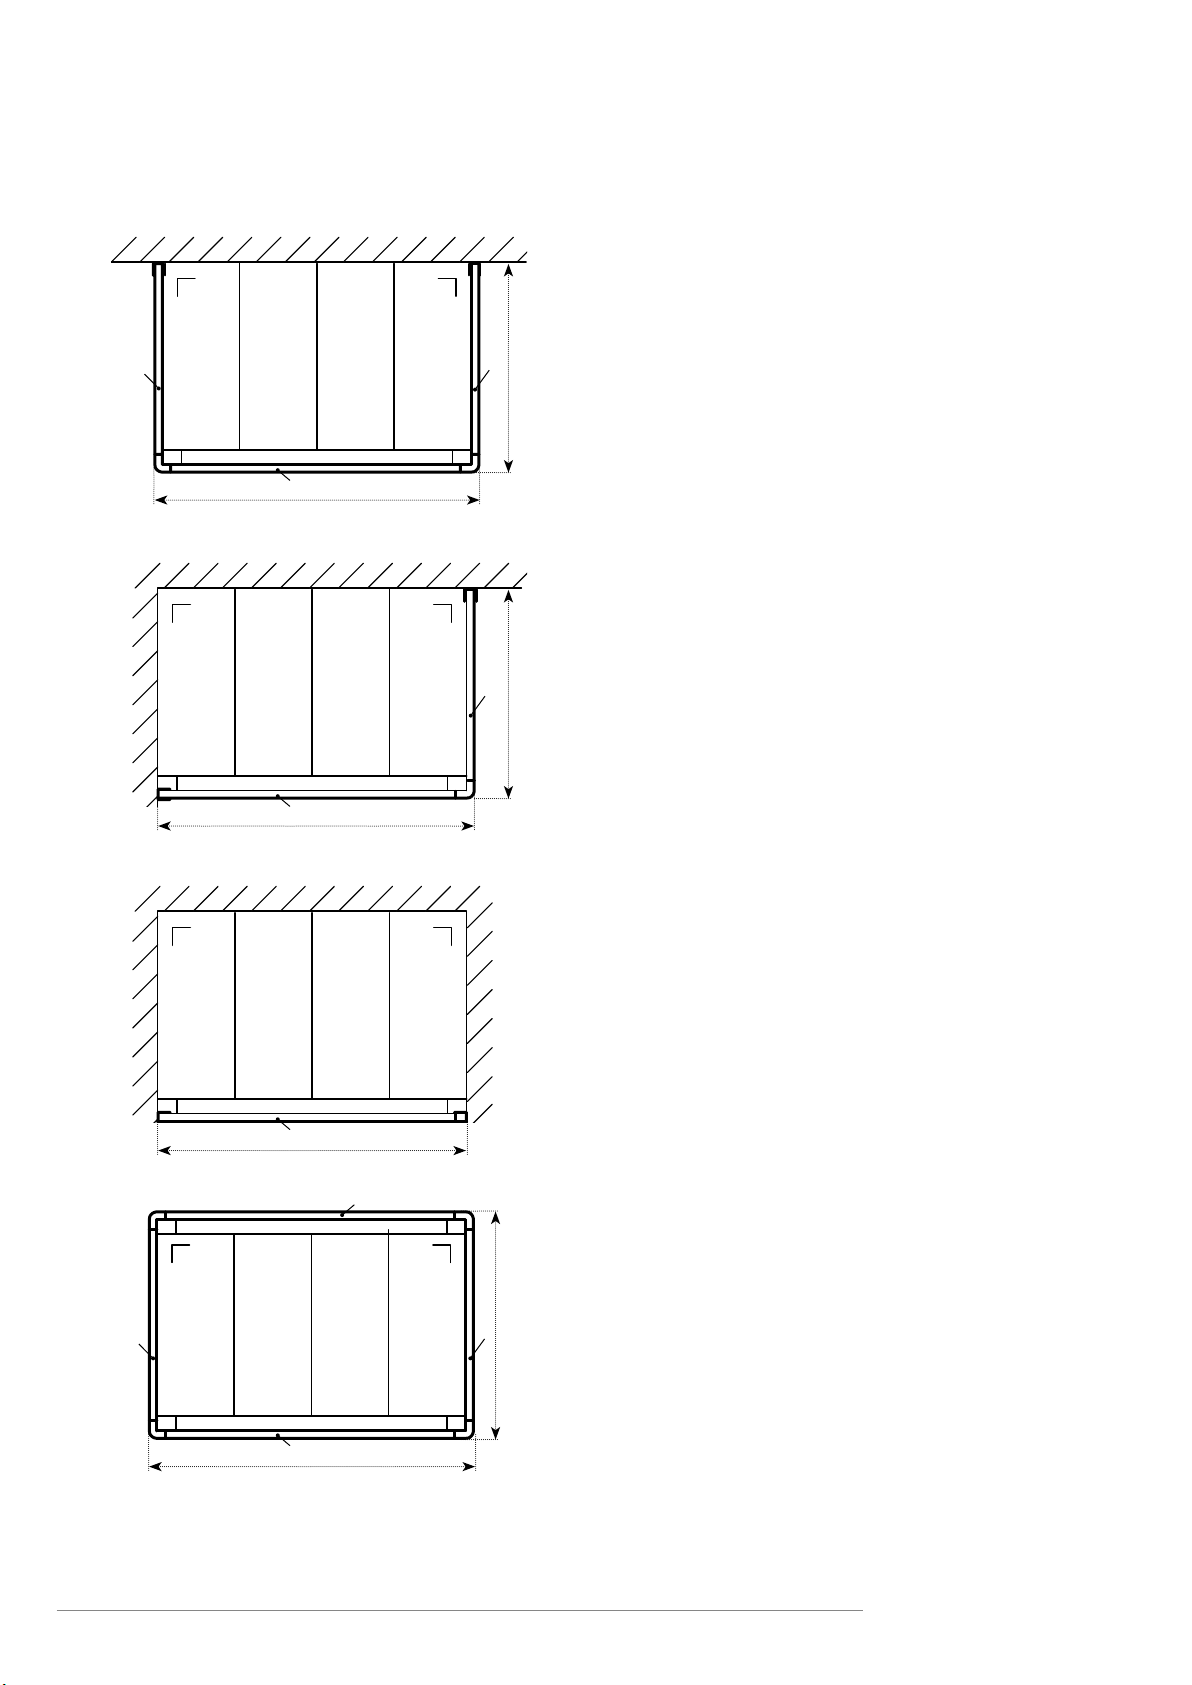
B: Breedte aluSKYlux-dak = lengte goot (zonder sluitstukken)
Largeur de la toiture aluSKYlux = longueur de la gouttière (hors embouts)
Width aluSKYlux roof = length gutter (without end fittings)
Breite aluSKYlux Dach = Länge Dachrinne (ohne Abschlussstücke)
D: Diepte aluSKYlux-dak = horizontale afstand muur tot paal
Profondeur de la toiture aluSKYlux = distance horizontale entre le mur et le poteau
Depth aluSKYlux roof = horizontal distance from wall to post
Tiefe aluSKYlux Dach = horizontaler Abstand von der Wand bis zum Pfosten
H: Hoogteverschil onderzijde muurprofiel tot onderzijde gootprofiel
Diérence de hauteur entre la face inférieure du profil mural et la face inférieure du profil de gouttière
Height dierence between bottom side wall profile to bottom side gutter profile
Höhenunterschied zwischen Unterseite Mauerprofil und Unterseite Rinnenprofil
160
115
h = 144
H
D
B
H
D
18/06/2018 3/16
E_MH_Mounting_instructions_aluSKYlux_aluSKYcrown
BCC = B - 15 mm | BU = BCC - 40 mm
BTOT = B + 55 mm
DCC = D + 146 mm | DU = D + 130 mm
DTOT = D + 185 mm
BCC = B - 7,5 mm | BU = B - 27,5 mm
BTOT = B + 27,5 mm
DCC = D + 146 mm | DU = D + 130 mm
DTOT = D + 185 mm
BCC = B | BU = B + 10 mm
BTOT = B + 10 mm
BCC = B - 15 mm | BU = BCC - 40 mm
BTOT = B + 55 mm
DCC = D + 258 mm | DU = D + 218 mm
DTOT = D + 328 mm
DCC DCC
BTOT
BCC
DTOT
DCC
BTOT
BCC
DTOT
BTOT
BCC
BTOT
BCC
DCC
DTOT
DCC
BCC
E_MH_Mounting_instructions_aluSKY lux_aluSKYcrown 18/06/2018
4/16
CC150
Stapelprofiel 150 mm
Profil empilable 150 mm
Stack profile 150 mm
Stapelprofil 150 mm
CC225
Stapelprofiel 225 mm
Profil empilable 225 mm
Stack profile 225 mm
Stapelprofil 225 mm
CCL
Hoekprofiel
Profil d’angle
Corner profile
Eckprofil
CCU
U-profiel
Profil U
U-profile
U-Profil
CCBEUG
Beugel voor goot GX
Étrier pour gouttière GX
Bracket for gutter GX
Bügel für Dachrinne GX
CCHAAK
Haak aluSKYcrown
Crochet aluSKYacrown
Hook aluSKYcrown
Haken aluSKYcrown
CCLAS
Sluitplaat hoekprofiel
Embout pour profil
d’angle
End piece corner profile
Abschlussstück für
Eckprofil
ZSB
ZSG
Zelorende schroef
5,5 x 32 mm TX 25
Vis autoperceuse
5,5 x 32 mm TX 25
Self-drilling screw
5,5 x 32 mm TX 25
Selbstbohrende Schraube
5,5 x 32 mm TX 25
PST
Parkerschroef
4,8 x 13 mm TX 25
Vis Parker
4,8 x 13 mm TX 25
Parker screw
4,8 x 13 mm TX 25
Parker-Schraube
4,8 x 13 mm TX 25
BOUTM5
Bout M5 x 20 RVS
Boulon M5 x 20 inox
Bolt M5 x 20 RVS
Bolzen M5 x 20 RVS
RONDM5
Rondsel M5 x 16 RVS
Rondelle M5 x 16 inox
Ring M5 x 16 RVS
Scheibe M5 x 16 RVS
MOERM5
Borgmoer M5 RVS
Écrou de sécurité M5 inox
Lock nut M5 RVS
Sicherungsmutter M5 RVS
NP
Nagelplug Ø 8 mm
Cheville à clou Ø 8 mm
Nail plug Ø 8 mm
Nageldübel Ø 8 mm
LED
LEDstripe IP67
Bandeau LED IP67
LED stripe IP67
LEDStreifen IP67
TRANSFO
Transfo 30W 12V
Transfo 30W 12V
Transformer 30W 12V
Transformator 30W 12V
KAB
Verlengkabel 6m
voor LED
Rallonge 6m
pour LED
Extension cord 6m
for LED
Verlängerungskabel 6m
für LED
LEDCO
LED-cover
Cover LED
LED cover
LED-Abdeckung
18/06/2018 5/16
E_MH_Mounting_instructions_aluSKYlux_aluSKYcrown
VOORBEREIDING
PREPARATION
PREPARATION
VORBEREITUNG
ZSB
CCBEUG
GX
AX
CCBEUG ZSB
= = = =
CCBEUG + ZSB CCBEUG + ZSB
E_MH_Mounting_instructions_aluSKY lux_aluSKYcrown 18/06/2018
6/16
l
LEFT CLLX-profile RIGHT CLLX-profile
Ø 5 mm
CCHAAK BOUT
ROND MOER
M5 M5 x 20
CCHAAK
cutting line
49
100
CLL CLL
18/06/2018 7/16
E_MH_Mounting_instructions_aluSKYlux_aluSKYcrown
De gelakte schroeven ZSG worden gebruikt om de sluitplaatjes op het hoekprofiel te monteren.
Les vis laquées ZSG sont utilisées pour fixer les embouts sur le profil d’angle.
The lacquered screws ZSG are used to mount the end pieces on the corner profile.
Die lackierten Schrauben ZSG werden verwendet, um die Abschlussstücke aufs Eckprofil zu befestigen.
CCHAAK ZSG/ZSB
ZSG
ZSG
CCHAAK
ZSB
ZSB
E_MH_Mounting_instructions_aluSKY lux_aluSKYcrown 18/06/2018
8/16
Aanpassen haak links en rechts (doorgang LED-kabel).
Adaptez les crochets à gauche et à droit (pour le passage du câble LED).
Adjust hook on the left and right (passage LED cable).
Anpassen Haken links und rechts (Durchgang LED-Kabel).
Ø 16
72
166,70
Ø 16
10
LED
drill hole Ø 12
41
7
drill hole Ø 12
41
7
18/06/2018 9/16
E_MH_Mounting_instructions_aluSKYlux_aluSKYcrown
LED-strook van binnen naar buiten doorsteken tussen zijdrager en gootprofiel
Insérez le bandeau LED de l’intérieur vers l’extérieur entre les supports latéraux et le profil de gouttière
Push the LED stripe from the inside to the outside between side rafter and gutter profile
LED-Streifen von innen nach außen zwischen Seitenträger und Rinnenprofil durchstecken
Zwarte zone 8 mm diep weghalen (aan de onderkant)
Enlevez la zone noire de 8 mm (face inférieure)
Remove black zone 8 mm (on the bottom side)
Schwarze Zone 8 mm tief entfernen (an der Unterseite)
TRANSFO
230V AC
8 mm
8 mm
8 mm
E_MH_Mounting_instructions_aluSKY lux_aluSKYcrown 18/06/2018
10/16
MONTAGE KROONLIJST ZIJKANT(EN)
MONTAGE DU BANDEAUX AUX COTES LATERAUX
ASSEMBLY CORNICE ON THE LATERAL SIDE(S)
MONTAGE DER ATTIKA AN DER SEITE(N)
Voorboren met Ø 4 mm en schroeven met PST
Préforez à la mèche Ø 4 mm puis vissez avec les vis PST
Pre-drill with Ø 4 mm and screws with PST
Vorbohren mit Ø 4 mm und Schrauben mit PST
optie LED: schuif de LED-stroken in de profielen
option LED: glissez les bandeaux LED à l’intérieur des profils
option LED: slide the LED stripes in the profiles
Zusatz LED: Schieben Sie die LED-Streifen in die Profile
+
CC150CC225 CCL
+
PST
/
CCBEUG
LED
10
20
CCL
CCL
5
2 x
CC150/CC225
PST
CCL
18/06/2018 11/16
E_MH_Mounting_instructions_aluSKYlux_aluSKYcrown
De schroef op 70 mm van de onderkant niet volledig indraaien zodat het profiel hierop rust.
Ne vissez pas complètement la vis à 70 mm de la face inférieure afin que le profil repose sur celle-ci.
Do not completely screw in the screw 70 mm from the bottom side so the profile can rest on it.
Die Schraube auf 70 mm der Unterseite nicht komplett eindrehen, damit das Profil darauf liegen kann.
CCU NP
CCHAAK
Hg- 10 mm
CCU
CC150/CC225
30
Ø 8
max.
300
max.
300
70
Ø 8
30 HG - 10 mm
CCU
NP
NP
70
E_MH_Mounting_instructions_aluSKY lux_aluSKYcrown 18/06/2018
12/16
Herhaal bovenstaande richtlijnen voor de andere zijkant.
Faites la même chose pour l’autre côté.
Repeat the above mentioned guidelines for the other side.
Wiederholen Sie die oben genannten Richtlinien für die andere Seite.
3 mm
1
2
20
10
CCU
18/06/2018 13/16
E_MH_Mounting_instructions_aluSKYlux_aluSKYcrown
MONTAGE KROONLIJST VOORZIJDE
MONTAGE DU BANDEAU SUR LA FACE AVANT
ASSEMBLY CORNICE ON THE FRONT SIDE
MONTAGE DER ATTIKA AN DER VORDERSEITE
optie LED: schuif de LED-stroken in de profielen
option LED: glissez les bandeaux LED à l’intérieur des profils
option LED: slide the LED stripes in the profiles
Zusatz LED: Schieben Sie die LED-Streifen in die Profile
Na deze handeling worden de platen of de beglazing (terug) op het aluSKY lux-dak geplaatst.
Werk het aluSKY lux-dak nu volledig af en monteer vervolgens de aluSKYcrown verder.
Une fois cette opération terminée, il faut (re)monter les panneaux ou le vitrage dans la toiture aluSKY
lux. Finissez à présent la toiture aluSKY lux et poursuivez le montage de la aluSKYcrown.
After this, the sheets or glazing are (re)mounted on the aluSKY lux roof.
Finish the aluSKY lux roof and continue to mount the aluSKYcrown.
Nach diesem Schritt werden die Platten oder die Verglasung (wieder) ins aluSKY lux-Dach montiert.
Stellen Sie das aluSKY lux-Dach komplett fertig und montieren Sie anschließend die aluSKY crown
weiter.
+
PSTCC150CC225
/
E_MH_Mounting_instructions_aluSKY lux_aluSKYcrown 18/06/2018
14/16
OPBOUW aluSKYCROWN
STRUCTUR aluSKYCROWN
CONSTRUCTION aluSKYCROWN
AUFBAU aluSKYCROWN
+
PSTCC150CC225
/
20
10
18/06/2018 15/16
E_MH_Mounting_instructions_aluSKYlux_aluSKYcrown
Breng de LED-cover op maat en klik deze tussen de haken in het profiel.
Découpez le cover LED sur mesure et clipsez-le entre les crochets du profil.
Adjust the LED cover and click it in between the hooks in the profile.
Passen Sie die LED-Abdeckung an und klicken Sie diese zwischen den Haken ins Profil.
Monteer de sluitplaatjes CCLAS op de hoekprofielen met de gelakte schroeven ZSG.
Montez les embouts CCLAS sur les profils d’angle à l’aide des vis laquées ZSG.
Mount the end pieces CCLAS onto the corner profiles with the lacquered screws ZSG.
Montieren Sie die Abschlussstücke CCLAS auf die Eckprofile mit den lackierten Schrauben ZSG.
CCU PST
LEDCO LED
“click”
CCU
CCLAS ZSG
CCLAS
CCLAS
ZSG
ZSG
E_MH_Mounting_instructions_aluSky lux_aluSK Y crown 18/06/2018
GEBRUIK ALLEEN DOOR aluSKY LUX GELEVERDE ORIGINELE ONDERDELEN. BIJ GEBRUIK VAN NIETORIGINELE ONDERDELEN VERVALT DE GARANTIE.
UTILISEZ UNIQUEMENT LES PIECES DETACHEES ORIGINALES aluSKY LUX. SI VOUS UTILISEZ DES PIECES NON ORIGINALES, VOUS N’AVEZ PLUS DROIT A LA GARANTIE.
VERWENDEN SIE NUR aluSKY LUX ORIGINALUNTERTEILE. BEI GEBRAUCH VON NICHT ORIGINALEN UNTERTEILEN, VERFÄLLT JEDE GARANTIE.
ONLY USE ORIGINAL aluSKY LUX SPARE PARTS. THE GUARANTEE EXPIRES WHEN YOU USE NONORIGINAL PARTS.
Terrassenüberdachung Niederrhein KR GmbH
Hammersteinstr.1 D-47807 Krefeld
TEL: 02151-82 10 231 - fAX. 02151-82 10 232
info@alusky.de
www.alusky.de
aluSKY

Popular Tent manuals by other brands

Skandika Helsinki Setup & maintenance

Skandika

Skandika Helsinki Setup & maintenance

Sunjoy D-GZ850PST Assembly instructions

Sunjoy

Sunjoy D-GZ850PST Assembly instructions

PROTENT 2000 manual

PROTENT

PROTENT 2000 manual

GigaTent Prospect Rock FT049 owner's manual

GigaTent

GigaTent Prospect Rock FT049 owner's manual

bauhaus Special Offer Carport Assembly instructions

bauhaus

bauhaus Special Offer Carport Assembly instructions

Palram solid ANNA 3x7/1x2.2 How to assemble

Palram

Palram solid ANNA 3x7/1x2.2 How to assemble

Bestway 58460 owner's manual

Bestway

Bestway 58460 owner's manual

Outdoor Connection ESCAPE 3 PLUS quick start guide

Outdoor Connection

Outdoor Connection ESCAPE 3 PLUS quick start guide

CMi 476 678 operating instructions

CMi

CMi 476 678 operating instructions

Jack Wolfskin TRAVEL LODGE RT manual

Jack Wolfskin

Jack Wolfskin TRAVEL LODGE RT manual

Hesperide ROSARIO 149887 manual

Hesperide

Hesperide ROSARIO 149887 manual

GigaTent Dual Identity SHT007 owner's manual

GigaTent

GigaTent Dual Identity SHT007 owner's manual

encompass HB-065 instruction manual

encompass

encompass HB-065 instruction manual

Vango HELIX 100 instructions

Vango

Vango HELIX 100 instructions

canvascamp PATROL Assembly instructions

canvascamp

canvascamp PATROL Assembly instructions

Avvilo Pop-Up G212305 quick start guide

Avvilo

Avvilo Pop-Up G212305 quick start guide

GigaTent Princess Tower owner's manual

GigaTent

GigaTent Princess Tower owner's manual

Tepui HyBox owner's manual

Tepui

Tepui HyBox owner's manual

manuals.online logo
manuals.online logoBrands
  • About & Mission
  • Contact us
  • Privacy Policy
  • Terms and Conditions

Copyright 2025 Manuals.Online. All Rights Reserved.