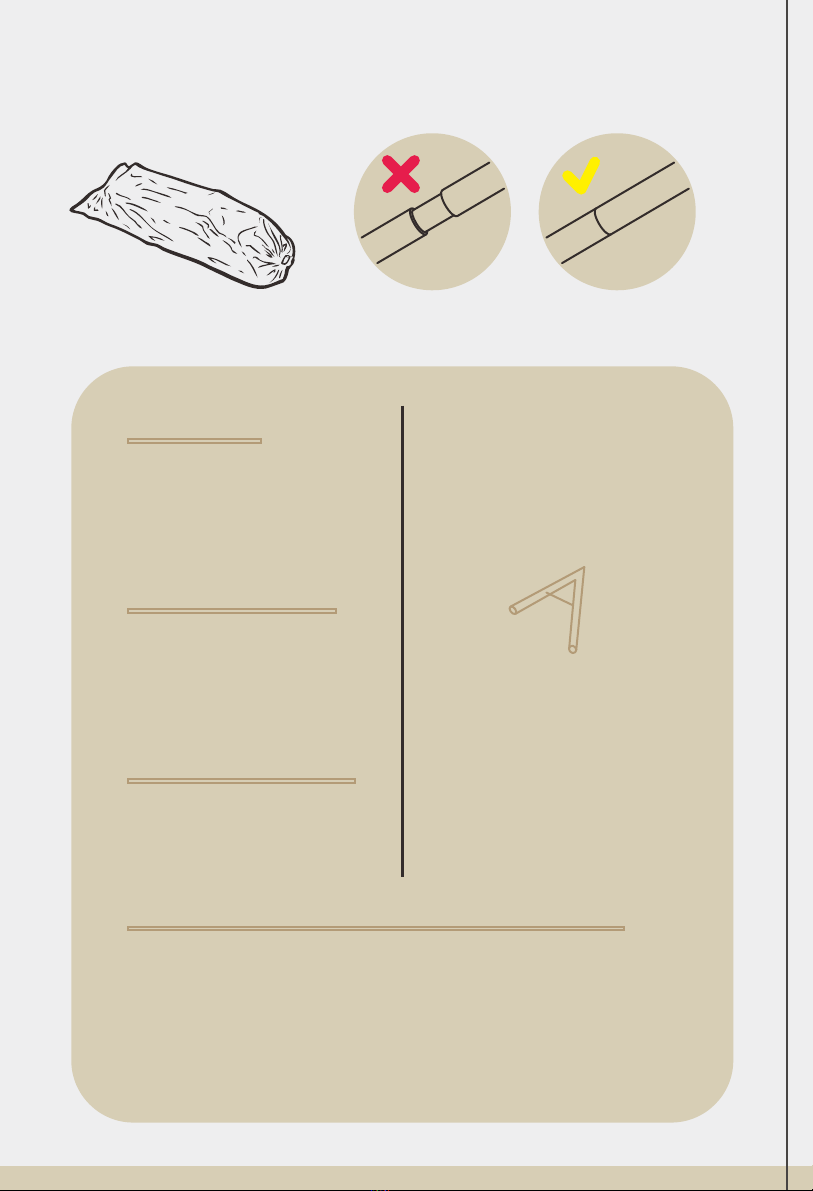
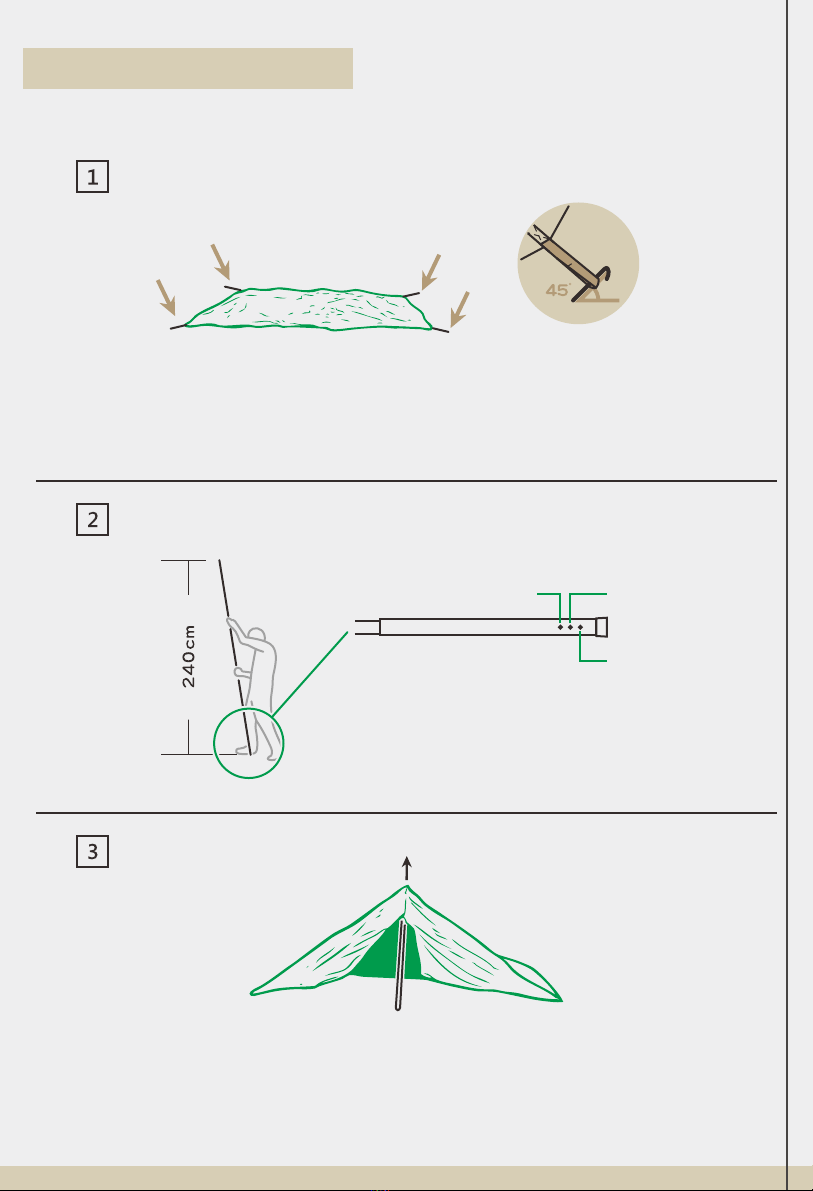
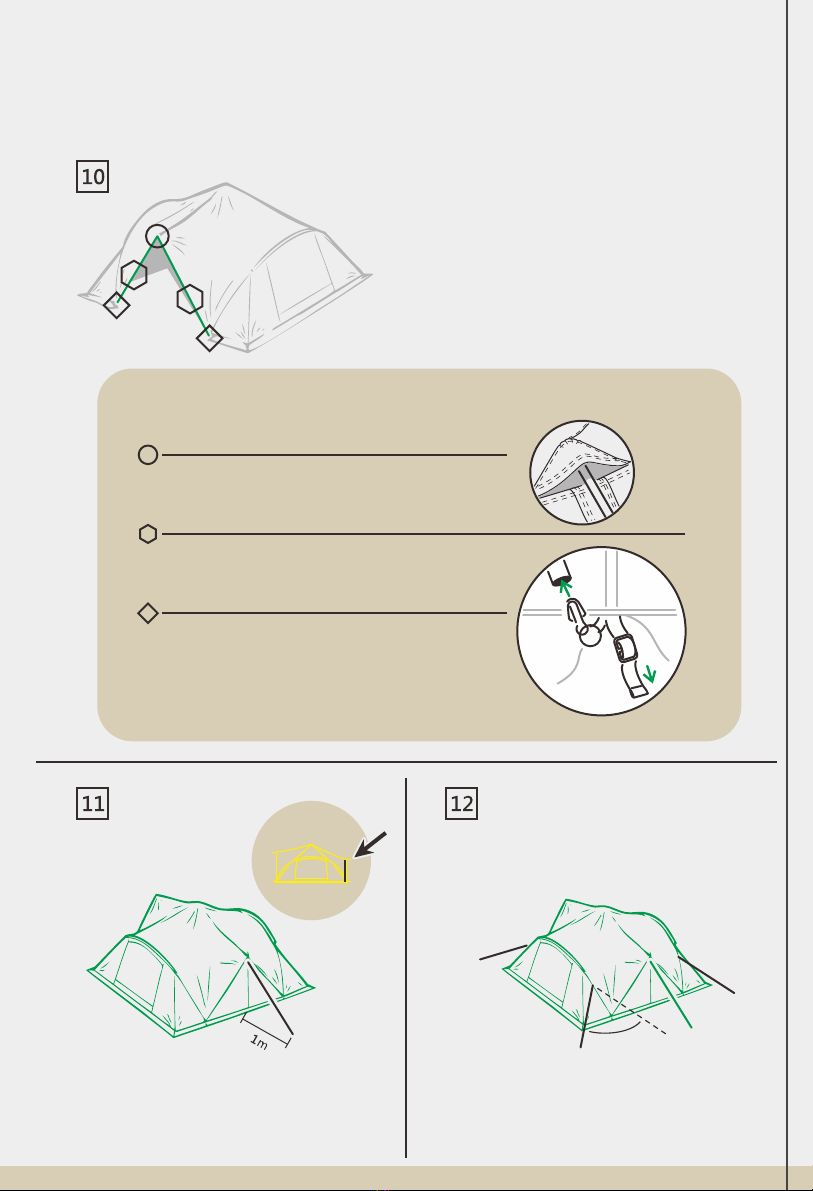
45°
Unzip the outer layer of the front triangular
door and the screen, slip the top of the A-
shaped pole into the inner pocket and insert
the pins of the ring & pin connectors to the
bottom of the pole, then tighten the guy
line for the front triangular door.
The top of the A-shaped pole must be
jointed medial layer properly.
This step must be followed carefully to avoid
damage to the cloth surface.
Note:
Use the Velcro on both sides of the
door to securely fix the A-shaped pole.
After inserted the pins of the pin &
ring, tighten the webbing strap.
Make sure that the A-shaped pole is
firm and not loose.
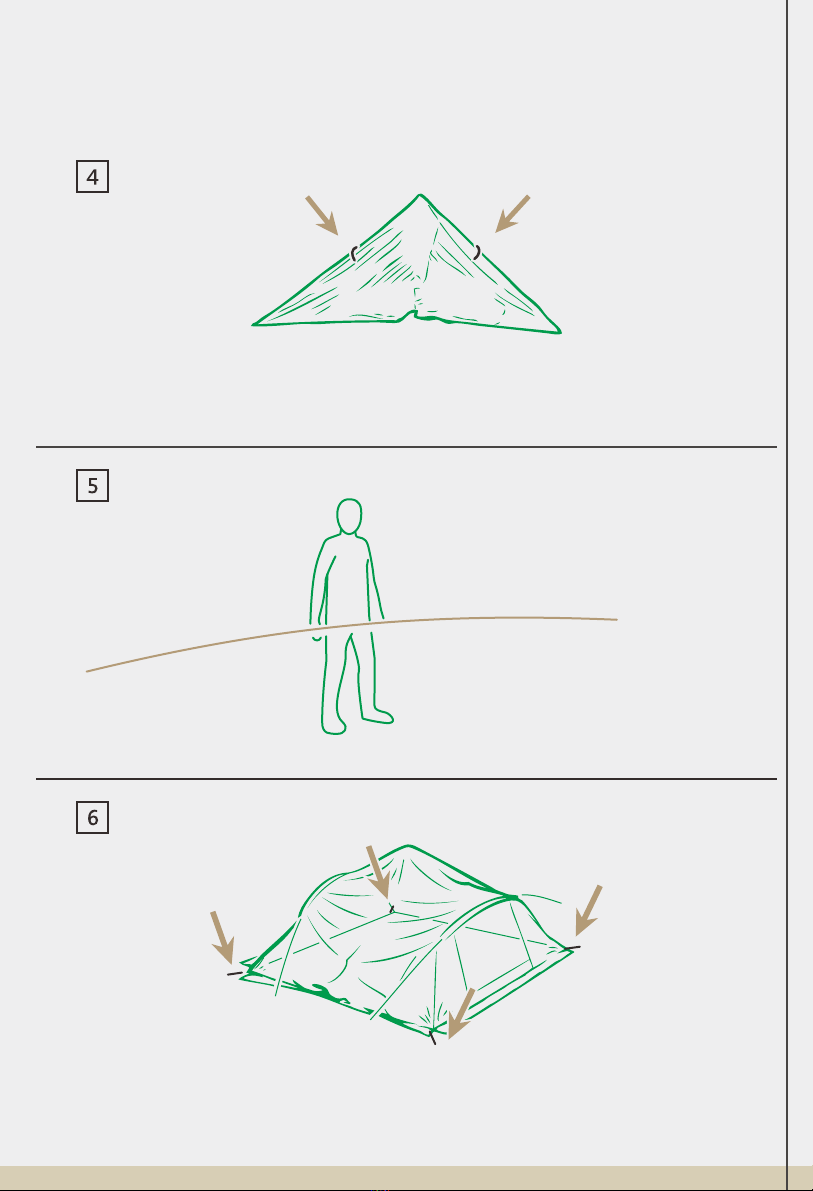
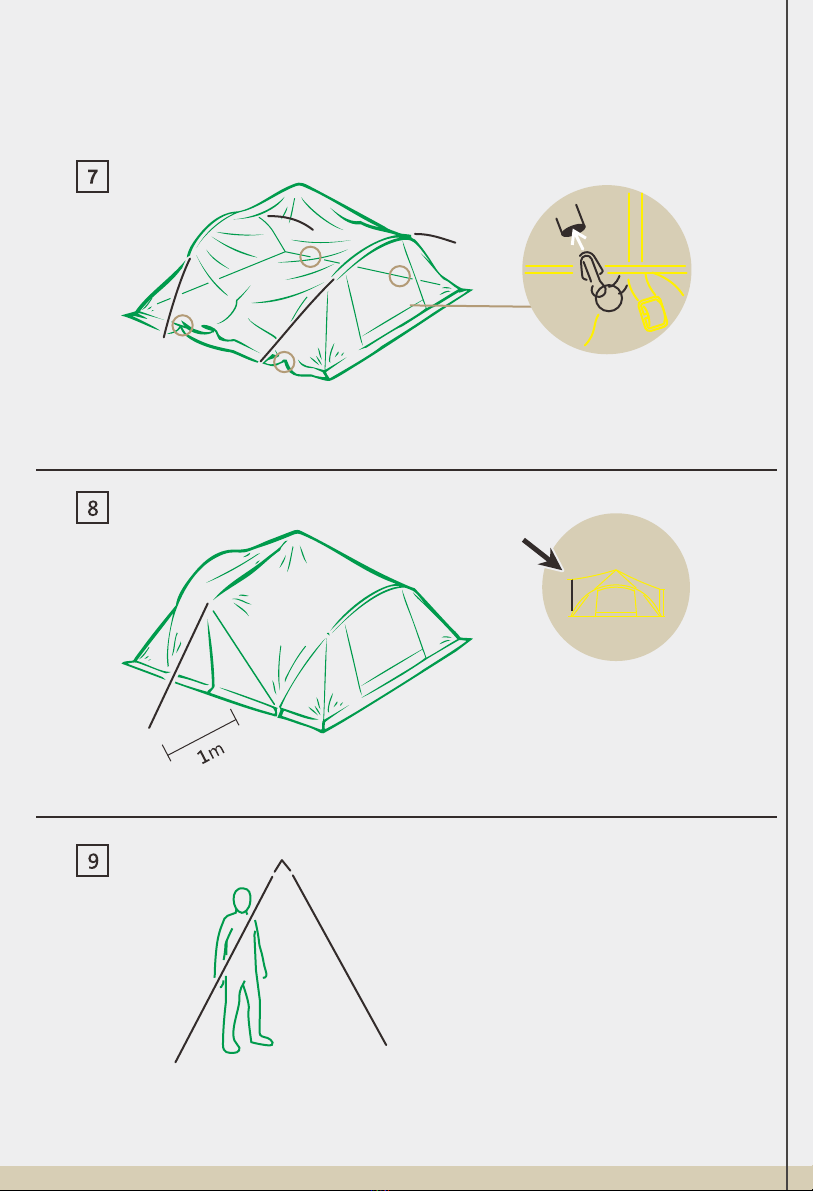
Rear triangular
door
Peg down the guy line for the rear
triangular door at 1m away from
the door.
Nail the four windproof guy lines
outward at 45°