SMRT TENT SUMMIT SUITE User manual
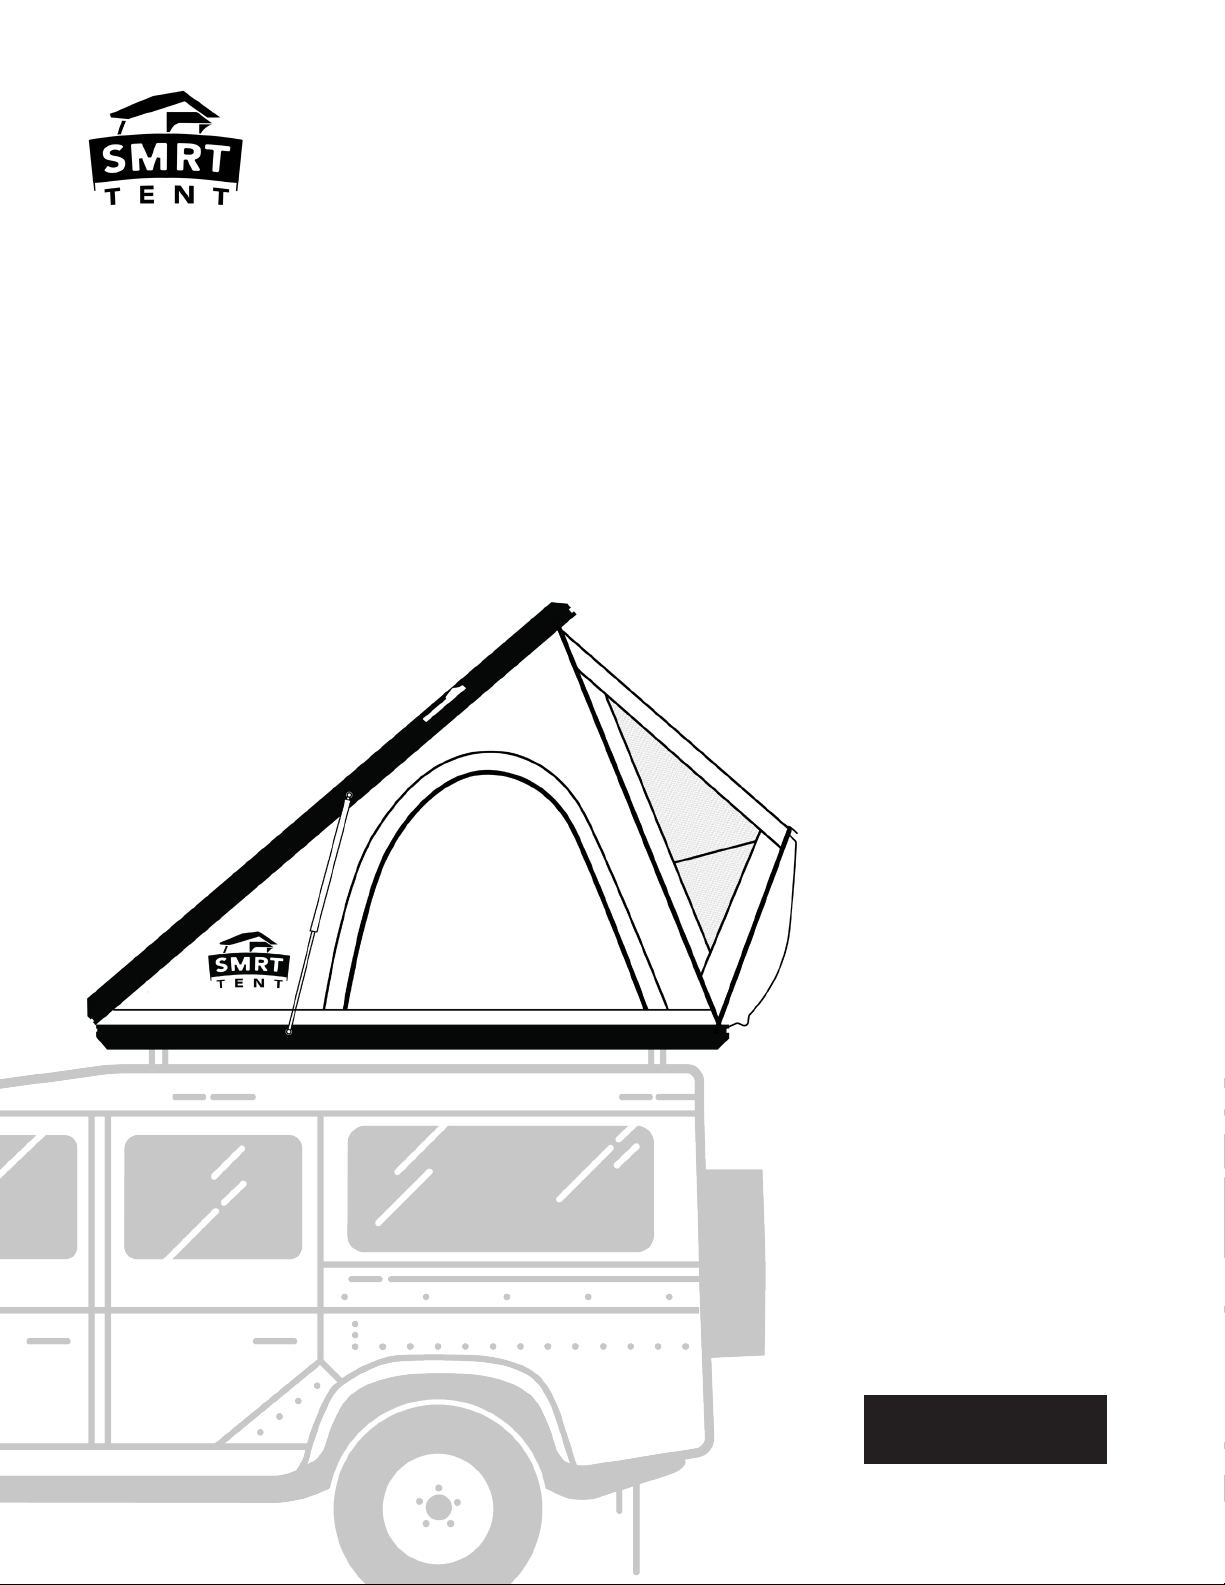
SUMMIT SUITE
Your childhood treefort just got a massive upgrade.
Owner Manual

2
Your childhood
treefort just got a
massive upgrade.

Summit Suite Owner Manual
3
Safety Warning
Parts
Installation Prep
Installing the Latch Hardware
Getting your SMRT Tent on your Vehicle
Installing the Mounting Hardware
Final Set Up Steps
Packing Up the Summit Suite
Tent Care & Upkeep
Offseason Storage
4
6
8
9
10
11
12
13
14
16
TABLE OF CONTENTS
ATTENTION: Manuel en Français
Si vous souhaitez lire ce manuel en français,
veuillez visiter notre site Web à l’adresse www.
smrttent.com et télécharger le PDF en français.
ATENCIÓN: Manual en Español
Si desea leer este manual en Español, visite
nuestro sitio web en www.smrttent.com y
descargue el PDF en Español.

4
FIRST THINGS FIRST: BE SAFE!
HOW TO CAMP SMRT
Congratulations on your purchase! We know
you are going to love the rooftop tenting
lifestyle, and many great adventures await
you. But before you pack up and leave on your
first trip, you need to properly install your
SMRT Tent, and know how to use it safely.
Although rooftop tenting and sleeping off the
ground has many safety benefits, there are
still steps that need to be taken to prevent
injury and dangerous situations. Remember
that you are still using nature’s space and that
it needs to be treated with respect. You will
be sharing it with animals, weather, and other
people.
Follow the instructions in this booklet to
safely and securely install your tent onto
your vehicle. For your ease and convenience,
you can also watch our Install Videos on
our YouTube Channel (SMRT Tent). You can
follow the QR code on this page to get to our
channel.
Please contact your vehicle manufacturer for
specific load rating of your roof rack. Not all
factory roof racks or aftermarket roof bars can
safely accommodate a SMRT Tent.
The installation of a SMRT Tent on your roof
rack will change your vehicle’s centre of
gravity, height and handling. The manufacturer
disclaims all responsibility in case of accidents
due to improper use, improper maintenance,
or checking the tightness of the brackets
regarding the fitting of your chosen roof rack
system.
Improper installation or use of the SMRT Tent
may result in serious injury or death. SMRT
Tent, the manufacturer, shall not be liable for
special, indirect incidental or consequential
damages.
Something close to our hearts is the
environment in which we have our fun; it
needs to be treated well and with respect so
the generations after us can explore too. When
using your SMRT Tent and exploring, stay
on designated roads and trails. Go over, not
around, obstacles to avoid widening the trails.
Cross streams only at designated fords, and
when possible avoid wet trails. Avoid sensitive
areas (meadows, lake shores, wetlands and
streams) – this protects wildlife habitats and
sensitive soils from damage. Don’t disturb
historical, archaeological or paleontological
sites. Try to leave no trace, leave the area
better than you found it, properly dispose
of waste, and avoid the spread of invasive
species.
Finally, go have some fun!
Scan this code to
view the SMRT Tent
YouTube Channel for
Install Videos!

Summit Suite Owner Manual
5
• Check your mounting hardware before every trip and tighten your bolts if
necessary.
• Maximum travel speed is 120km/hr (74.5mph)
• You must you recheck your hardware after your first 200km/120 miles, and we
recommend giving it a check before every trip after that, making sure it is still
tight.
• Ensure ladder is well secured to your Rooftop Tent and at the correct angle
(approx. 70 degrees between ladder and ground) to avoid injury.
• Be sure to always have a light source to help you safely move around
in the dark.
• Keep all flame and heat sources away from the tent materials. Under no
circumstances should any naked flame sources or heating devices be used
inside or near the tent!
• Keep campfires well away from tent and be cautious of embers.
• Keep a fire extinguisher or a water source nearby when having a fire.
• Do not smoke in your Rooftop Tent.
• Do not operate any device which burns fuel inside your Rooftop Tent.
• Keep exits clear.
• If you’re camping in an undeveloped campground or in the backcountry, hang
up your garbage and food in a tree and make a “bear hang” that’s far away from
your tent, keeping it out of any animal’s reach.
• Always ensure your tent is securely closed and fastened before departing and
driving away.
• Do not park in waterways or areas that could be flooded at night.
• Do not bring tent through automatic car wash.
Safety Warnings
EXTREMELY IMPORTANT! The included mounting brackets are meant for on-road use
only. If you plan on using this tent in any offroad capacity, you must purchase the Heavy
Duty Mounting Kit... No, seriously. You don’t want your tent flying off your vehicle.
6
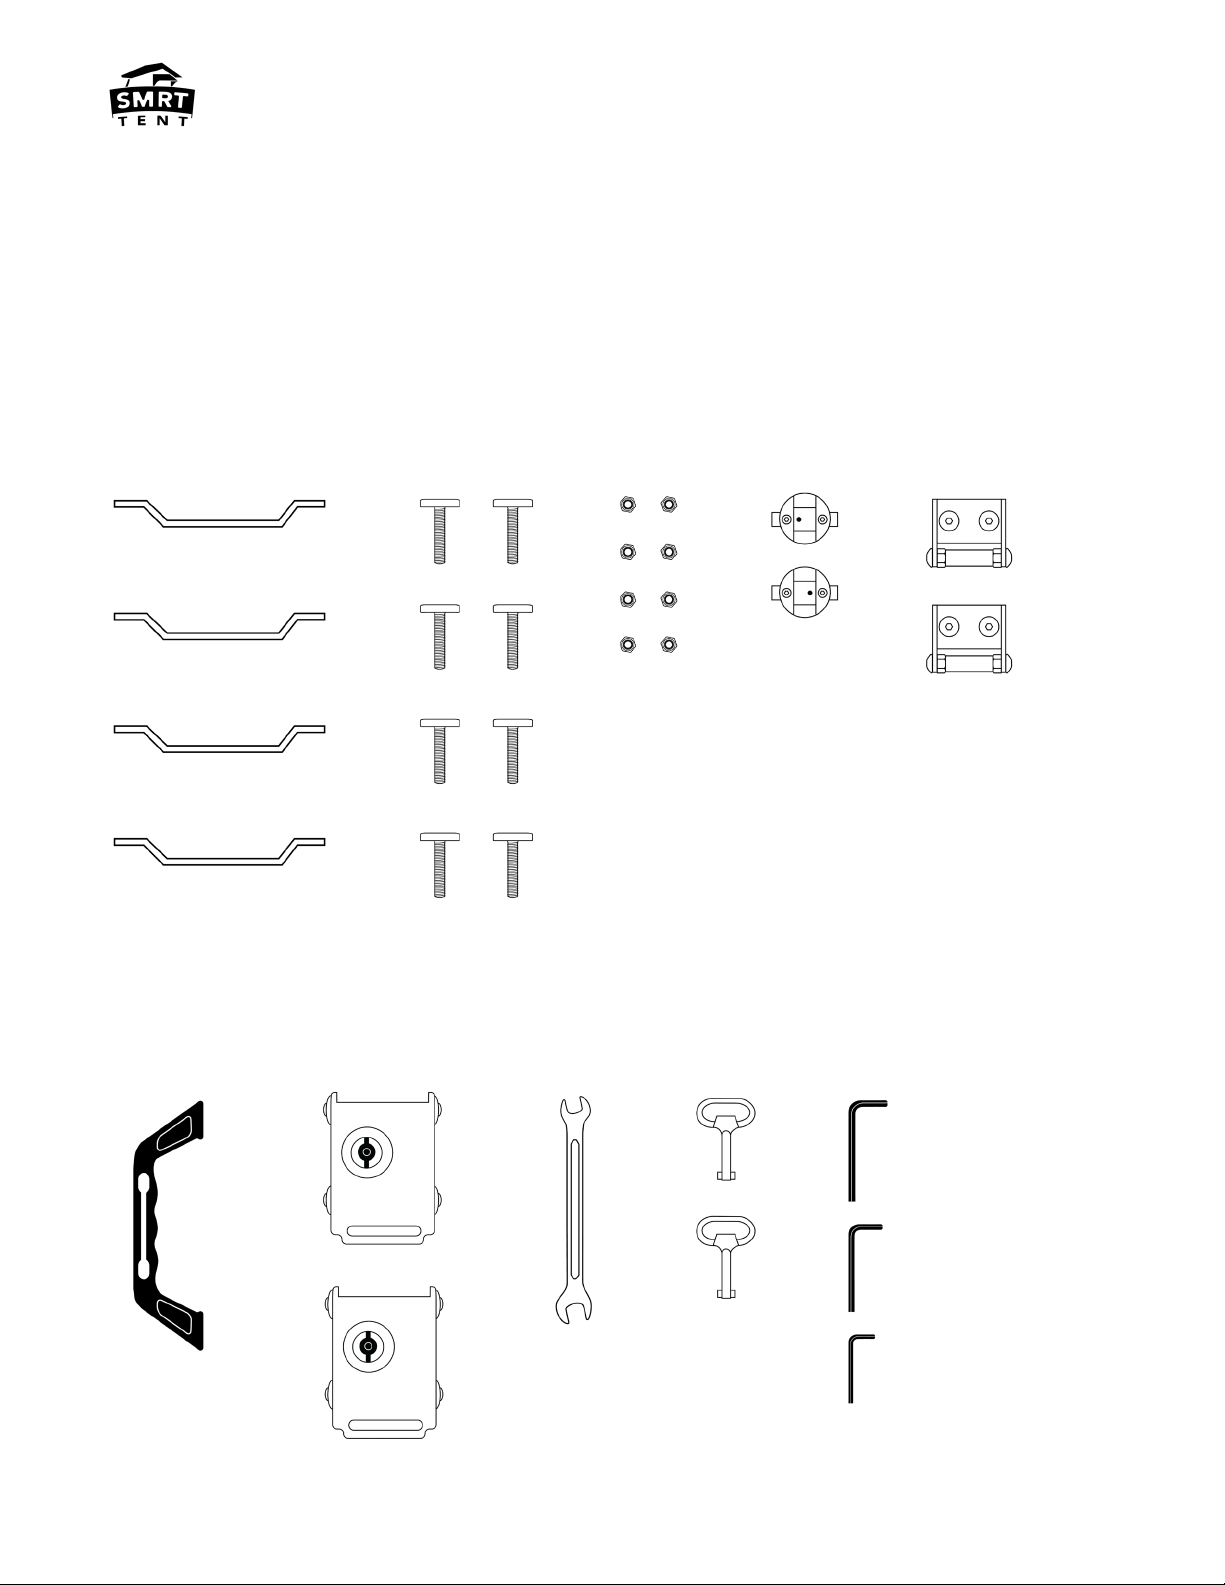
PARTS
4X
1X
8X
2X 2X 3X
2X 2X8X
1X
The hardware kit for your Summit Suite will be inside the Ladder Box. It includes:
Mounting Brackets
Handle
T Bolts
Latches Keyway Allen Keys
Pole Bases Ladder HooksNuts
#13/#10
Summit Suite Owner Manual
7
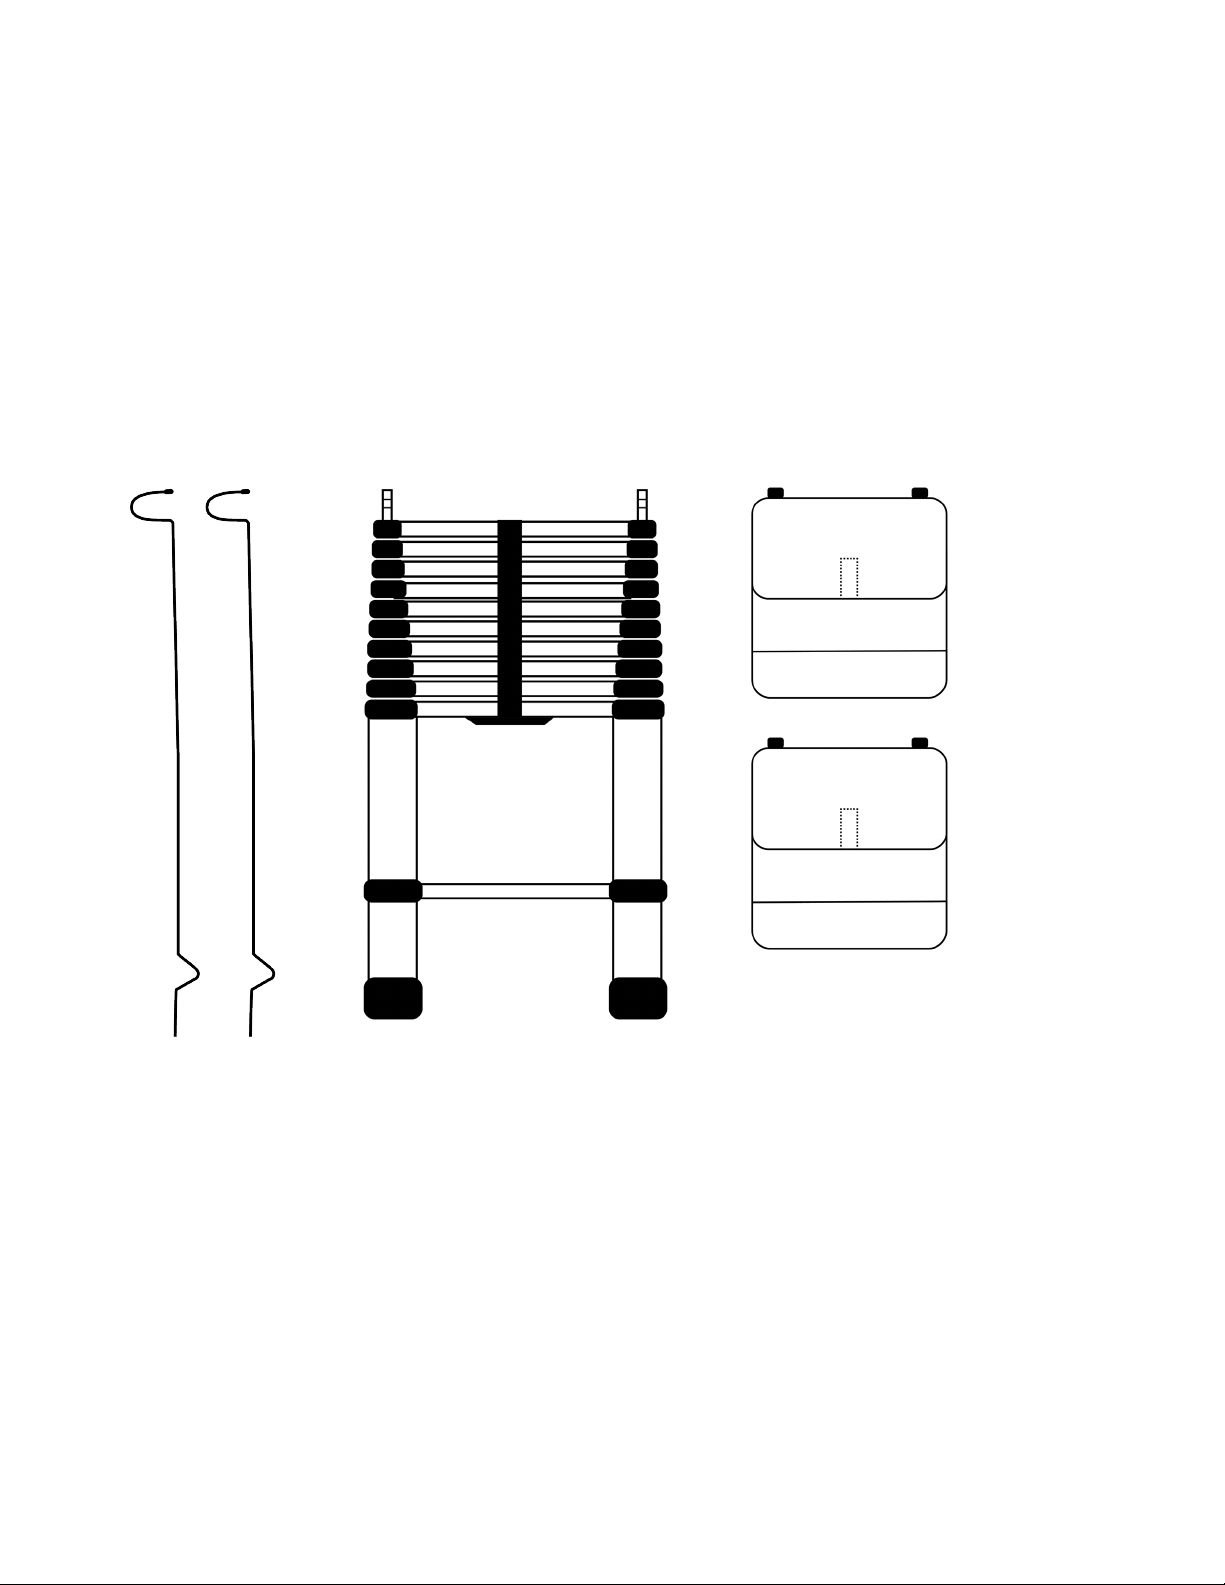
2X 1X 2X
Note: We recommend laying your hardware out on a flat surface for easy access and to
avoid losing a piece.
Window Rods Telescopic Ladder Shoe Bags

8
• Think about what vehicle you are
putting this on top of. The way we
mount a tent to a truck is different
than an SUV or a car. Identify what
you are mounting to and follow
the recommended steps for your
vehicle.
• Open the ladder box. Here you will
find the Ladder bag and the Tent
Install Hardware. Remove Ladder
and contents from bag.
• Take Tent out of Box and lay it on
the thin cardboard box top.
• Prop the back end of the tent (not
the side with the hinges, the side
with the logo) up with a bucket,
chair, anything to give you a bit of
lift so you can install your clamps.
to fully raise your canopy glass
safely when your tent is shut,
however you may use any of the 3
options that you like.
• If you have a hatchback, SUV,
anything with a rear opening
door or spoiler, you may want to
mount the latches on the sides
of the tent to save space on the
back end and be able to have
the tent more centered on your
vehicle, as well as having no
interference with the door lifting.
You may want to leave the handle
installation out. You can still
mount onto the back if you’d like,
however that may cause the tent
to have a bigger overhang on the
front of your vehicle.
• If you have a curved glass on your
back window, you may want to
mount the latches on the far
sides of the back of the tent, as to
create room for your glass, and
you may want to leave the handle
installation out.
• If you have decided you would like
to install your latches on the side
of the tent, you will have to install
your ladder hooks into desired
side, as well as any other SMRT
Tent accessories you may have
purchased (Shower Kit, Awning),
as these will not be able to slide
in past the latches once installed
(you would need to remove the
latch). If you’ve decided to mount
your latches on the back, you can
wait to do these steps until after.
A note: if you drive on the right side of
the road (North America Standard), we
suggest installing the ladder hooks on
the right side of the tent so if you ever
pull over for a snooze, your exit is on
the non traffic side. Vice versa if you
drive on the left hand side of the road.
Open the tent and remove the
contents for install.
We mount in three locations: A)
Centered on the back of the tent
(most common for most vehicles),
B) On outer edges of the back of the
tent (if you have curved glass) and C)
On sides of the tent (hatchback, SUV
with full lift gate, spoiler). There are
factors that might affect where you’d
like to mount.
Factors that affect mounting:
• If you have a canopy on the back
of your truck, you may want to
try mounting your latches on the
sides in order to retain ability
Decide where you would like to
install your latches.
1
1
2a
2b
Summit Suite Owner Manual
9
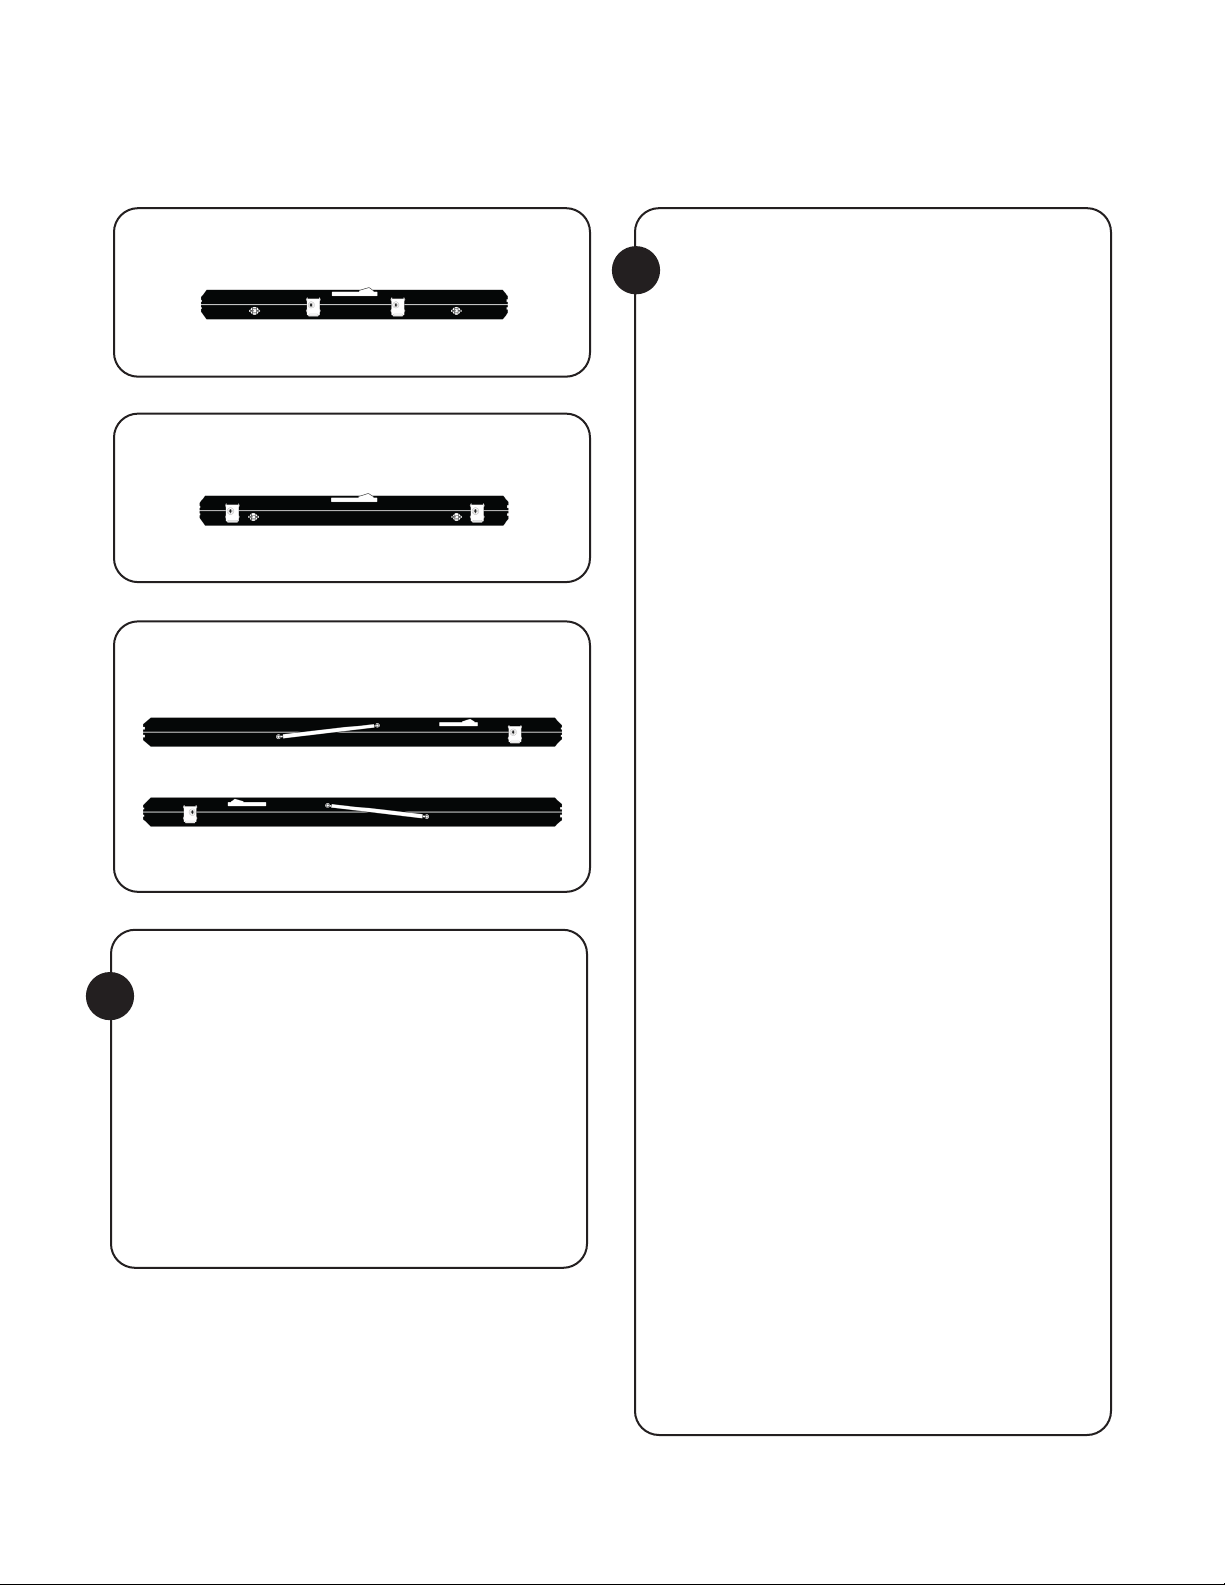
• Unthread the nutserts a bit (not
all the way) and then slide the
nutserts in the mounting channel
until the handle is located in
middle of the tent, underneath the
logo on the back of the tent.
• Tighten.
• Remove the latches from the
plastic packaging, and unhook
the bottom C brackets from each
latch. Remove the rods from these
lower C brackets by removing
the Allen head key bolts on both
sides. Put all the parts of the lower
brackets aside so you don’t mix
them up with the other parts.
• Next you must take the apart the
latching mechanism from the
upper C bracket for installation.
Once disassembled, start with
upper portion C bracket.
A) Latches Centered on the back of
the Tent.
• Locate the centre of the tent,
and approximately 8 inches from
centre should be the centre of
your C bracket - slide it in.
• Tighten the bolts while applying
downward pressure (doing this
will make it easier for you to open
your latches, they can be hard to
open and close at first).
• Reattach the latching mechanism
to the C bracket using the
hardware that you had removed
with a 10mm wrench and the
provided Allen key.
• Next you will slide in the lower C
bracket (without the rod in) into
it’s approximate location. Flip the
latching mechanism down into
latch position, which will show you
the perfect location to tighten the
bolts on the lower bracket.
• Tighten the bolts on the lower C
bracket while applying upward
pressure.
Install the Handle
Stainless Steel Latches
Installation:
A
B
C
Mounting Location A
Mounting Location B
Mounting Location C
BACK OF TENT
BACK OF TENT
BACKFRONT
BACK FRONT
RIGHT SIDE
LEFT SIDE
3
4a
10
5
D
• Get some help lifting your tent
onto the vehicle with another
person or an overhead hoist. We
do not recommend doing it by
yourself.
• Pick up the tent and bring it to
the side of the vehicle. Holding
the front and back, lift it up to the
height of the rack. Slide the tent
across the rack until you have both
mounting rails on the crossbars
or rack that you have (Figure
E). Don’t worry about it being
completely centered yet.
6Grab a friend to help you lift the
tent onto your rack or crossbars.
E
F
• Now you can reattach the stainless
steel rod to the lower C bracket and
make sure that the clamp latches. It
will be tough to close at first – this
is normal, your latches will break in
over time.
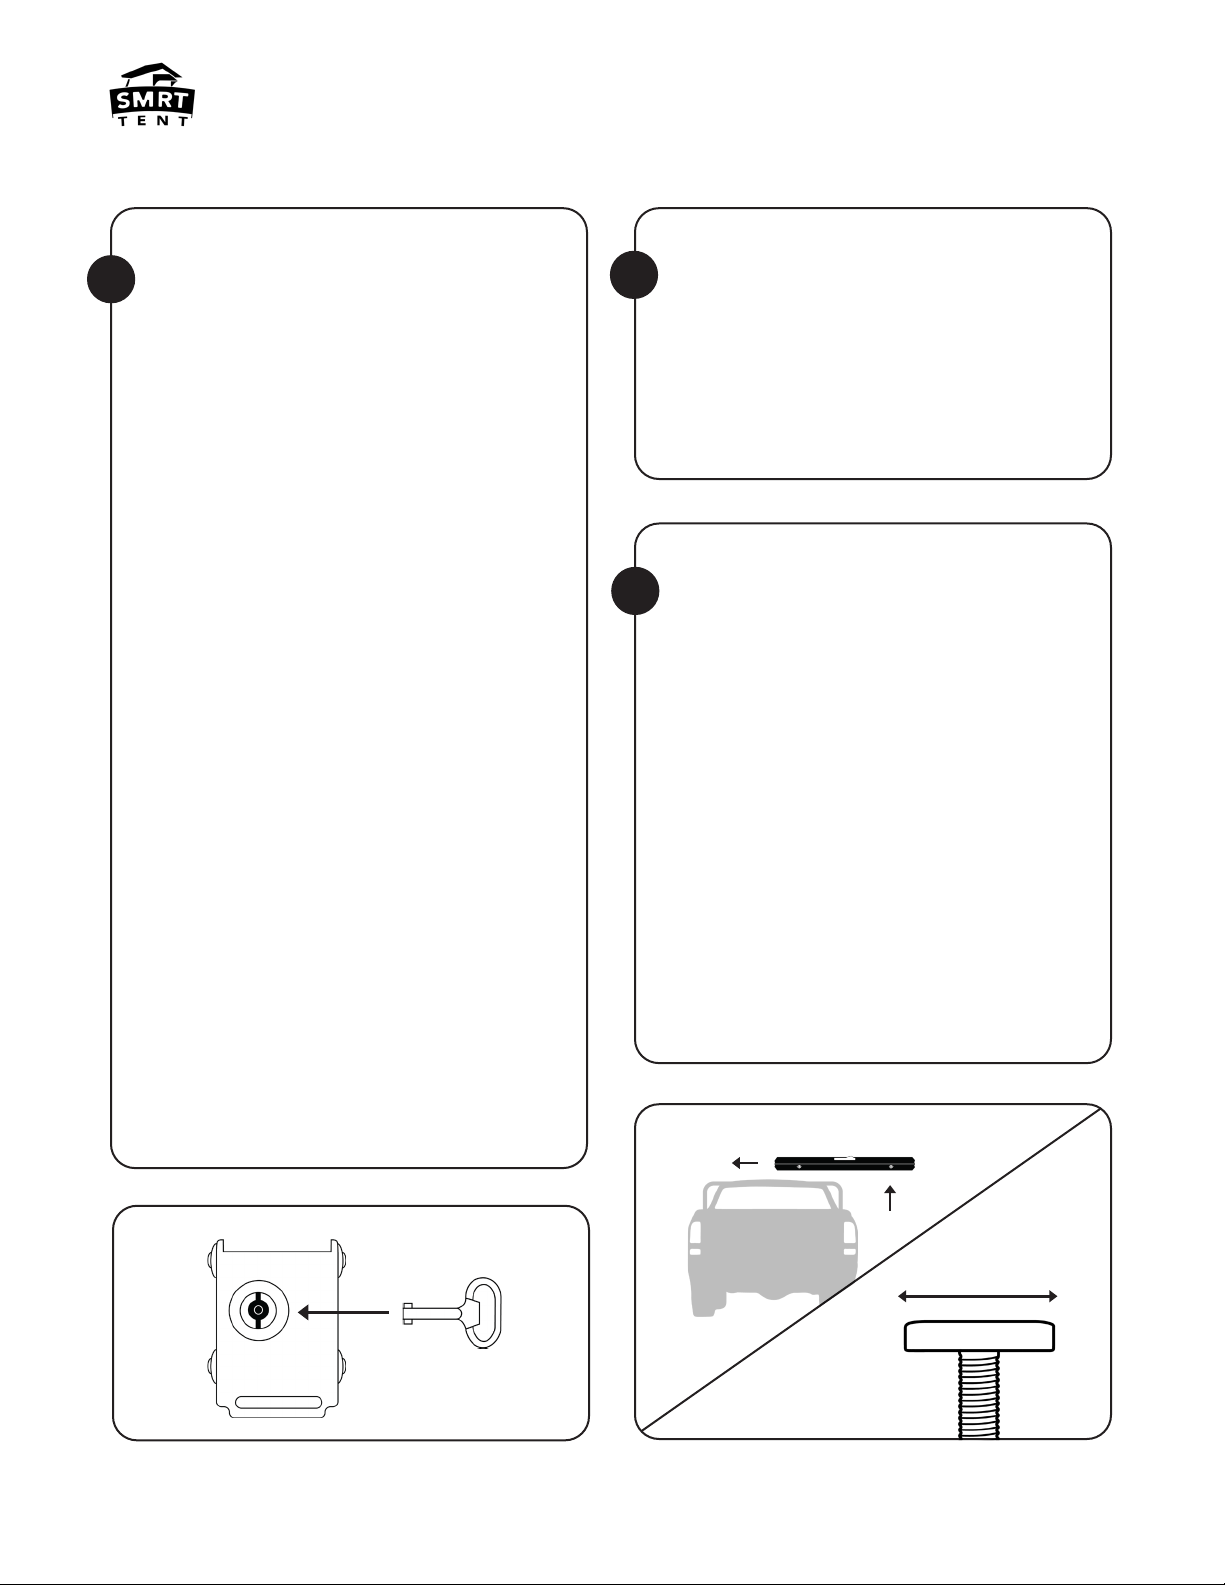
• Use the provided keyway to lock
the clamp in place (you can check
that the latch is locked by looking
down from the top of that latch and
ensuring the locking arm is straight
down in it’s lowered position. That
is one latch done! (Figure D).
• To install the second latch, repeat
the previous steps on the opposite
side, moving the other way from
centre so that your latches end up
around 16 inches apart, for your
ladder hooks.
B) Installation: Latches on outer
edges of the back of the tent
• Follow previous latch instructions,
but change your mounting location
to the far edges of the back of the
tent. You want to mount the latches
8 inches from the edge instead of
from the centre.
C) Installation: Latches on Sides of
Tent
• Follow previous latch instructions,
but change your mounting location
to the sides of the tent. You want
to mount the latches 3-4 inches in
from the back of the tent. You can
start with the left or ride side.
• Slide them in the lower mounting
rail and tighten. These will come
in approximately 8-9 inches from
the outside edge of the lower
mounting rail.
Install the Window Rod Bases
4b5
6

Summit Suite Owner Manual
11
• Stand at the back of the tent
where you attached your latches.
Tilt the back of the tent up and
slide in 2 T Bolts per mounting rail
into the centre portion of the tent,
and between your two mounting
rails (4 total). Let the tent down
softly. Important note on proper
insertion: The wide edge of the T Bolt
should be entered into the mounting
rail, not the shorter edge. (Figure F)
• Now walk around and insert 1
T Bolt into the mounting rail on
each corner. These will sit on the
outside of your crossbars/rack.
• Next you need to centre the tent,
finding the desirable location – it is
OK to have some overhang to the
front or the rear, but we want to
keep that to a maximum of 1/3 of
the tent. (Figure G)
• Stand at the front of your vehicle
and make sure it is centered side
to side. Then repeat this standing
at the back of your vehicle.
• Keep repeating until you are
satisfied.
4Install sliders for mounting and
center the tent on your vehicle.
C
G
1/3 MAX
27 in
68.6 cm 68.6 cm
CENTER ZONE 1/3 MAX
27 in
SAFETY ZONES
• Once we have found the desired
mounting location, we must install
our mounting brackets. Start on
any corner.
• Take one of the sliders from inside
the centre channel, and the one
from the outside, and attach the
lower bracket with two nuts. Do
not tighten yet – only thread them
on. Repeat that step 3 times on
all corners, giving you 4 mounting
locations. (Figure H)
• Now you need to tighten the
nuts. The tightening sequence
for the mounting hardware is 4
rotations on inner nut, followed by
4 rotations on the outer nut, and
repeating until tightened evenly.
This ensures an equal tightening
sequence. You will know you have
tightened enough when you see
the bottom bracket start to deflect
slightly. Do not tighten one side at
a time - this will create an uneven
clamping load.
• Repeat on the other 3 mounting
locations.
Important Warning: It is
important to note that this
tent has a Max traveling speed
of 120km/h when installed.
Please adhere to this guideline
to ensure your safety, and your
tent’s integrity.
5Assemble and tighten the
mounting brackets.
7
8

12
• Now that we have our tent
attached and clamped, we like to
check how secure it is. Give your
tent a firm shake with both hands
and make sure the tent is not
sliding on the rack at all.
• Seriously, shake it hard.
• Using the provided keyways that
you used to lock the clamps,
unlock the tent.
• Hook your ladder to the back of
the tent and open it up.
• Push the Top Lid of the tent up –
the gas struts will take over and
your tent will open.
• There will be a bungee cord on the
fabric that you will have pull down.
• Locate your shoe bags. The “S”
clips will clip onto the other
two remaining ladder mounting
locations.
Give your tent a firm shake,
shake, shake!
Setup & Open
H
• Inside the tent there will be two
stainless steel rods in a package,
which we will use to prop the rear
vestibule open.
• First stick the straight end of the
rod in the base, then hook the hook
end of the rod into the eyelet of the
vestibule fabric.
• The tent rod should snugly fit into
the pole base, however if it does
not fit, do not try to force it. Check
for burrs, in rare cases you may
have to run a drill bit into the base
to smooth it out.
• If you put your latches on the sides
of the tent, you should have done
this before the latches.
• Find your ladder hooks, locate the
side entrance you want to use. A
note: if you drive on the right side of
the road (North America Standard),
we suggest installing the ladder hooks
on the right side of the tent so if you
ever pull over for a snooze, your exit
is on the non traffic side. Vice versa if
you drive on the left hand side.
• Slide in the ladder hooks
approximately where you would like
them (easiest to do when the tent
is open to position under window
entrance). Tighten one hook down.
• We will use the ladder itself to
give us the second measurement
(approximately 15-16 inches).
Tighten the second hook with the
provided Allen key. (Figure I)
Set up the Window Rods
Installing the Side Mount
Ladder Hooks
9
10
11
12

Summit Suite Owner Manual
13
I
• Great job! You’ve successfully set
up your Summit Suite. Now to
learn how to pack it up!
• Remove any bedding items from
the tent. Remove the shoe bags,
window rods (from the hook first,
then the base) and put them in
their sleeve, and the ladder from
the tent (put the ladder in the
bag), and put the ladder in your
vehicle or the bed of your truck.
• For easier closing, we suggest
keeping the side windows and
screen open and laying flat on the
mattress, as well as keeping the
back window open to allow air to
drain from the inside of the tent
more efficiently.
• Bring your bungee cord to the
middle of the tent. Grab the pull
strap and pull down from the
middle, evenly, and allow the air
to come out. It is normal to have
the tent material sticking out from
both sides here.
• Move to one side of the tent and
lift the back corner up about an
inch, just enough to put the fabric
in with your free hand. Repeat on
the other side. Double check both
sides. For the best seal, there has
Packing Up Your Summit Suite
• Take your bungee cord and stuff it
in the back, over the metal lip.
• Fasten both latches by pushing
down on the top of the tent and
securing the latch until you hear
it click. Use your keyway to turn
the latches into locked position.
You can check that the latch is
locked by looking down from the
top of the latch or from below
and ensuring the locking arm
is straight down in it’s lowered
position.
• The tent is now closed! You’re
ready to drive away.
13a
13b

14
TENT UPKEEP + CARE
• You wake up to head home and it rained
all night, and there is water all over the
outside of your tent. You can pack up your
tent when it’s wet. We suggest leaving your
windows zipped up because that will help
keep the moisture on the outside.
• Give it a good shake and get as much water
off as you can before pack-up.
• Once you’ve arrived at your new location, it
is imperative that you don’t forget to open
it up and air it out completely! Try not to
leave it more than 36 hours – as soon as
you can is best.
• Once your tent is completely dry, you can
pack it back up.
• Having snug hardware is important. We
recommend checking your hardware before
every trip - just a quick check and tighten
1/16th of a turn goes a long way! You can
use a paint marker and make a mark on
your bolt to keep track of movement for a
quick visual inspection.
• Your zippers will be exposed to all kinds of
elements. We highly recommend regularly
lubricating them to keep them operating
smoothly!
• Using a lubricant such as Bee’s Wax is a
great way to protect the longevity of your
zipper. Just buy a small block and rub it on
• When packing up your tent, make sure
you fold in the corners and try and get the
fabric inside in as orderly of a manner as
you can, preventing from bunching and
lumps. The cinch cord will help with this.
• Double check the sides when closing and
push the fabric past the seal with your
fingers so it doesn’t get caught when you
close and latch the tent.
• Do up the straps on the latches tightly,
giving the tent a good seal, with no fabric
popping out.
Your tent’s lifespan greatly depends on how
much you use and care for it.
With extremely good care, safe handling
practices, proper winter storage, and average
use, you should be seeing 5+ years. Here
are our tips for keeping your tent in the best
shape possible!
*This could fluctuate based on region,
temperature, use rates, abuse, and terrain.
Rain + Your Tent: Packing up your
tent when it’s wet
Check your Hardware Regularly
Zipper Care
Make sure you have a Proper Seal
with Packing up your Tent
• Just like your car, the shell of your tent
likes to be clean. Use a bucket, warm water
and mild soap, then air out.
Clean the shell

Summit Suite Owner Manual
15
• Many people store their tents in their
basements or garages over the winter
(instructions on how to do this on pages
17-18).
• Before you can put your tent away for
the winter season, you need to air it out
completely, allowing all possible moisture
to evaporate. We suggest removing the
mattress as well and letting it air out.
• Check on your tent throughout the winter!
The only way to really make sure no water
or mold ensues is to check on it once in
a while. Once a month or so is great, just
to open it and make sure there aren’t any
issues.
• If you do have any mold or mildew growing
on the fabric (this would only happen if
moisture got left in the tent and it went
unchecked for months), you can clean it
with a vinegar and water mixture.
• Open the tent up and brush the affected
areas with a stiff bristled brush to get and
loose dirt/mold off.
• Fill a bucket or spray bottle with warm
water. Add Vinegar to the water, use your
best judgment on how much to use, start
small and work your way up (5% vinegar,
95% water would be a good place to
start). Stir thoroughly until the solution is
dissolved completely.
• Use a sponge or your spray bottle to apply
the solution to the affected area. Let this
soak for 1 hour.
• While the fabric is soaking, wash the frame
and any mold in it with Vinegar solution.
Dry with a rag.
• When the hour is up, wipe the fabric and
rinse with warm water to get the vinegar
out. Check out the fabric and see how it’s
looking. If you have tough spots left that
need more work, you can work on them
with a sponge and brush using a solution
of 1 cup lemon juice, 1 cup sea salt, 4
litres hot water. Rinse again with water to
dissipate the lemon and salt.
• Once rinsed, let the tent air out until it
is completely and absolutely dry. This
timeframe will be different for everyone
depending on climate.
• Treat the tent area you worked on with
a canvas specific waterproofing solution
of your choice, to repair the waterproof
fabric.
Getting the tent ready properly for
winter storage
Cleaning the fabric of your tent if
necessary.
the zipper both while open and closed. This
should greatly improve the operation of the
zipper and increase it’s lifespan, making
sure you don’t need to replace it.
• If mud, dirt or too much dust gets stuck in
the zipper, clean it with a damp cloth and
then re-lubricate.

16
OFF-SEASON STORAGE
Although you are welcome to leave your tent
on your vehicle for the winter season, a lot of
our customers decide to remove it from their
vehicle until Spring when camping season
starts up again. If you are going to leave
your tent on your vehicle for the winter but
don’t plan on using it, we suggest taking the
mattress out, minimizing the risk of moisture
build up.
The main thing to keep in mind when storing
a Hard Shell Rooftop Tent is the struts and
hinges; we don’t want to add too much lateral
stress and cause issues when opening.
We advise against storing your tent outdoors
if not on your vehicle and being used. The
elements can have damaging effects if not in
use as moisture can build up with changing
temperatures. Mold or rotting can ensue.
Tents do best when stored in a building with
a consistent temperature – it can be cold or
warm (Most customers store their tents in
their garage). We don’t worry about this when
your tent is on your vehicle because you are
using it and giving everything a chance to air
out!
• You can store the Summit Suite by
leaning it against the wall, but to keep
all the hardware intact, you must put
two blocks of wood underneath the tent
before you lean it. You need to make
sure you aren’t putting pressure on
your gas struts, hinges or latches. We
recommend putting the side with the
latches face down, where you can place
the chunk of wood/block
• To avoid injury or damages to valuables
you must place a strap or two of good
quality around the tent (one in the
middle or two 12”/30cm from the edges)
and attach that to your wall, to prevent
the tent from tipping over and falling on
top of a person, pet or valuable.
OPTION 1
Storing the Tent Upright Against a Wall

Summit Suite Owner Manual
17
• If you have an overhead hoist or an at-
home strap system, you can hoist your
tent up to the roof of your garage and
have it sit above your vehicle. To do this,
you can simply drive in to your garage,
lower the hoist, secure the straps, and
unmount it from your car. Now you just
pull it up! Make sure you have a secure,
legitimate system, a falling tent from
above could cause serious injury or
death and SMRT Tent is not liable.
• Some customers find this to be a handy
system because to re-install the tent
they simply need to lower it back onto
the vehicle instead of lifting it from the
ground! Great for those who need to
take their tent on and off often.
• You might have the floorspace or shelf
space to store your tent in it’s normal,
bottom down position. If you’re going to
do this, make sure you do not put the
tent directly on the ground or shelf.
• Get a Pallet or Two Pieces of Wood (to
mimic cross rails) and set the tent on
top; This keeps airflow and prevents any
water from creeping into the tent from
the floor, as well as creepy crawlies.
OPTION 2
Storing the Tent with a Hoist System
OPTION 3
Storing the Tent on the Floor/Shelf

Your childhood
treefort just got a
massive upgrade.
Other SMRT TENT Tent manuals


