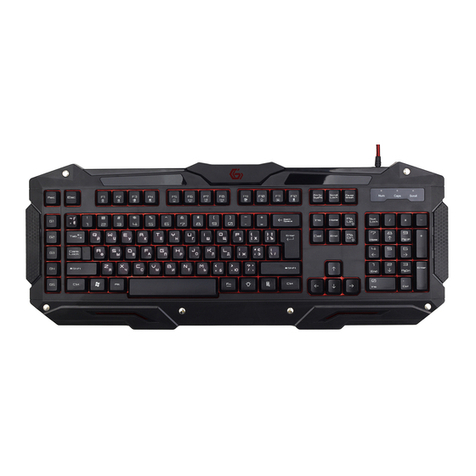
Snarkoon SKILLER SGK5 User manual

SGK5
S5 S6
^
6
&
7
*
8
(
9
)
0
_
-
+
=
Backspace
RTY UI OP
{
[
}
]
|
\
FG HJ KL :
;
Enter
XCVB NM <
,
>
.
?
/
Shift
Alt Ctrl
Print
Screen
Sys Rq
Scroll
Lock
Pause
Break
InsertH ome
Delete End
Num
Lock
/
*
Home PgUp
End PgDn
Ins Del
.
Enter
PgUp
PgDn
Profile WinN um Caps Scroll
MANUAL

2
Table of Contents
1. Specifications . . . . . . . . . . . . . . . . . . . . . . . . . . . . . . . . . 3
1.1 General . . . . . . . . . . . . . . . . . . . . . . . . . . . . . . . . . 3
1.2 Key Properties . . . . . . . . . . . . . . . . . . . . . . . . . . . . . . . 3
1.3 Cable and Connectors . . . . . . . . . . . . . . . . . . . . . . . . . . . . 4
1.4 Software Properties . . . . . . . . . . . . . . . . . . . . . . . . . . . . . 4
1.5 Package Contents. . . . . . . . . . . . . . . . . . . . . . . . . . . . . . 4
2. Installation . . . . . . . . . . . . . . . . . . . . . . . . . . . . . . . . . . 5
3. Overview. . . . . . . . . . . . . . . . . . . . . . . . . . . . . . . . . . . 5
3.1Illumination Keys . . . . . . . . . . . . . . . . . . . . . . . . . . . . . . 6
3.2 Macro Keys . . . . . . . . . . . . . . . . . . . . . . . . . . . . . . . . 7
3.3 Profile Keys . . . . . . . . . . . . . . . . . . . . . . . . . . . . . . . . 8
3.4 Brightness and Volume . . . . . . . . . . . . . . . . . . . . . . . . . . . . 9
3.5 Multimedia Keys . . . . . . . . . . . . . . . . . . . . . . . . . . . . . . 10
3.6 Reset . . . . . . . . . . . . . . . . . . . . . . . . . . . . . . . . . . . 11
4. Software Installation . . . . . . . . . . . . . . . . . . . . . . . . . . . . . . 12
5. Software Overview . . . . . . . . . . . . . . . . . . . . . . . . . . . . . . . 13
6. Game Profiles . . . . . . . . . . . . . . . . . . . . . . . . . . . . . . . . . 14
7. Main Control . . . . . . . . . . . . . . . . . . . . . . . . . . . . . . . . . 15
7.1 Reassign Key . . . . . . . . . . . . . . . . . . . . . . . . . . . . . . . 16
8. Macro Settings . . . . . . . . . . . . . . . . . . . . . . . . . . . . . 17, 18, 19
9. Light Settings . . . . . . . . . . . . . . . . . . . . . . . . . . . . . . . 20, 21
10. Advanced Settings . . . . . . . . . . . . . . . . . . . . . . . . . . . . . . . 22
11. Reset . . . . . . . . . . . . . . . . . . . . . . . . . . . . . . . . . . . . 23

3
1.1 General
Type Gaming Keyboard
Switch Technology Rubber Dome
Illumination RGB, 6 Zones
Adjustable Illumination ü
Lighting Effects ü
Max. Polling Rate 1,000 Hz
Gaming Mode ü
Palm Rest Detachable
Block 3-Block Layout
Weight incl. Cable 1,120 g
Dimensions (L x W x H) 482 x 185 x 40 mm
Supported Operating Systems Windows 7/8/10
1.2 Key Properties
Multimedia Keys 5
Macro Keys 5
Profile Keys 3
Function Keys with Preset Multimedia Actions ü
Adjustable Key Response Time ü
Anti-Ghosting Keys ü
N-Key Rollover Support ü
Arrow Keys Functions are Interchangeable
with the WASD Section ü
Operating Life Cycles of Keys Min. 10 Million Keystrokes
1. Specifications

4
1. Specifications
1.3 Cable and Connectors
Connector USB
Textile Braided Cable ü
Cable Length 176 cm
Gold-Plated USB Plug ü
1.4 Software Properties
Gaming Software ü
Individually Configurable Key Functions ü
Number of Profiles 3
Onboard Memory for Game Profiles ü
Capacity of Onboard Memory 256 kB
1.5 Package Contents
SKILLER SGK5
Manual

6
3.1 Illumination Keys
On the left side of the keyboard, the top four of the five illumination keys provide preset lighting effects without
using the gaming software. With the fifth key, individual lighting can be set up by zone, also independently of the
gaming software.
Press the first illumination key for the “Wave“ lighting effect. Press the key again to switch to the “Color Mar-
quee“ lighting effect. Pressing the key once more returns you to the lighting effect “Wave“.
With the second illumination key the lighting effect “Color Change” is activated as well as the effect “Perma-
nent”. After selecting the “Permanent” lighting effect, press the key up to seven times to switch through the
seven preset lighting profiles. These profiles are also freely configurable via the gaming software. More about
setting up the lighting profiles can be found in the section “Lighting Settings“.
The third illumination key starts the effect “Pulsating single Profile“. Press the button up to seven times to
switch through the seven preset lighting profiles of the effect. These profiles are also freely configurable via the
gaming software.
Press the fourth illumination key to activiate the “Pulsating RGB Cycle“ as well as the effect “Pulsating Profiles“.
Press the fifth key to adjust the lighting within zones. During the configuration of the lighting, the status LEDs
above the number block will flash. To assign each zone of the keyboard one of seven colors, first press and hold
down the SKILLER key and also press one of the keys F1 to F6 up to seven times to select the colors for the zone.
F1 lights the first zone on the left. F6 is the last zone on the right. When you are finished, press the fifth key again.
This saves all the settings and ends the confinguration. The status LEDs will also stop flashing.
3. Overview

8
3.3 Profile Keys
With the keys P1 to P3, game profiles can be activated. Game profiles include all settings of the software. These
include changes made to key assignments and to the lighting effects, the selected behavior of the Windows key
as well as the preferred polling rate and key reaction time. Macros are created independently of game profiles,
but any macro can be later used for any game profile.
The profile LED above the number block indicates which game profile is currently activated. When Profile P1 is
activated, the profile LED will light in red. For Profile P2, the LED will light in blue. For Profile P3, green. After the
gaming software has been installed, the currently active game profile is briefly shown in the bottom right corner
of the monitor when switching from one game profile to another.
Initially, all the game profiles have the same default keyboard settings. The profiles can then be customized as
desired using the gaming software. For more information about setting and managing the profiles see the section
“Game Profiles“.
3. Overview

9
3.4 Brightness and Volume
Using the knobs to the right of the profile keys, the brightness of the active lighting effect and the overall volume
can be adjusted.
Turn the relevant knob counter-clockwise to decrease the brightness or the volume. Turn clockwise to increase
the brightness or volume.
3. Overview

10
3.5 Multimedia Keys
With the multimedia keys, on the right edge of the SKILLER SGK5, the most important multimedia functions are
available.
Press the first multimedia button to play or pause a track from the chosen media player. The next button stops
playback. The third and fourth keys are used to go one track backward or forward. The last key mutes the playback.
3. Overview

12
Download the software for the SKILLER SGK5 from
the Sharkoon website at www.sharkoon.com. Unzip
the ZIP file in a folder of your choice and then doub-
le click the file SKILLER_SGK5_Setup.exe to launch
the installation.
Follow the instructions of the setup wizard and then
click on “Finish“ to complete the installation. The
SGK5 symbol will then appear in the taskbar. The
software has now been successfully installed.
To start the gaming software, double click on the
SGK5 symbol in the taskbar.
Please note: The gaming software continuously runs
in the background while the computer is on. Only
this allows the full range of functions of the SGK5
to be used. The SGK5 symbol will be displayed in
the Windows taskbar while the gaming software
is running.
4. Software Installation

13
F
B
A
5. Software Overview
Game Profiles: In this menu - which is visible and available throughout the software - game profiles can be
created, saved and modified. Changes must be confirmed with a click on the “Apply“ button.
Main Control: The Main Control allows individual keys to be reassigned. It is also possible to assign keys
with macros or multi-media functions. Also here, changes must be confirmed by clicking the “Apply“ button.
Macro Settings: In this section of the software, macros can be created or deleted.
Light Settings: The illumination of the keyboard can be customized in the Light Settings menu. Changes must
be confirmed by clicking “Apply“.
Advanced Settings: This menu has settings for the polling rate, the key response time and the status of the
Windows key.
Reset: This resets the keyboard to the factory default settings. Macros, which have previously been created,
will not be affected by the reset.
A
B
C
D
E
F
C D
E

14
The menu for selecting, creating, loading, saving and editing game profiles is visible and available throughout
the software. To select a game profile via the software, click on one of the three game profiles within the “Game
Profiles“ menu, and confirm this selection by clicking on “Apply“. The three game profiles are also assigned to
the three profile keys P1 to P3 on the keyboard. In the gaming software, the profile which is active is highlighted
in blue.
To create a game profile, click on “Create Profile“. You now have the possibility to give the profile a name and
to link the profile with a game or other application. The game profile will be automatically activated with all its
settings when the linked application is started.
Please note: If an application has been linked to more than one profile, then the profile with the lowest number
will be activated.
In addition to the three game profiles on the keyboard, any number of game profiles can be saved on the PC. To
save a game profile, first make sure that the desired game profile is active. Next, click on “Save Profile“ and
choose a name and a folder where the profile will be saved.
Please note: By default, the game profiles are saved in the subfolder “config“ in the installation folder of the
SKILLER SGK5.
Game profiles which have previously been saved on the PC can be loaded into the internal memory of the key-
board via the “Load Profile“ button. Click this button and choose the desired game profile saved on the PC. The
keyboard‘s currently active game profile will be replaced by the game profile which is loaded from the PC.
Under “Edit Profile“, the name of the game profile can be changed. The customized profile can also be linked to
a game or other application.
6. Game Profiles

15
In the Main Control, the individual keys can be reassigned or allocated functions. The Esc key, P1 to P3, F1 to F12,
the Windows key, the W, A, S, D keys, the arrow keys and the SKILLER key cannot be reassigned.
To process a key, click this key on the illustrated keyboard of the gaming software. In the window which then
appears, the key can be assigned a new function via the dropdown menu. The menu offers a number of options
for the chosen key: to be reset to factory default, to be reassigned with another key, to be assigned a media fun-
ction, to be allocated for a macro you have created, to use for switching the game profiles, to use for launching
applications, to be assigned shortcuts, or to be completely deactivated.
7. Main Control

16
7. Main Control
7.1 Reassign Key
To reassign a key, select “Keyboard Button“, then click in the black field and type in the desired key. To implement
the change, click on “Apply“. The changed key is highlighted in blue in the illustrated keyboard of the gaming
software.
For the reassignment of a key, up to four different keys can be combined. Keys such as Shift and Ctrl are counted.
For example, the combination Shift + x + y + z will give XYZ when the reassigned key is pressed.

18
8. Macro Settings
Select the macro, and under “Options“ click on “Start Recording“ to record a sequence of up to 50 key
commands.
Please note: Make sure you release the Shift, Ctrl, etc. key only after you have pressed the key to be
modified. This ensures that combinations with Shift, Ctrl. etc. are correctly registered while recording macros. If
necessary, check the recording under “Keystroke Sequence“.
If you wish to also record delays between key commands, click “Record delay between keystrokes“. The
sequence of the entered key commands is displayed in the field “Keystroke Sequence“. Click “Stop Recording“
to finish the recording of the macro. If you wish to replace the recorded sequence with a new one, click again on
“Start Recording“. To completely delete the macro, click “Delete“.

19
It is also possible to edit macros which have already been recorded. First, select the macro which is to be edited.
Then select and click the recorded key command or delay where you wish to edit. Now click with the right button
of the mouse in the field “Keystroke Sequence“. You now have various options: An additional recording can now
be inserted before or after the selected key command; a delay can be inserted or edited; a mouse command can
be added; or the selected key command can be deleted.
A macro sequence can be repeated up to 255 times. Click the box “Numbers of Loops“ and, in the field directly
underneath, enter the desired number of repetitions. For example, if the macro has the keystroke sequence
F6 F2 4 7 8 with three loops, the macro will be: F6 F2 4 7 8 F6 F2 4 7 8 F6 F2 4 7 8.
Macros are independent of the game profiles. Before they can be used, they must be assigned to a key within
the “Main Control“ menu. Apart from the settings for the number of loops, the Main Control can set macros to be
continuously repeated while the assigned key is being pressed or, alternatively, to be continuously repeated until
any key on the keyboard is pressed. Under these options, any previous loop settings will be overridden. Finally,
click on “Apply“ to confirm the new key assignment for the selected game profile.
8. Macro Settings

20
To change the lighting effect of the keyboard for the chosen game profile, select the desired effect in the “Light-
ing Effect“ dropdown menu. You have the choice of: Wave, Color Marquee, Color Change, Permanent, Pulsating
single Profile, Pulsating RGB Cycle or Pulsating Profiles.
The direction of the Wave and Color Marquee lighting effects can be adjusted. You can select whether the effect
begins from the left or the right of the keyboard. It is also possible to adjust the brightness and the frequency of
all the effects using the relevant slide bars.
9. Light Settings
Table of contents
Other Snarkoon Keyboard manuals


