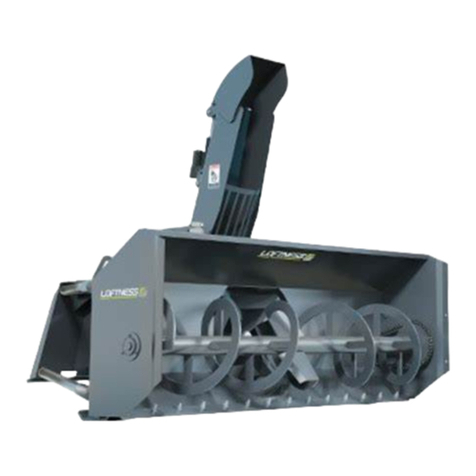
SnowWolf AlphaBlower 24-84-H Manual

!
Operation & Maintenance Manual
REMEMBER: Register your product! No claims for warranty shall be considered unless your product
registration card is completed online within 30 days of purchase. Go to: snowwolfplows.com/registration.
AlphaBlower
Model 24-84-H & 24-84-P
2023 Rev 1

MANUFACTURER'S WARRANTY
One-Year Limited Warranty
SNOWWOLF International, hereinafter referred to as SNOWWOLF, warrants new SNOWWOLF SNOW
BLOWERS at the time of delivery to the original purchaser, to be free from defects in material and
workmanship when properly set up and operated in accordance with the recommendations set forth by
SNOWWOLF.
SNOWWOLF'S liability for any defect with respect to accepted goods shall be limited to repairing the
goods at a SNOWWOLF designated location or at an authorized dealer location, or replacing them as
SNOWWOLF shall elect. The above shall be in accordance with SNOWWOLF warranty adjustment
policies. SNOWWOLF'S obligation shall terminate twelve (12) months after the delivery of the goods to
original purchaser including cutting edge breakage or wear. This warranty shall not apply to any machine
or attachment which shall have been repaired or altered outside the SNOWWOLF factory or authorized
SNOWWOLF dealership or in any way so as in SNOWWOLF'S judgment, to affect its stability or reliability,
nor which has been subject to misuse, negligence or accident beyond the Company recommended
machine rated capacity.
Warranty Claim
To submit a warranty claim, a return authorization from SNOWWOLF must be obtained. The failed part
may then be returned. Tampering with the failed part may void the warranty. This warranty does not
include freight or delivery charges incurred when returning machinery for servicing. Dealer mileage,
service calls, and pickup/delivery charges are the customers' responsibility.
Exclusions of Warranty
Except as otherwise expressly stated herein, SNOWWOLF makes no representation or warranty of any
kind, expressed or implied, AND MAKES NO WARRANTY OF MERCHANTABILITY IN RESPECT TO
ITS MACHINERY AND/OR ATTACHMENTS ARE FIT FOR ANY PARTICULAR PURPOSE. SNOWWOLF
shall not be liable for incidental or consequential damages for any breach of warranty, including but not
limited to inconvenience, rental of replacement equipment, loss of profits or other commercial loss. Upon
purchase, the buyer assumes all liability for all personal injury and property resulting from the handling,
possession, or use of the goods by the buyer.
No agent, employee, or representative of SNOWWOLF has any authority to bind SNOWWOLF to any
affirmation, representation or warranty concerning its machinery and/or attachments except as specifically
set forth herein.
This warranty policy supersedes any previous documents.
No claims for warranty shall be considered unless warranty registration is sent to SNOWWOLF
within 30 days of purchase!
Manufactured By:
15100 Business Parkway
Rosemount, MN 55068
www.snowwolfplows.com

1
AlphaBlower Operation and Maintenance Manual
CONTENTS
Introduction..........................................................................................................................................3
Owner Information . . . . . . . . . . . . . . . . . . . . . . . . . . . . . . . . . . . . . . . . . . . . . . . . . . . . . . . . . . . . .3
Serial Number Location . . . . . . . . . . . . . . . . . . . . . . . . . . . . . . . . . . . . . . . . . . . . . . . . . . . . . . .3
AlphaBlower Identification . . . . . . . . . . . . . . . . . . . . . . . . . . . . . . . . . . . . . . . . . . . . . . . . . . . . . .4
Safety......................................................................................................................................................7
Safety Information . . . . . . . . . . . . . . . . . . . . . . . . . . . . . . . . . . . . . . . . . . . . . . . . . . . . . . . . . . . . .7
Safe Operation Needs A Qualified Operator . . . . . . . . . . . . . . . . . . . . . . . . . . . . . . . . . . . . . .7
Importance of Safety . . . . . . . . . . . . . . . . . . . . . . . . . . . . . . . . . . . . . . . . . . . . . . . . . . . . . . . . .8
Operation.............................................................................................................................................11
General Information. . . . . . . . . . . . . . . . . . . . . . . . . . . . . . . . . . . . . . . . . . . . . . . . . . . . . . . . . . .11
Pre-Operation Inspection. . . . . . . . . . . . . . . . . . . . . . . . . . . . . . . . . . . . . . . . . . . . . . . . . . . . . 11
Snow Blower Operating Tips . . . . . . . . . . . . . . . . . . . . . . . . . . . . . . . . . . . . . . . . . . . . . . . . . . 11
AlphaBlower Inspection . . . . . . . . . . . . . . . . . . . . . . . . . . . . . . . . . . . . . . . . . . . . . . . . . . . . . . .12
Daily Inspection. . . . . . . . . . . . . . . . . . . . . . . . . . . . . . . . . . . . . . . . . . . . . . . . . . . . . . . . . . . . .12
Monthly Inspection . . . . . . . . . . . . . . . . . . . . . . . . . . . . . . . . . . . . . . . . . . . . . . . . . . . . . . . . . .12
Tractor Requirements . . . . . . . . . . . . . . . . . . . . . . . . . . . . . . . . . . . . . . . . . . . . . . . . . . . . . . . . .13
PTO Revolutions. . . . . . . . . . . . . . . . . . . . . . . . . . . . . . . . . . . . . . . . . . . . . . . . . . . . . . . . . . . .13
Skid Steer Requirements . . . . . . . . . . . . . . . . . . . . . . . . . . . . . . . . . . . . . . . . . . . . . . . . . . . . . .13
Entering and Exiting the Machine . . . . . . . . . . . . . . . . . . . . . . . . . . . . . . . . . . . . . . . . . . . . . .13
AlphaBlower Installation Skid Steer . . . . . . . . . . . . . . . . . . . . . . . . . . . . . . . . . . . . . . . . . . . .14
Connecting The Snow Blower To A Skid Steer . . . . . . . . . . . . . . . . . . . . . . . . . . . . . . . . . .14
AlphaBlower Adjustment Skid Steer. . . . . . . . . . . . . . . . . . . . . . . . . . . . . . . . . . . . . . . . . . . .15
AlphaBlower Installation To Tractor . . . . . . . . . . . . . . . . . . . . . . . . . . . . . . . . . . . . . . . . . . . . .16
Connecting The Snow Blower To The Tractor’s Three-Point Hitch . . . . . . . . . . . . . . . . . .16
PTO Installation. . . . . . . . . . . . . . . . . . . . . . . . . . . . . . . . . . . . . . . . . . . . . . . . . . . . . . . . . . . . .18
AlphaBlower Adjustment Tractor. . . . . . . . . . . . . . . . . . . . . . . . . . . . . . . . . . . . . . . . . . . . . . .20
Hydraulic Couplers . . . . . . . . . . . . . . . . . . . . . . . . . . . . . . . . . . . . . . . . . . . . . . . . . . . . . . . . . . .22
Checking AlphaBlower Operation . . . . . . . . . . . . . . . . . . . . . . . . . . . . . . . . . . . . . . . . . . . . . .23
Operating The AlphaBlower . . . . . . . . . . . . . . . . . . . . . . . . . . . . . . . . . . . . . . . . . . . . . . . . . . .24
Operation . . . . . . . . . . . . . . . . . . . . . . . . . . . . . . . . . . . . . . . . . . . . . . . . . . . . . . . . . . . . . . . . . .24
Clearing a Plugged AlphaBlower . . . . . . . . . . . . . . . . . . . . . . . . . . . . . . . . . . . . . . . . . . . . . .25
AlphaBlower Removal Skid Steer . . . . . . . . . . . . . . . . . . . . . . . . . . . . . . . . . . . . . . . . . . . . . .26
AlphaBlower Removal Tractor . . . . . . . . . . . . . . . . . . . . . . . . . . . . . . . . . . . . . . . . . . . . . . . . .27
Maintenance.......................................................................................................................................29
Maintenance Safety. . . . . . . . . . . . . . . . . . . . . . . . . . . . . . . . . . . . . . . . . . . . . . . . . . . . . . . . . . .29
General Maintenance. . . . . . . . . . . . . . . . . . . . . . . . . . . . . . . . . . . . . . . . . . . . . . . . . . . . . . . .30
AlphaBlower Maintenance. . . . . . . . . . . . . . . . . . . . . . . . . . . . . . . . . . . . . . . . . . . . . . . . . . . . .31

2AlphaBlower Operation and Maintenance Manual
Maintenance Schedule . . . . . . . . . . . . . . . . . . . . . . . . . . . . . . . . . . . . . . . . . . . . . . . . . . . . . . 32
Lubrication. . . . . . . . . . . . . . . . . . . . . . . . . . . . . . . . . . . . . . . . . . . . . . . . . . . . . . . . . . . . . . . . .33
Oil Change on the Cut Out Clutch . . . . . . . . . . . . . . . . . . . . . . . . . . . . . . . . . . . . . . . . . . . . 34
Fan Shaft Splines . . . . . . . . . . . . . . . . . . . . . . . . . . . . . . . . . . . . . . . . . . . . . . . . . . . . . . . . . . 34
Auger Axle Couplings. . . . . . . . . . . . . . . . . . . . . . . . . . . . . . . . . . . . . . . . . . . . . . . . . . . . . . . . 35
Gearbox Adjusting Bolts . . . . . . . . . . . . . . . . . . . . . . . . . . . . . . . . . . . . . . . . . . . . . . . . . . . . . 35
Hydraulic Hoses . . . . . . . . . . . . . . . . . . . . . . . . . . . . . . . . . . . . . . . . . . . . . . . . . . . . . . . . . . . . 35
Cutting Edge Replacement . . . . . . . . . . . . . . . . . . . . . . . . . . . . . . . . . . . . . . . . . . . . . . . . . . . 36
Troubleshooting . . . . . . . . . . . . . . . . . . . . . . . . . . . . . . . . . . . . . . . . . . . . . . . . . . . . . . . . . . . . . . 37
24-84-P . . . . . . . . . . . . . . . . . . . . . . . . . . . . . . . . . . . . . . . . . . . . . . . . . . . . . . . . . . . . . . . . . . . 37
24-84-H . . . . . . . . . . . . . . . . . . . . . . . . . . . . . . . . . . . . . . . . . . . . . . . . . . . . . . . . . . . . . . . . . . . 37
Storage And Return To Service . . . . . . . . . . . . . . . . . . . . . . . . . . . . . . . . . . . . . . . . . . . . . . . . 38
Parts......................................................................................................................................................39
AlphaBlower . . . . . . . . . . . . . . . . . . . . . . . . . . . . . . . . . . . . . . . . . . . . . . . . . . . . . . . . . . . . . . . . . 40
AlphaBlower Parts . . . . . . . . . . . . . . . . . . . . . . . . . . . . . . . . . . . . . . . . . . . . . . . . . . . . . . . . . . 40
Chute . . . . . . . . . . . . . . . . . . . . . . . . . . . . . . . . . . . . . . . . . . . . . . . . . . . . . . . . . . . . . . . . . . . . . 42
Deluxe Chute, 4-Stage . . . . . . . . . . . . . . . . . . . . . . . . . . . . . . . . . . . . . . . . . . . . . . . . . . . . . . 44
Chute, Telescopic (Optional). . . . . . . . . . . . . . . . . . . . . . . . . . . . . . . . . . . . . . . . . . . . . . . . . . 46
Blower Parts . . . . . . . . . . . . . . . . . . . . . . . . . . . . . . . . . . . . . . . . . . . . . . . . . . . . . . . . . . . . . . . 48
Hydraulic Swivel Motor . . . . . . . . . . . . . . . . . . . . . . . . . . . . . . . . . . . . . . . . . . . . . . . . . . . . . . 49
Hydraulic Swivel Motor Assembly . . . . . . . . . . . . . . . . . . . . . . . . . . . . . . . . . . . . . . . . . . . . . 50
Chute, Hydraulic Tilt. . . . . . . . . . . . . . . . . . . . . . . . . . . . . . . . . . . . . . . . . . . . . . . . . . . . . . . . . 51
Chute, Swivel Stopper . . . . . . . . . . . . . . . . . . . . . . . . . . . . . . . . . . . . . . . . . . . . . . . . . . . . . . . 52
Blower Fan . . . . . . . . . . . . . . . . . . . . . . . . . . . . . . . . . . . . . . . . . . . . . . . . . . . . . . . . . . . . . . . .53
Gearbox Mounting . . . . . . . . . . . . . . . . . . . . . . . . . . . . . . . . . . . . . . . . . . . . . . . . . . . . . . . . . . 54
Blower Housing / Wear Shoes . . . . . . . . . . . . . . . . . . . . . . . . . . . . . . . . . . . . . . . . . . . . . . . . 55
Rubber Flap Parts . . . . . . . . . . . . . . . . . . . . . . . . . . . . . . . . . . . . . . . . . . . . . . . . . . . . . . . . . . 56
Auger Axle Parts. . . . . . . . . . . . . . . . . . . . . . . . . . . . . . . . . . . . . . . . . . . . . . . . . . . . . . . . . . . . 57
Cutting Edge / Axle Parts . . . . . . . . . . . . . . . . . . . . . . . . . . . . . . . . . . . . . . . . . . . . . . . . . . . . 58
Gearbox . . . . . . . . . . . . . . . . . . . . . . . . . . . . . . . . . . . . . . . . . . . . . . . . . . . . . . . . . . . . . . . . . . . 59
Fan Axle Parts. . . . . . . . . . . . . . . . . . . . . . . . . . . . . . . . . . . . . . . . . . . . . . . . . . . . . . . . . . . . . . 60
Wear Shoe . . . . . . . . . . . . . . . . . . . . . . . . . . . . . . . . . . . . . . . . . . . . . . . . . . . . . . . . . . . . . . . .61
Blower Skidsteer Mount. . . . . . . . . . . . . . . . . . . . . . . . . . . . . . . . . . . . . . . . . . . . . . . . . . . . . . 62
Hydraulic Manifold, Motor . . . . . . . . . . . . . . . . . . . . . . . . . . . . . . . . . . . . . . . . . . . . . . . . . . . . 64
Decal Identification . . . . . . . . . . . . . . . . . . . . . . . . . . . . . . . . . . . . . . . . . . . . . . . . . . . . . . . . . . . 66
Specifications....................................................................................................................................67
AlphaBlower Specifications. . . . . . . . . . . . . . . . . . . . . . . . . . . . . . . . . . . . . . . . . . . . . . . . . . . . 67
Torque Specifications . . . . . . . . . . . . . . . . . . . . . . . . . . . . . . . . . . . . . . . . . . . . . . . . . . . . . . . . . 68

3
AlphaBlower Operation and Maintenance Manual
Introduction
Owner Information
Thank you for your decision to purchase a
SnowWolf AlphaBlower. To ensure maximum
performance of your equipment, it is mandatory
that you thoroughly study the Operator’s Manual
and follow the recommendations. Proper
operation and maintenance are essential to
maximize equipment life and prevent personal
injury.
Operate and maintain this equipment in a safe
manner and in accordance with all applicable
local, state, and federal codes, regulations and /
or laws. Follow all on-product labeling and
instructions.
Make sure that all personnel have read this
Operator’s Manual and thoroughly understand
safe and correct operating, installation and
maintenance procedures.
SnowWolf is continually working to improve its
products. SnowWolf reserves the right to make
any improvements or changes as deemed
practical and possible without incurring any
responsibility or obligation to make any changes
or additions to equipment sold previously.
Although great care has been taken to ensure the
accuracy of this publication, SnowWolf makes no
warranty or guarantee of any kind, written or
expressed, implied or otherwise with regard to the
information contained within this manual.
SnowWolf assumes no responsibility for any
errors that may appear in this manual and shall
not be liable under any circumstances for
incidental, consequential or punitive damages in
connection with, or arising from the use of this
manual.
Keep this manual available for frequent reference.
All new operators or owners must review the
manual before using the equipment and annually
thereafter. Contact your SnowWolf Attachments
Dealer for assistance, information, or additional
copies of the manual. Contact
www.snowwolfplows.com or call 1-800-905-2265
for a complete list of dealers in your area.
Serial Number Location
Please record snow blower information in the
space provided for future reference.
Always use the serial number of the snow blower
when requesting service information or when
ordering parts. Early or later models (identification
made by serial number) may use different parts,
or may require a different procedure in doing a
specific service operation.
NOTE: This document and the information
provided are the property of SnowWolf
and may only be used as authorized
by SnowWolf.
The snow blower serial number plate is located on
the left side of the frame, below the discharge
chute.
Model Number:
Serial Number:
Dealer Name:
Dealer Number:
Date of Purchase:

4AlphaBlower Operation and Maintenance Manual
Introduction
AlphaBlower Identification
AUGER
AUGER
DEFLECTOR
CHUTE
DRIFT CUTTER
CUTTING
EDGE
CUTTING EDGE
RIGHT SIDE
DRIFT CUTTER
GEARBOX
RUBBER
FLAP

5
AlphaBlower Operation and Maintenance Manual
Introduction
AlphaBlower Identification (Cont’d)
AUGER
DEFLECTOR
CYLINDER
WEAR
SHOE
IMPELLER
HOUSING
LIFTING
POINT
MANIFOLD

6AlphaBlower Operation and Maintenance Manual

7
Safety
AlphaBlower Operation and Maintenance Manual
Safety Information
Safety Alert Symbol
This SAFETY ALERT SYMBOL identifies
important safety messages on the
equipment and in the owner’s manual. When
you see this symbol, be alert to the
possibility of personal injury and carefully
read the message that follows.
The signal word DANGER on the machine
and in the manuals indicates a hazardous
situation which, if not avoided, will result in
death or serious injury.
The signal word WARNING on the machine
and in the manuals indicates a potentially
hazardous situation which, if not avoided,
could result in death or serious injury.
The signal word CAUTION on the machine
and in the manuals indicates a potentially
hazardous situation which, if not avoided,
may result in minor or moderate injury. It
may also be used to alert against unsafe
practices.
The signal word IMPORTANT identifies
procedures which must be followed to avoid
damage to the machine.
Safe Operation Needs A Qualified
Operator
AVOID SERIOUS INJURY OR DEATH
Operators must receive instructions before
operating the machine. Untrained operators
can cause serious injury or death.
For an operator to be qualified, he or she
must not use drugs or alcoholic drinks
which impair alertness or coordination while
working. An operator who is taking
prescription drugs must get medical advice
to determine if he or she can safely operate
a machine and the equipment.
Owner’s Responsibility
Operate and maintain this machine in a safe
manner and in accordance with all applicable
local, state, and federal codes, regulations and/or
laws; and in compliance with on-product labeling
and this owner’s manual instructions.
Make sure that all personnel have read this
owner’s manual, and thoroughly understand safe
and correct installation, operation and
maintenance procedures.
Give operating instructions to the operators before
allowing them to operate the equipment, and at
least annually thereafter.

8
Safety
AlphaBlower Operation and Maintenance Manual
Importance of Safety
Operating Safety
• Read and follow instructions in this manual and
the machine Operators Manual before
operating.
• Operator must have instructions before
operating the equipment. Untrained operators
can cause injury or death.
• Be certain all equipment operators are aware
of the dangers indicated by safety decals
applied to the snow blower, and be certain they
follow all safety decal instructions. Contact
your authorized Distributor, Dealer Parts
Department or SnowWolf for safety decal
replacement.
• Operate the snow blower according to the
Operator’s Manual.
• The snow blower is intended for use in snow
removal. Us in any other manner is considered
to be contrary to the intended use of the snow
blower.
• In addition to the design and configuration of
equipment, hazard control and accident
prevention are dependent upon the
awareness, concern, prudence and proper
training of personnel involved in the operation,
transport, maintenance and storage of
equipment.
• Under no circumstances should young children
be allowed to work with this equipment.
• The snow blower is dangerous to persons
unfamiliar with its operation.
• Check for overhead power lines before
operating snow blower (if applicable).
• Check that the snow blower is securely
fastened to the machine.
• Make sure all the machine controls are in the
NEUTRAL before starting the snow blower.
• When learning to operate the equipment, do it
at a slow rate in an area clear of bystanders.
• DO NOT permit personnel to be in the work
area when operating the snow blower. Snow,
ice rocks or debri can be thrown from the
blower, causing injury to persons, cars,
buildings or other objects.
• Rotating PTO shaft, augers, impeller can
cause serious personal injury or death, make
sure no-one is in the work area when operating
the blower.
• The snow blower must be used ONLY on
approved machines.
• Always stop the snow blower if any persons
enter the work area.
• DO NOT modify the snow blower in any way.
Unauthorized modification may impair the
function and / or safety and could affect the life
of the snow blower.
• DO NOT make any adjustments or repairs on
the snow blower while the machine is running.
• Keep shields and guards in place. Replace if
damaged.
• Prior to maintenance, repairs or clearing a
plugged blower, the machine must be turned
off or the snow blower must be disconnected
from the machine.
• DO NOT operate the snow blower in poor
visibility conditions such as fog, darkness, or
any conditions that limit clear visibility.
• DO NOT operate in a work area that has not
been inspected for foreign debris and
obstacles.
• Remove any foreign objects and clearly mark
any objects that cannot be removed.
• Wear safety glasses, gloves, hard hat, hearing
protection and other protective clothing when
operating or maintaining this equipment.
• Have a first-aid kit available for use should the
need arise and train personnel on proper use
of the kit.
• SnowWolf cannot anticipate every
possible circumstance that may involve a
potential hazard. The warnings in this owner’s
manual are not all inclusive.

9
Safety
AlphaBlower Operation and Maintenance Manual
Importance of Safety Cont’d
Fire Prevention Safety
• All fuels, most lubricants and some coolant
mixtures are flammable. Flammable fluids that
are leaking or spilled onto hot surfaces or onto
electrical components can cause a fire.
• Know where fire extinguishers are located and
how to use them.
Transporting Safety
• Comply with state and local laws governing
highway safety and movement of machinery
on public roads.
• Check local laws for all highway lighting and
marking requirements.
• Always yield to oncoming traffic and move to
the side of the road so any following traffic may
pass.
• Never allow riders on the machine or snow
blower.
• If transporting the snow blower on a truck or
trailer, make sure it is properly secured to the
transport vehicle.
Hydraulic Safety
• Always disconnect hydraulic connections
between the machine and the snow blower
before performing maintenance to the snow
blower.
• Always clean fluid spills. Do not use gasoline or
diesel fuel for cleaning parts. Use commercial
nonflammable solvents.
• Check hydraulic tubes, hoses and fittings for
damage and leakage. Never use open flame or
bare skin to check for leaks. Hydraulic tubes
and hoses must be properly routed and have
adequate support and secure clamps. Tighten
or replace any parts that show leakage.
Leaking fluids under pressure can enter the
skin and cause serious injury or death.
Immediate medical attention is required.
Wear goggles. Use cardboard to check for
leaks.

10 AlphaBlower Operation and Maintenance Manual

11
AlphaBlower Operation and Maintenance Manual
Operation
General Information
Pre-Operation Inspection
Before operating the snow blower for the first time
and each time thereafter, use the following list as
a guideline during equipment inspection.
1. Use only a machine of adequate power to
operate the snow blower. (See Tractor or Skid
Steer Requirements on page 13).
2. Check the snow blower and machine mounts
for damage, loose or missing parts. Repair as
needed before operation.
3. Lubricate the snow blower, see Lubrication on
page 33.
4. Check that the PTO shaft telescopes easily
and turns freely.
5. Check that the snow blower is properly
attached to the machine. Be sure retainers are
used on the mounting pins.
6. Check that wear shoes / gauge wheels (if
equipped) are set at the same working depth.
7. Make sure that all guards and shields are in
place, secured and functioning as designed.
8. Check oil level in machine hydraulic reservoir.
9. Check that the hydraulic hoses and couplers
are securely attached to the machine. Make
sure hoses are routed and secured to avoid
pinch points or strain during movement of the
machine / snow blower.
10. Check cutting blade for wear or damage.
11. Check hydraulic lines, connections and fittings
for hydraulic oil leaks.
12. Check all electrical connections.
Snow Blower Operating Tips
• Make sure the snow blower is adjusted
properly. (See “AlphaBlower Adjustment Skid
Steer” on page 15) or (See “AlphaBlower
Adjustment Tractor” on page 20.)
NOTE: Improper snow blower adjustment will
cause increased wear to the cutting
edge or wear shoes.
• Driving speed and gear selection are
dependent on the snow conditions and the
machine type. Do not choose too high a gear
but make a selection so speed can be kept
steady.
• Before disengaging the PTO it is important to
wait until the blower has emptied out the snow.
If the PTO is disengaged while the blower is full
of snow, the chute will likely clog up when the
PTO is re-engaged.
• If the blower is frequently used on gravel roads
or asphalt, in conditions with little snow, it is
recommended to use gauge wheels instead of
wear shoes.
• Adjust throwing distance and the direction of
the snow being removed, away from buildings,
cars, or other objects to avoid causing
damage.
• Always stop the snow blower before exiting the
machine.

12 AlphaBlower Operation and Maintenance Manual
Operation
AlphaBlower Inspection
Daily Inspection
NOTE: Inspect the snow blower by performing
a walk around daily before and after
use. Use the following inspection
checklist as a guideline.
• Verify that the snow blower is properly
connected to the machine.
• Check that all shields and guards are in place.
• Check for damaged or leaking hydraulic hoses
or fittings. Replace if necessary.
• Check the cutting edge for wear or damage.
Replace if necessary.
• Check that all cotter pins that retain pivot/
anchor pins are in place and not damaged or
missing.
• Check the snow blower to ensure that all
components are secure and that all bolts and
nuts are thoroughly tightened.
• Check the snow blower mounting hardware for
wear or damage. Inspect the pins and mounts
for wear or damage. Repair or replace
damaged parts if necessary.
• Check that all bearings turns freely. Replace
any that are rough or seized.
• Check that the PTO shaft is securely fasten to
the snow blower and to the tractor.
• Check the oil level in the gearbox.
Monthly Inspection
Check the following items every 50 hours of
operation:
• Inspect the snow blower, frame, and all welds
for cracks, bends, or excessive wear.
• Check wear shoes and gauge wheels (if
equipped) for wear.
• Check that all bolts are tight.
• Check the cutting edge and mounting plate for
cracks or damage. Replace if necessary.
• Check the wing cutting edge’s (if equipped) for
cracks or damage. Replace if necessary.
• Check hydraulic lines, connections and fittings
for hydraulic oil leaks. Repair or replace
damaged parts if necessary.
• Check for damaged or missing decals.
Replace if necessary.
• Lubricate as required.
AVOID SERIOUS INJURY OR DEATH
Before servicing the snow blower:
• Always park on a flat level surface.
• Lower the tractor’s three-point hitch or
loader arms and place snow blower flat
on the ground.
• Place all controls in NEUTRAL.
• Engage the park brake.
• Stop the engine and remove the key.
• Wait for all moving parts to stop.
• Exit the machine.
SEE MACHINE’S OPERATOR’S MANUAL
FOR ADDITIONAL INFORMATION.

13
AlphaBlower Operation and Maintenance Manual
Operation
Tractor Requirements
PTO Revolutions
NOTE: It is important to use the correct type of
PTO shaft! The PTO shaft for towing
and reversing is adapted for 540 rpm
and must NOT be used for front
mounting as this could result in the
gearbox becoming overloaded. For
front loading a PTO shaft with a shear
pin adapted for 1000 rpm must be used.
Skid Steer Requirements
Entering and Exiting the
Machine
Entering The Operator’s Position
Use the machine’s safety treads, handles and
steps to enter the operator’s position.
When in the operator’s position, fasten the seat
belt, start the engine and release the parking
brake.
Exiting The Operator’s Position
AVOID SERIOUS INJURY OR DEATH
Before servicing the snow blower:
• Always park on a flat level surface.
• Lower the skid steer’s loader arms and
place snow blower flat on the ground.
• Place all controls in NEUTRAL.
• Engage the park brake.
• Stop the engine and remove the key.
• Wait for all moving parts to stop.
• Exit the machine.
SEE MACHINE’S OPERATOR’S MANUAL
FOR ADDITIONAL INFORMATION.
REQUIREMENTS
Power Input (min/max) 60- 150 HP
Hitch Type Cat 2, 3 or 4
REVERSING FRONT MOUNT
24-84-P 540 RPM 1000 RPM
SKID STEER REQUIREMENTS
Hydraulic Flow 32 - 45 GPM

14 AlphaBlower Operation and Maintenance Manual
Operation
AlphaBlower Installation Skid Steer
Connecting The Snow Blower To A
Skid Steer
CRUSH HAZARD
• Before moving the machine, look in all
directions and make sure no bystanders,
especially small children are in the work
area. Do not allow anyone between the
machine and snow blower when
approaching the snow blower for
connecting.
• Keep fingers and hands out of pinch
points when connecting and
disconnecting snow blower.
Before connecting to the snow blower, inspect the
skid steer’s universal mounting plate. (See the
skid steer’s Operator’s Manual for inspecting the
mounting frame).
Enter the operator’s position, start the engine and
release the parking brake. (See “Entering The
Operator’s Position” on page 13.)
Move the skid steer into position in front of the
snow blower.
Move the skid steer forward, aligning the skid
steer’s universal plate and snow blower mount
plate.
When the skid steer’s universal plate is aligned
with the snow blower’s mounting plate, raise the
arms and tip the plate back and engage the
mounting pins.
Once connected to the universal plate and secure,
shut down machine and exit operators position.
Hook up the 3 couplers Be sure the case drain is
installed properly as this could cause catastrophic
failure of the hydraulic motor.
Install the electrical connector(s) for use on
machine controls.

15
AlphaBlower Operation and Maintenance Manual
Operation
AlphaBlower Adjustment Skid Steer
The snow blower must be adjusted so that it
is level.
For the blower to penetrate all the way down to
the asphalt it is very important that the blower is
correctly adjusted to be level prior to operation.
NOTE: The blower is adjusted using the height
adjustment for the wear shoes.
Incorrect adjustment of the wear shoes will result
in high wear to replaceable edges.
If the blower is lifted at the front, a larger part of
the blower weight will be transferred to the wear
shoes, provided these have been adjusted
correctly. This results in less wear to cutting edge.
1. Locate a level surface to adjust the blower.
2. Lift the blower using the machine’s hydraulics.
Adjust the underside of the wear shoes to
approximately 2” higher than the underside of
the cutting edge.
3. Lower the blower onto the surface. Blower is
now level on the surface and resting on the
cutting edge.
NOTE: The blower should now be resting on
the cutting edge.
4. Adjust wear shoes so that these are flush with
the surface.
CORRECT INCORRECT INCORRECT

16 AlphaBlower Operation and Maintenance Manual
Operation
AlphaBlower Installation
To Tractor
NOTE: Ensure that the PTO shaft guard is
always in place, that it is in proper condition
and secured using the supplied chain to
prevent rotation during use.
Figure 1
Towing Installation - Ensure that the guard (1)
[Figure 1] has been installed over the PTO stub
shaft protruding from the blower housing.
Reversing Installation - Replace the PTO stub
shaft guard (Item 1) [Figure 1] with the axle guard
(Item 2). Pull the axle guard onto the PTO shaft
before connecting it.
Front Installation - Remove the PTO stub shaft
guard (Item 1) before installing the gearbox. Pull
the axle guard (Item 2) [Figure 1] onto the PTO
shaft before connecting it and secure the axle
guard to the gearbox.
Connecting The Snow Blower To
The Tractor’s Three-Point Hitch
CRUSH HAZARD
• Before moving the machine, look in all
directions and make sure no bystanders,
especially small children are in the work
area. Do not allow anyone between the
machine and snow blower when
approaching the snow blower for
connecting.
• Keep fingers and hands out of pinch
points when connecting and
disconnecting snow blower.
Before connecting to the snow blower, inspect the
tractor’s three-point mounting frame. (See the
tractor’s Operator’s Manual for inspecting the
mounting frame).
Enter the operator’s position, start the engine and
release the parking brake. (See “Entering The
Operator’s Position” on page 13.)
Open the tractor’s three-point hitch locking levers
(if equipped). (See the tractor’s operation manual
for the correct procedure.)
Move the tractor into position in front of the snow
blower.
Move the tractor backwards, aligning the tractor’s
three-point hitch and snow blower three-point
mounts.
When the tractor’s three-point hitch is aligned with
the snow blower three-point mounts, raise the
tractor’s three-point hitch until the snow blower
three-point mount pins are fully seated into the
tractor’s three-point hitch.
1
2

17
AlphaBlower Operation and Maintenance Manual
Operation
Connecting The Snow Blower To
The Tractor’s Three-Point Hitch
(Cont’d)
NOTE: Tractor hitch type may require a
different procedure for pin
installation. (See the tractor’s
operation manual for the correct
procedure.)
Exit the operator’s position. (See “Entering The
Operator’s Position” on page 13.)
Close the tractor’s three-point hitch locking levers
(if equipped). (See the tractor’s operation manual
for the correct procedure.)
NOTE: Always use implement mounting pins
of adequate size and strength and a
retaining pin with a locking device.
Adjust the top link until it aligns with the snow
blower upper mount pin or mounting hole. (See
the tractor’s operation manual for the correct
procedure.)

18 AlphaBlower Operation and Maintenance Manual
Operation
PTO Installation
Install the PTO shaft from the blower to the tractor.
The angle of the PTO should not exceed 20
degrees. Angles greater than 20 degrees
result in excessive wear and reduce service
life of PTO shafts.
For reversing: See 1-7.
For front mounting: Mount the snow blower
without the PTO, and see 2- 7.
1. Install the blower on the tractor for reversing
[Figure 2]. The PTO stub shaft on the snow
blower is situated slightly closer to the tractor
drawbar for reversing. Do not install the PTO
shaft immediately. First ensure that there is
sufficient clearance between the tractor wheel
and the wing cutting edges of the blower at all
lifting heights, including during active use of top
links.
2. Locate the setting at which the PTO stub shafts
have the shortest spacing. Pull the PTO shaft
apart and insert the prongs on each PTO stub
shaft so that the pipes are situated next to each
other.
3. Mark the pipe for cutting, calculate at least
0.394” in for end clearance.
4. Verify the longest distance between the PTO
stub shafts. If this is in a working position, the
telescoping tubes must continue to overlap
with half the pipe length.
5. When all of the above has been verified, the
axle can be cut. All pipes must be cut in the
same way.
6. File all cut edges that could inhibit sliding,
clean and lubricate the telescoping tubes using
grease.
7. Install the axle and check the adaptation
carefully and at all heights and movements.
This manual suits for next models
1
Table of contents
Other SnowWolf Snow Blower manuals
Popular Snow Blower manuals by other brands
Bercomac
Bercomac BERCO PIONEER 700455 owner's manual

Craftsman
Craftsman 247.985370 Operator's manual

Troy-Bilt
Troy-Bilt Storm 2410 Operator's manual

Stiga
Stiga ST 4851 AE instruction manual

Schiller Grounds Care
Schiller Grounds Care STEINER SB648 Owner/Operator's Manual & Illustrated Parts List

Poulan Pro
Poulan Pro 428553 owner's manual