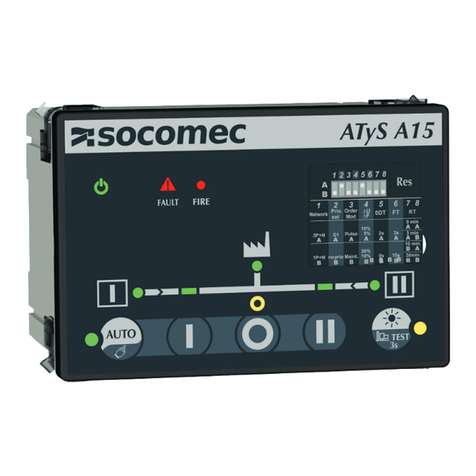
socomec ATyS DT User manual

www.socomec.com
To download, brochures,
catalogues and technical manuals:
www.socomec.us/resources/
Preliminary operations
Check the following upon delivery and after removal
of thepackaging:
• Packaging and contents are in good condition.
• The product reference corresponds to the order.
• Contents should include:
Qty 1 x ATyS DT
Qty 1 x C66 Controller
Qty 1 x Harness
Warning
Risk of electrocution, burns or injury to persons
and / ordamage to equipment.
This Quick Start is intended for personnel trained in
theinstallation and commissioning of this product.
For further details refer to the product instruction
manual available onthe SOCOMEC website.
• This product must always be installed and
commissioned by qualied and approved personnel.
• Maintenance and servicing operations should be
performed by trained and authorized personnel.
• Do not handle any control or power cables connected
tothe product when voltage may be, or may become
present on the product, directly through the mains or
indirectly through external circuits.
• Always use an appropriate voltage detection device
toconrm the absence of voltage.
• Ensure that no metal objects are allowed to fall in
thecabinet (risk of electrical arcing).
Failure to observe good engineering practices as well
as tofollow these safety instructions may expose the
user and others to serious injury or death.
Risk of damaging the device.
In case the product is dropped or damaged in any
way itis recommended to replace the complete
product. Installation standards must be respected.
Accessories
Accessories are not included and must be
ordered seperatly
• Terminal shrouds (see step 6A).
• Additional aux contacts (ref. 96990021).
• Digiware I/O 10 (ref. 48290140).
• Transformer 480 - 240 VAC (SPARTAN SP350MQMJ).
• Controller 24 VDC aux power supply
(6W minimum type SELV) mandatory with I/0 10 Modules.
• Power terminal lugs (see step 1D).
For further details refer to the product instruction
manual under chapter “Spares and Accessories”.
Spares
• ATyS C66 Controller (ref. 16000066).
• UL 1008 ATyS DT (ref. 980XXXXX).
• Connector kit (ref. 16090002).
• Controller Nema 3R gasket (ref. 16090001).
• Controller mounting screws (ref. 16090004).
• Controller mounting feet (ref. 16090005).
• Cable harness without transfomer (ref. 98974000).
• Cable harness with transfomer (ref. 98974000).
CORPORATE HQ CONTACT:
SOCOMEC SAS,
1-4 RUE DE WESTHOUSE,
67235 BENFELD, FRANCE
0: Without solid neutral
1: With solid neutral
N° of poles
3: 3P
4: 4P
9 8 X X X XXX
Non contractual document. Subject to change without notice.
548696D
QUICK START GUIDE EN
ATyS DT
100 A, 200 A, 260 A, 400 A
Installation and Commissioning
Reference configurator
Switch installation
Cabinet / Back
Plate Installation
STEP 1
Connecting
the cable harness
STEP 2
Controller
interface
STEP 3
Operational
limits
STEP 4
Manual
operation
STEP 5
Accessories
STEP 6
1A
Rating
010: 100 A
020: 200 A
026: 260 A
040: 400 A
0: spare switch for networks up to 480 VAC
8: ATSE assembly for 480 V.a.c 3 wire network
A: ATSE Assembly for networks up to 480 VAC
Ensure that the product is installed on a at rigid
surface of a Types 1, 3R, 12 and/or 12k enclosure.
Do not lift using power contacts, use the holes on
the side of the metal mounting feets.
Mounting
orientation
Source 2
Load
Source 1
PE

PB
H
7.52
191
6.09
154.8
30.25
768,3
26.81
681
4.32
109,8
1.96
49,7
A
L
W D
4.23
107,5
4x Ø 0.41
4x Ø 10.5
19.91
505,6
1.77
44,9
max.: 26.18
max.: 665
min.: 25.23
min.: 641
min. 2.36
min. 60
Dual Dimensions
in/mm
Product dimensions
Switch & minimum enclosure size dimensions (4th pole represented with lugs installed.)
Front view Side view
Switch top view Controller dimensions
1B
SWITCH DIMENSIONS MINIMUM ENCLOSURE SIZE
A B L P H W D
in mm in mm in mm in mm in mm in mm in mm
100-200A 3P 11.85 301,30 1.25 31,80 5.49 133,70 1.38 35 36 915 16 406 12 305
3P+N/ 4P 13.24 336,30 1.25 31,80 6.60 168,70 1.38 35 36 915 16 406 12 305
260-400A 3P 13.63 346,30 1.55 39,30 7178,60 1.97 50 60 1524 24 610 12 305
3P+N/ 4P 15.60 396,30 1.55 39,30 8.97 228,60 1.97 50 60 1524 24 610 12 305
9.45
240
2.52
63,90
1.89
48,10
7.09
180
6.30
160
8.66
220

Screw Tightening torque
PH1 / 0.2 Nm 1.77 lb.in
Clip the
mounting feet in
thedesignated
slot Screws notdelivered with product
5.9
+/-0.4
150
+/-1
6.77 - 7
172 - 178
0.25
6,4
R 0.24
R 6,25
0.12
3
1.53 ±0,01
39 ±0,3
0.86
22,05
0.05
±0,02
15,5
±0,5
135°
0.07
2
0.31 ±
0,004
8 ±0,1
Mount the load terminal lugs on the
switch terminals before mounting source
2 terminal lugs.
Backplate mounting
Mounting & connecting controller
1C
Installing terminal lugs (optional accessory)
1D
Use terminal screws and washers supplied with the ATSE
Product
Rating (A) Designation Ref. lugs
Quantity
per
reference
Openings
per lug
Size / Section
(AWG)
Pressure screw
torque Bolt torque
Y
min. max. lb.in Nm Size in lb.in Nm Size in mm
100A
Ilsco D0957
Contact us 114 1/0 50 5,65 870.8 85 mm 0.625 15,9
200A
Ilsco D2831
Contact us 1 6250 KCMIL 275 31,1 5/16 70.8 85 mm 125,4
100-200 A
CMC LA-300R
39542020 2
1 6 300 KCMIL 275 31,1 5/16 70.8 85 mm 1.12 28,439543020 3
39544020 4
260-400 A
CMC LA-630R
39542040 2
14600 KCMIL 550 62,1 1/2 310 35 8 mm 1.79 45,739543040 3
39544040 4
260-400 A
Ilsco D3096
Contact us 14600 KCMIL 600 67,8 1/2 310 35 8 mm 1.79 45,7
Power cable connections : For 100A use 1/0 AWG / For 200A use 250 KCMIL / For 260A use 300 Kcmil / For 400A use 600 Kcmil copper cables.
Mounting & connecting the cable harness
2A
PE
Insert the 4 door mounting
screws in thedesignated slot and
push back to clip in lock in place.
For use on a at surface of
Types 1, 3R, 12 and/ or 12K
enclosure
1
2
Gasket for Type 3R/12
8.66
+/-0.4
220
+/-1
6.30+/-0.4
160+/-1
For details on the cable harness wiring diagram and integration see Cable harness Quickstart guide ref 551401.
Cable harness without transformer (ref. 98964000) delivered with 98AX XXXX products.
Cable harness for connections with transformer (ref. 98974000) delivered with 988X XXXX products.
Note: transformers not delivered with the product.
Door mounting
PE

See step 6B for
Auxiliary contacts
Mounting the cable harness on the Switch
2B
SWITCH TYPE TERMINAL N° DESCRIPTION CHARACTERISTICS RECOMENDED
CROSS SECTION
S1
Switch Power input 1101-1102 Order switch to position S1 194-304 VAC8A for at least
100ms 50/60Hz
17-14 AWG
1-2.5 mm²
1201-1202 Order switch to OPEN Switch S1
Switch Signalization output
1333-1334 Contact closed if cover of switch S1 is closed
internal use for C66 controller1313-1314 Contact closed if the switch is in position S1
1323-1324 Contact closed if the switch S1 is OPEN
S2
Switch Power input 2101-2102 Order switch to OPEN S2 194-304 VAC8A for at least
100ms 50/60Hz
2201-2202 Order switch to position S2
Switch Signalization output
2333-2334 Contact closed if cover of switch S2 is closed internal use for ATyS C66
controller
2313-2314 Contact closed if the switch S2 is OPEN
2323-2324 Contact closed if the switch is in position S2
Connector tightening torque
0.5 N.m / 4.4 Lb.in
SOURCE 2 A
A
B
B
C
C
N
N SOURCE 1
Fix FASTON connectors
according to thetable in
step 2C.
(Max 2FASTON per pole).
Wires must not be in contact with active voltage points such as unused
FASTON connections and lugs. In order to do so any unused or loose
cables must be tensed then xed on a non conductive part of the transfer
switch (use cable tie xation points as shown in the images below).
1
Pass wiring harness in theintegrated
cable duct.
After all the faston cables have been
connected make sure the cables are tight
and x them in place using the cable tie
point shown below.
This switch also includes provision
for additional cable ties these can be
used to maintain cables connected to
the auxiliary contacts.
Use the cable tie connection point on the side of
the switch shown above to maintain any unused
cables (for 3P switches).
Mandatory
Optional
3
4
5
After xing the FASTON
maintain thewires in place
wiring connexion point.
2
CONTROL
POSITION OUTPUTS
101
102
201
202
334
333
314
313
324
323
Connectors
Tightening
Torque:
0.5Nm/4.4lb.in
194-304Vac 50-60Hz (>100ms)
S2 S2
S2
S1
S1
S1
Cover Closed
S2
OPEN
S1
OPEN
POSITION
CONNECTION
1A1 2A1
3A1
C NC
NO
1B1 2B1
C NC
NO
3B1
1C1 2C1
3C1
1D1 2D1
3D1
Reserved !
Reserved !
For Product Operation
C NC
NO
C NC
NO
black cables for source 2
red cables
for source 1

Connection of harness on the switch
Controller connection details
2D
2C
TYPE TERMINAL N° DESCRIPTION CHARACTERISTICS RECOMENDED CROSS
SECTION
TIGHTENING
TORQUE
Sensing source 1 SOURCE 1
L1/L2/L3/N
Voltage sensing inputs source 1
& voltage supply (L1-L2) Sensing voltage
50 - 575 V.a.c P-P - 50/60 Hz (+/- 10%)
Supply voltage (L1-L2)
88 - 576 V.a.c - 50/60Hz (+/- 10%) Ui 600V
AWG 18-14
0.75-2.5mm²
4.4-5.3 Lb.in
0.5-0.6 Nm
Sensing source 2 SOURCE 2
L1/L2/L3/N
Voltage sensing inputs source 2
& voltage supply (L1-L2)
Inputs
71 IN1: reserved (SWITCH IN POS1)
Do not connect to any external power
supply AWG 20-14
0.5-2.5mm²
72 IN2: reserved (SWITCH IN POS2)
73 IN3: reserved (SWITCH S1 IN POS0)
74 IN4: reserved (SWITCH S2 IN POS0)
75 IN5: reserved (COVER OPEN)**
76 IN6: programmable input
70 Common point for inputs
Aux power supply 81/82 - : negative terminal for aux supply
+: positive terminal of aux supply 12-24 Vd.c.
Outputs
12/14/11 OUT1: reserved (POS 1 ORDER)
Dry contacts
8A / 277 VAC 50/60 Hz
5A / 24 VDC AWG 16-14
1.5-2.5mm²
22/24/21 OUT2: reserved (POS 2 ORDER)
32/34/31 OUT3: reserved (POS 0 ORDER S1)
42/44/41 OUT4: reserved (POS 0 ORDER S2)
Latching relays 52/54/51 OUT 5: elevator control
62/64/61 OUT 6: genset start relay
Current
transformers IN/I3/I2/I1 CT neutral / CT phase C / CT phase B/ CT phase A CT input 1A or 5A
Serial connection RS485
Connection RS485
-: negative terminal of RS485 bus
+: positive terminal of RS485 bus
NC : Ground
RS485 bus insulated
LiYCY sheilded twisted pair
30-14 AWG /
0.14 to1.5 mm²
1.9 - 2.2 Lb.in
0,22 - 0,25
Nm
Digiware* DIGIBUS Connection point for I/O 10 optional accessories
(must use 24VDC input) RJ 45 digiware cable - -
* For more information check I/O module instruction sheet ref 545597.
** After wizard conguration "COVER OPEN will not be programmed by default, users must go to "MAIN MENU">"PARAMETERS">"I/O">"INPUTS" and congure
"INPUT 5" to "COVER OPEN" and "INPUT 5 TYPE" to "NC".
VOLTAGE TRANSFORMER
480 VAC 240 VAC
NETWORK
TYPE TYPE SOURCE RTSE FASTON CONNECTIONS AUXILIARY CONTACT PRIMARY SECONDARY
A B C N1C1 3C1 1D1 3D1 H1 H4 X1 X4
120/208 VAC 3P+N / 4P S2 S2A & 2201 S2B S2C S2N 1D1 3D1
S1 S1A & 1102 S1B S1C S1N 1C1 3C1
208 VAC 3P S2 S2A & 2201 S2B S2C -
(1)
1D1 3D1
S1 S1A & 1102 S1B S1C -
(1)
1C1 3C1
277/480 VAC 3P+N / 4P S2 S2A S2B S2C S2N & 2201 1D1 3D1
S1 S1A S1B S1C S1N & 1102 1C1 3C1
480 VAC
+ Transformer 3P S2 2xS2A 2xS2B S2C -1D1 3D1 T2A T2B T2A' T2B'
S1 2xS1A 2xS1B S1C -1C1 3C1 T1A T1B T1A' T1B'
(1) Cables which are not used are to be fastened as shown in image 4 of step 2B.
Wiring harness connectors toplace on controller.
Bottom view
Top view
Connect the faston on the switch connexion according to your network and the table below:

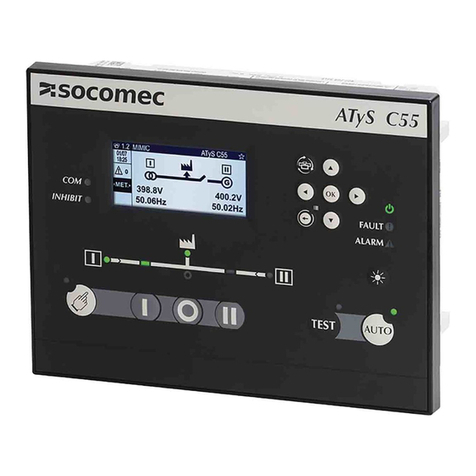
ATyS C66
AUTO
LCD display
Source and
switchsynoptic
Standard code for programming : 1000
Manual operation buttons
and indicator
Communication
indicator LED
Switch not in automatic mode
indicator LED
Automatic button and
LED indicator
Test button and indicator for
load tests / no load tests
Short press for lamp test /
Long press to reset faults
Power, Fault and alarm LED
Navigation buttons
Change dashboard / set screen
as favorite
3
Controller Interface
When powered for the rst time the controller will prompt the user to congure using the wizard.
To access the wizard input code 1000 then the conguration will go as follow:
SMART WIZARD CONFIG:
Foradvanced conguration go to parameters menu.
Language Source configTime & date Switch &
Application Product Name Communication
In STEP 5/8 of the wizard cong make sure the network detected matches your network.
In STEP 6/8 make sure the “switch technology” parameter is set to “ATyS DT”.
If a fault is shown on the controller, correct the associated fault and clear by doing a long press (>3s) on the lamp test button.
Left side hinge door Right side hinge door
Mounting the cable harness on the controller
2E
or
For details on the controller connectors refer to step 2D, after inserting the required connectors use the cable tie connection points shown below to
maintain the cables in place:
black cables
red cables
b
b
b
b
b
b
b
b
b
r
r
rr
r
r
r

WARNING More than one live circuit! Disconnect all sources of supply before servicing and/or before using the manual operation.
WARNING Switch will be “not in auto” when
either one of the covers are open.
Clip to maintain
cover upright
Slide cover
to access
service
handle hole.
See manual
operation below
for the handle
sequences.
Operational limits
4
5
Manual operation (for maintenance purpuses only)
Instructions for manual, non-electric, offload operations for service
Manual operation
1
For inspection use a standard tool as shown to operate
(not included).
Unscrew handle cover and arc chutes cover
Open the cover and click in place and
open the arc chute
Use the slow or fast handle to visualize
the state of the contacts
Operation order
Recommendation : carry out one ofoad
manual operation with handle (FAST
OPERATION) before putting the switch
back in service.
Reverse the procedure to close. Ensure that all is closed properly before putting back in service. In case
any part of the ATyS DT switch is found to be damaged in any way, replace the complete switch.
Inspection of power
contacts
Connecting to source 2:
To connect the load to Source 2 (S2) position
both handle to the bottom position (top handle
to S2, bottom handle to OPEN).
Connecting to source 1:
To connect the load to Source 1 (S1) position
both handle towards the top (top handle to
OPEN, bottom handle to S1).
Connecting to center OFF:
To connect the load to center off (OPEN)
position the top switch handle to the top
position and the bottom switch handle to the
bottom position.
Interlocking mechanism:
The mechanical interlock ensures
that S1 and S2 are mutually
exclusive and inhibits one switch
from being closed unless the
other switch is open.
Warning: when manually
switching always place one of
the two handles in the OPEN
position BEFORE switching the
second handle.
4
1 2 3
OPERATING VOLTAGE @ 50/60 (+/- 10%) HZ
NETWORK MINIMUM COIL
OPERATING VOLTAGE (VAC)
MAXIMUM COIL
OPERATING VOLTAGE (VAC)
277/480 VAC 194 (Ph/N) 304 (Ph/N)
120/208 VAC 194 (Ph/Ph) 304 (Ph/Ph)
120/240 VAC 194 (Ph/Ph) 304 (Ph/Ph)
480 VAC with transformer 194 (Ph/N) 304 (Ph/N)
OPERATING TIMES
(1)
RATING TRANSFER DESCRIPTION MINIMUM TRANSFER TIME (ms)
(NORMAL TO ALTERNATE)
MINIMUM TRANSFER TIME (ms)
(ATLTERNATE TO NORMAL)
MAXIMUM TRANSFER TIME (ms)
(NORMAL TO ALTERNATE)
MAXIMUM TRANSFER TIME (ms)
(ATLTERNATE TO NORMAL)
100-200 A Contact transfer time
(2)
48 41 61 54
Total transfer time
(3)
144 321 198 553
260-400 A Contact transfer time
(2)
60 54 90 64
Total transfer time
(3)
156 333 226 563
(1) All times measured without load and at 240 VAC at ambient temperature, actual times may vary depending on network and load.
(2) Time for which load is disconnected from both source 1 and source 2 with both sources available.
(3) Total time to transfer including detection of source total failure and transfer times.
OPERATING TEMPERATURE
SWITCH AND
TRANSFORMER I0 /10 CONTROLLER
32 to 131°F
0 to +55°C
14 to 158°F
-10 to +70°C
-22 to 158°F
-30 to +70°C
with limitation on the LCD screen that may
show distortion below 32°F / 0°C
0.25 in / 6mm diam max.
SLOW OPERATION
A
B
C
After maintenance
operations are done
screw back the covers:
Tightening torque
17.7 lb.in / 2 N.m / PH2
A B C
2
FAST
OPERATION
4
3

For 250, 300 & 600 KCMIL (200 , 260 400A) break off all removable
parts (highlighted on the picture). For 1/0 & (100A ) do not remove any parts.
Print: 90 g/m2 - open format 432 x 279 mm - folded 216 x 279 mm with staples - R/V - B&W
The ATyS DT shall be maintained in accordance with industry standards and as per instructions in the ATyS DT
instruction sheet.
As per NFPA 110 requirements for emergency and standby power systems the ATyS DT should be inspected
and should be exercised under load at least monthly.
Refer to step 5 for instructions for manual, "non-electric", ofoad operations for service.
Terminal shrouds
contain provisions for
voltage sensing
NO. OF POLES REFERENCE*
100-200A 3P 96983020
4P/3P+N 96984020
260-400A 3P 96983040
4P/3P+N 96984040
* Refs: top and bottom
Top and bottom protection against direct contact with terminals or connecting parts
Place the transparent
plastic piece to cover
the auxiliary conacts
and lock in place in
order to protect from
direct contacts.
Use the correct protection according to your
auxiliary contact circuit and your load
The ATyS DT switch has 4 pre-installed auxiliary
contacts, two of which are reserved for use for
harness. This kit includes two additional contacts
it is therefore recommended to order two sets of
this kit for ATyS DT switches.
Ref : 96990021
a
b
PH2 screwdriver
Tightening torque
17.7 lb.in / 2 N.m / PH2
Make sure contact
is correctly activated
AUXILIARY CONTACT ELECTRICAL CHARACTERISTICS
Rated current (125-480 VAC) 22 A
Rated current (125 VDC) 0.5A
Rated current (250 VDC) 0.25 A
Rated horse power up to 250 VAC ½ HP
Rated horse power up to 480 VAC ¼ HP
Recommended wire section for 22A 10 AWG
4 mm²
Terminal tightening torque
7.9 lb.in / 0.9 Nm
11
NO NC
COM
2
2
3
3
Installing power terminal shrouds (optional accessories)
PERIODIC MAINTENANCE
6A
Additional auxiliary contacts
6B
WARNING More than one live circuit.
Disconect all sources of supply before servicing and/or before using the manual operation.
Remove pre-installed auxillarycontact
1
Assemble contacts with parts from
kit as shown below
2
Assemble optional aux contact and
pre-installed aux contact together
3
4
1
Fix the terminal shrouds in place and push back
2
V
Terminal shrouds can
be locked in place
using locking points
Push back to
click in place.
3
This manual suits for next models
2
Table of contents
Other socomec Controllers manuals
Popular Controllers manuals by other brands

VRG Controls
VRG Controls VPC SN Series instruction manual

Jung
Jung FMJ50700UP operating instructions

Andover Controls
Andover Controls ACX 780 installation guide

Calian
Calian SatService sat-nms ACU-19V user manual

Rockwell Automation
Rockwell Automation 1769-L30ER installation instructions

Leroy-Somer
Leroy-Somer R729 Installation and Maintenance