SoftBank 930CA User manual

1-1
Getting Started
Handset Parts....................................... 1-2
Basic Key Operations ................................ 1-3
Opening/Closing Handset......................... 1-7
Front Keys.................................................. 1-7
Display.................................................. 1-8
Display Indicators ...................................... 1-8
USIM Card .......................................... 1-10
Before Using USIM Card......................... 1-10
Other Notes on USIM Cards.................... 1-10
USIM PINs................................................. 1-11
USIM CardInstallation ............................ 1-12
Battery & AC Charger........................ 1-13
Notes on Battery Charging..................... 1-13
Battery Installation ................................. 1-13
Open Port Cover...................................... 1-15
Charging Battery..................................... 1-16
Power On/Off .................................... 1-18
Power On................................................. 1-18
Power Off ................................................ 1-19
Mobile Manners ................................ 1-20
Activating Manner Mode........................ 1-20
Codes.................................................. 1-21
Security Code ........................................... 1-21
Center Access Code.................................. 1-21
Network Password................................... 1-21
Other Basic Information ................... 1-22
Checking Battery Level............................ 1-22
My Phone Number................................... 1-22
Checking Network Status........................ 1-22
Using Power Save Mode.......................... 1-23
1

1-2
Getting Started
1
Handset Parts
216
1
3
15
11
26
14
13
12
32
31
30
29
17
18
23
20
22
21
19
4
5
6
7
8
9
10
25
24
27
28
◎
So
f
tBan
k
930CA 1Earpiece/Speaker3
2Charging Indicator/Illumination
3Display
4Front Keys
(Right)
l
(Top)
4
(Center)
;
(Left)
:
(Bottom)
5Multi Selector Xd& Xb4
6Mail Key Xo4
7Menu Key Xi4
8SendKey Wr4
9KeypadW0- W94
10 Key Ww4
11 #/Manner Key Wq4
12 Power/EndKey Wy4
13 Clear/Back Key Wt4
14 Shortcut Key Xu4
15 Yahoo!Keitai Key Xp4
16 Light Sensor
17 Light
18 Camera Indicator
19 Battery Cover
20 Memory CardSlot
21 FeliCa Mark
22 Camera
23 Internal Antenna1
24 InfraredPort
25 Microphone
26 Strap Eyelet
27 External Device Port2

1-3
Handset Parts
Getting Started
1
Basic Key Operations
◎In Standby
1 Portrait view when handset open; Landscape view when
closed.
2 Acts as shutter when using Camera.
◎In Standby (Handset Closed)
1 For optimal signal reception, do not cover Internal
Antenna with hands or anything else. Do not put
stickers over Internal Antenna.
2 Connect AC Charger or suppliedStereo Earphone
Conversion Cable to use earphone-microphone.
See instructions includedwith Stereo Earphone
Conversion Cable.
3 Earpiece also functions as speaker. Be careful of
ringtone/alarm sounding close by your ear when
receiving or ending a call.
4 Key illustrations are simplifiedanddiffer in
appearance from actual handset keys.
28 Lock Key k4
29 Shutter Key Zz4
30 Camera Key a4
31 Viewer Key Ys4
32 Digital TV Antenna No. Key/Operations Description
31 sActivate Snap Viewer.1
30 a
Activate Camera in Photo Mode.
1
Press and hold a
Activate Camera in BI-DO-RI Mode.
1
29 zActivate TV.2
28 Press and hold kSet/cancel Manner Mode.
No. Key/Operations Description
4l
;
:
Activate/operate Quick Launcher.
28 kLock/unlock Side Keys and Front
Keys.
Press and hold kSet/cancel Manner Mode.

1-4
Handset Parts
Getting Started
1◎In Standby (Handset Open)
No. Key/Operations Description
5fAccess Shortcuts.
Press and hold fOpen S!Quick News List.
gOpen Phone Book Search menu.
hOpen Received Calls window.
Press and hold hOpen Received Address List.
jOpen Redial window.
Press and hold jOpen Sent Address List.
dOpen Main Menu.
6oOpen Mail menu.
Press and hold oCompose a new message.
15 pAccess Yahoo!Keitai portal.
Press and hold pOpen Yahoo!Keitai menu.
7iOpen Main Menu.
Open Task Switch window (when
multitasking).
14 uActivate function assigned to key.
Default Setting: Schedule
Press and hold uAssign a function to key.
8rAnswer/make calls.
Open Quick List.
13 tPlay messages on Answering
Machine.
Press and hold tSet/cancel Answering Machine.
12 Press and hold yTurn power on/off.
9 Press and hold 3Set/cancel IC Card Lock.
Press and hold 5Activate/deactivate Power Save
Mode.
・Display is dimmed in Power Save
Mode.
Press and hold 7Set font type, thickness and size.
Press and hold 8Set Screen Filter on/off.
・Display becomes opaque.
・Setting returns to off when
powered back on.
No. Key/Operations Description

1-5
Handset Parts
Getting Started
1
◎During Voice Calls (Handset Open)
◎During Voice Calls (Handset Closed)
* When earphone-microphone attached. Call ends when
handset closes and earphone-microphone not attached.
◎During Text Entry
9 Press and hold 9Toggle Light on/off.
Press and hold 0Enter “+“(international access
code).
11 Press and hold qSet/cancel Manner Mode.
No. Key/Operations Description
5fIncrease earpiece volume
(alternatively, use Viewer Key).
Press and hold fContinuously increase earpiece
volume.
gDecrease earpiece volume
(alternatively, use Camera Key).
Press and hold gContinuously decrease earpiece
volume.
hOpen Received Calls window.
jOpen Redial window.
6oTurn handsfree on/off.
7iOpen Task Switch window.
14 uDisplay function menu.
No. Key/Operations Description
13 tHold call.
12 yEnd call.
11 Press and hold qSet/cancel Manner Mode.
In Manner Mode, voice sent via
microphone is amplified on
caller’
s side.
No. Key/Operations Description
31 sIncrease earpiece volume*.
30 aDecrease earpiece volume*.
No. Key/Operations Description
5gInsert line feed ““
(when cursor is
at the end of text).
jAdd a space (when cursor is at the
end of text).
No. Key/Operations Description

1-6
Handset Parts
Getting Started
1
6oToggle character entry mode (in
5-touch or T9 input mode).
Toggle double-byte and single-byte
characters (in 2-touch mode).
Press and hold oToggle text input methods (in
5-touch, 2-touch or T9 input
mode).
15 pSwitch to pictograph/symbol lists.
Press and hold pAccess My Pictograms (in S!Mail).
8rCycle characters in reverse order (in
5-touch mode).
Press and hold rUndo last operation (conversion,
pasting, cut, etc.) and return to the
previous state.
13 tDelete one character to right of
cursor.
When cursor is at end of text, a
character to left is deleted.
Press and hold tDelete all text to right of cursor.
When cursor is at end of text,
delete all text.
No. Key/Operations Description
10 wEnter dakuten (゛) or handakuten (
゜) (in 5-touch, 2-touch or T9
mode).
Toggle case (in 5-touch or 2-touch
mode).
Insert line feed “.“
Press and hold wSelect area.
11 qToggle Shift, Caps Lock and lower
case modes (when entering
alphanumerics in T9 input mode).
Press and hold qPaste copied or cut text.
No. Key/Operations Description

1-7
Handset Parts
Getting Started
1
Opening/Closing Handset Front Keys
Use Front Keys to activate/operate Quick Launcher when
handset is closed. From Quick Launcher, access Camera, TV,
Music Player, etc.
●To use Front Keys in Landscape or Portrait view, position
handset as follows.
●Use :(Top) or l(Bottom) to scroll through menu then press
;to select an item.
●Use kto lock/unlock Front Keys.
Tip
・Functions activated while handset is closed remain active after
opening handset.
Note
・Opening or closing handset while touching Front Keys or Side
Keys may cause malfunction. Set Keypad Lock (press Kkwhile
handset closed) to prevent malfunction.
Slide Display open. Slide Display shut.
Tip
・In this guide, Front Keys are indicated as follows.
Top Front Key: l(Top)
Bottom Front Key: :(Bottom)
Center Front Key: ;
Front Key
Top Front Key
Center Front Key
Bottom Front Key
Portrait ViewLandscape View

1-8
Getting Started
1
Display
Display Indicators
Battery Level
Temperature Monitoring
Signal Strength
Out of Range
Emission OFF Mode
USIM Lock Active
Yahoo!Keitai Mode
Yahoo!Keitai Communication in
Progress
Packet Transmission (No Data Transfer)
Connecting to Network for Packet
Transmission
/ Packet Transmission (Sending/
Receiving Data)
SSL Secured Site Connected
Unread Messages
Handset Message Memory Full
USIM SMS Memory Full ( when
there are unread messages)
Handset & USIM SMS Memory Full
Software Updated
Dial Lock Active
Secret Mode/Secret Data Only Mode
Custom Lock Active
Custom Lock Active in Secret
Mode/Secret Data Only Mode
Infrared Transmission
Authenticating IC Card
S!Addressbook Back-up Synchronizing
IC Card Lock Active
Power Save Mode
Screen Filter On ( when Backlight
is Off)
Keypad Lock Active (
After Closed
,
Timer
or
Lock Key
is
ON
*)
Memory Card Inserted
Invalid Memory Card Inserted
Memory Card Reader/Writer in Use
Accessing Memory Card
Voice Call
Video Call
Maximum Call Cost Limit Reached
/ USB Cable Connected in
Communication/microSD Mode
microSD Mode
/ Handsfree Device Connected in
Communication/microSD Mode
/
USB Cable & Handsfree Device Connected
in Communication/microSD Mode
Vibration Set for Incoming Calls & Messages
/ Vibration Set for Incoming
Calls/Messages
No Ringtone for Incoming Calls & Messages
/ No Ringtone for Incoming
Calls/Messages
Manner Mode
Auto Manner Mode Start On
Auto Manner Mode Release On
Alarm Set
Alarm Set for Today (appears prior
to set time.)
TV Timer Recording in Progress
New Messages at Voice Mail Center
-
Voice Messages on Answering Machine
- Video Messages on
Answering Machine
* Lock Key is ON by default.
①②③④⑤⑥ ⑦ ⑩⑧ ⑨ ⑪ ⑫
⑬ ⑭ ⑮ ⑯ ⑰ ⑳⑲⑱
③
Tip
・To see indicator descriptions:
Xd
Settings
Xd
Display
Xd
Icons
Xd

1-9
Display
Getting Started
1
More Features
Customize
Display Settings
Wallpaper
Display Color Scheme
Set Font Type
Interface Language
Guard from Prying Eyes
Display Quality
(☛P. 14-4)
Backlight
Set Backlight & Power Saving
Set Brightness of Backlight
(☛P. 14-7)
Standby Indicators
Enable Indicator Selector
(☛P. 14-10)

1-10
Getting Started
1
USIM Card
Before Using USIM Card
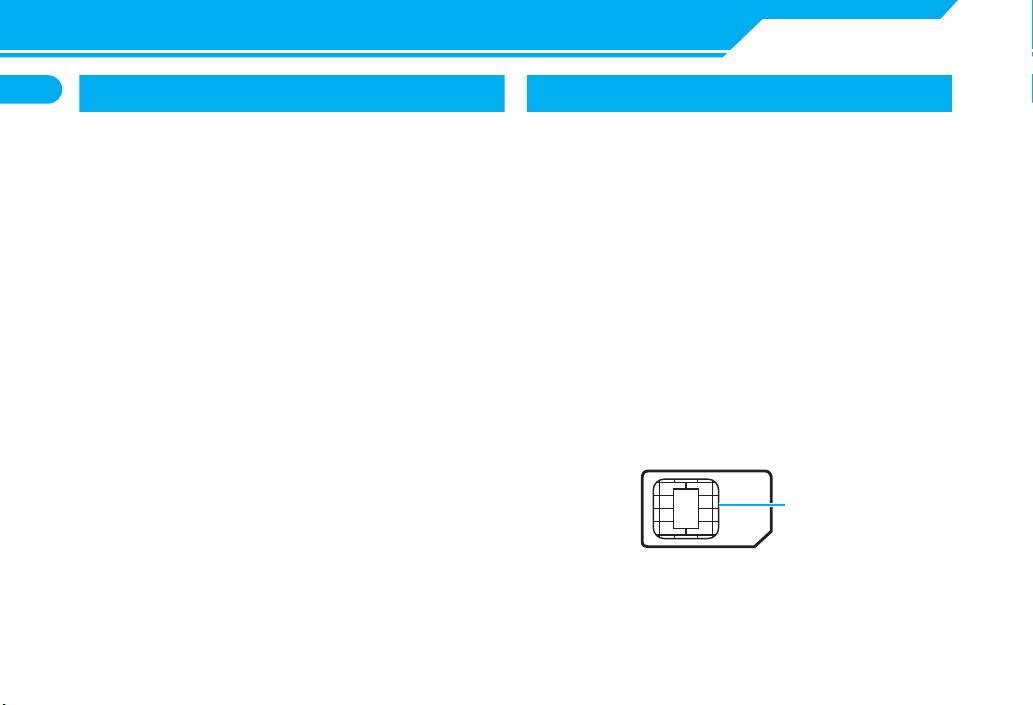
Universal Subscriber Identity Module (USIM) Cardis an IC
cardthat contains customer information (phone number,
etc.). A USIM Cardmust be insertedto use your handset.
●Store Phone Book entries and SMS on USIM Card.
●Insert USIM Card into other USIM-compatible SoftBank
handsets to use information on Card.
●Do not apply excessive force when inserting/removing USIM
Card.
●SoftBank is not liable for any damage caused by inserting USIM
Card into other IC card readers/writers.
●USIM Card may become warm during use. This is not a
malfunction.
●Keep IC chip clean.
●For details, refer to the manual supplied with your USIM Card.
●Do not drop USIM Card or subject to excessive shock. Doing so
may cause malfunction.
●Do not bend USIM Card or place heavy objects on it. Doing so
may cause malfunction.
●Avoid extreme temperatures.
●Do not scratch, carelessly touch or short-circuit the IC chip.
Doing so may result in data loss or malfunction.
●Clean USIM Card with a dry soft cloth (such as is used for
eyeglasses).
●Use a SoftBank-designated USIM Card. Using a non-designated
card may result in handset malfunction.
Other Notes on USIM Cards
●USIM Cards are the property of SoftBank.
●USIM Cards will be reissued for a fee if lost or damaged.
●Return USIM Cards to SoftBank upon cancellation or
suspension of service.
●Returned USIM Cards are recycled.
●USIM Card specifications and performance may change without
prior notice.
●Keep a separate copy of data saved on your USIM Card.
SoftBank is not liable for lost data.
●If USIM Card or handset (with USIM Card inserted) is lost or
stolen, suspend service immediately. For details, contact
SoftBank Customer Center, General Information (P. 15-52).
●Downloaded files (S!Appli, videos, Saved Pages, etc.) saved to
handset or memory card may be inaccessible after USIM Card
replacement, handset upgrade or service subscription
cancellation. If a different USIM Card is inserted, the cookies
and cache are cleared to protect personal information.
IC Chip

1-11
USIM Card
Getting Started
1
USIM PINs
There are two security codes for USIM Cards: PIN1 andPIN2.
PIN1
PIN1 is a four- to eight-digit code to prevent unauthorized
handset use by a thirdparty.
●Default PIN1 is 9999.
●PIN1 can be changed (P. 4-2).
●When PIN1 Code Entry Set is set to ON, PIN1 must be entered
each time handset is turned on to be used.
PIN2
PIN2 is requiredto reset total call cost or to set a maximum
limit to call costs.
●Default PIN2 is 9999.
●PIN2 can be changed (P. 4-2).
PIN Lock & Cancellation (PUK)
If PIN1 or PIN2 is incorrectly enteredthree times
consecutively, PIN Lock is activated, limiting handset use to
specific functions. Enter Personal Unblocking Key
(PUK1/PUK2) to cancel PIN Lock.
●For information on PUK, contact SoftBank Customer Center,
General Information (P. 15-52).
Note
・If PUK1 is incorrectly entered ten times consecutively, USIM Card
is locked and handset is disabled.
・If PUK2 is incorrectly entered ten times consecutively,
operations requiring PIN2 entry are all disabled.
・Write down your PUK.
・To cancel USIM Card lock, contact SoftBank Customer Center,
General Information (P. 15-52).

1-12
USIM Card
Getting Started
1USIM Card Installation
●Remove Battery (P. 1-13) before inserting or removing USIM
Card.
Insertion
Pull Tray out by catch
Place USIM Card on tray with gold IC part
facing downward, in the orientation shown
Push Tray all the way in
Removal
Pull Tray out by catch and remove USIM Card
If Tray Detaches
Do not use excessive force to pull Tray; may slide out
completely.
If Tray detaches, align Tray horizontally, then push in all the
way.
1
2
Side with gold IC
visible facing
downward
Notch
Tab
1
2
3
Properly Inserted
1

1-13
Getting Started
1
Battery & AC Charger
Notes on Battery Charging
●Charge battery at least once every six months. If battery is left
uncharged for a long period, it may become unusable or its
operation time may decrease.
●Avoid connecting too many things to one AC outlet. Doing so
may cause the AC outlet to overheat and cause a fire.
●Battery and AC Charger may become warm during charging,
but this is not a malfunction. If they become too hot, however,
stop charging and contact SoftBank Customer Center,
Customer Assistance (P. 15-52).
●If Charging Indicator flashes during charging, battery may be
faulty. Contact SoftBank Customer Center, Customer
Assistance (P. 15-52).
●Depending on the conditions of usage, the battery may expand
as it nears the end of its life. However, this presents no safety
problems.
●Check the battery type on its label:
Battery Installation
Insertion
Press ““
mark and slide off Battery Cover
Mark Typ e
Li-ion00 Lithium-ion battery
Lithium-ion batteries are a
recyclable resource. Do not
dispose of them as municipal
waste. Bring used batteries to your nearest
SoftBank Shop or recycling center after
insulating the terminals with tape. Observe
local regulations on battery disposal.
Note
・Hold handset firmly so handset does not slide open when
removing Battery Cover.
1

1-14
Battery & AC Charger
Getting Started
1Align terminals and insert in direction shown
(①), and then press into handset (②).
Replace cover
Removal
●Turn off handset before removing battery.
Remove battery cover
Pressing Tab (①), lift out battery (②)
2
2
1
Terminals
facing upward
B
3
Note
・Do not force Battery Cover shut. Tab may be misaligned, and
cause breakage.
1
2
Tab

1-15
Battery & AC Charger
Getting Started
1
Open Port Cover Pull Port Cover (as indicated by arrow ①)
Rotate Port Cover (as indicated by arrow ②)
●Using excessive force may cause damage.
●Keep Cover completely open (as illustrated) while Port
is in use.
2
1
Port Cover
Slot
Note
・When handset is connected to an external device, be cautious
of Port Cover. Excessive force may damage it.
1
2

1-16
Battery & AC Charger
Getting Started
1Charging Battery
Using AC Charger
Use only SoftBank-specifiedAC Charger “ZTDAA1“(sold
separately). In this guide, the ZTDAA1 model AC Charger is
referredto as “AC Charger.“
Open Port Cover
See P. 1-15.
Insert Charger connector into External Device
Port
Extend Charger blades and plug into an AC
Outlet
Charging Indicator lights while charging. When
charging is complete, Indicator goes out.
Disconnect connector from handset
Press andholdRelease Tabs to remove connector.
Close Port Cover
Unplug Charger from AC Outlet
External
Device Port
Connector
Release Tabs
Port Cover
1
2
3
Blades
AC Charger
Note
・Battery can only be charged while inserted in handset.
・When Charging Indicator and Display Indicator go out and
Charge Unusual Stop Charge appears, disconnect handset
from AC Charger and remove battery. Set up handset and
Charger and start charging again. If the same error occurs, AC
Charger may be faulty. Contact SoftBank Customer Center,
Customer Assistance (P. 15-52).
・When Charging Indicator and Display Indicator are
flashing, handset temperature is unsuitable for charging
(Temperature Monitoring). Wait until handset cools down.
1
2
3
4
5
6

1-17
Battery & AC Charger
Getting Started
1
More Features
Customize
Backlight
Set Backlight during Charging
(☛P. 14-7)

1-18
Getting Started
1
Power On/Off
Power On
●Make sure USIM Card is correctly
inserted before turning power on.
Press and hold y
◎
Powering Handset On for the
First Time (Initial Setup)
Setup prompt appears in Japanese.
Select NO and press dto exit.
After changing interface language to
English (P. 14-6), restart handset and
perform setup procedure as follows.
[Initial Settings] window
YES
d
Auto
d
Select a time
zone
d
■To Manually Enter Date & Time
Manual (Date Time Set)
d
Select a time zone
d
Enter date andtime
d
Enter Security Code (9999)
d
Enter new Security
Code
d
YES
d
Select a font size
d
■When Separate Setting is
Selected
Set a font size for each function
window (P. 14-6).
[Keypad Sound Setting] window
ON
or
OFF
d
◎
Retrieving Network
Information
When o, p, ior dis pressed after
initial setup, a prompt appears. Select YES
to update network settings.
Tip
・
After USIM Card is replaced, Security Code
is required when powering handset on for
the first time. If Security Code is incorrectly
entered five times, handset shuts down.
Turn handset on again.
1
1
2
3
4
5
Tip
・Setup prompt no longer appears when
all the initial setup items have been set.
・The default Security Code is 9999.
Tip
・Retrieve network information to use
network-related services, such as mail
and the Internet.
・To manually update network settings:
d
Settings
d
Connection
Settings
d
Retrieve NW Info
d
YES
d

1-19
Power On/Off
Getting Started
1
◎Welcome Mail
You will find a Welcome mail from
CASIO in Inbox at time of purchase.
Power Off
Press and hold y
Handset shuts down.
More Features
Customize
Clock
Hide Clock
Set Auto Time Adjustment
Manually Adjust Time
Summer Time
Time Zone (Sub Clock)
Hide Sub Clock
Summer Time (Sub Clock)
Time Zone Major City (Sub Clock)
(☛P. 14-2)
Auto Power On/Off
Set Auto Power On/Off
(☛P. 14-3)
Display Settings
Set a Wake-up Image
Set a Wake-up Message
Set Font Sizes Collectively
Set Font Size for Each Function Window
(☛P. 14-4)
Sounds
Set Handset Open/Close Sound
(☛P. 14-14)
Key
Set Key Sound Off
(☛P. 14-39)
Tip
・Packet transmission fees apply when
accessing links in Welcome mail.
・Welcome mail can be deleted but after
initializing handset, it will reappear in
Inbox.
1

1-20
Getting Started
1
Mobile Manners
Use your handset responsibly.
Inappropriate handset use can be both
dangerous andbothersome. Take care
not to disturbothers when using your
handset. Adjust handset use according
to your surroundings.
●Turn handset power off in theaters,
museums and other places where
silence is the norm.
●Refrain from use in restaurants, lobbies,
elevators, etc.
●Observe signs and instructions
regarding handset use aboard trains,
etc.
●Refrain from use that interrupts the
flow of pedestrian or vehicle traffic.
Activating Manner
Mode
Most handset sounds are mutedin
Manner Mode.
Press and hold q
■To Cancel Manner Mode
Press andholdq
More Features
Customize
Manner Mode
Set Manner Mode Type
Configure Original Manner Mode
Set Time for Auto Manner Mode Start
Set Time for Auto Manner Mode
Release
Toggle Auto Manner Mode Start and
Release On/Off
(☛P. 14-13)
Note
・When handset is set to vibrate for
incoming calls, be careful as handset
may slide off, slide into a stove, etc.
Tip
・Shutter click sounds even in Manner
Mode.
・Press and hold Wqto set or cancel
Manner Mode during a call. Short
beeps sound through the earpiece
when Manner Mode is set or canceled
during a call.
・Set or cancel Manner Mode by
pressing and holding k.
1
Other manuals for 930CA
2
Table of contents
Other SoftBank Cell Phone manuals

SoftBank
SoftBank 932SH Safety guide

SoftBank
SoftBank 731SC User manual

SoftBank
SoftBank 824p User manual

SoftBank
SoftBank 006SH User manual

SoftBank
SoftBank 002SH User manual

SoftBank
SoftBank 945sh User manual

SoftBank
SoftBank 109SH User manual

SoftBank
SoftBank 912SH User manual

SoftBank
SoftBank 301P User manual

SoftBank
SoftBank 830SH User manual

SoftBank
SoftBank 002P User manual

SoftBank
SoftBank X06HT User manual

SoftBank
SoftBank 003Z User guide

SoftBank
SoftBank 707SC User manual

SoftBank
SoftBank 940SC User manual

SoftBank
SoftBank 815SH User manual

SoftBank
SoftBank 940SH User manual

SoftBank
SoftBank 007HW User manual

SoftBank
SoftBank 201m User manual

SoftBank
SoftBank 920T User manual