1
Libero3
Libero3 User Guide Contents
Introduction
About the User Guide........................................................ 3
Getting Started
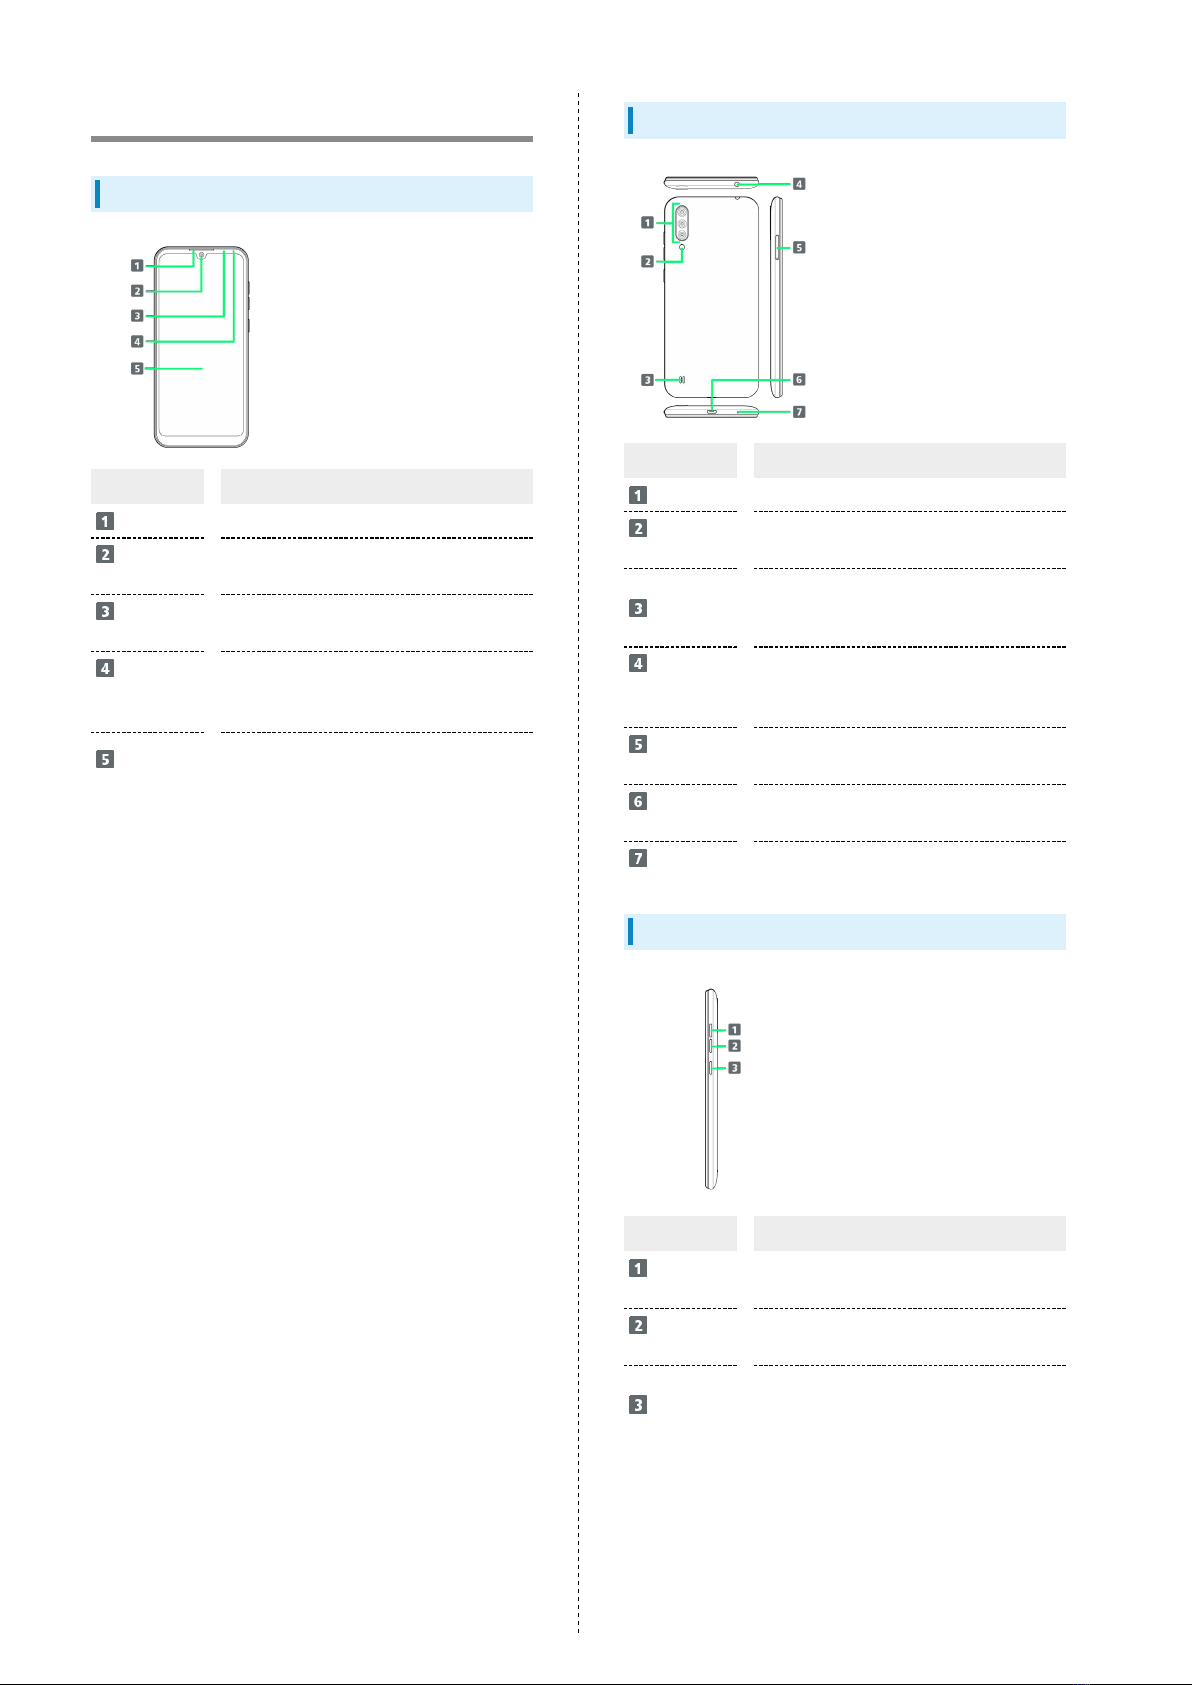
Parts & Functions.............................................................. 6
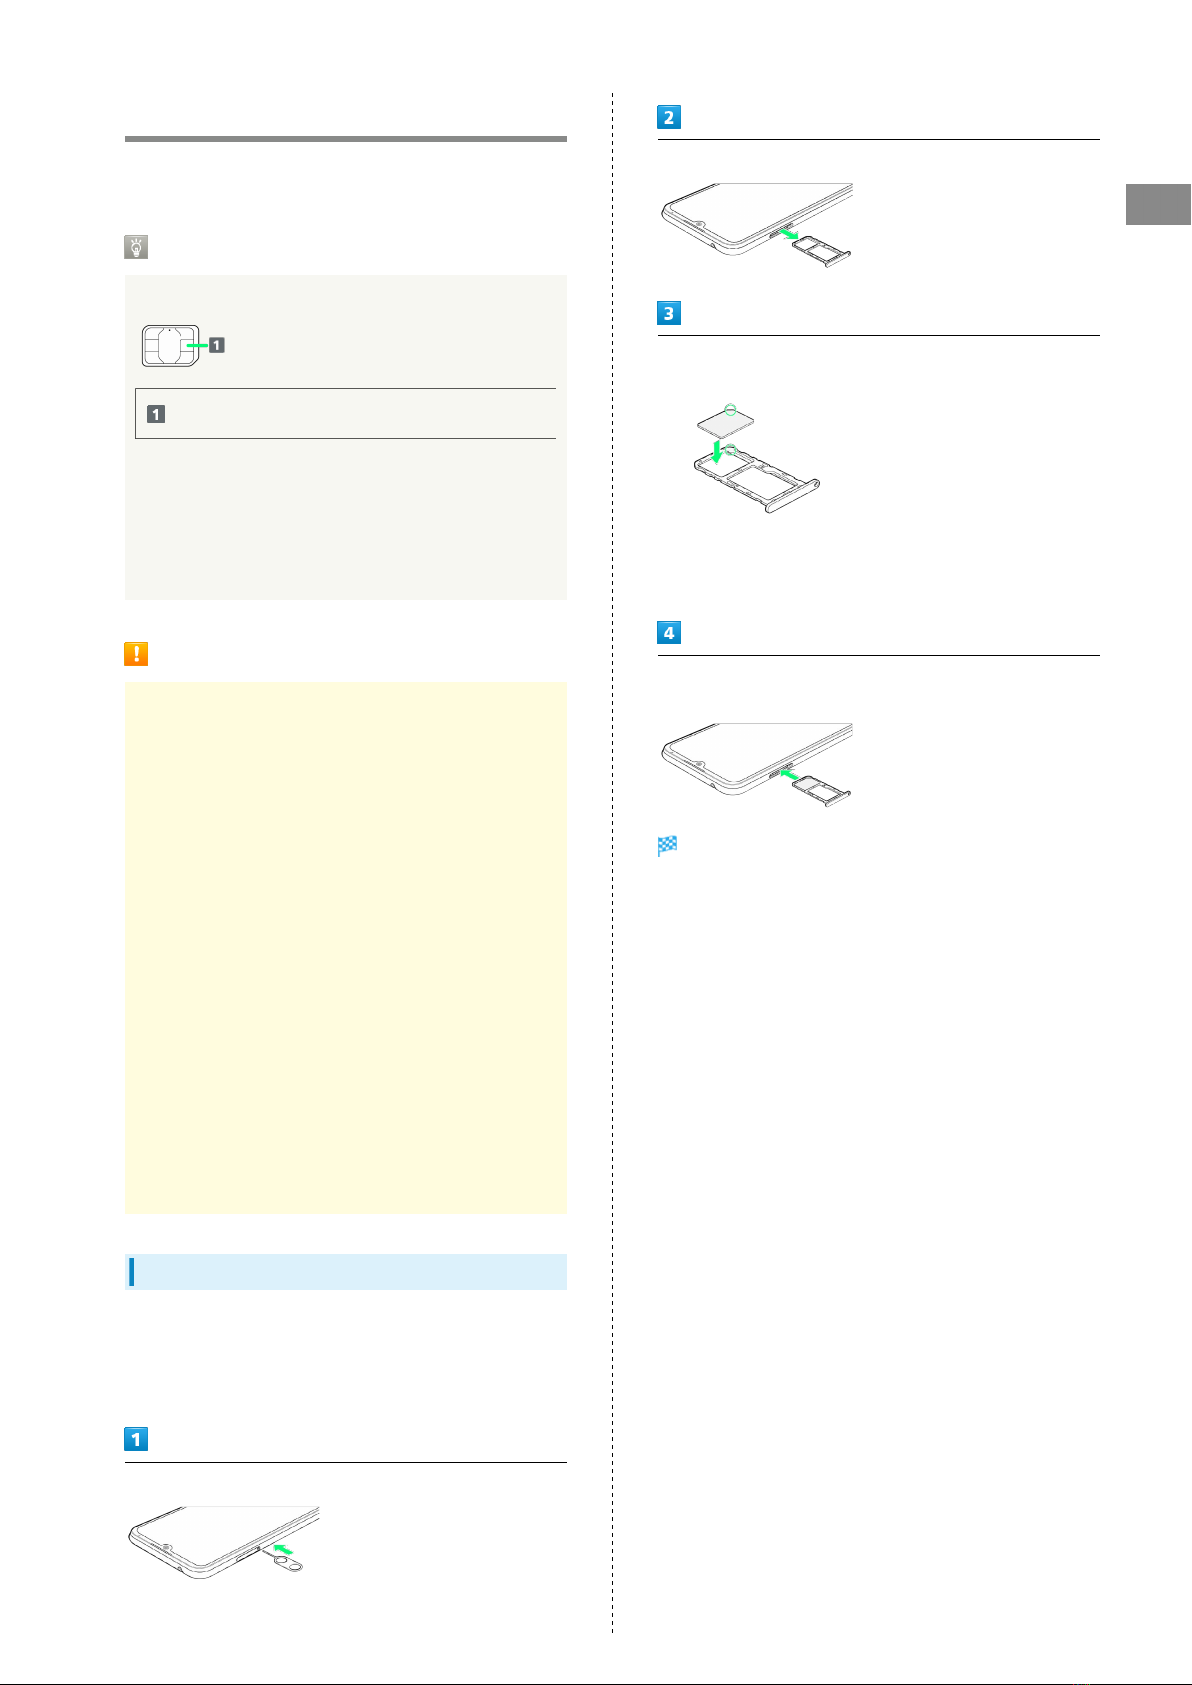
USIM Card............................................................................ 7
SD Card................................................................................ 8
Charging Battery.............................................................. 11
Power On/Off................................................................... 11
Making Initial Settings.................................................... 12
Using a Google Account................................................... 14
Unlocking Screen...............................................................17
Basic Operations
Basic Operation.................................................................20
Using Touchscreen............................................................ 20
Silent Mode....................................................................... 21
Airplane Mode................................................................... 22
Text Entry.........................................................................23
Updating Software........................................................... 24
Handset Interface
Handset Screens............................................................... 26
Status Bar......................................................................... 27
Using Notifications Window............................................ 28
Using Quick Settings........................................................28
Phone
Placing/Answering Calls................................................... 32
Optional Services (Describe content as per instructions
of each carrier)................................................................ 34
Phone Number................................................................... 36
Using Contacts..................................................................37
Messaging
Sending Messages (+Message)......................................... 40
Using Gmail....................................................................... 41
Internet
Using Chrome.................................................................... 44
Camera
Capturing Still Images/Videos......................................... 46
Viewing Captured Still Images/Videos (Photos).............48
Application Basics
Applications.......................................................................50
Adding/Deleting Application............................................51
Wi-Fi Bluetooth
Connecting by Wi-Fi.........................................................54
Using Bluetooth® Function.............................................. 55