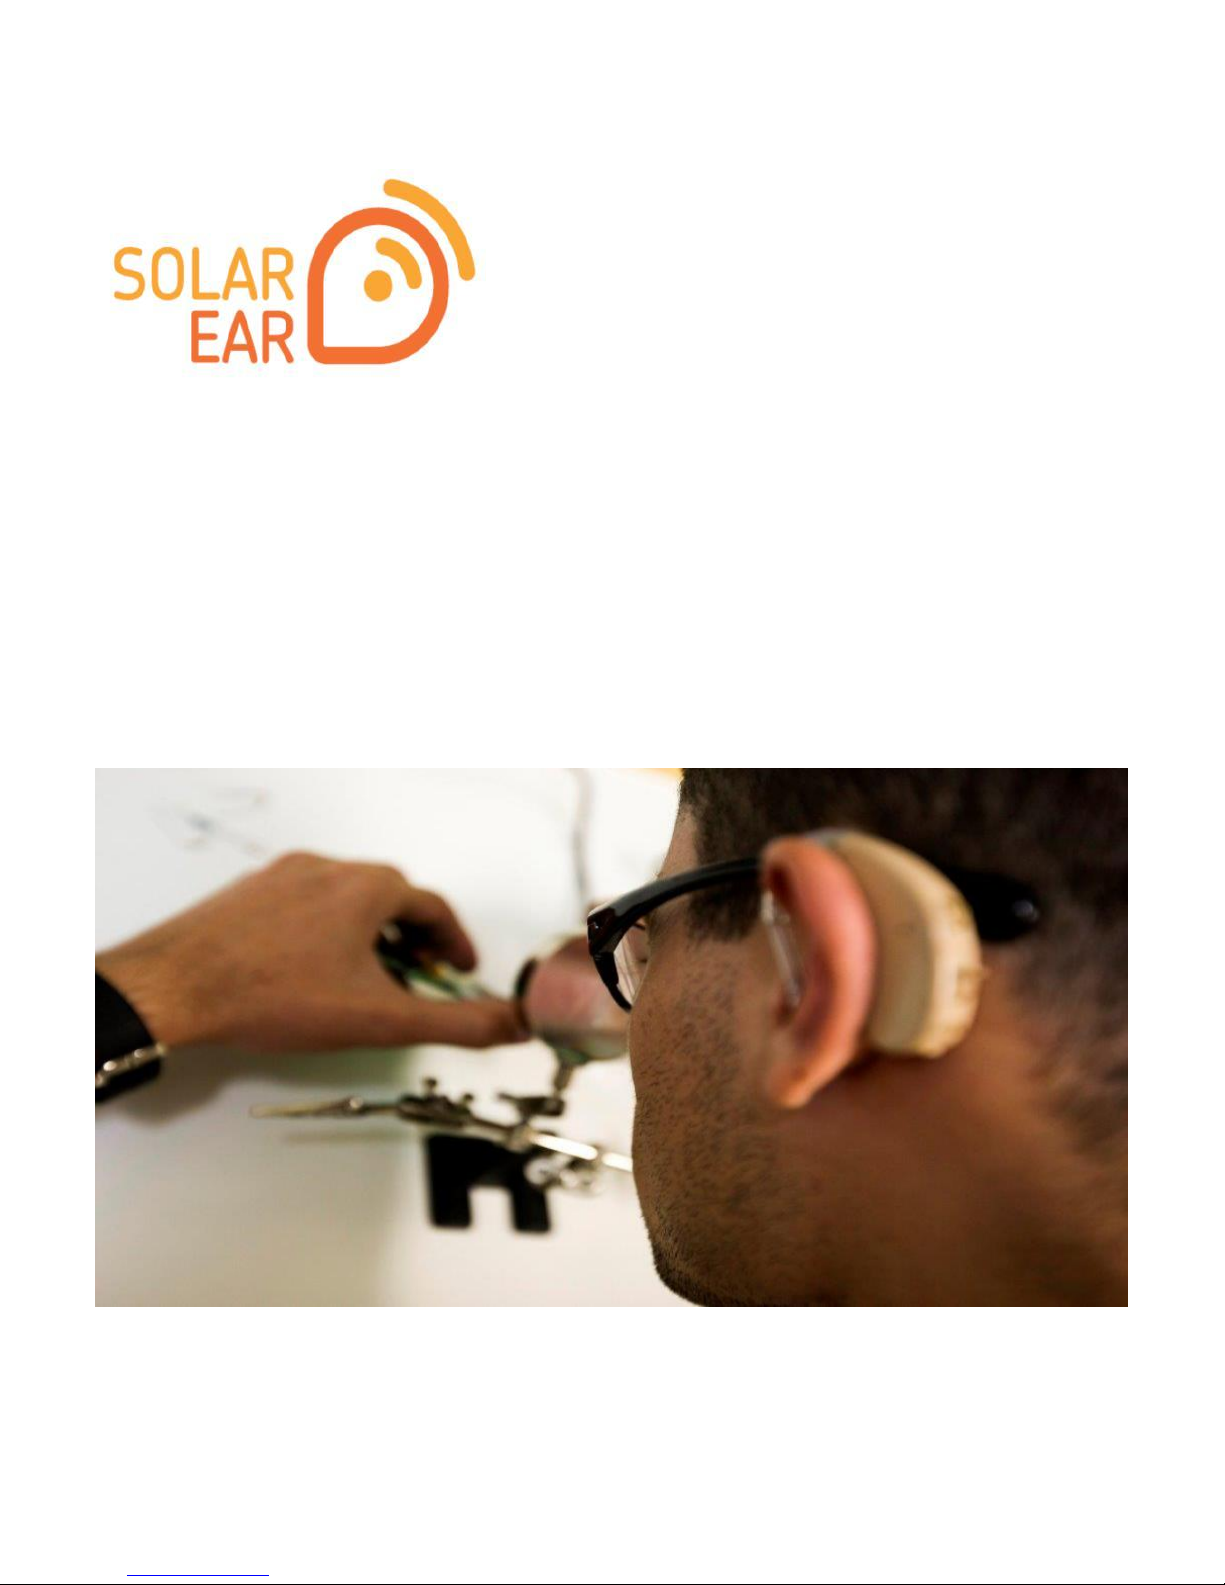
Solar Ear HD-45 User manual
Canada, Botswana, Brazil, China, Egypt, Russia
HD-45, HD-48, HD-424, Vivo Trimmer
HDP- Open Fit & HDP, ASANA Programmable

User Manual HD-45, HD-48, HD-424, Vivo trimmer
HDP- Open Fit & HDP, ASANA programmable
Contents
Preface…………………………………………………………..
Features……………………………………………………………
Preparation………………………………………………………
How to wear your hearing instrument………………………….
Volume control………………………………………………………
Memory switch……………………………………………………..
Replacing the battery……………………………………………….
Troubleshooting Guide…………………………………………………
Low battery Warning………………………………………………….
Caring for batteries……………………………………………..
Cleaning …………………………………………………………….
Working condition…………………………………………………..
FDA information…………………………………………………….

Your hearing instrument
Hearing Healthcare Professional: ___________________________
Model: □LEFT ______ □ RIGHT _______
Serial No.: □LEFT _____ □ RIGHT ______
Battery:
□LEFT □ A13 □A675
□RIGHT □ A13 □A675
Warranty: _______________________
Low battery warning: □ YES □ NO
Hearing program:
□Program 1 _______________________
□Program 2__________________________
□Program 3__________________________
□Program 4__________________________

Preface
Congratulations! Welcome to Solar Ear’s “Behind-The-Ear”hearing
instrument. Please read this manual carefully before use.
Intended use
Hearing instrument is a kind of electronic device which amplifies sound
from your surroundings. It is used to help hearing impaired people
recover hearing ability by compensating for the hearing loss. Your BTE is
only one type of hearing instruments.
.
Precautions
For patients with middle ear infection, it’s suggested not to wear hearing
instrument until cured or follow the doctor’s advice.
Please consult your hearing healthcare professional first if you have any
questions about your hearing or your hearing instrument.
THE MANUFACTURER RESERVES THE RIGHT TO MODIFY THE
TECHNICAL SPECIFICATIONS OF THIS PRODUCT WITHOUTANY
PRIOR NOTICE.
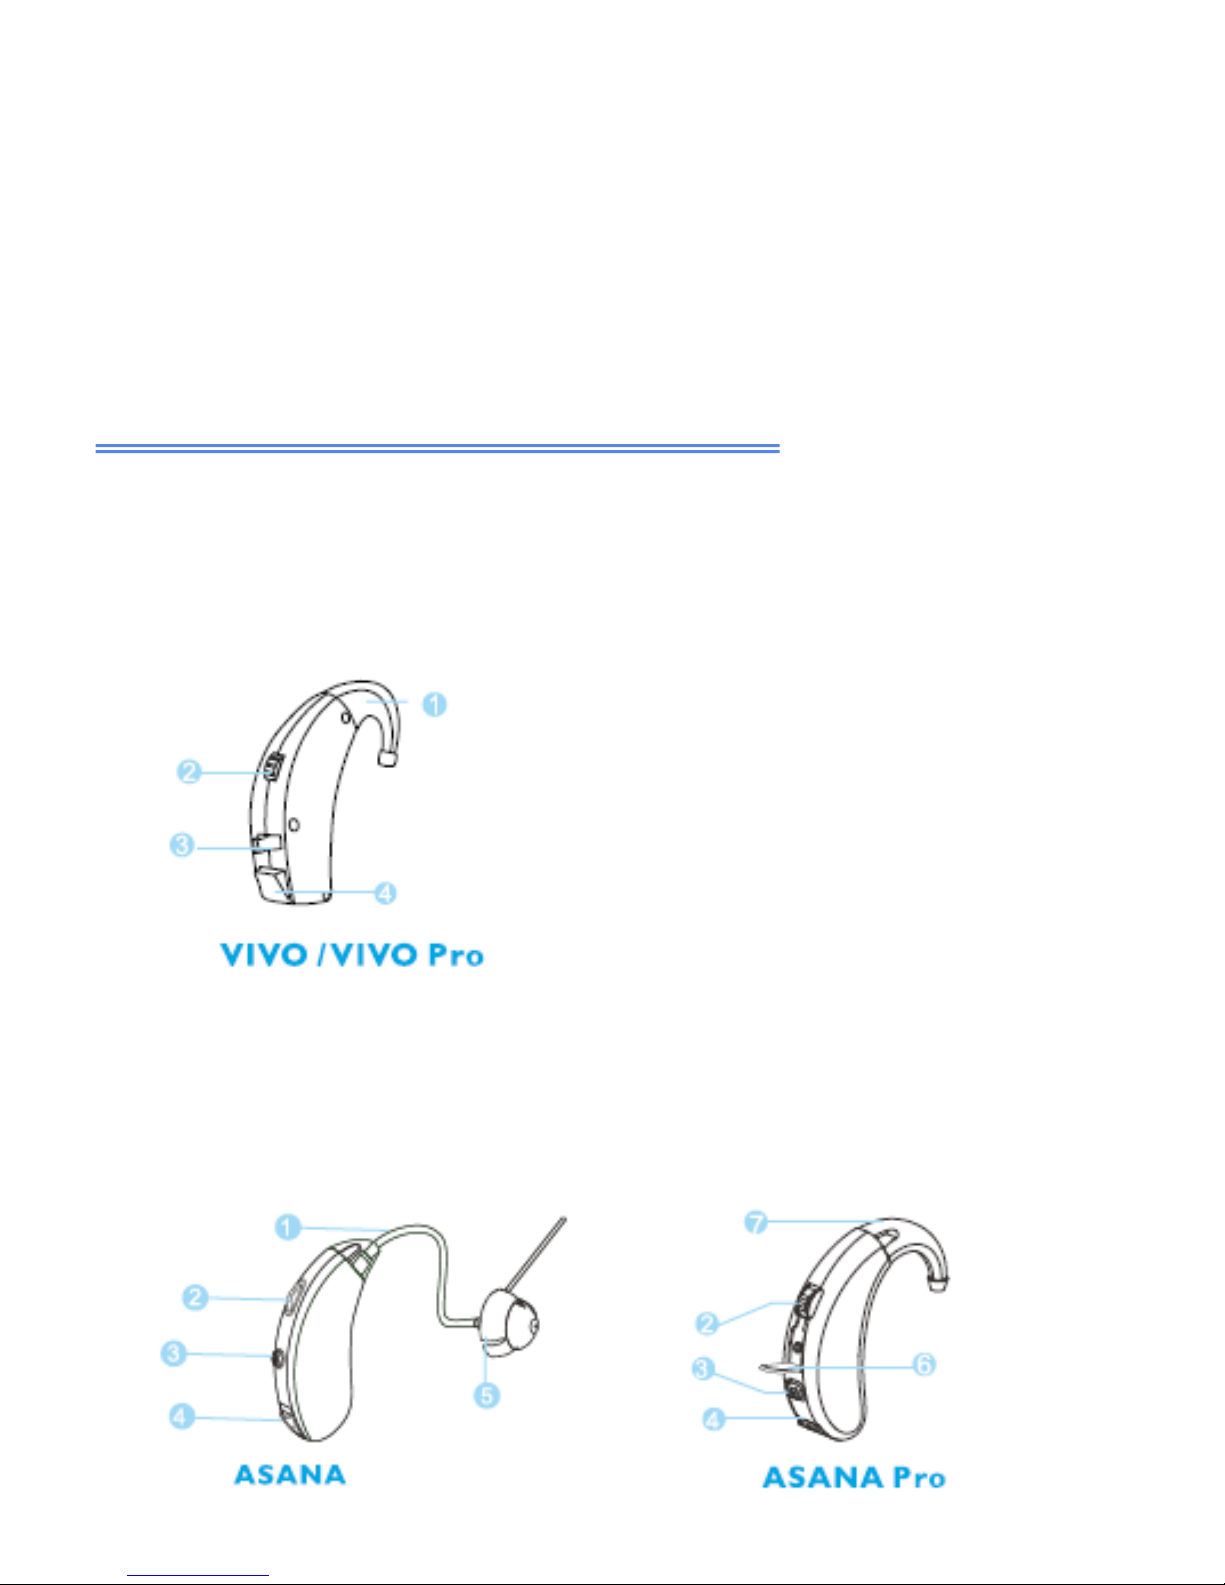
Features HD-45, HD-48, HD-424, Vivo trimmer
HDP- Open Fit & HDP, ASANA programmable
The earhook should be connected with an earmold (eartip) that fits
comfortably in your ear canal.
1.Earhook 2. Volume Control
3. N-H-O / N-H-T Swtich
4. Battery door

1.Sound tube 2. Volume Control 3. Memory Switch 4.Battery
door 5. Dome 6. Programming socket cover 7. Ear hook
1.Earhook 2. Volume Control 3. Trimmer/ Programming socket
cover 4. Memory Switch 5. Battery door 6. Outlet microphone
port 7. M-T-O switch
NOTE:
This socket is used to connect your BTE with a programmer. This is only
for use by your hearing healthcare professional only!


Preparation
When placing the battery into your instrument, put the battery with the
positive (+) side (or totally flat side) up and insert it into the battery door. If
the battery is inserted incorrectly, the door will not close. Do not force the
door closed.
CAUTION: Batteries are dangerous if swallowed! Keep batteries away
from children and pets. Never put batteries in your mouth for any reason
they are easily swallowed. In case a battery has been swallowed, seek
immediate medical attention.
TO TURN ON- Gently open the battery door, insert battery and close the
door. Then the instrument would be equipped with a power on delay, you
will be given several seconds to seat the device comfortably before it
turns on.
TO TURN OFF-Simply open the battery door completely.
Store it in a safe & dry place.
How to wear your hearing instrument
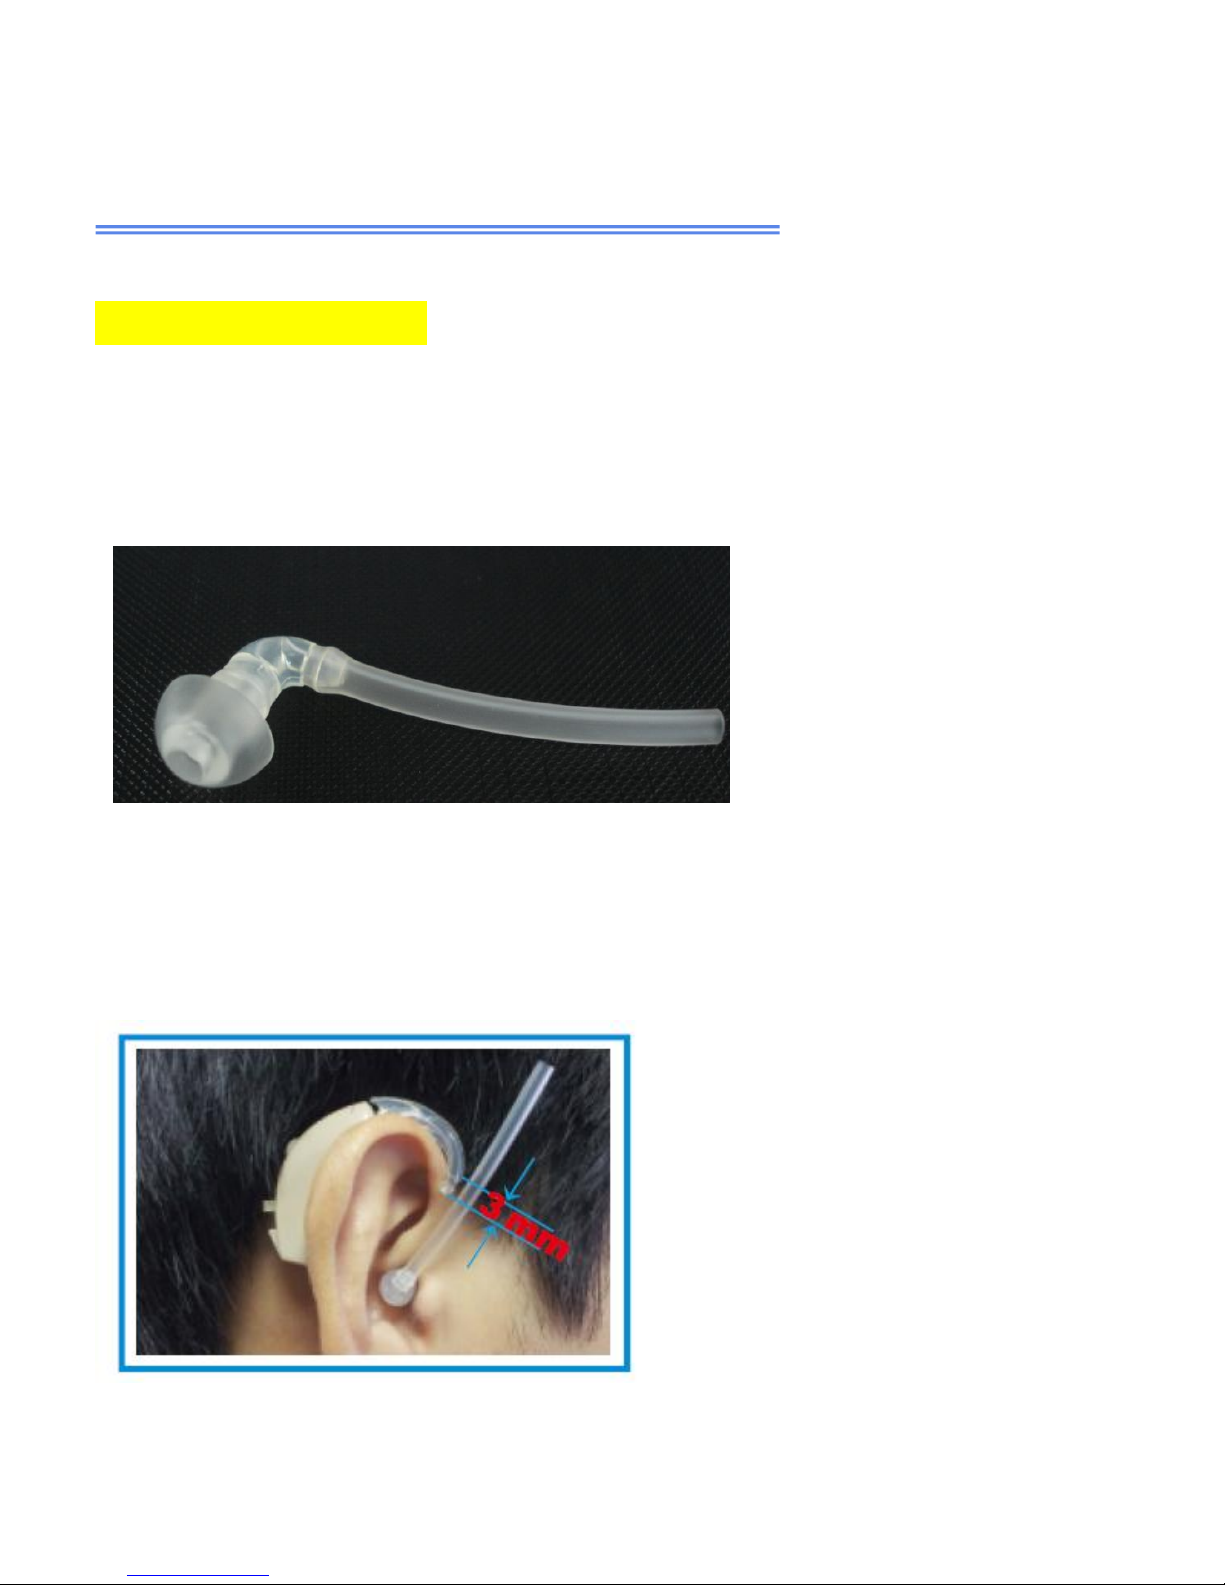
How to deal with earhook
Attach your hearing instrument parts
1. Choose the suitable earmold (or eartip), and then fit with the
adaptor and sound tube.
2. Cut off the needless part of the sound tube showed below to
achieve the best hearing experience. And then connect sound tube
with earhook.
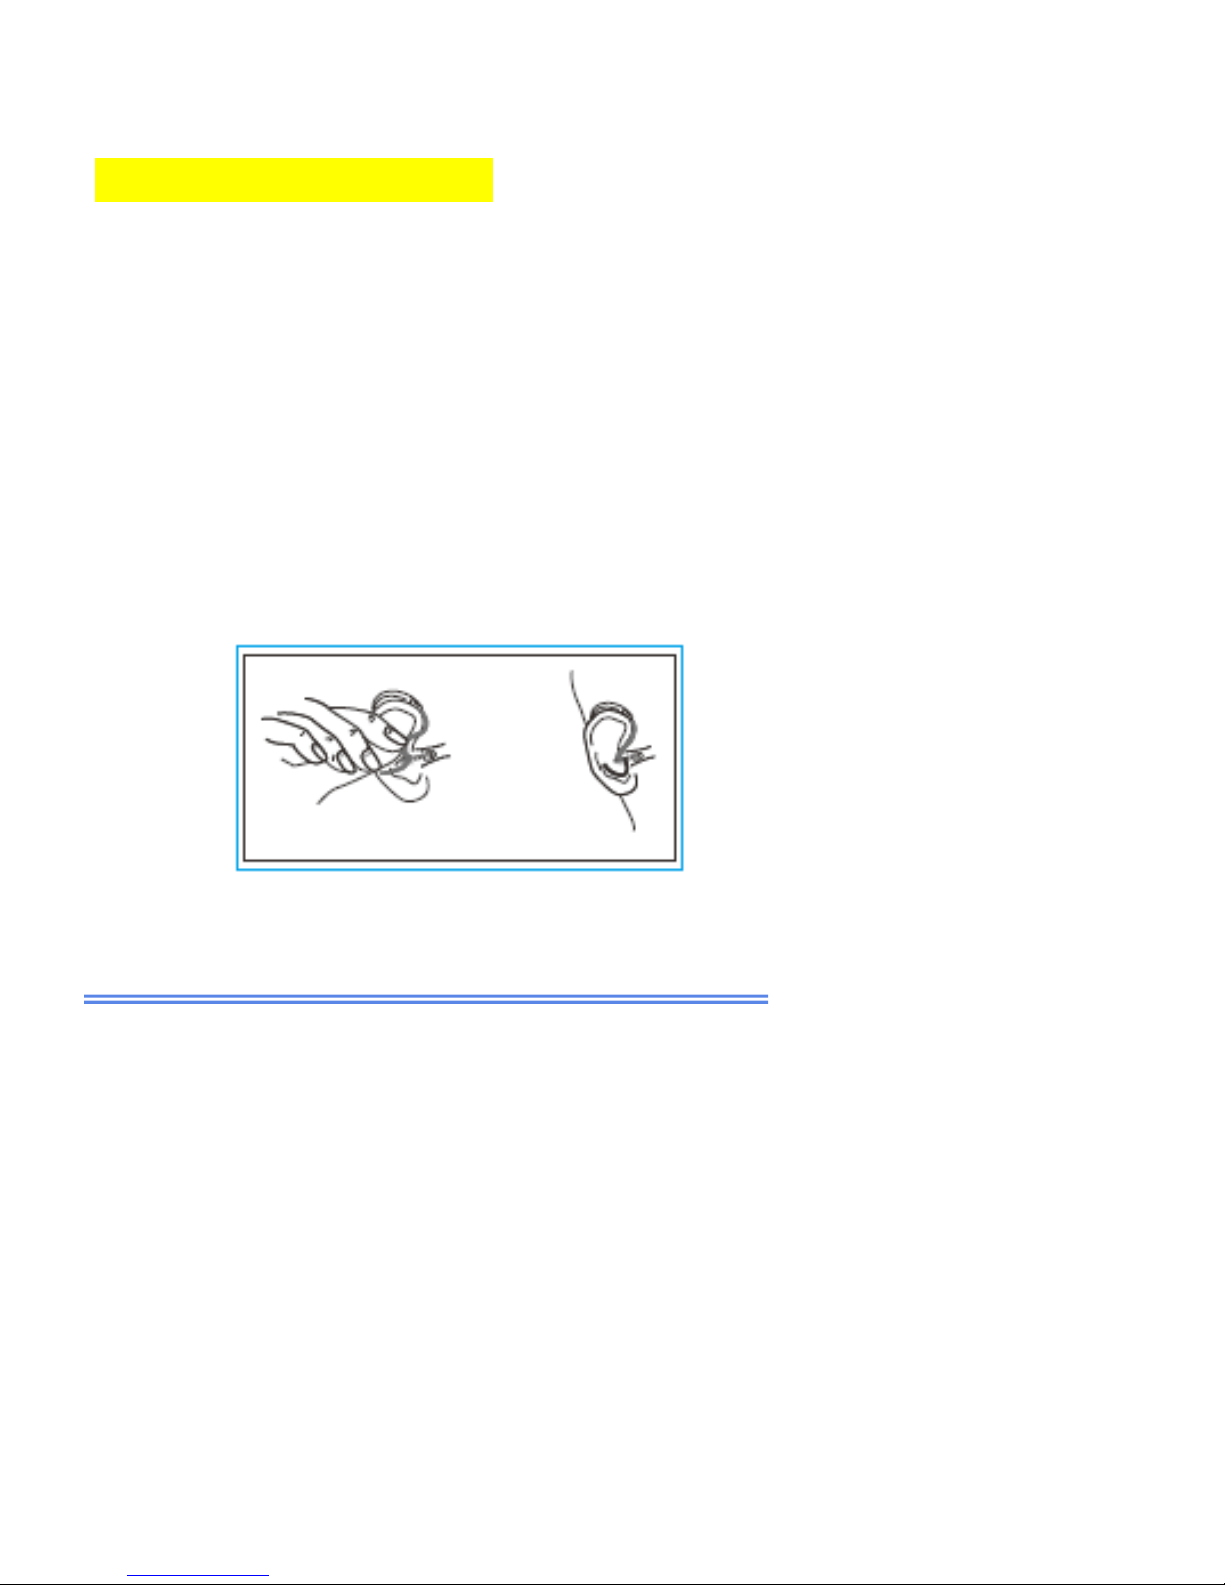
Insert the earmold (or eartip) into your ear canal first, and then place the
hearing instrument behind your ear.
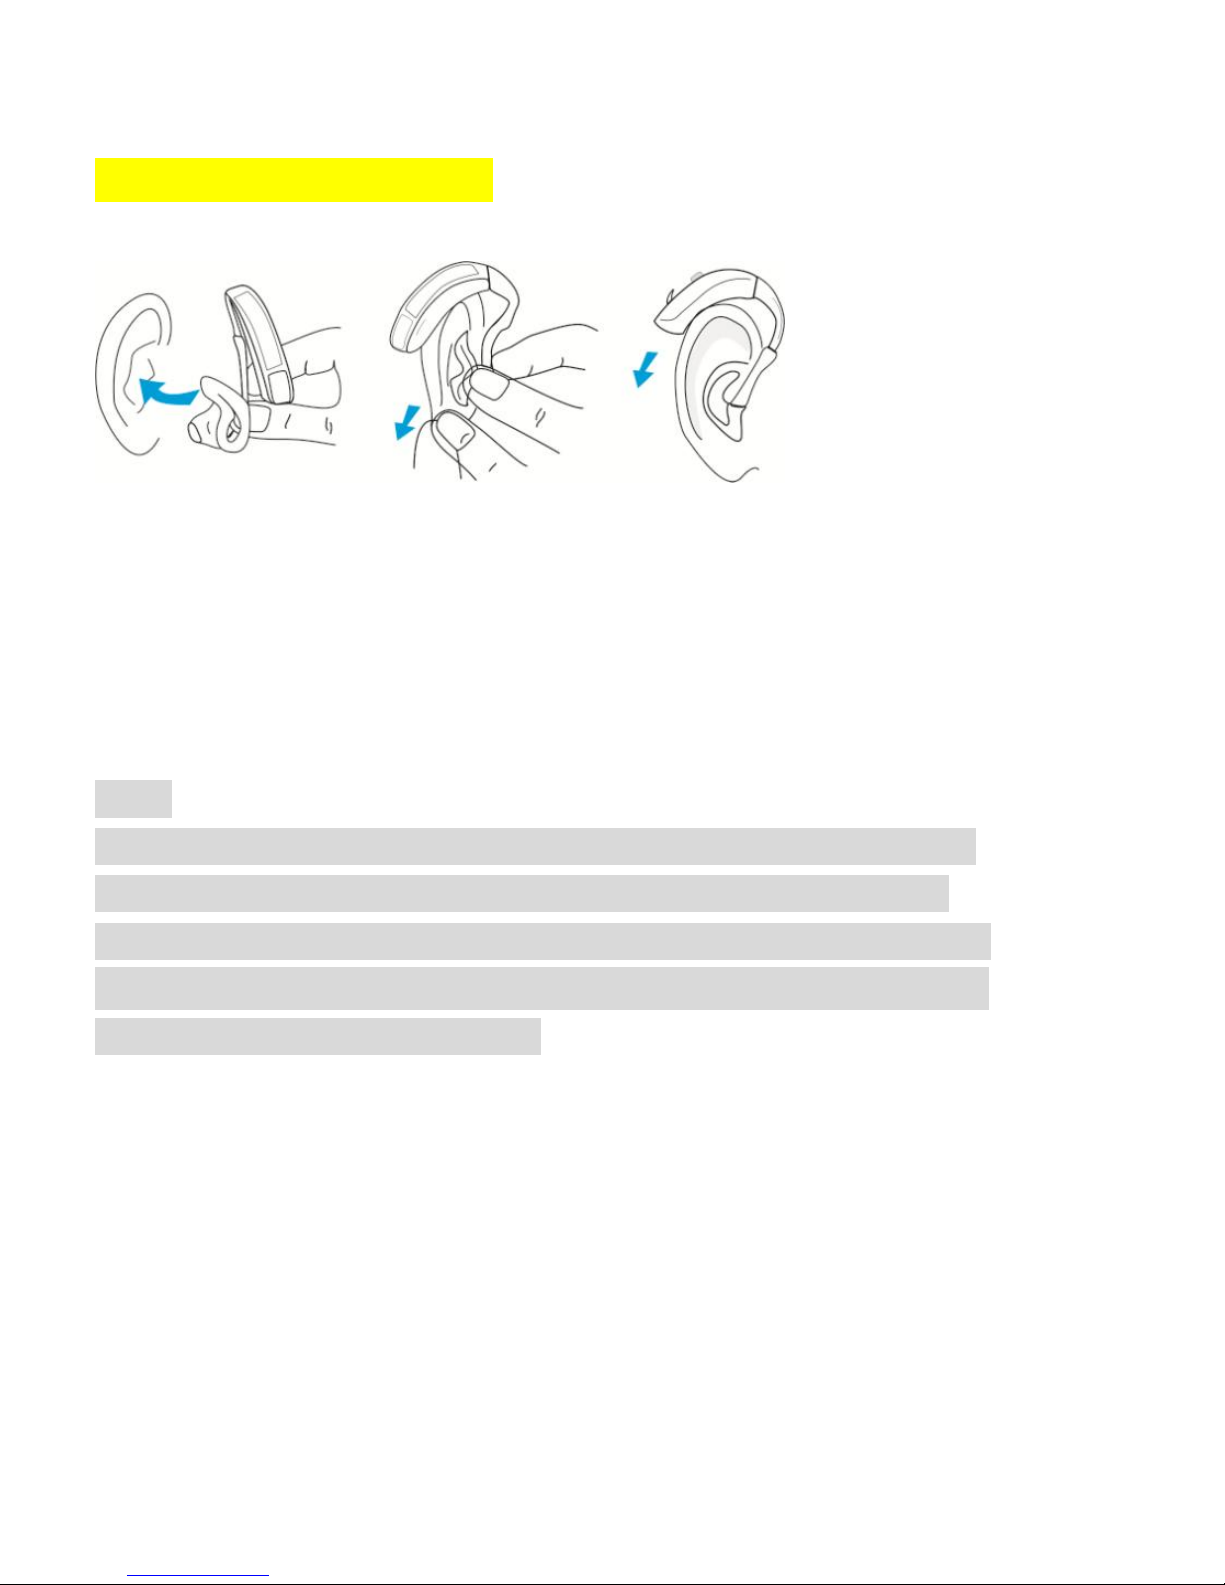
Put on your hearing instrument
Step 1:Hold the earmold by the outer side near the tubing with your
thumb and forefinger. Insert the canal tip of the earmold into your ear
canal gently. Then softly press the earmold into place with your fingertip.
Step 2:Carefully place the BTE behind your ear with the ear hook and
earmold tubing wrapped over the top.
Note:
Before placing the BTE earmold (or eartip) into your ear canal,
Insure the battery is inserted properly and the battery door is
closed securely. If your BTE has an M-O (M-T-O)switch, ensure
it is set to “O”(off) or the volume control is turned off before
inserting the earmold(or eartip).

How to deal with sound tube
Attach your hearing instrument parts
Your hearing instrument consists of three basis parts: the hearing
instrument case, the sound tube, and the dome.
Attach the dome
Push the dome over the grooves on the tube to mount it.
Attach the sound tube
Hold the end of the sound tube in one hand and the hearing
instrument in the other. Line up the sound tube on top and twist
onto the adaptor that sticks out of the hearing instrument case.
Put on your hearing instrument
Step 1. Hold the sound tube on the outside near the tubing with
your thumb and forefinger. Gently insert the dome or mold into
your ear canal to the most comfortable place .
Step 3. Place the hearing instrument over the top of your ear.
Step 2. Position the retention lock into the indentation above your
ear lobe using your index finger.
M-O(M-T-O) Switch|N-H-O/N-H-T Switch
M-O (M-T-O) switch:
Position “M”: The instrument is switched on, on Microphone mode.
Position “O”: The instrument is switched off.
Position “T”: Telecoil function for helping hear on telephone.
N-H-O /N-H-Tswitch:
Position “O”: The instrument is switched off.
Position “N”: The instrument is switched on, on Normal mode.
Position “H”: Background noise reduction function.
Position “T”:The instrument is on Telecoil mode.

Trimmers
The amount of trimmers on your instrument may be different from the
following listed. Please adjust them according to the trimmer types on
your instrument.
H Trimmer:
Used to eliminate feedback.
Turn clockwise for maximum High-frequency
sound, minimum feedback reduction.
L Trimmer:
Used to eliminate noise.
Turn clockwise for maximum Low-frequency
sound, minimum noise reduction.
P Trimmer:
Controls the maximum output sound level.
Turn clockwise for maximum sound
amplification.
Volume control
To adjust the volume, rotate the volume control by your fingertip up and
down. The numbers indicates an orientation for the current volume setting.
1 is the lowest volume.
To increase the volume, turn the volume control
up. To decrease the volume, turn the volume
control down.

Memory switch
Note: This function is available for digital hearing aids only.
Your hearing instrument can be programmed with up to 3 different
listening programs.
When the hearing instrument is turned on, it will automatically be in
program 1-microphone mode.
The additional settings which are pre-programmed for your specific needs
are accessed by the memory switch. Each time you press the memory
switch, the hearing instrument will move to the next program. The
sequence is 1, 2, 3, 1...
Your hearing instrument will alert you to you help you identify which
program you are using. When you select program 1 you will hear one
beep, program 2 will emit two beeps, 3 beeps for program 3.
Please note that the programs are pre-set by your hearing healthcare
professional or manufacturer.

Replacing the battery
1. Switch off the hearing instrument.
2. Open the battery door and remove the old battery.
3. Remove the protective foil from the new battery.
4. Insert the new battery, be sure that the plus (+) is facing up.
5. Close the battery door.
Important: Handle the battery door gently. The operation requires only a
minimum force. If there is any resistance when closing the battery door,
ensure that the battery is correctly inserted. The battery door cannot be
closed if the battery is inserted incorrectly.

Low battery warning
When you hear one short beep, it means that the battery is low. You will
hear the warning intermittently until you replace the battery.
After the first warning, you may experience some reduction in sound
quality. This is normal and can be remedied by inserting a fresh battery in
the hearing instrument.
Always remove the battery if your instrument is not in use for long periods
of time.
Caring for batteries
The performance of the hearing instrument depends largely on the quality
of the battery.
1) To get the full benefit of your hearing instrument, it is necessary and
important to use high-quality batteries. The lifetime of a battery depends
on the quality. With a reliable battery, you can avoid periodic hearing
instrument failures.
2) It is also important that air does not enter the battery before use.
Therefore, each battery is provided with an adhesive label that ensures
that the batteries are sealed and fresh until use.
3) Never let an exhausted battery remain in the hearing instrument. It may
leak and cause damage to the hearing instrument.

Troubleshooting
SYMPTOM
POSSIBLE
CAUSES
SOLUTIONS
No sound
Dead or low battery
Replace battery
Battery improperly
inserted
Insert battery correctly
Wax or debris in the
microphone or
receiver
Clean both microphone and
receiver with brush. Remove
and clean the dome
Not loud
enough
Low battery
Replace battery
Excessive ear wax
Consult your physician
Wax or debris in the
microphone or
receiver
Clean both microphone and
receiver with brush. Remove
and clean the dome
Hearing change
Contact your hearing care
professional
Whistling,
feedback
Loose insertion of
hearing instrument
Remove and reinsert
Excessive ear wax
Consult your physician
Dome of improper
size
Change domes of proper size
Not clear or
distorted sound
Low battery
Replace battery
Hearing instrument
damaged
Contact your hearing care
professional
Hearing instrument
settings not optimal
Contact your hearing care
professional

Cleaning
Cerumen will accumulate on it while using your hearing instrument during
use. It will damage the instrument if the cerumen enters it.
The instrument has a protection system, the WaxStop. Clean the
instrument and replace the WaxStop regularly. Failure to do so can lead
to an accumulation of cerumen which will impair sound quality.
Cleaning is easier when accumulated cerumen is dry; e.g., in the morning,
before you insert the instrument into your ear.
Cleaning the instrument
• Clean your instrument with a soft, dry cloth and the small brush. Do the
cleaning on the soft table to avoid damage or scratch if the instrument fell.
• Do not use water or other fluids.

Working condition
Temperature should not exceed limits of -20°/60°
Celsius at a relative air humidity of 65% for extended periods during
transportation and storage.
Technical Data Standard
Maximum Output IEC-118-7/2005(2cc-coupler)
Manufacturer
Solar Ear- HQ
3 Westmount Square #1016
Westmount, PQ
Canada, H3Z 2S5
Deaftronics
Riverwalk,Gaborone
Unit 5,Plot 54516
Private Bag 00265
Gaborone,Botswana
CEFAC
Av. Angelica 1648 #62
Sao Paulo, SP
Brazil, 01228-100
Newsound
1st # 13 Xiangyue Road, Torch Hi-Tech Industrial
Development Zone, Xiang’An District, Xiamen,361100, China.

Note: detailed technical data for each model can be found in the
appendix.
NOTE: Detailed technical data for each model can be find in
appendix.
FDA information
Following the medical evaluation, the physician will give you a written
statement that states that your hearing loss has been medically evaluated
and that you may be considered a candidate for a hearing aid. The
physician will refer you to an audiologist or hearing aid dispenser, as
appropriate, for a hearing aid evaluation.
The audiologist or hearing aid dispenser will conduct a hearing aid
evaluation to assess your ability to hear with and without a hearing aid.
The hearing aid evaluation will enable the audiologist or dispenser to
select and fit a hearing aid to your individual needs.
If you have reservations about your ability to adapt to amplification, you
should inquire about the availability of a trial rental or purchase-option
program. Many hearing aid dispensers now offer programs that permit
you to wear a hearing aid for a period of time for a nominal fee after which
you may decide if you want to purchase the hearing aid.
Federal law restricts the sale of hearing aids to those individuals who
have obtained a medical evaluation from a licensed physician. Federal
law permits a fully informed adult to sign a waiver statement declining the
medical evaluation for religious or personal beliefs that preclude
consultation with a physician. The exercise of such a waiver is not in your
best health interest and its use is strongly discouraged.
This manual suits for next models
4
Table of contents
Other Solar Ear Hearing Aid manuals


