SolarPath SPFS Series User manual


Before using carefully read
the following precautions to avoid damage or errors.
Introduction:
Product Manual
The SPFS series is extremely versatile, robust Solar Street Light.
It features all of its components fully integrated within an attractive and
compact design. It combines a highly efficient solar panel with a ‘smart’
and ‘intelligent’ charge controller to energize
a high capacity lithium-ion battery that supplies power to the Super-
Bright Bridgelux LEDs to achieve multiple features such as high
luminance, long lifespan, minimal maintenance and easy
installation.
By choosing a wireless module and wireless concentrator, user can
wirelessly control the light, monitor working status, set custom working
mode or review historical charging data. SPFS Light brings you a easier
way to control the outdoor lighting than even before.
Application:
Multi options & wide usage:
From 15w to 100w, all in one solar lighting system can be used for a
wide range of area lighting.
Public areas & Parks & campuses
Residential & Community Center
Urban trunk road & Slow lane
Bike trails & Tourist attraction
City stadium & Office district
Parking lots & Entrance Lighting
Island & dock & Coastal
Industry & Mining Security & Perimeter
Refugee camp & Temporary Construction
Precautions
Product Manual
Operating Conditions & Limits:
This product is rated as IP65 protection grade. Do
not exceed the stated operating limits. The
operating temperature range is from -4
°F to 140°F
and the charging temperature limit is within 32F to
140
°F. If equipped with heating features, it may be
used between -40
°F and 140°F.
Transportation & Storage:
This product contains lithium batteries. Please
follow air transport regulations when shipping. It
should be regarded as potentially flammable and
explosive, and be isolated from other goods when
stored, so as to avoid any damage.
The solar panels of this product should be
considered as fragile. There should never be
more than 4 layers of boxes when stacked. To
avoid damage to the panels, make sure no heavy
pressure is applied to the boxes.
Please store the product in temperature between
32F to 113
°F.
If stored for a long period, the product should be
recharged every 6 months. Please only use the
special charger (purchased from manufacturer) to
avoid damage to the battery or device.
Modification:
It is not on the terms of warranty if clients does
modify or refit the light leading to no-proper working
without authorization of Solarpath.
Product Maintenance:
To ensure effective solar light absorbance, clean
the surface of the panels regularly
with water and
a soft cloth. Do not use chemical solutions or
abrasives.
This Solar Street Light operates on a low voltage
DC current. Unless customized otherwise, do not
connect components or ports to an AC current or
any higher rated DC voltage.
Do not replace the original unit with unauthorized
third party parts as they may cause serious
damage to the product. To order replacement
parts or to have them fitted, please visit
www.obluesmart.com or contact your local
distributor.
Product Recycling:
This product is made from recyclable, high-performance
materials. All materials are compliant
to the ROHS standard. Do not dispose of this
product with other household waste.
Please check your local regulations on collection
and disposal of electronic items. Proper disposal
of used product helps prevent negative impacts
on the environment.
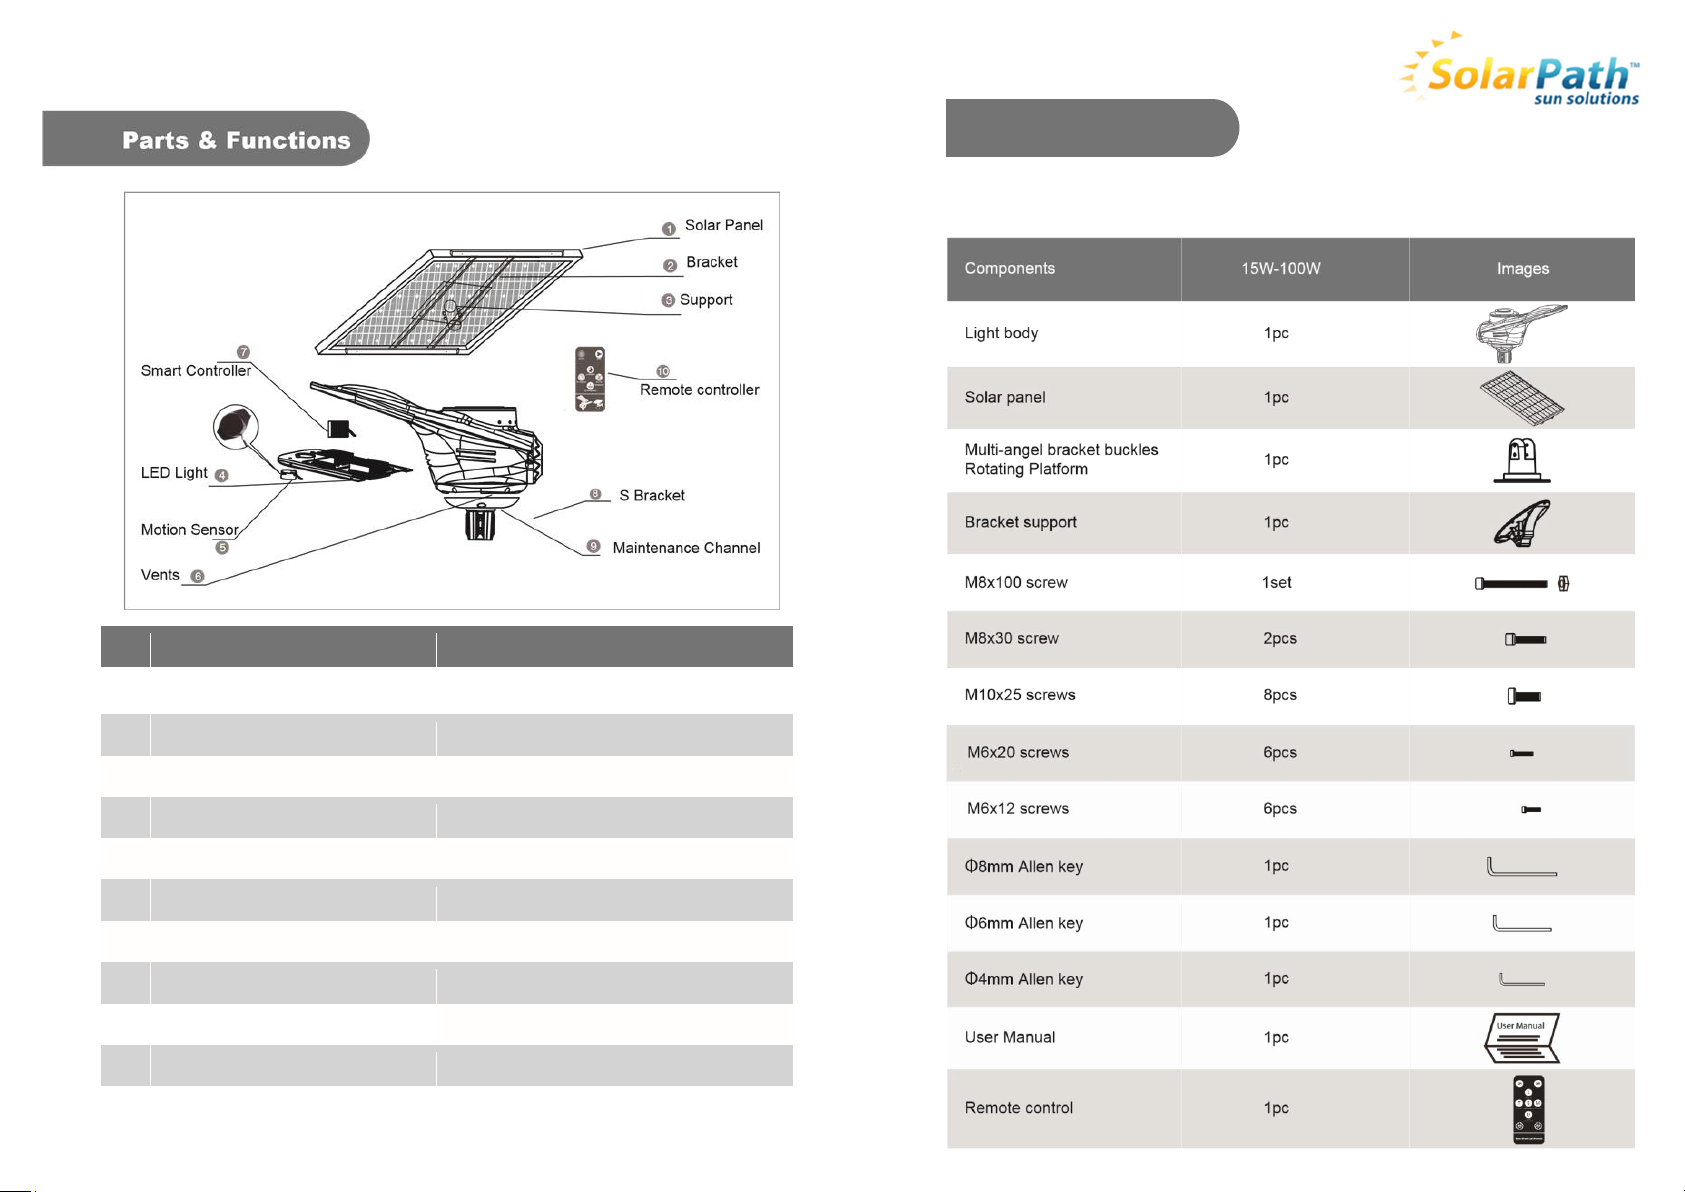
When open the package please confirm that all parts are received, the parts are listed below:
No.
Parts
Functions
1
Solar panel
Absorbs and converts solar energy into
electricity
2
Bracket
Fixed the solar panel
3
Support
Connect device between solar panel and pole
4
LED light
Lighting the area
5
Microwave motion sensor
Detects movements
6
Vents
Heat dissipation
7
Smart controller
MPPT solar charge controller
8
S Bracket
Install the arm of pole
9
Maintenance channel
Quickly maintenance channel
10
Remote controller
Switch 4 working modes
Packing List

5 working modes can be chosen from:
ON: Instant light ON
OFF: Instant light OFF
Light control: 100% 2hr|70% 2hr|20% till dawn
Time control: 50% 1hr|100% 4hr|50% 3hr|25% 4hr
Supper Brightness: 100% 6hr|50%6 hr
Always 30% dim, motion sensor trigger jump to 100% for 2 minutes.
Always 20% dim, motion sensor trigger jump to 100% for 2 minutes.
+ 20%: Increase 20% brightness based on original working mode
Remark:
After connected the cables between solar panel and the
lamp, the light will turn on automatically when it detect sunshine
(there is no need using remoter to turn on the solar light ).
Default is M mode, you can choose the best mode according to
different sunshine condition.
Microwave sensor works by emitting high frequency electric wave to detect objects
movement, such cases above may result in not working well.
Why choose microwave for outdoor lighting?
1. It can get through glass, wood, plastic and other non-metallic object, so it can be
installed inside and there is no influence on lamp`s appearance.
2. It won`t be influenced by airflow, dust, temperature, humidity like PIR.
What should be noticed when using microwave sensor?
Microwave has been improved a lot compared to PIR, but it is still not perfect. It may
be influenced by metallic things and it`s very sensitive to some extension, may detect
other objects’ movement such as leaves’ movement.
The wrong working situations as below:
1. Light flickers un-regularly.
2. The lamp is too sensitive, so it is always at 100% light, then battery can`t last long.
3. Sensor does not work, not light when people come close
.
U
M
s
T
L
%
20
20
%
OFF
ON
Factory settings and motion detection functions: Pole:
The factory setting of the SPFS series switch is light-controlled (at a threshold of 30 Lux). The Recommend use the upper diameter of pole: 2.3-2.9 in (see figure 1)
lamp automatically lights up when it is dark and turns off when there is light or at dawn. At night,
when no one is around, it operates under power saving mode. When anyone approaches, its
brightness increases by a factor of four. If the air temperature is close to human temperature, the
motion detection may reduce in sensitivity.
1. Environment:
a. Please select the appropriate product according to the installation site’s sunlight intensity and
required operating time. If you are in the northern hemisphere, face the solar panels towards
the south as far as possible when installing the SPFS series; if you are in the southern
hemisphere, face the solar panels towards the north.
b. For maximum operation efficiency of the solar panels, make sure the sunlight is not blocked by
buildings or trees.
2. Altitude and distance parameters:
Install according to the height and distance (between the lamps) restrictions as set by each
respective product type. Consult our product specialists for special lighting requirements.
How to turn on our solar street lights ?
Notice: Please do not need Press ON button of the small blue remote to turn on the lamp,
because our solar lamps have Automatic Activation Function.
Remove the SPFS light from package box, let the solar panel absorb energy from sun, connect
the waterproof cable between solar panel and lamp, then the lighting system can be activated,
the SPFS light will be lighting automatically at night.
If you want to check whether the SPFS light are lighting during the daytime:
Cover the solar panels with shelters, the lamp will be lighting. Figure 2
Press Demo Button after the lighting system has been activated, the lamp will be lighting
for a few mins then turn off automatically.
Ø2.3~2.9

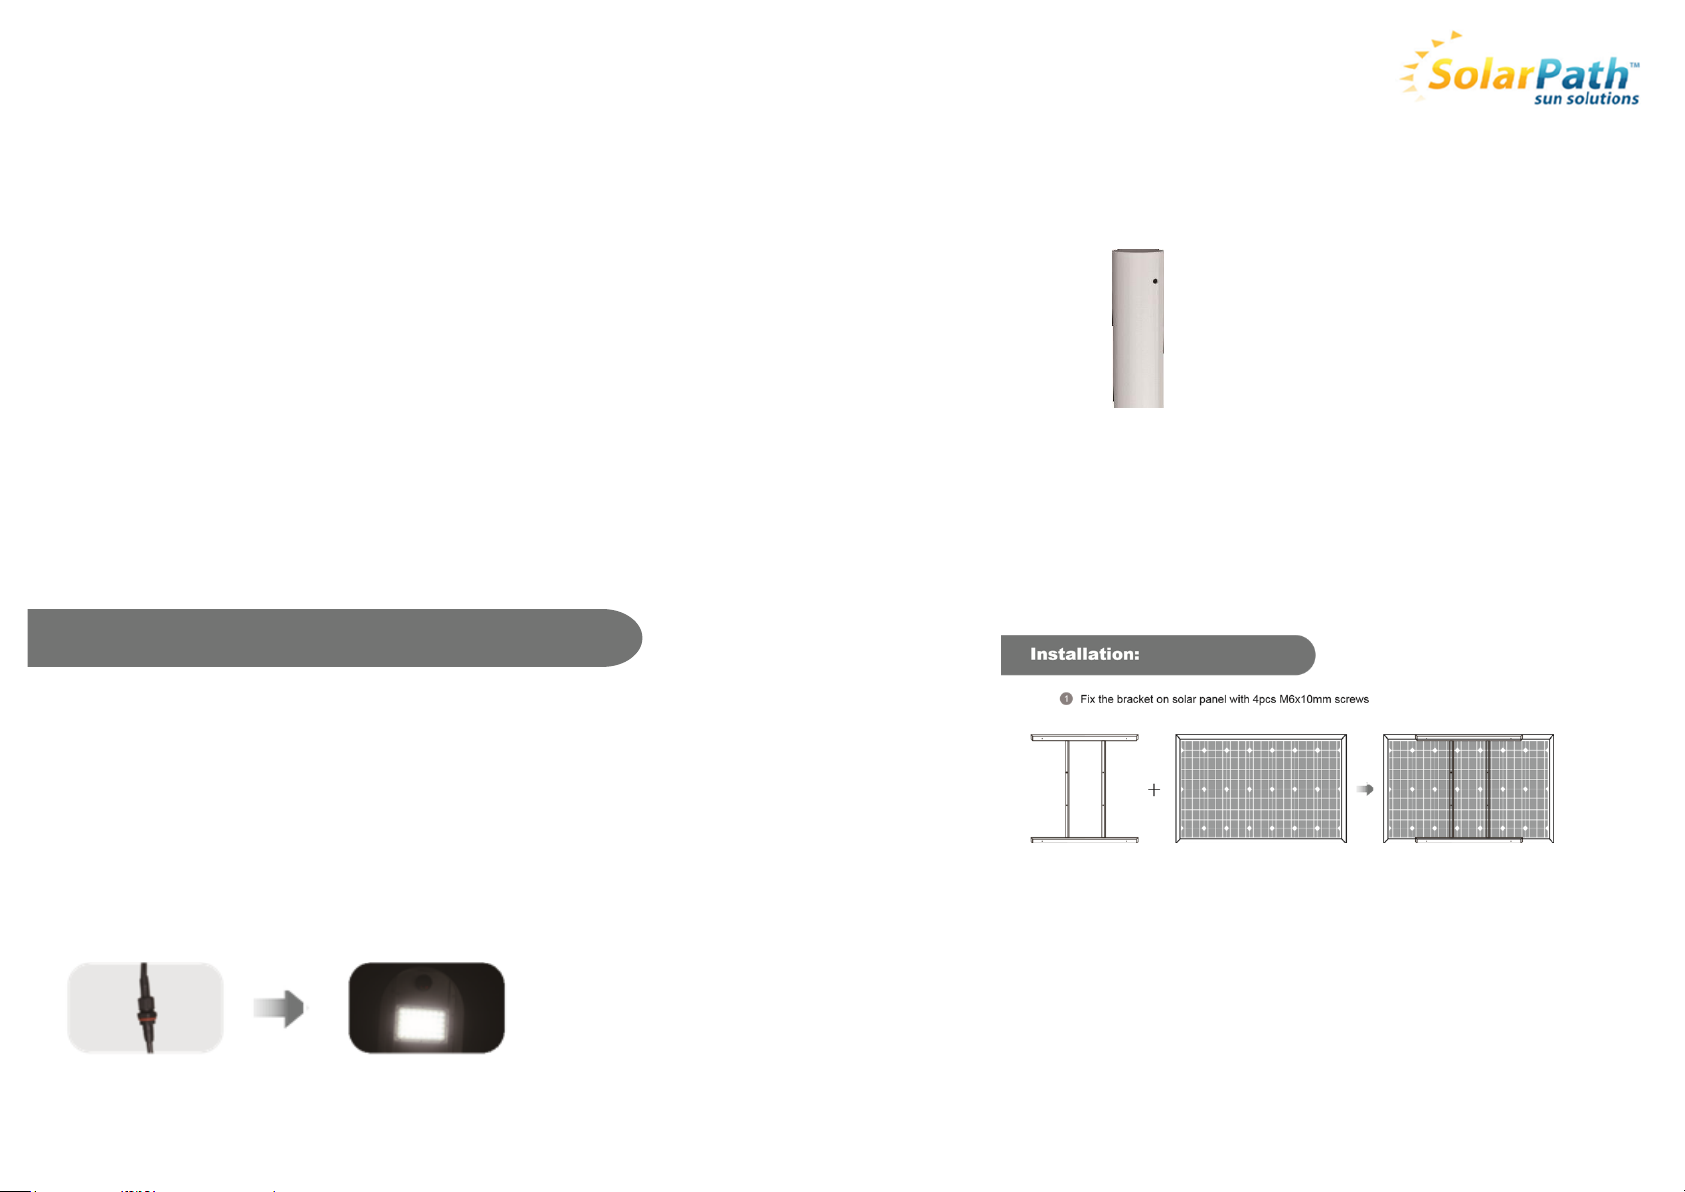
2.Fix the support on bracket with 4pcs M8x10mm screws.
Figure 3
3. Install the solar lamp to the arm of pole, Connect the waterproof connector between
solar panel and lamp.

Process
Other SolarPath Lighting Equipment manuals


