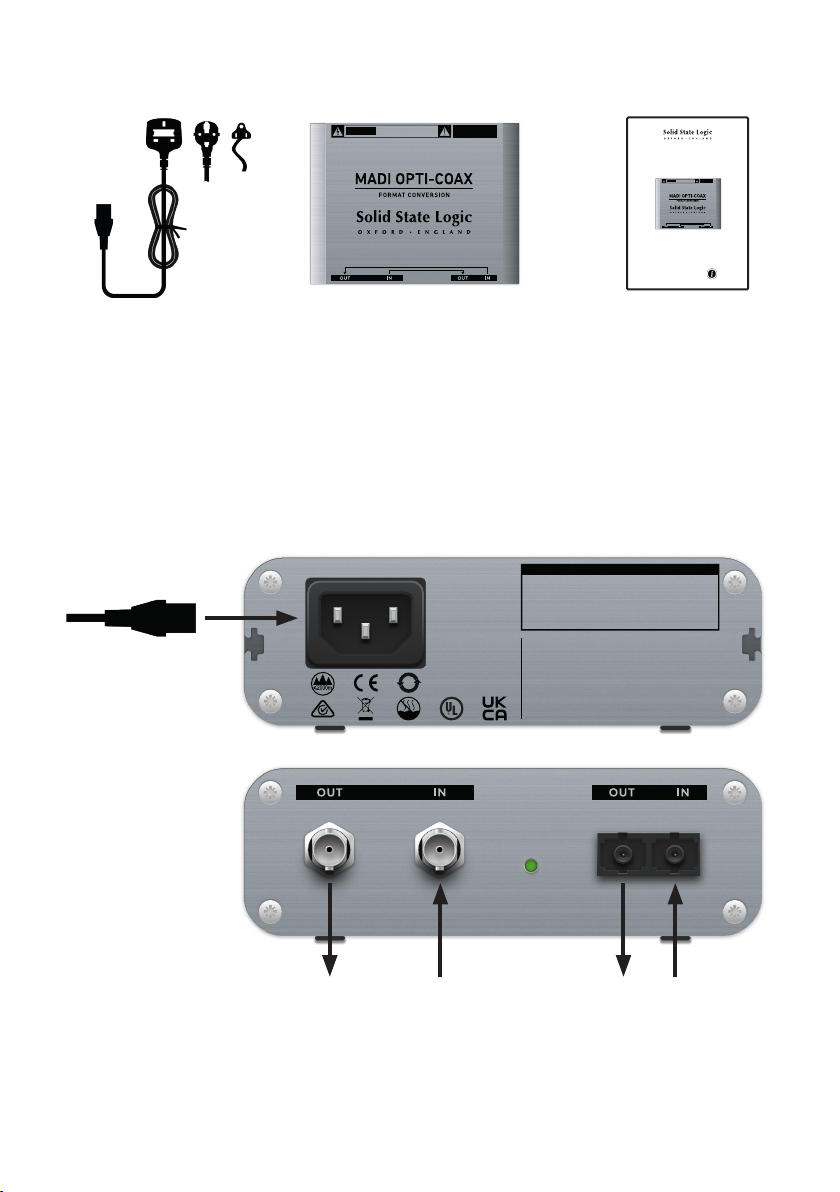
Unpacking
Connecting Your MADI Opti-Coax Unit
1. Connect the supplied IEC power cable to the mains inlet on the rear of the unit.
The POWER indicator on the front of the unit will light when the unit is powered.
NOTE: The cable should bear the approval mark of the country in which it is to be used.
2. Connect the MADI COAXIAL and MADI OPTICAL connections on the front of the unit
to your MADI equipment.
Ensure the OUT and IN ports are connected in the correct orientation.
MADI COAXIAL MADI OPTICAL
100 - 240 V AC
50/60 Hz • 250 mA Max
RISQUEDE CHOC ÉLECTRIQUE NE PAS OUVRIR
RISKOF ELECTRIC SHOCK DO NOT OPEN
CAUTION !
Important
Information Inside
MADI OPTI-COAX
Quick Start Guide
MADICOAXIAL MADIOPTICAL
100-240 V AC
50/60Hz •250mAMax
RISQUEDECHOCÉLECTRIQUE NE PAS OUVRIR
RISKOFELECTRICSHOCK DO NOT OPEN
CAUTION!
MADI OPTI-COAX Unit Quick Start Guide
(this document)
IEC Cable
SERIAL NUMBER
WARNING: This appliance must be connected to a mains
socket outlet with a protective earthing connection.
ATTENTION: Cet appareil doit étre raccordé à une prise
électrique sécurisée reliée à la terre.
This device complies with part 15 of the FCC Rules.
Operation is subject to the following two conditions:
(1) This device may not cause harmful interference.
(2) This device must accept interference received, including
interference that may cause undesired operation.
10
DEN Apparatets stikprop
skal tilsluttes en
stikkontakt med jord, som
giver forbindelse til
stikproppens jord.
FIN Laite on liitettävä
suojäkoskettimilla
varustettuun pistorasiaan.
NOR Apparatet må
tilkoples jordet
stikkontakt.
SWE Apparaten skall
anslutas till jordat uttag.
CAN ICES-3 (B)/NMB-3 (B)
ENGINEERED IN THE U.K.
ASSEMBLED IN CHINA
100 - 240 V AC • 50/60 Hz • 250 mA Max
POWERMADI COAXIAL MADI OPTICAL
Solid
State
Logic
MADI Coaxial MADI Optical