manuals.online logo
Brands
  1. Home
  2. •
  3. Brands
  4. •
  5. Solid State Logic
  6. •
  7. Music Mixer
  8. •
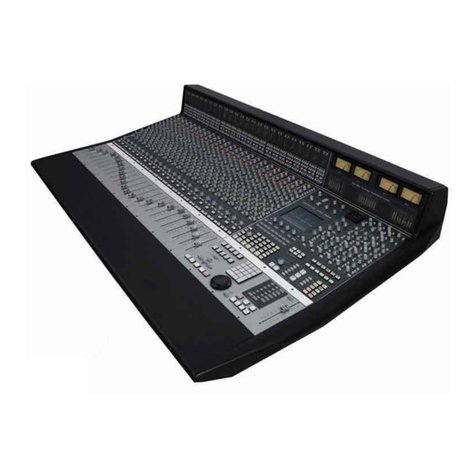
  9. Solid State Logic AWS V4 Logictivity User manual

Solid State Logic AWS V4 Logictivity User manual

Other manuals for AWS V4 Logictivity

1

Other Solid State Logic Music Mixer manuals
Solid State Logic Sigma User manual

Solid State Logic

Solid State Logic Sigma User manual

Solid State Logic Duality User manual

Solid State Logic

Solid State Logic Duality User manual

Solid State Logic C100 HDS User manual

Solid State Logic

Solid State Logic C100 HDS User manual

Solid State Logic AWS 924 User manual

Solid State Logic

Solid State Logic AWS 924 User manual

Solid State Logic C100 HDS User manual

Solid State Logic

Solid State Logic C100 HDS User manual

Solid State Logic SiX User manual

Solid State Logic

Solid State Logic SiX User manual

Solid State Logic Nucleus2 User manual

Solid State Logic

Solid State Logic Nucleus2 User manual

Solid State Logic SL 4000 G Series User manual

Solid State Logic

Solid State Logic SL 4000 G Series User manual

Solid State Logic ORIGIN User manual

Solid State Logic

Solid State Logic ORIGIN User manual

Solid State Logic Matrix2 Delta User manual

Solid State Logic

Solid State Logic Matrix2 Delta User manual

Solid State Logic Matrix User manual

Solid State Logic

Solid State Logic Matrix User manual

Solid State Logic Duality Fuse Assembly instructions

Solid State Logic

Solid State Logic Duality Fuse Assembly instructions

Solid State Logic Duality SE User manual

Solid State Logic

Solid State Logic Duality SE User manual

Solid State Logic C100HDSS User manual

Solid State Logic

Solid State Logic C100HDSS User manual

Solid State Logic C300 HD User manual

Solid State Logic

Solid State Logic C300 HD User manual

Solid State Logic C200 HD User manual

Solid State Logic

Solid State Logic C200 HD User manual

Solid State Logic Duality 82S6DUA20C User manual
Solid State Logic

Solid State Logic Duality 82S6DUA20C User manual

Solid State Logic AWS 900+ User manual

Solid State Logic

Solid State Logic AWS 900+ User manual

Solid State Logic Sigma Delta User manual

Solid State Logic

Solid State Logic Sigma Delta User manual

Solid State Logic SL 9000 J SERIES User manual

Solid State Logic

Solid State Logic SL 9000 J SERIES User manual

Solid State Logic C100 HD Range User manual

Solid State Logic

Solid State Logic C100 HD Range User manual

Solid State Logic Live L100 User manual

Solid State Logic

Solid State Logic Live L100 User manual

Solid State Logic Sigma User manual

Solid State Logic

Solid State Logic Sigma User manual

Solid State Logic X-PANDA 82BXEM01A User manual
Solid State Logic

Solid State Logic X-PANDA 82BXEM01A User manual

Popular Music Mixer manuals by other brands

Denon DN-HC5000 - Serato ITCH Hardware/Software... Service manual

Denon

Denon DN-HC5000 - Serato ITCH Hardware/Software... Service manual

Yamaha WC42260 owner's manual

Yamaha

Yamaha WC42260 owner's manual

Vertiv KMMLED156 Quick installation guide

Vertiv

Vertiv KMMLED156 Quick installation guide

Yamaha EMX3000 user manual

Yamaha

Yamaha EMX3000 user manual

Mackie Onyx Analogue Mixer brochure

Mackie

Mackie Onyx Analogue Mixer brochure

Peavey S-32 Sanctuary Series Operation guide

Peavey

Peavey S-32 Sanctuary Series Operation guide

Rane MP 4 Operator's manual

Rane

Rane MP 4 Operator's manual

True T9 Touchscreen Console owner's manual

True

True T9 Touchscreen Console owner's manual

Studiomaster Air Pro 24 instruction manual

Studiomaster

Studiomaster Air Pro 24 instruction manual

Yamaha MV802 owner's manual

Yamaha

Yamaha MV802 owner's manual

Roland SoundCanvas SC-8820 owner's manual

Roland

Roland SoundCanvas SC-8820 owner's manual

Roland M-160 owner's manual

Roland

Roland M-160 owner's manual

Yamaha MR1642 Operation manual

Yamaha

Yamaha MR1642 Operation manual

Pioneer DJM 909 - Battle Mixer W/Effects operating instructions

Pioneer

Pioneer DJM 909 - Battle Mixer W/Effects operating instructions

Veeder-Root TLS-350 Series System setup manual

Veeder-Root

Veeder-Root TLS-350 Series System setup manual

Alto APM80.QUAD user manual

Alto

Alto APM80.QUAD user manual

Omnitronic PM-211 user manual

Omnitronic

Omnitronic PM-211 user manual

SoundCraft B400 user guide

SoundCraft

SoundCraft B400 user guide

manuals.online logo
manuals.online logoBrands
  • About & Mission
  • Contact us
  • Privacy Policy
  • Terms and Conditions

Copyright 2025 Manuals.Online. All Rights Reserved.

A S V4 Logictivity
Installation uide
This booklet contains practical information for the safe installation of this apparatus.
For operational information please refer to the User uide.
A S. This is SSL.
C
Contents
1. Exchanging the Monitor PROM
2. Enabling the AWS Logictivity features on your console
3. Install the latest AWS900 or AWS900+ software
4. Install the ipMIDI driver and Logictivity browser
5. Software Installation (Macintosh)
6. Software Installation (PC)
7. Make and configure the network connection
8. Direct Network Configuration (Macintosh)
9. Direct Network Configuration (PC)
10. Enabling ipMIDI on your AWS
11. Finding the console using the AWS Remote application
12. Setting your workstation(s) to communicate via ipMIDI
13. Network troubleshooting
14. Larger Networks
15. Assigning the AWS900+ IP Address
16. SSL Logictivity Badge
17. Licence
1
Safety Considerations
This page contains definitions, warnings, and practical information to ensure a safe working environment.
Please take time to read this section before installing or using this unit. Please do not dispose of these instructions.
General Safety
• Read these instructions.
• Keep these instructions.
• Heed all warnings.
• Follow all instructions.
• Do not use this apparatus near water.
• Do not expose this apparatus to rain or moisture.
• Do not block any ventilation openings. Install in accordance with the
manufacturer’s instructions.
• Do not install near any heat sources such as radiators, heat registers, stoves or
other apparatus (including amplifiers) that produce heat.
• Adjustments or alterations to this apparatus may affect the performance such
that safety and/or international compliance standards may no longer be met.
• This apparatus is equipped with a headphone socket – excessive sound pressure
from earphones and headphones can cause hearing loss.
Caution
• Hazardous voltages may be present inside this apparatus.
• Do not operate this apparatus with the covers removed.
• To reduce the risk of electric shock, do not perform any servicing other than
that contained in these Installation Instructions unless you are qualified to do
so. Refer all servicing to qualified service personnel and ensure that all power
cords are disconnected when servicing this apparatus.
Power Safety
• Multiple power cords may be supplied with this unit – use only the power cord
appropriate to your local power wiring. Alternative power cords may be used if
rated 2.5A or above and fitted with a 3-pin IEC320 connector.
• An external over-current protection device is required to protect the wiring to this
apparatus. This protection device must be installed according to current wiring
regulations. In certain countries this function is supplied by use of a fused plug.
• If an extension power cable or adaptor is used, ensure that the total power
rating of the power cable and/or adaptor is not exceeded.
• An external disconnect device is required for this apparatus. The appliance
coupler is a suitable disconnect device. The appliance coupler shall remain
readily operable.
• The power socket used for this apparatus should be located nearby and be
easily accessible.
• Unplug this apparatus during an electrical storm or when unused for long periods
of time.
• All power cords must be disconnected to isolate this apparatus completely.
2
Un-pack
There are two variants of the V4 Logictivity upgrade kit. One for the original AWS900 Classic Console and one for
the AWS900+ Console. Depending on the model of console your V4 Logictivity Upgrade box should contain the
following:
AWS900 Classic 4 Logictivity Upgrade Kit - SSL Pt No 70930SE3
1 off PLCC Removal Tool
1 off Programmed Monitor PROM
1 off V4 Software Licence Serial No
1 off Logictivity Licence Serial No
1 off Console SSL Logictivity Badge
1 off Upgrade Instructions — this document
AWS900+ 4 Logictivity Upgrade Kit - SSL Pt No 70930SE4
1 off V4 Software Licence Serial No
1 off Logictivity Licence Serial No
1 off Console SSL Logictivity Badge
1 off Upgrade Instructions — this document
To see the images shown in this booklet in full colour please visit the AWS Documention section of our website:
http://www.solidstatelogic.com/support/consoles/aws/documentation.asp
3
Introduction
Thank you for purchasing the AWS V4 Logictivity upgrade for your AWS console. After installation your system will
benefit from the full range of AWS900+ SE V4 features. These include:
Logictivity browser allowing renaming of scribble strips, external sources, mixes, and TR setups as well as
providing fast, reliable archiving and restoration of automation and TR setups over Ethernet.
Two switchable workstation layers with transport lock.
A-FADA mode where motorised analogue faders follow DAW Automation data.
Total Recall Autoscan and Autodetect.
MIDI over Ethernet driver (ipMIDI). This driver eliminates the need for a remote MIDI interface between your AWS
console and workstation.
AUTO CUE option for talkback, listen mic and red light switch.
Monitor volume control calibration for film mixing and fine gain control options.
Solo boost and Solo isolate.
Seperate EFX and CHOP selection allows channel output to be sourced pre-fader while the EFX system feeds the
track busses to generate stereo headphone mixes.
Single layer DAW mode allows two DAWs to be configured on the same layer, giving parallel access to both
machines.
IMPORTANT - PLEASE READ CAREFULLY
Before attempting the upgrade, please read these instructions in full to ensure that you have sufficient time,
technical skills and the required crossover RJ45 network cable to complete the upgrade. If you would prefer an SSL
technician to complete the upgrade, please contact your local SSL distributor or office.
4
1. Exchanging the Monitor PROM
The exchange of the CPU card’s Monitor PROM is only necessary on AWS 900 Classic consoles. The Monitor PROM
on the AWS 900+ CPU already incorporates AWS Logictivity support.
The instructions on exchanging the Monitor PROM are intended for technically competent personnel. To
reduce the risk of electric shock do not perform the upgrade unless you are competent to do so. If you
would prefer an SSL technician to complete the upgrade, please contact your local SSL distributor or
office.
Disconnect the power cord before removing any panels or modules.
Take basic antistatic precautions. Electrostatic discharge (ESD) can damage electronic components, even
if you cannot feel, see, or hear it.
Please note that the console will not boot fully after the new Monitor PROM is installed. However, the console’s
processor will boot into a basic download mode allowing the new SE Logictivity software to be transferred.
1) rasp an exposed metal part of the AWS chassis with your bare hand to discharge any static charge you may have
accumulated.
2) Unplug the mains power cord at the rear of the console. Wait 10 seconds to allow any residual charge in the
console’s electronics to decay.
3) Working from the rear, using the Pozidrive screw driver supplied with the console, remove the four screws securing
the top trim. Remove the top trim.
5
4) Using the Pozidrive screwdriver, remove the four screws securing meter panel 17-24 in position. Tilt the panel
forward slightly and lift the panel out of its slot. Lay the panel onto channels 17-24. It is not necessary to unplug
any of the meter panel’s connections.
5) On consoles shipped prior to the 3rd November 2005 (serial numbers AWS001 – 144 approximately) a screening
plate covered the AWS900’s CPU card. Remove this screening plate taking care not to drop any screws into the
console.
6
6) The AWS900’s CPU card will now be visible. With the help of the picture below locate the card’s Monitor PROM in
PCB location CD.
7) Using the supplied PLCC IC puller, remove the existing PROM. Squeeze the tool to align its hooks with the slots
in opposite corners of the socket. Insert the hooks fully, squeeze gently, and pull the IC straight out of the socket.