Solo Tele Style DIY Electric Guitar Kit
Copyright © 2011 Solo Music Gear. All rights reserved | v1.02
STEP 3 –Install the bridge. First insert the ground wire (the insulation must be removed on both ends,
about 1/3” – 8mm max) into the hole between the predrilled mounting screw holes and the bridge pickup
cavity (pull it through the second hole into the control cavity). Make sure that enough length of bare metal
wire is left on top of the body to make a secure contact with the bridge. Now, take the bridge with the
mounted pickup and insert the pickup’s wire into the hole between the pickup cavity and the control
cavity. Align the bridge with mounting screw holes and attach it tightly with 4 screws (7/8”).
STEP 4 –Install the pickguard. First, insert the neck pickup wire into the hole at the pickup cavity and
push it all the way through into the control cavity. Properly align and secure it with 8 screws (15/32”).
Do not over tighten the screws as it can crack the pickguard.
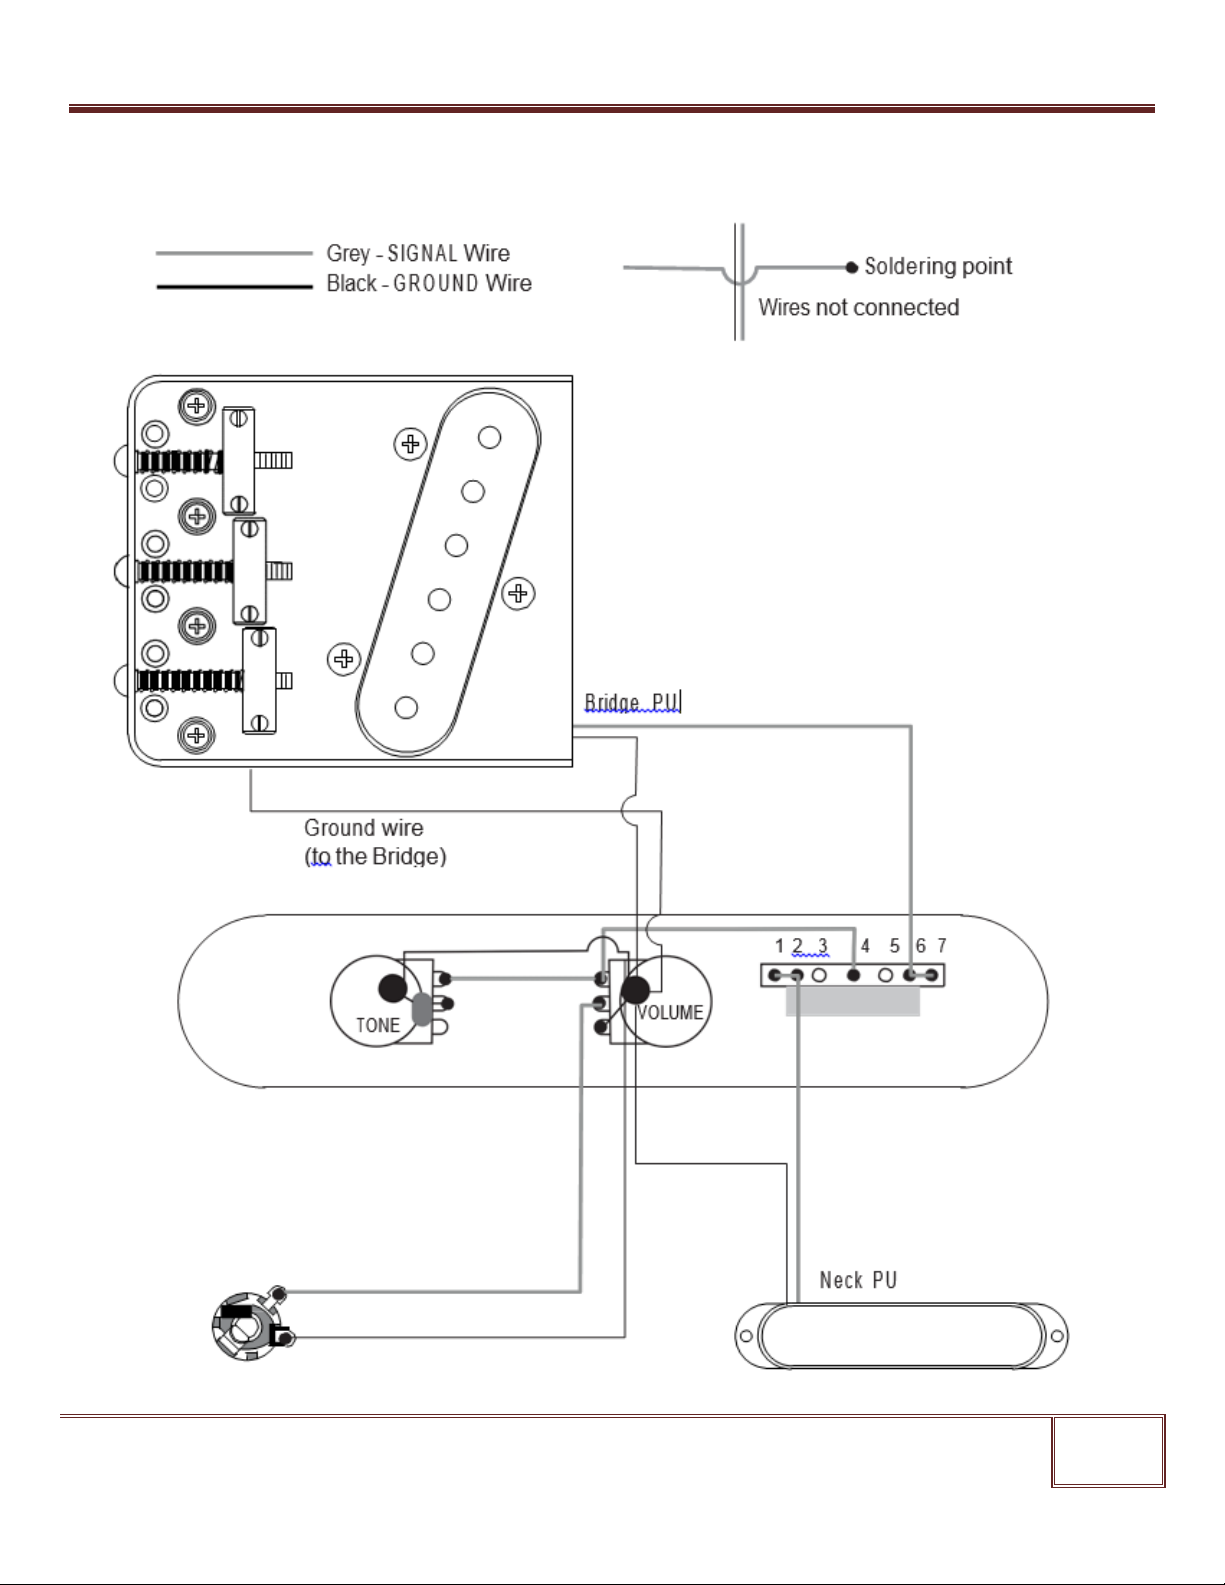
STEP 5 - Wire the control plate and pickups, ground wire and output jack. For wiring instructions, use
the diagram on the last page of this manual.
STEP 6 –After you complete the wiring, install the jackplate with the jack using 4 mounting screws, and then
install the control plate with 2 screws.
STEP 7 –Before stringing your guitar, apply some oil to the Rosewood fingerboard to protect it from possible
shrinking and cracking. Tung oil or Linseed oil work well, or it’s OK to use Walnut or Olive oil. One thin layer is
enough. Wipe the fingerboard thoroughly with a clean cloth.
STEP 8 –Install the strings by inserting them through the holes on the back of the bridge, over the bridge
saddles. There are a few different ways to wrap the strings around the post of a tuning head. When
threading the string through the post hole, bring it tight before wrapping it in the opposite direction of the
threading, under and then back over the string and around the post, holding it tight as you tighten to pitch.
Wrapping each string around two-three times should be enough.
6. TUNING AND SETUP
Tuning a 12-string guitar:
A 12 string guitar is split up into 6 pairs of 2 strings. The thicker string of the pair is tuned to the same note and octave as
a regular 6 string guitar. The thinner string, on the pair of strings 3-6, is tuned one octave higher than its pair.
Standard tuning of a 12-string guitar:
The open strings are tuned in pairs as follows:
•2 E strings tuned in octave (2nd octave and 3rd octave)
•2 A strings tuned in octave (2nd octave and 3rd octave)
•2 D strings tuned in octave (3rd octave and 4th octave)
•2 G strings tuned in octave (3rd octave and 4th octave)
•2 B strings tuned in unison (3rd h octave)
•2 E strings tuned in unison (4th octave)