Solstice Pod User manual
pg 1 | Pod Demo Guide | www.mersive.com | © Copyright 2019 Mersive
Solstice Pod Demo Guide
The Solstice Pod connects to a meeting-room display and leverages existing WiFi/Ethernet networks to facilitate wireless
content sharing and collaboration. This document provides technology managers with instructions for evaluating one or
more Pods.
Looking for Something Else?
•Quickly deploy a single Pod: For more information on how to quickly deploy a single Pod, see our Pod Quickstart
Guide.
•Using Solstice: If you are looking for information on how to use Solstice to share content and collaborate, please go
to our Solstice User Guide.
•Deploying on a Managed Network: For information on how to deploy Solstice on a managed IT network, see our
Network Deployment Guide.
•Security Guidelines: For information on deploying Solstice in a security-conscious environment, please refer to the
Solstice Pod Baseline Security Standard (BSS) document.
•Pod Admin Guide: For a detailed list of configuration options and other reference information, see our Pod Admin
Reference Guide.
Table of Contents
Demo the Solstice Pod
Step 1: Unpack your Pod
Step 2: Connect the Pod to a Network (optional)
Step 3: Install the Free Solstice User App
Step 4: Connect to the Pod
Step 5: Share Content from your Solstice App
Step 6: Control your Posts
Step 7: Try out Moderator Mode
Step 8: Try out Solstice Ink
Like what you see?
Solstice Pod Demo Guide
Updated March 25th, 2019
pg 2 | Pod Demo Guide | www.mersive.com | © Copyright 2019 Mersive
Introduction to the Solstice Collaboration System
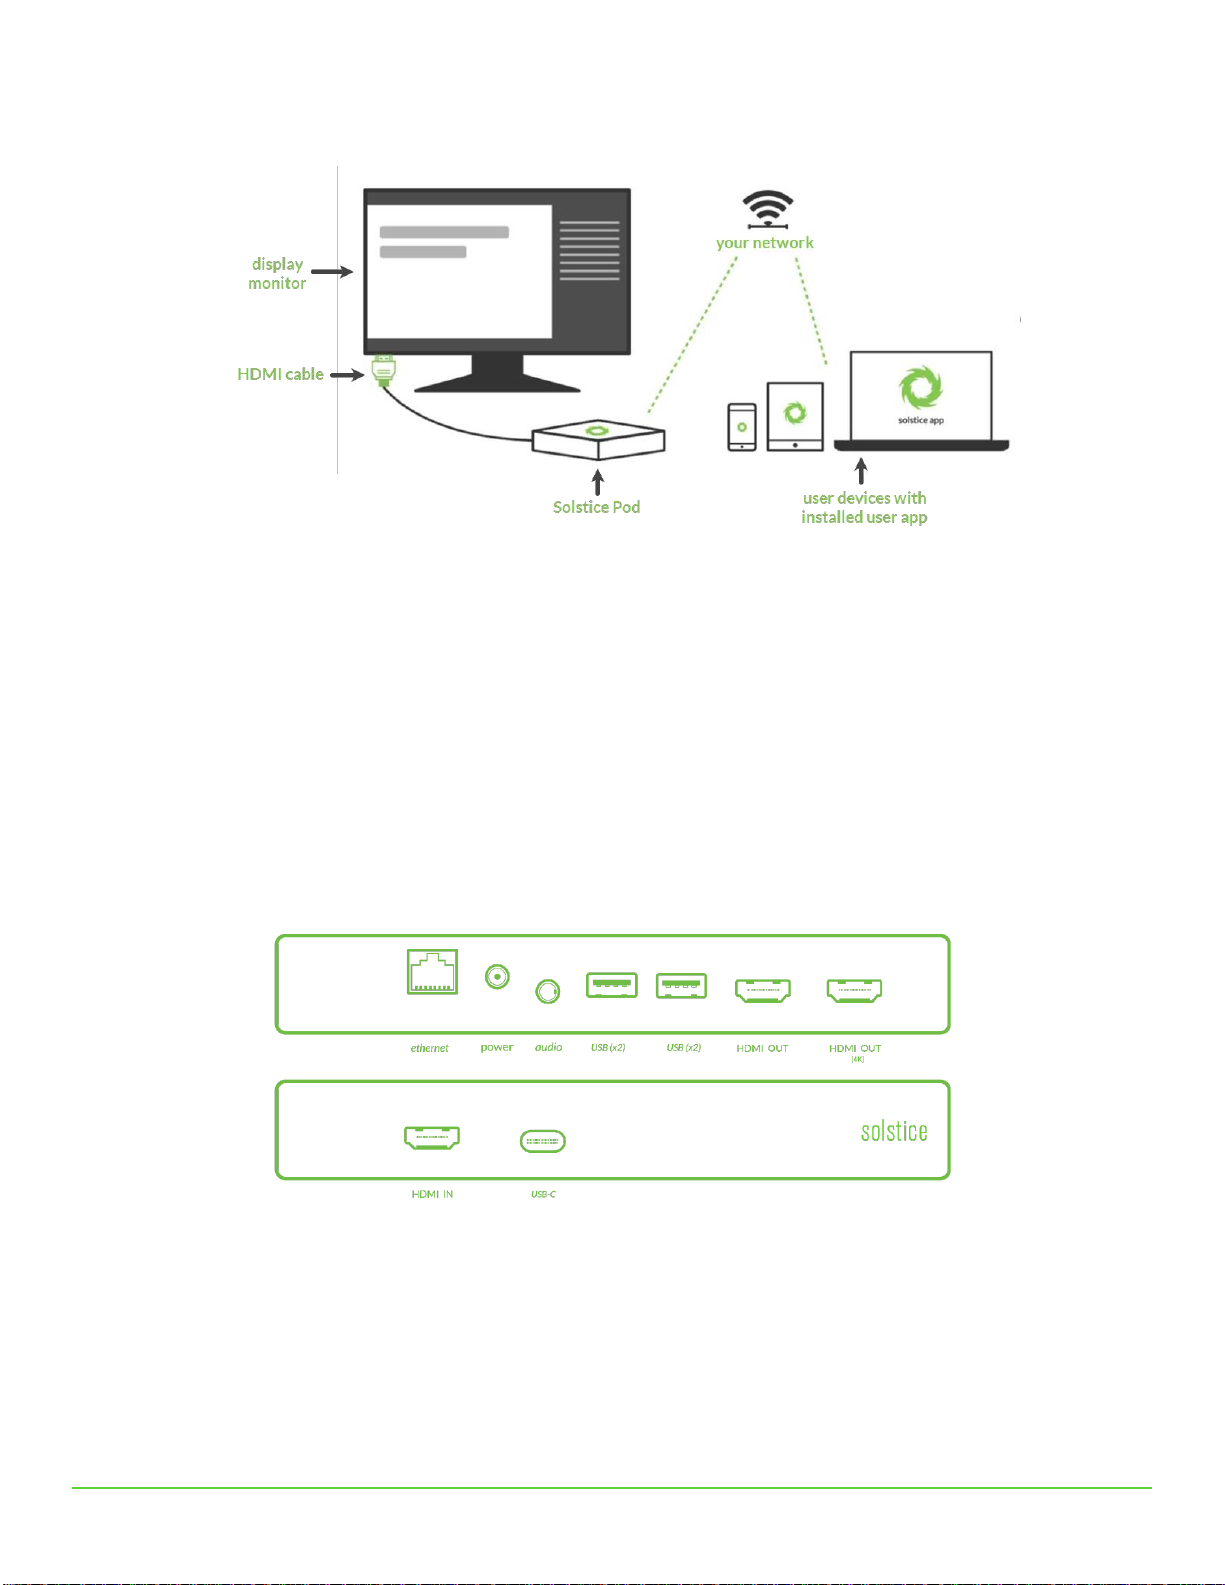
A diagram of a typical Solstice-enabled conference room setup is shown below.
The requirements for an operational Solstice system are straightforward. The Solstice Pod is directly connected to a display
monitor via HDMI cable. The Solstice Pod is then attached to the WiFi/Ethernet network that participants will use to
connect and share to the display. Then, users on the network can follow the on-screen instructions to get the Solstice app
and connect to the display.
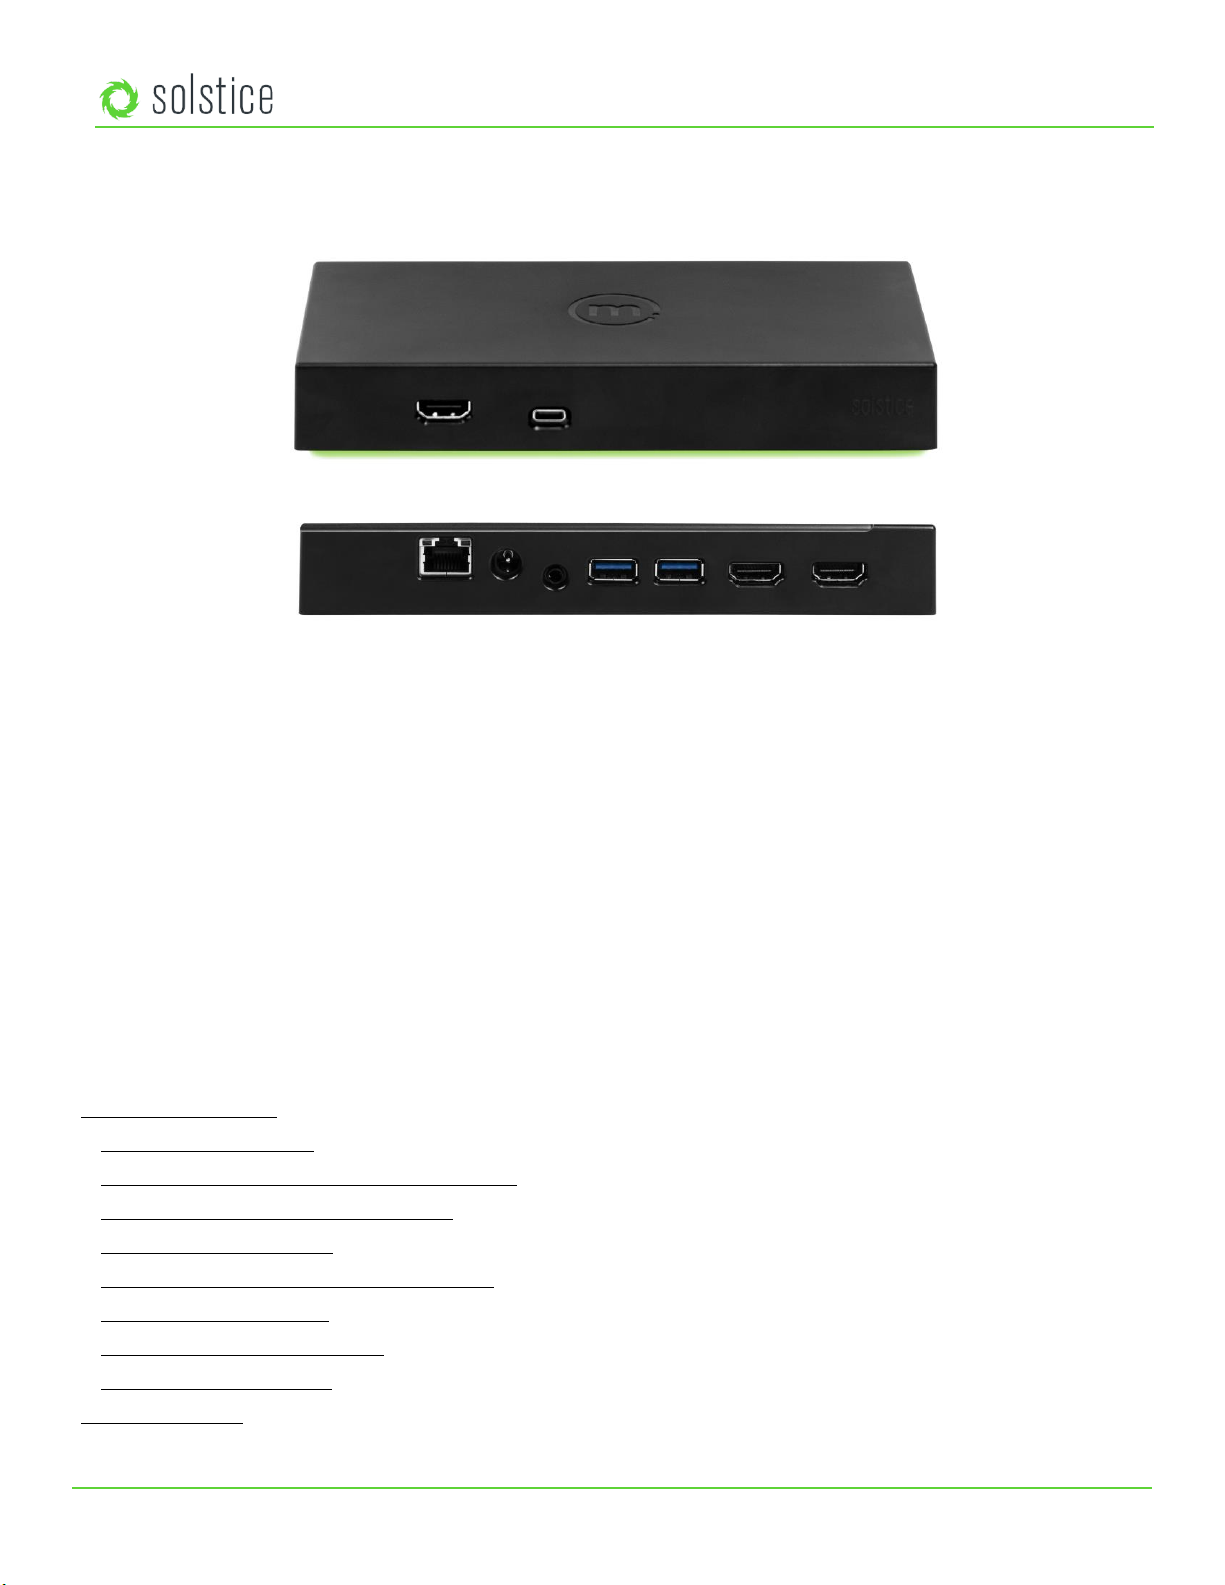
The Solstice Pod
The Solstice Pod integrates Mersive’s award-winning Solstice collaboration software with a dedicated hardware platform
to deliver a turnkey wireless content sharing solution. The Solstice Pod connects to any room display via HDMI and
attaches to your WiFi/Ethernet network(s). The Solstice Gen3 Pod supports simultaneous HDMI-in and wireless content
sharing, dual displays to support a larger content workspace, PoE+, audio out, and USB-C input for future innovation. For
additional specs for the Solstice Gen3 Pod, see the Pod Hardware and Technical Specs.
Solstice Gen3 Pod Hardware Ports
The Solstice Display
The term Solstice display is used to refer to any flat panel or projector display connected to a Solstice Pod or Solstice
Display Software host PC, allowing users to connect and share content wirelessly to the display.
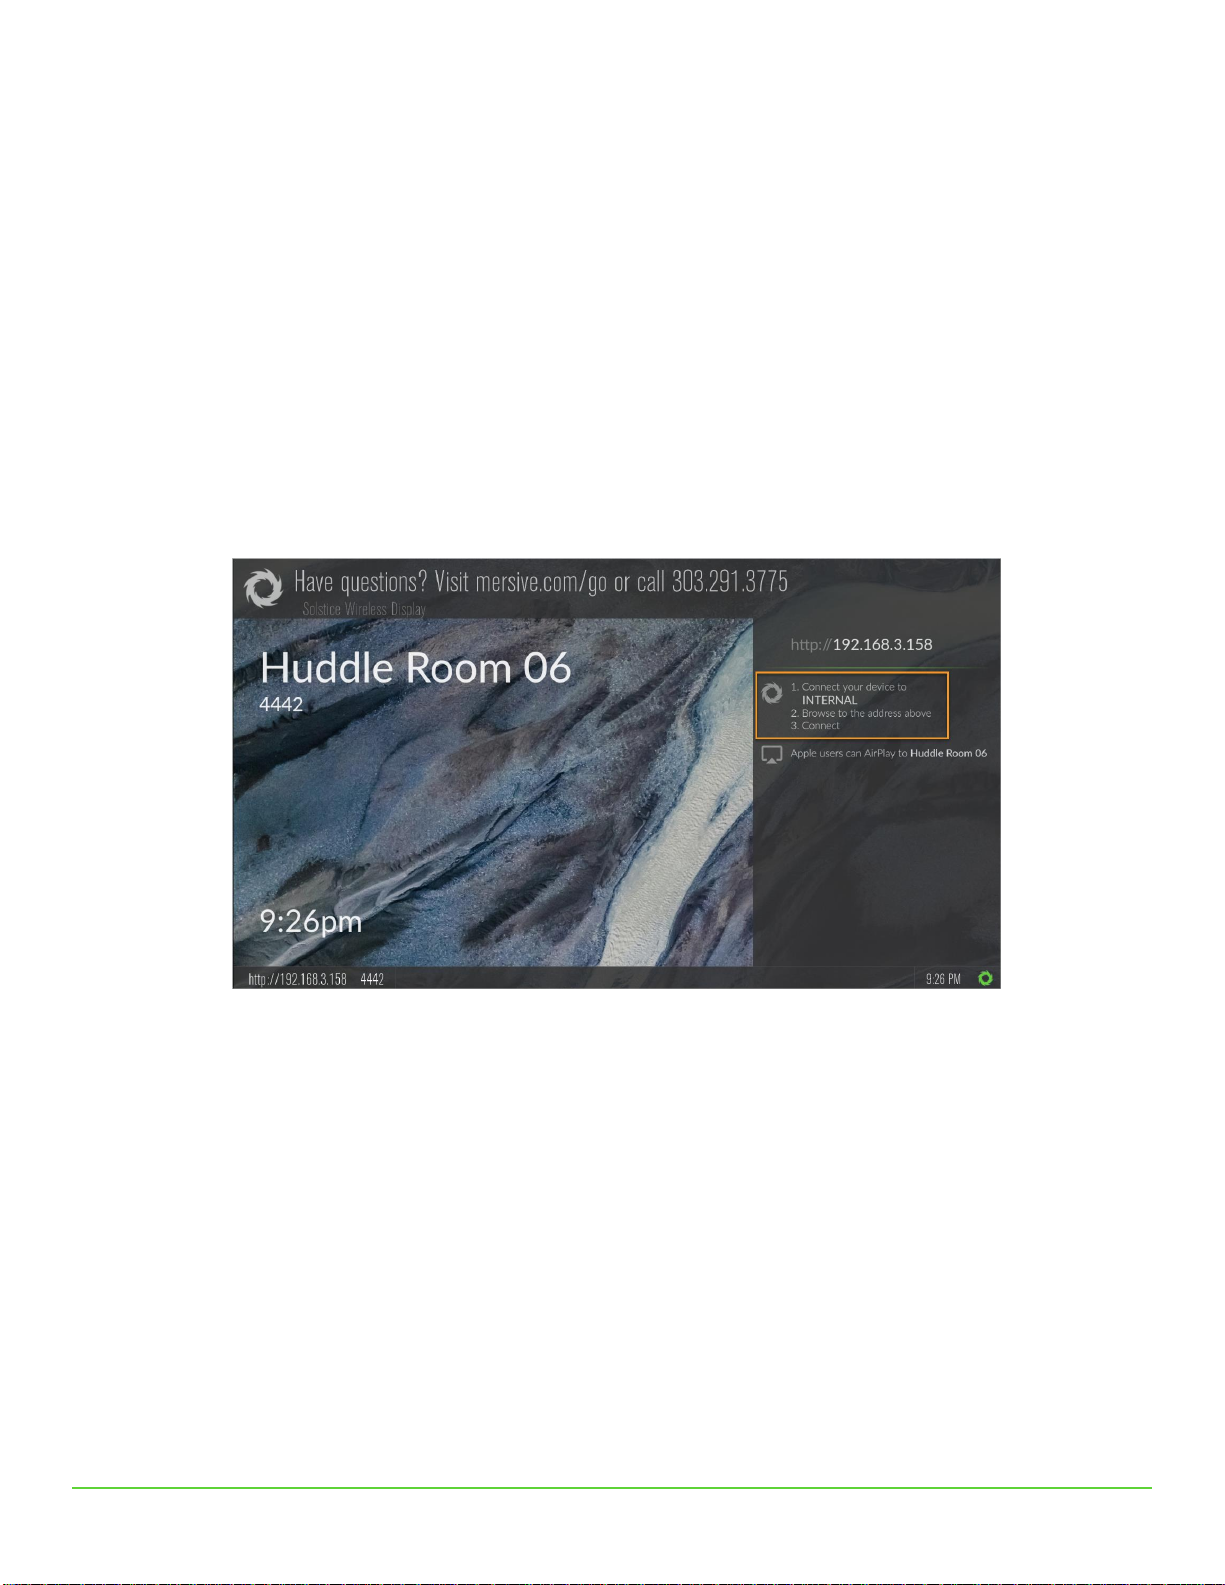
Welcome Screen
When viewing a Solstice display that does not have a current collaboration session, you will see the Welcome Screen
containing the Solstice display name, a screen key (if applicable), network information, user connection instructions, and the
Solstice display menu.

pg 3 | Pod Demo Guide | www.mersive.com | © Copyright 2019 Mersive
Solstice Display Menu
The Solstice Display Menu lets in-room users manually change various Solstice display settings, such as bringing the display
out of moderated mode, locking the display, or disconnecting all users. To access the Solstice Display Menu when Solstice is
running, click the Solstice icon in the bottom right corner of the display (using a USB mouse or via a supported touch
screen).
Display Menu Options
•Access Control: Allows a user to manually remove the display from moderator mode in the case that the user
moderating the meeting left the room without disconnecting from the display. Note: The display is put into
moderator mode through the Solstice user app’s Meeting controls. If moderator mode is disabled for the display,
the Moderate tab and option to moderate the meeting will not appear.
•Lock: Disables access to the display by any new users for the remainder of the session. Only users already
connected to the display can share media.
•Disconnect All Users: Disconnects all users from the session and removes all shared content.
•System > Configure: Provides access to the local Configuration Panel. This is used by admins to configure settings
such as the display’s appearance and network settings. For more detail on these settings, please see the Pod Admin
Guide.
Solstice User App
End users can connect to a Solstice display using the Solstice user app. The Solstice user app is installed on Windows,
MacOS, Android, and iOS devices (such as laptops, tablets, and phones) that you want to use to connect and share media to
the Solstice display. These user devices must be on the same network as the Solstice host in order to connect. First time
users that have not previously installed the Solstice user software app have two options: download the user app from the
Mersive downloads page, OR, download the app directly from the host. Note: Admin permissions are not required to install
the app.

pg 4 | Pod Demo Guide | www.mersive.com | © Copyright 2019 Mersive
Demo the Solstice Pod
If you have a Pod and want to experiment with all the features, follow the steps below. Setting up and trying out the Pod is
straightforward. The way you set up and evaluate your first Pod may be different than how you configure and deploy Pods
throughout your organization depending on your network and use cases. This section will help you get a Pod up and running
quickly so you can test performance and take a first-hand look at end-user features.
Step 1: Unpack your Pod
Use the HDMI cable to attach the Pod to up to two displays and power the Pod on by connecting an Ethernet cable with
PoE+ capabilities, or the power adaptor to a standard power outlet. Optionally, if you have a touch-enabled display and
would like to try out the Pod’s touch features, connect a USB cable from the Pod to the USB port on the display.
A green LED bar will illuminate on the front of the Pod once it receives power. The Pod will take a few minutes to boot up
and display the default welcome screen.
Step 2: Connect the Pod to a Network (optional)
For your convenience, we ship the Pod with both the wireless access point (WAP) enabled and Ethernet ready to support
DHCP. Notice that the welcome screen instructions display the default “SolsticePod” hotspot network name/SSID. If you’re
not able to connect the Pod to a DHCP-ready Ethernet network, you can evaluate the Pod using this SolsticePod hotspot
network (present when WAP mode is enabled). Just keep in mind that your devices (and the Pod) won’t have internet access
during your evaluation with the Pod in WAP mode. Features that require internet access, such as the welcome screen RSS
feeds and sharing YouTube videos, won’t be available.
To connect the Pod to a network via Ethernet, simply plug an Ethernet cable attached to your network into the Pod.
To connect the Pod to a network wirelessly:
1. Open the Pod’s configuration panel. The Pod’s configuration panel may be accessed two ways:
a. By clicking the Solstice icon in the bottom right corner of the display using a USB mouse or via a
supported touch screen, then clicking System > Configure.
b. Navigating to the Pod’s IP address via a browser, then clicking the Settings icon in the lower right-hand
corner of the screen.
Important note: The Pod is shipped with the Wireless Access Point (WAP) enabled to make it easy to connect and
evaluate Solstice’s collaboration features without needing to connect the Pod to a network. However, WAP mode is not
recommended for long-term deployment for security and performance reasons.
pg 5 | Pod Demo Guide | www.mersive.com | © Copyright 2019 Mersive
2. Go to the Network tab and enable Wireless Settings.
3. Select the Attached to Existing Network radio button.
4. Click Apply. The list of available networks will populate.
5. Select a wireless network and enter in the network credentials, then click Apply.
Step 3: Install the Free Solstice User App
Once your Pod and display are powered on, it’s time to install the free Solstice App. The Solstice App is what allows end
users to connect to a Solstice display and share and control content. The Solstice user App is installed on Windows, MacOS,
Android, and iOS devices (such as laptops, tablets, and phones) that you want to use to connect and share media to the
Solstice display. These user devices must be on the same network as the Solstice Pod in order to connect.
First time users that have not previously installed the Solstice user software app have two options: download the user app
from the Mersive downloads page, OR, download the app directly from the host. Note: Admins permissions are not required
to install the app. Instructions to get the app are shown on the Solstice display’s welcome screen. These instructions direct
you to the Pod’s QuickConnect page, which allows you to directly download the most recent apps that were pre-installed on
your Pod.
How to Download the Solstice App from the Pod
1. On the user device, connect to the “SolsticePod” network.
2. Enter the IP Address shown on the display into a browser on your device. The QuickConnect page opens.
3. Click the Get the App & Join button. The Solstice App will be installed and opened.

pg 6 | Pod Demo Guide | www.mersive.com | © Copyright 2019 Mersive
Android or iOS device users will be directed to the corresponding app stores to download and install the app. However, this
requires internet access which is not available when connected to the Pod’s hotspot network (available when the Pod is in
WAP mode). For this evaluation, these users will need to connect to a network that has internet to install the Solstice
mobile app. Note: For full rollout and deployment, Pods should be deployed on internet-enabled networks. Deployment of
the Pod in WAP mode is not recommended.
Although Solstice users don’t need to download the user app before they walk into the room, we’ve also provided download
links here for convenience.
Windows: download from www.mersive.com/download or directly from the Pod
Mac: download from www.mersive.com/download or directly from the Pod
iOS: https://itunes.apple.com/us/app/solstice-client/id887643816?mt=8
Android: https://play.google.com/store/apps/details?id=com.mersive.solstice.client_v2
Step 4: Connect the Solstice User App to the Pod
Now that you have the user app, let’s connect to the Pod. First, your device must always be on the same network as the Pod
to connect. For example, if your Pod is in the default WAP mode, your device must be connected to the “SolsticePod”
hotspot network.
When you launch the Solstice app, you will see the Discovered Displays tab. This tab shows all the Solstice displays on your
network so that you can simply click the appropriate display and connect. For now, the discovery panel is likely to only show
the single Pod you’re evaluating. Click on the SolsticePod display and enter the on-screen PIN if prompted.
Tip: Whether you download the client apps from the Pod or our website, admin rights are never required to install
them.

pg 7 | Pod Demo Guide | www.mersive.com | © Copyright 2019 Mersive
If you are unable to see any Pods to connect to, you can select the “Enter IP” option and type the IP address visible on the
Solstice Pod welcome screen.
Regardless of which device you are using to evaluate Solstice, the user interface and experience is nearly identical. This
allows users to freely move between devices when sharing content to the display without needing to navigate a new user
interface.
Step 5: Share Content from your Solstice App
Once you are connected to the Pod, there are several ways you can share content to the display:
•Sharing your entire desktop or device screen
•Sharing a specific application window (not supported on all mobile devices)
•Sharing media files such as images and videos
•Sharing using a wired source via HDMI input
When you connect to a Pod, you’ll be presented with the Share panel. The Share panel allows you to share various content
sources to the display. From PC-based devices, you can share desktops, application windows, images, and videos. From
mobile devices, you can share the device screen, images, and videos stored on the device, and even images and videos
captured live from the device’s camera.
Try sharing multiple pieces of content to the display using the Share panel. For example, it’s useful to share a couple
different application windows and some media files to see how things work. Try sharing your desktop by using the Desktop

pg 8 | Pod Demo Guide | www.mersive.com | © Copyright 2019 Mersive
sharing option. Next, open a PowerPoint or PDF document and share by using the App Window option. You can resize the
PowerPoint or PDF to half screen and note the difference between the desktop post and shared app window post on the
display. Also share multiple images or videos saved locally on your device using the Media File sharing option. Lastly,
connect a laptop PC to the Pod using an HDMI cable. The HDMI cable should be plugged into both the HDMI input port on
the front of the Solstice Pod as well as into the laptop PC sharing content.
You’ll notice that your posts carry an outline color that matches the user color assigned to you when you connected. If you
have a second device available, connect to the Pod from that device too and share something to see how different users are
represented on the shared display.
Step 6: Control your Posts
By selecting Layout in the grey sidebar menu, you can access Solstice’s intuitive What-You-See-Is-What-You-Get
(WYSIWYG) control interface. Here, you have multiple ways that you can control the content and how it appears on the
display. Any user connected to the session can control the content layout.
•Drag and drop posts around to change the order of the content.
•Drag and drop posts on or off the on-deck panel on the left side of the display.
•Click and hold, or right-click on a post to view options to make the post full screen, view post details, create a stack,
or delete the post.
•Pinch-to-zoom posts on touch-enabled devices.
•Control videos posted to the display with the Solstice video player. The Solstice video player functions similarly to
other video players, with play/pause buttons, volume control, and loop options. To view the video player controls,
click the camera icon in the lower right corner of the video post.
•Click a Meeple to access the participant menu. This menu gives you options to show, hide, stack, or delete the
participant’s posts, as well as disconnect the participant from the collaboration session.
•Click the vertical ellipsis icon to view the media placement menu. This menu allows you to set whether or not
posts are aligned to a grid and allows you to quickly move all posts on or off the screen.
Step 7: Try out Moderator Mode
Moderator mode allows you to approve requests from collaborators to join the session or post content to the display. Once
moderator mode is enabled, any future collaborators will request to join and wait for a session moderator to approve the
request. Only the moderator will have the ability to control what content is posted and the layout of the content.
1. Click the Meeting control in the user app sidebar.
2. Toggle Moderate this meeting to “On”.
3. Use a different user device to try and connect to the display. When a new collaborator tries to connect to the
display, an alert will appear in the moderator’s app sidebar. On the moderating device, click Alerts to view the
request. Three options display for the connection request:
•Reject: Connection is rejected. The collaborator will be notified that their connection attempt was
canceled by the moderator.
•Approve: The collaborator will be connected to the display.
•Approve as Moderator: The collaborator will join with full moderator rights to approve and reject requests
to join and post media content.
4. Once approved as a collaborator, post a piece of media to the display. When a collaborator tries to post media
content to the display, another alert will appear in the moderator’s app sidebar. On the moderating device, click
Alerts to view the request. Two options display for the media post request:
•Reject: The post will not appear on the display. Rejecting the request will not alert the user that their post
has been rejected.
Did you know? If you have an iPad, iPhone, or even an OSX device, you can Airplay the device screen directly to the Pod.
Swipe up from the bottom or down from the top right corner of the screen and click on “SolsticePod” in the AirPlay menu.
You’ll see your device mirrored live on the display.
pg 9 | Pod Demo Guide | www.mersive.com | © Copyright 2019 Mersive
•Approve: The post will appear on the display.
5. To control collaborators in the session, use the moderating device to click on the meeple group icon in the user
panel. A list of the connected users will appear with an option to Disconnect the user or Make Moderator.
6. To exit moderator mode, go to Meeting in the sidebar and toggle Moderate this meeting to “Off”.
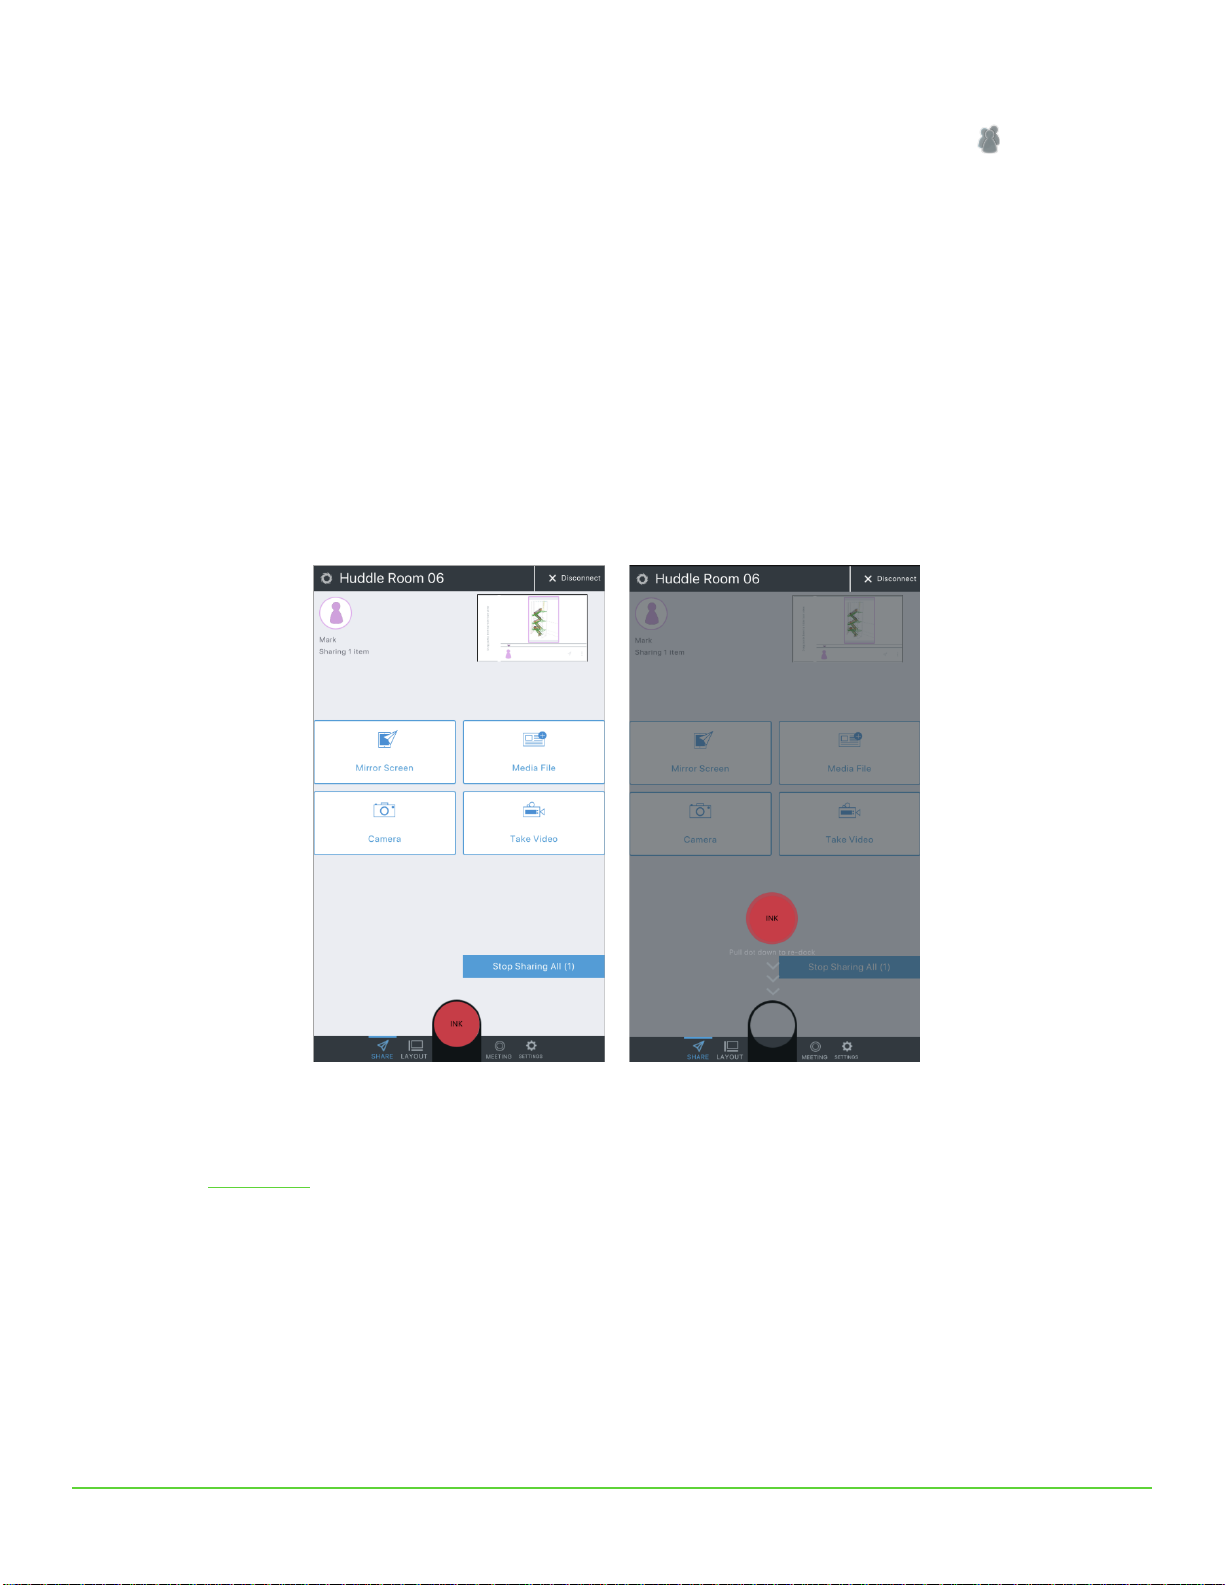
Step 8: Try out Solstice Ink
Available in the mobile version of the Solstice App (for iOS and Android devices), Solstice Ink allows users to highlight and
temporarily mark up content on the Solstice display from anywhere in the room by simply pointing and drawing with their
smartphones. This feature is also supported in moderator mode. As a note, this feature not supported on tablets.
Solstice Ink has three modes of use:
•Pointer: Press and hold the red Ink button or drag the button to the center of the screen to use your phone as a
pointer.
•Pulse: Tap the Ink button to pulse the pointer.
•Temporary markup: Drag the Ink button to the center of the screen, then press and hold the button to draw.
To exit Ink mode, drag the Ink button down to re-dock it.
Like what you see?
Check out our How to Buy page for more information on buying options, or to get in contact with one of our authorized
channel partners.
Table of contents


")


