7
SONAMP
®
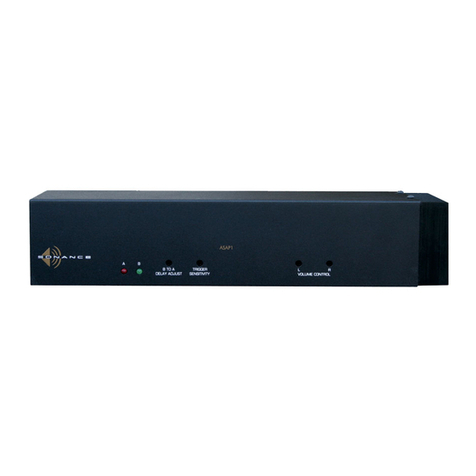
ASAP3D SE STEREO POWER AMPLIFIER
The SPEAKER OUTPUT connector uses a removable 4-wire quick
connector that accepts bare wire up to 14AWG. To wire the
quick connector see the sidebar on page 6.
Mono Fixed/Variable Output
The MONO VAR OUTPUT jack (see
Figure
10
) supplies a sum of the left & right
channel signals from the LOCAL LINE IN
or LOCAL SPEAKER INconnections.
The signal from the MONO VAR OUTPUT
jack is ideal for driving a powered
subwoofer, enabling the local system to
deliver improved bass performance that will greatly enhance
the listening experience when playing film soundtracks or
musical performance videos.
Volume changes made with the front-panel INPUT SENSITIVITY
adjustments or via IR commands will also effect the level of
the MONO VAR OUTPUT, so the subwoofer will track volume
adjustments made to the local main speakers.
NOTE: YOU CAN CHANGE THE MONO VAR OUT TO A FIXED-
LEVEL OUTPUT BY SWITCHING AN INTERNAL JUMPER. FOR DETAILS
SEE
A
PPENDIX
1
, ON PAGE 13.
Control Inputs/Outputs
IMPORTANT: ALWAYS UNPLUG THE AMPLIFIER’S POWER
CORD FROM THE WALL OUTLET BEFORE MAKING CONTROL
CONNECTIONS.
The ASAP3D SE has a set of rear-panel
DIP switches (see
Figure 11
) that lets
you select the different methods for
triggering the switch from the House
source to the Local source.
AUDIO:The presence of a 10mV or
higher audio signal at the LOCAL LINE IN
or LOCAL SPEAKER INinputs will switch
the ASAP3D SE to the Local source.
VOLT:The presence of a 5 ~ 24V AC or DC external control
voltage at the VOLTAGE TRIGGER input will switch the ASAP3D
SE to the Local source. See
Voltage Trigger Connections
, next
column.
AC: The ASAP3D SE will switch to the Local source when a TV
set that is connected to the ASAP3D SE’s AC Trigger Outlet is
turned ON. See
AC Trigger Outlet
, on page 8.
IMPORTANT: YOU CAN ONLY USE ONE OF THE ABOVE
TRIGGERING METHODS AT A TIME. IF MORE THAN ONE
METHOD IS SELECTED THE ASAP3D SE WILL ENTER A PRO-
TECT CONDITION AND WILL NOT SWITCH TO THE LOCAL
SOURCE (SEE
S
TATUS
LED
S
,
ON PAGE 9). IF NO TRIGGER IS
SELECTED THE AMPLIFIER WILL PASS THE HOUSE SOURCE TO
THE SPEAKERS BUT WILL NOT SWITCH TO THE LOCAL SOURCE.
IR: The ASAP3D SE will switch to the Local source when it
receives an amplifier ON command from a connected IR
control device.
NOTE: THE IR TRIGGER CAN BE SELECTED ALONG WITH THE
AUDIO, VOLTAGE OR AC TRIGGER, TO ALLOW IR CONTROL OF
VOLUME, MUTE AND BBE ON/OFF IN THESE CONTROL MODES.
IR
P
OWER
ON
AND
P
OWER
OFF
COMMANDS ARE IGNORED
WHEN ANOTHER TRIGGER METHOD IS ALSO SELECTED.
SEE
A
PPENDIX
2
, ON PAGE 13
Voltage Trigger Connections
When the ASAP3D SE’s VOLT trigger
mode switch is set to the ON position,
the source can be switched from House
to Local by an external trigger voltage
appearing at the VOLTAGE TRIGGER IN
connections (see
Figure 12)
. The trig-
ger voltage must be between 5V and
24V, either AC or DC, usually supplied
by the
Status
output from an IR control
system.
The VOLTAGE TRIGGER OUT connection (see
Figure 12
) supplies
a 12V DC trigger signal whenever the Local source is ON.
This trigger can be used to control other devices, such as
Sonance AL2/AS2 automatic secondary switches, other
Sonamps or 12V DC relays.
The VOLTAGE TRIGGER connections feature a removable 4-wire
quick connector similar to the ones used for the speaker
connections. To wire the connector see the sidebar on page 6.
IR Input
The IR INPUT connection (see
Figure 13
)
allows the ASAP3D SE’s Local/House
source switching to be triggered by an
IR signal from a keypad controller or
other IR control device.
The IR INPUT connections feature a
removable 16AWG 4-wire quick
connector similar to the ones used for
the speaker connections. To wire the
connector see the sidebar on page 6.
The connections are as follows:
+= +12V DC D= Data
GND = Ground S= Status
See
Appendix 2
, on page 13, for a list of IR-controllable
functions. IR control codes for the ASAP3D SE can be down-
loaded from the Sonance website: www.sonance.com.
FIGURE 10:
MONO VAR OUT
JACK
FIGURE 11:
TRIGGER MODE
DIP SWITCHES
FIGURE 12:
VOLTAGE TRIGGER
CONNECTIONS
FIGURE 13:
IR INPUT
CONNECTIONS
