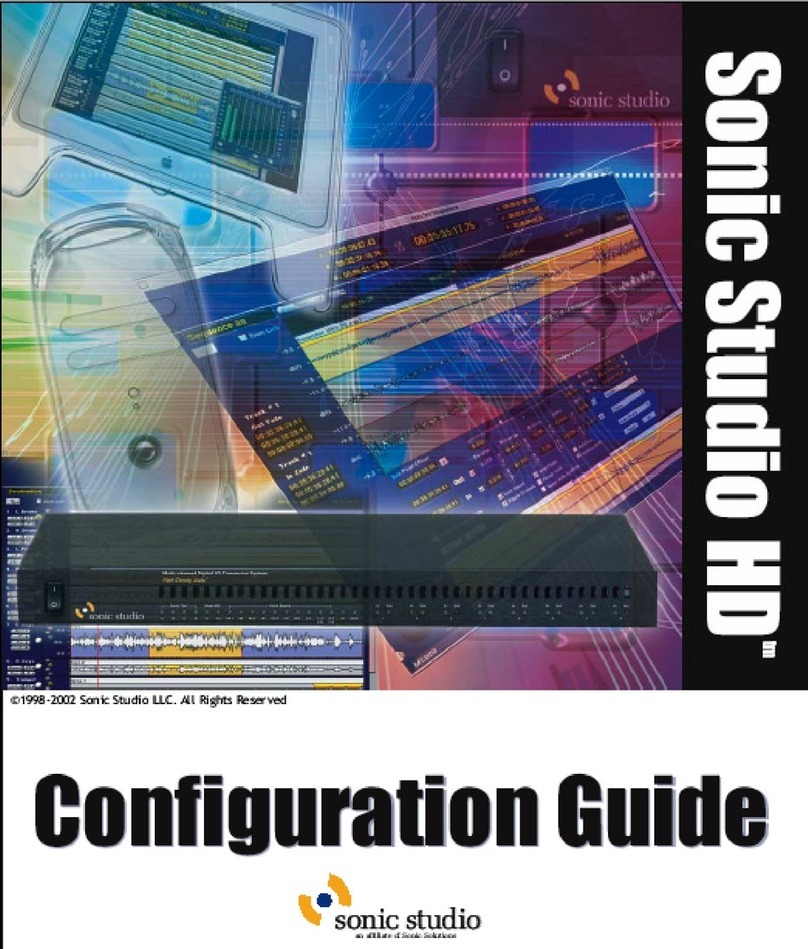
Sonic Studio HD-1000 User manual


©2002 SonicStudio. All rights reserved.
SonicStudio High Density User Guide - Sonic Part Number 800127A (4/99)
This manual, as well as the software described in it, is furnished under license and may only be used or copied in
accordance with the terms of such license. The information in this manual is furnished for informational use only, is
subject to change without notice, and should not be construed as a commitment by Sonic Studio LLC. Sonic Studio LLC
assumes no responsibility or liability for any errors or inaccuracies that may appear in this book.
Except as permitted by such license, no part of this publication may be reproduced, stored in a retrieval system, or
transmitted, in any form or by any means, electronic, mechanical, recording, or otherwise, without the prior written
permission of Sonic Studio LLC.
SONIC STUDIO LLC MAKES NO WARRANTIES, EXPRESS OR IMPLIED, INCLUDING WITHOUT LIMITATION THE
IMPLIED WARRANTIES OF MERCHANTABILITY AND FITNESS FOR A PARTICULAR PURPOSE, REGARDING THE
APPLE SOFTWARE. SONIC STUDIO LLC DOES NOT WARRANT, GUARANTEE, OR MAKE ANY
REPRESENTATIONS REGARDING THE USE OR THE RESULTS OF THE USE OF THE SONIC STUDIO LLC
SOFTWARE IN TERMS OF ITS CORRECTNESS, ACCURACY, RELIABILITY, CURRENTNESS, OR OTHERWISE. THE
ENTIRE RISK AS TO THE RESULTS AND PERFORMANCE OF THE SONIC SOFTWARE IS ASSUMED BY YOU. THE
EXCLUSION OF IMPLIED WARRANTIES IS NOT PERMITTED BY SOME STATES. THE ABOVE EXCLUSION MAY
NOT APPLY TO YOU.
IN NO EVENT WILL SONIC STUDIO LLC, ITS DIRECTORS, OFFICERS, EMPLOYEES, OR AGENTS BY LIABLE TO
YOU FOR ANY CONSEQUENTIAL, INCIDENTAL, OR INDIRECT DAMAGES (INCLUDING DAMAGES FOR LOSS
OF BUSINESS PROFITS, BUSINESS INTERRUPTION, LOSS OF BUSINESS INFORMATION, AND THE LIKE) ARISING
OUT OF THE USE OR INABILITY TO USE THE APPLE SOFTWARE EVEN IF SONIC HAS BEEN ADVISED OF THE
POSSIBILITY OF SUCH DAMAGES. BECAUSE SOME STATES DO NOT ALLOW THE EXCLUSION OR LIMITATION
OF LIABILITY FOR CONSEQUENTIAL OR INCIDENTAL DAMAGES, THE ABOVE LIMITATIONS MAY NOT APPLY
TO YOU.
SonicStudio, SonicStudio HD, Audio2000 and Varispeed are trademarks of Sonic Studio LLC.
NoNOISE is a registered trademark of Sonic Studio LLC.
Sonic, Sonic Solutions, the Sonic logo, Sonic DVD Creator, First in DVD, DVD Now, DVD Production Alliance, DVD
Ready, Constant Q, High-Density Audio, and TimeTwist are trademarks of Sonic Solutions.
Dolby Digital is a trademark of Dolby Laboratories, Inc. Dolby Laboratories encourages use of the Dolby Digital
trademark to identify soundtracks that are encoded in Dolby Digital. This is an effective way to inform listeners of the
soundtrack format, and the use of a standard logo promotes easy recognition in the marketplace. However, like any
trademark, the Dolby Digital logo may not be used without permission. Dolby Laboratories therefore provides a
standard trademark license agreement for companies who wish to use Dolby trademarks. This agreement should be
signed by the company that owns the program material being produced. Recording studios or production facilities
which provide audio production or encoding services for outside clients generally do not require a trademark license. If
you would like more information on obtaining a Dolby trademark license, please contact Dolby Laboratories Licensing
Corporation. Information on trademark licensing plus instructions for using the Dolby Digital trademark and marking
audio formats can also be found online at http://www.dolby.com.
QuicKeys is a registered trademark of CE Software, Inc.
JL Cooper is a registered trademark of J. L. Cooper Electronics, Inc.
Apple, the Apple logo, Finder, Macintosh, Quadra, and Quicktime are registered trademarks of Apple Computer, Inc.
Acrobat is a trademark of Adobe Systems, Inc.
NuBus is a trademark of Texas Instruments.
All other company or product names are either trademarks or registered trademarks of their respective owners.
Written and designed at Sonic Studio LLC, 12813 Industrial Park Blvd., Plymouth, MN 55441-3910, USA

Contents
Welcome to SonicStudio HD
Audience . . . . . . . . . . . . . . . . . . . . . . . . . . . . . . . . . . . . . . . . . . . . . . . . . . . v
Related Documents. . . . . . . . . . . . . . . . . . . . . . . . . . . . . . . . . . . . . . . . . . . vi
How to Reach Technical Support . . . . . . . . . . . . . . . . . . . . . . . . . . . . . . . . vi
Activating the Sonic Keyfile. . . . . . . . . . . . . . . . . . . . . . . . . . . . . . . . . . . . vii
1 HD-1000 Workstation
What s Included with the HD-1000 Workstations . . . . . . . . . . . . . . . . . . 1-2
HD-1000 Installation Quickstart . . . . . . . . . . . . . . . . . . . . . . . . . . . . . . . 1-3
System Requirements. . . . . . . . . . . . . . . . . . . . . . . . . . . . . . . . . . . . . . . . 1-4
Installing the Hardware . . . . . . . . . . . . . . . . . . . . . . . . . . . . . . . . . . . . . . 1-5
2 Software Installation/Drive Setup
Installing Your Software . . . . . . . . . . . . . . . . . . . . . . . . . . . . . . . . . . . . . 2-2
Formatting a Sound Storage Drive . . . . . . . . . . . . . . . . . . . . . . . . . . . . . . 2-3
Formatting a Sonic Media Drive. . . . . . . . . . . . . . . . . . . . . . . . . . . . . . . . 2-4
Repairing a Lightspeed Media Drive . . . . . . . . . . . . . . . . . . . . . . . . . . . . 2-6
3 The Sonic HD3 I/O Box

IV
T
ABLE
OF
C
ONTENTS
Overview of the HD3 . . . . . . . . . . . . . . . . . . . . . . . . . . . . . . . . . . . . . . . . 3-2
Safety Information . . . . . . . . . . . . . . . . . . . . . . . . . . . . . . . . . . . . . . . . . . 3-3
Front-Panel Indicators . . . . . . . . . . . . . . . . . . . . . . . . . . . . . . . . . . . . . . . 3-5
Rear-Panel Switches & Connectors . . . . . . . . . . . . . . . . . . . . . . . . . . . . . 3-6
Connections . . . . . . . . . . . . . . . . . . . . . . . . . . . . . . . . . . . . . . . . . . . . . . . 3-7
Configuring the System . . . . . . . . . . . . . . . . . . . . . . . . . . . . . . . . . . . . . 3-11
A
CONNECTOR WIRING
HD3 Connections. . . . . . . . . . . . . . . . . . . . . . . . . . . . . . . . . . . . . . . . . . . A-2
Index

WelcometoSonicStudioHD
Welcome to SonicStudio HD
™
from Sonic Studio! SonicStudio HD is the
first family of digital audio workstations to be designed from the ground up
for DVD-Audio production and High-Density™ Audio mastering.
Each SonicStudio HD system gives you all the tools you need to record,
edit, mix and master the highest quality audio for release on Compact
Disc™. SonicStudio HD can be upgraded with additional features and
functions for full DVD-Audio and DSD (Direct Stream Digital) production.
Audience
This installation guide is provided for audio professionals who intend to use
SonicStudio HD as their complete production tool for sound editing and
Compact Disc™ or DVD-Audio premastering.
You should be familiar with basic computer terms such as click, drag,
highlight, etc.We also assume that you understand the basics of how to
maneuver through the Macintosh interface. If not, please review the
tutorials provided by Apple Computer.

VI
Related Documents
Please refer to the following for further information:
•
SonicStudio HD User Guide
•
NoNoise User Guide
How to Reach Technical Support
You will receive software technical support from Sonic Studio for 90 days
at no charge. If you wish to continue receiving support or technical
assistance, please be sure to purchase a SonicCare technical support
contract for your system (a representative will contact you before the 90-
day period is up).
Sonic Studios’ Customer Support center is available from 9:00 AM - 6:00 PM
PST via phone, fax, or email:
Telephone:
763-577-1535
Fax:
763-577-5950
Email:
Please have the following information before contacting customer support:
•
Software version (select the application icon in the Finder and type
COMMAND
+
I
or look on the CD-ROM label)
•
Board Serial Numbers — look on the board for the sticker and write the
serial numbers below:
HDSP Processor:
HDSP Plug-In Processor:

VII
Activating the Sonic Keyfile
1
Launch the Sonic Keyfile Activator application (located in the same folder
as your Sonic application).You will see this dialog:
Figure 1
Sonic Keyfile Activator Dialog
2
Type the Activator Code into the Sonic Keyfile Activator application.
3
Click the OK button.Your keyfiles will automatically be installed in a Sonic
Preferences folder inside your Macintosh System Folder.
4
You may now launch SonicStudio HD.
Please feel free to contact Sonic Studios’ Customer Support at 763-577-1535
with any questions regarding this procedure. Be sure to have your
SonicCare number on hand when you call.

VIII
Warning!
Before you activate your key code, remove from the Sonic
Preferences folder (located in the System folder) any existing SonicKey files
that you wish to keep. Existing keyfiles will be overwritten by your new
keyfile.

1
HD-1000Workstation
This chapter describes how to install the hardware for the HDSP
Workstation (HD-1000).
Figure 1-1
The Sonic HDSP Workstation (HD-1000)
SOLUTIONS ABCD 12345678
Multi-ChannelDigital I/OConversion System
DualAES ClockSource
In
Out
192
176.4
96
88.2
48
44.1
WS
DS
1-2
3-4
JA Lock
SonicPort In Out In Out In Out In Out In Out In Out In Out In Out
SONIC

1-
2HD-1000 W
ORKSTATION
What’s Included with the HD-1000 Workstations
The HD-1000 and HD-2000 Workstations include the following hardware:
HDSP Audio Processor Sonic HD3 I/O Box
HDSP Audio I/O
Cable
HDSP Serial
Adapter Cable
Sonic I/O
Te rminator
BNC Terminator
BNC Tee
Serial Machine Control &
Timecode Cable

HD-1000 I
NSTALLATION
Q
UICKSTART
1-
3
HD-1000 Installation Quickstart
For detailed installation instructions, see "Installing the Hardware" on
page 1-5.
Install the HDSP card in
the Macintosh
1
Connect the HDSP
to the HD3 I/O Box
3Connect timecode and
machine control
4
Connect external
SCSI devices
2

1-
4HD-1000 W
ORKSTATION
System Requirements
In addition to the hardware supplied by Sonic, you’ll need the following
components:
Macintosh Computer System
•
Power Macintosh G3 or G4 computer
•
128 MB memory minimum (256 MB recommended)
•
Mac OS 9.04 or later
•
4 GB internal hard drive (system and applications)
•
CD-ROM drive
•
20-inch color monitor
•
24-bit, 1024x768 color graphics card (if not supplied with CPU)
•
18 GB external hard drive (media drive)
•
SCSI adapter card
Note:
For high clock rate, multi-channel audio, SonicStudio HD requires
an ultra-wide SCSI drive and SCSI accelerator card. For the latest
information regarding approved devices, visit www.sonic.com.
Peripheral Equipment
•
A/D and D/A converters: two to eight channels of 44.1 to 96 kHz, or
two channels of 176.4 to 192 kHz (such as the Sonic 888 from Lucid
Technology)
•
Audio source and monitoring equipment
•
Disk image output medium (such as CD-R, Exabyte, Image File or Sony
1630)

I
NSTALLING
THE
H
ARDWARE
1-
5
Installing the Hardware
This section presents grounding precautions and detailed instructions for
installing the HD-1000 Workstation hardware.
Grounding Precautions
To assure safety and protect your system components from damage, please
follow these grounding procedures:
•
Before making any connections, shut down your Macintosh and any
peripheral equipment that is already connected to it. Never connect or
disconnect components when the power is on unless you are certain
that they are hot-swappable.
•
Use only three-pin, grounded AC mains outlets and, if in doubt, test
them before using to ascertain that they are properly wired.
•
Never use ground-lifting adapters to defeat the earth ground
connection; this can result in a hazardous condition.
•
Use surge-protected outlets to prevent damage from power surges.
•
Where possible, connect all components to the same AC circuit; this
will minimize the possibility of ground voltage differentials.
•
Handle circuit cards by the edges only, and use the included anti-static
wrist band to avoid damaging sensitive components.

1-
6HD-1000 W
ORKSTATION
Installing the HDSP Card
To install the HDSP card, you will need:
•
A #2 Phillips screwdriver
•
The Power Macintosh CPU
•
The HDSP PCI card
Figure 1-2
Installing PCI Expansion Cards
To install the HDSP card:
1
Make certain that the Macintosh power is off. Disconnect the power cord.
2
Put on the static protection wrist band and attach the wire to a grounded
terminal.

I
NSTALLING
THE
H
ARDWARE
1-
7
3
Open the Macintosh CPU (refer to the instructions that came with your
computer) and locate the PCI expansion slots.
4
Remove the screw that holds the access cover for the third slot from the
hinge in place. Remove the access cover and set it aside.
5
Unpack the HDSP card from its static-proof bag. Handle the card by its
edges: don’t touch the gold connector fingers or on-board components.
Note:
If you’ve not already done so, write down the serial numbers for
the HDSP Processor in the space provided on page vi of this manual.You’ll
need this number if you require technical support.
6
Align the card’s connector fingers with the PCI slot and press down until
the card is seated. Reinstall the screw to hold the card in place.
7
Follow steps 4–6 again to install a SCSI accelerator card if SCSI was not
included with your CPU (refer to the documentation for the card to
determine which slot to use).
8
Close the computer.You can now take off the wristband.
Note:
Reconnect the Macintosh power cord before continuing the
installation.This will ensure that the computer is safely grounded, and thus
prevent damage from differing ground potentials or stray electrostatic
charges.

1-
8HD-1000 W
ORKSTATION
SCSI Bus Connections
SonicStudio uses the SCSI (Small Computer System Interface) bus to
communicate with peripheral devices such as media drives, CD-R or DVD-R
units, and digital tape drives. SCSI devices are connected in a daisy-chain
fashion, with the bus connections looping through each successive device.
SCSI peripherals typically have two SCSI connectors, and either connector
can serve as input or output.
Three simple rules govern SCSI bus connections:
•
The total physical bus length must not exceed six meters (or less for
Fast,Wide and Ultra SCSI implementations; check the documentation
for your SCSI interface for further information).
•
The devices at each end of the bus must be terminated to prevent signal
reflections that can corrupt data.
•
Each device in the chain (including the computer’s SCSI port) must be
assigned a unique address.
Additional constraints apply when mixing narrow (8-bit) and wide (16-bit)
devices on the bus. Before making SCSI bus connections, review the
documentation for each peripheral device, the Macintosh and, if
applicable, the PCI SCSI card to familiarize yourself with how they should
be connected.
Tip:
For the latest information regarding SCSI connections, check the
Sonic website at www.sonic.com.Additional information about SCSI
connections may be found at the web site of the SCSI Trade Association,
www.scsita.org.

I
NSTALLING
THE
H
ARDWARE
1-
9
To connect SCSI peripherals, you will need:
•
The peripheral devices
•
SCSI cables (normally supplied with the device)
•
A SCSI terminator (also often supplied with the device)
•
The Power Macintosh CPU
Figure 1-3
Connecting External SCSI Devices
To connect external SCSI devices:
1
Check to see that the Macintosh is plugged in and turned off.
2
Connect the power cords of each peripheral.This will assure that they are
grounded. Do not turn any of the peripherals on.
3
Assign each device a unique address, making certain that none conflicts
with the computer’s SCSI port.

1-
10 HD-1000 W
ORKSTATION
4
Using the supplied cable, connect the Macintosh SCSI port to a peripheral
device. If you are connecting only a single peripheral, attach the SCSI
terminator to the device’s other SCSI port.
5
If you are connecting several peripherals, use the supplied SCSI cables to
loop from one to another.Attach the terminator to the last device in the
chain.

I
NSTALLING
THE
H
ARDWARE
1-
11
Connecting the Sonic HD3 I/O Box
The HD3 connects to the HD-1000 Workstation using the Sonic I/O bus.
Similar to SCSI, the Sonic I/O bus requires that devices on the bus have
unique addresses, and the bus must be terminated.
To connect the HD3, you will need:
•
The HD3
•
The Power Macintosh CPU
•
The HDSP Audio I/O Cable
•
The Sonic I/O Terminator
Figure 1-4
Connecting the Sonic HD3

1-
12 HD-1000 W
ORKSTATION
To connect the HD3:
1
Connect the HD3 power cable to a grounded outlet. Do not turn it on.
2
Attach the smaller connector of the HDSP Audio I/O Cable to the
corresponding connector on the HDSP card.
3
Attach the other end of the Audio I/O cable to either Sonic I/O port on the
rear panel of the HD3.
4
Attach the terminator to the unused Sonic I/O port on the rear panel of the
HD3.
Note:
For connections between the HD3 and external devices, see
"Connections" on page 7.
Table of contents
Other Sonic Studio Desktop manuals
