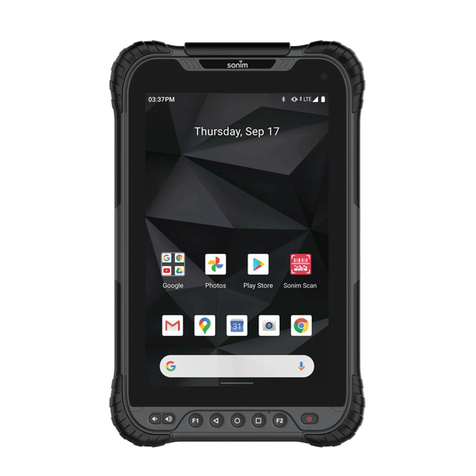
Sonim RS80 User manual

User Guide
RS80

1
Power on for The First Time
Power On/power Off
Remove Battery
Remove Battery Cover
Network & Internet
Appearance Overview
CONTENTS
Unfasten Handstrap to Remove Battery Cover
Remove Battery Cover
SIM/microSD Card
Insert Battery
Connected Devices
Network & Internet
Display Settings
Battery Settings
Storage Settings
Privacy Settings
Google Settings
Product Safety Warnings
3~4
5
6
7
8
9
10
11
12
13
11
15
17
17
18
19
19
20
20
21
23
24~27
What’s In The Box 1
Notice
Sound Settings
Accessibility Settings
System Settings

What’s In The Box
1
2
Handstrap
Device
Battery
Type-C cable
Converter plugs Charging adaptor

Appearance Overview
Microtablet
Function button F2
Recent button
Power button
Home button
Front camera
Back button
Function button F1
Volume up
Volume down
Ambient light sensor
Charging indicator
2
3

1D/2D Scanner
Rear camera
Battery cover lock A
Battery cover lock B
External GNSS antenna port
LED flash
TYPE-C interface
3.5mm Headset
Battery cover lock B
NFC
Appearance Overview
3
4

Unfasten Handstrap to Remove Battery Cover
4
5
1 2
3 4

Clasp
1. Power off the device before removing the battery cover
2. Push the battery cover lock to the open position
3. Detach the battery cover
To remove the battery cover
Remove Battery Cover
5
6

SIM/microSD Card
To insert/remove SIM/microSD card
Follow the indicated direction printed in the chamber
6
7
microSD SIM

To insert the battery
1. Insert the battery
2. Push the battery lock to the closed position
3. Attach the battery cover
4. Push the battery cover lock to the closed position
Insert Battery
7
8

1. Power off the device before removing the battery
2. Push the battery cover lock to the open position
3. Detach the battery cover
4. Push the battery lock to the open position
5. Remove the battery
To remove the battery
Remove Battery
8
9

Power on for The First Time
When starting for the first time, fully charge the device.
Plug the power adapter into the device and charge the device to make sure that battery is full.
9
10

Power On/power Off
1. Power On
Press the power button few secends until the device vibrates
2. Enter/Exit Sleep
Click the power button once, the screen enters sleep mode.
If the device screen is light on and keep standby 1 minute, the screen will automatically turn off
and enter sleep mode(Standby time setting: Display > Screen timeout).
Click the power button once, the screen lights up and exits sleep mode. Swipe up on the screen to
unlock.
3. Power Off/restart/screenshot
Long press the power button, a dialog box will pop up on the right side of the screen. Select the
desired function to turn off the power, restart or take a screenshot.
10
11

WI-FI
Wi-Fi is a wireless network technology that can provide Internet access at distance up to 100 feet,
depending on the Wi-Fi router and surroundings.
You can access word Internet when you connect your RS80 to a Wi-Fi network. To connect your
tablet to a Wi-Fi network;
1. From Notifications or App menu, tap on Settings ( ).
2. Tap on Network & Internet ( ) .
3. Tap on Wi-Fi ( ) .
4. Set the Wi-Fi to ON position located under Wireless & networks settings. A list of Wi-Fi access
points present within your tablet accessible range are displayed.
5. Select your preferred network. Enter the WEP/WPS/WPA key (if it is a secured network) and
select Connect. To verify the password before connecting, enable Show password.
Add Network
1. On Wi-Fi screen, tap on Add network ( ).
2. Enter the Network name and select the Security from the drop-down list. You can set the
network password.
3. Tap on Advanced options. The settings such as Proxy and IP settings can be updated using the
drop-down list.
4. Tap on Save to save the network settings.
Connect To Network
1. Long press on connected network.
2. Tap on Connect to network.
3. Enter the network password.
4. The other network setting details such as Advanced options, Proxy, IP settings can be updated.
5. Tap on CONNECT to get connected to the network.
11
12
Network & Internet

Mobile Network
1. From Notifications or App menu, tap on Settings( ).
2. Tap on Network & Internet ( ) > Mobile network ( ),
3. Select SIM card Slot and the following options are displayed:
• Mobile data: Turn On to enable mobile data. Using mobile data, you can access Internet.
• Roaming: Turn ON to enable data roaming to connect to data services while roaming.
• Data usage: Mobile data usage for a particular time frame is displayed.
• Network:
- Automatically select network: Turn ON to connect to the selected network automatically.
- Network: The network name is displayed.
- Access Point Names: Tap on Access Point
Names (APNs) to view and edit the network access points. Tap on the ( ) icon to add a new
access point.
Data Usage
Data usage refers to the amount of data utilized by your tablet during data transfers through the
Internet. The data usage charges are dependent on the wireless plan provided by your service
provider.
To monitor your data usage, adjust your data usage settings.
1. From Notifications or App menu, tap on Settings ( ).
2. Tap on Network & Internet ( ) > Data usage
3. Under Usage, you can view the data usage for a particular time frame.
4. Turn on Data saver ( ) to access unrestricted data.
Hotspot & Tethering
Hotspot and Tethering provides Internet to other devices through your mobile data connection.
Apps can also create a hotspot to share content with nearby devices.
Network & Internet
12
13

USB Tethering
Using USB tethering, you can share tablet’s Internet connection via USB.
1. From Notifications or App menu, tap on Settings ( ).
2. Tap on Network & Internet( ) > Hotspot & tethering ( ).
3. Turn on USB tethering.
Setup Mobile Hotspot
You can set up a hotspot using your mobile device.
1. From Notifications or App menu, tap on Settings ( ).
2. Tap on Network & Internet( ) > Hotspot & tethering ( ).
3. Tap on Set up Mobile hotspot.
4. Enter the following details:
• Hotspot name: Enter the hotspot name.
• Security: Select the desired security from the drop-down list.
• Hotspot Password: The password must have at least 8 characters.
5. Tap on Save to save the mobile hotspot.
Airplane Mode
When your tablet is set in airplane mode, network connectivity or mobile data connectivity is
disabled. But you can access your camera, media files and other features that do not require
mobile data connectivity.
To activate airplane mode;
1. From Notifications or App menu, tap on Settings ( ).
2. Tap on Network & Internet( ) > Airplane Mode ( ).
14

Bluetooth Turn ON
You can share the tablet’s Internet connection via Bluetooth.
1. From Notifications or App menu, tap on Settings ( ).
2. Tap on Connected devices( > Connection preferences > Bluetooth( )
3. Turn ON to enable Bluetooth tethering.
Bluetooth
Bluetooth is a short-range wireless communication technology used to communicate between the
devices over a distance of about 8 meters.
• You can perform the following tasks using Bluetooth paired devices.
• Transfer media files and contacts between connected mobile devices using Bluetooth.
• Use Bluetooth connected headtablets for playing media file.
Pairing A Bluetooth Device
To activate Bluetooth and pair your RS80 device with other
Bluetooth Devices:
1. From Notifications or App menu, tap on Settings ( ) > Connected devices ( ) > Connec-
tion preferences.
2. Tap and enable Bluetooth ( ). A list of accessible Bluetooth devices are displayed. Ensure
that Bluetooth is activated on the other device as well.
3. Tap on Pair new device ( ) to pair a new device. Available devices are listed.
4. Select the desired device from the list. It starts pairing with the selected device. A confirmation
message is displayed to pair the device. Select PAIR.
Connected Devices
13
15

Device Name
1. From Notifications or App menu, tap on Settings ( ) > Connected devices ( )> Connection
preferences..
2. Tap and enable Bluetooth ( ).
3. Tap on Device name. Rename this device screen is displayed. You can change the name and
tap on Rename.
Cast
1. From Notifications or App menu, tap on Settings ( ) > Connected devices ( ) >
Connection preferences.
2. Tap on Cast ( ).
3. You can cast your screen from your Android™ device. Connect your Android device to the
same Wi-Fi network as your Chromecast or TV with Chromecast built-in. In the top left corner of
the app’s Home screen, tap on Menu Cast Screen > audio Cast Screen > audio.
4. Ensure that your Android device and Chromecast are connected to the same Wi-Fi network.
NFC
When NFC (Near-Field Communication) is a set of communication protocols that enable two
electronic devices one of which is usually a portable device such as a smart tablet, to establish
communication by bringing them within 4 cm of each other.
1. From Notifications or App menu, tap on Settings ( ) > Connected devices ( ) > Connec-
tion preferences> NFC ( ).
2. Turn ON NFC to allows your device to scan various cards.
Printing
1. From Notifications or App menu, tap on Settings ( ) > Connected devices ( )> Connection
preferences > Printing ( ) .
2. Tap on Print > Default Print Service ( ). Turn On the Default Print Service.
3. Tap on Add services ( ). Google Play screen is displayed. You can sign in with your Google
credentials and add any desired service.
16

Display
1. From Notifications or App menu, tap on Settings ( ) > Display ( ).
2. Set the following options to configure your tablet’s display:
• Brightness level: Set the brightness of the tablet display.
• Night Light :
• Schedule: You can schedule the night light on your device: None, Turns on at custom time and
Turns on from sunset to sunrise
- Stare time: Sunrise time
- End time:The sunset time
- Intensity: You can increase/decrease the light intensity as per your requirement.
• Adaptive Brightness: This optimizes the brightness level for available light.
• Wallpapers: Includes images that are pre-loaded with the tablet.
• Dark theme : Turn On to display the black theme.
• Screen timeout: Set the sleep time so that the screen brightness is turned down after specified
time of tablet inactivity. This setting also optimizes the battery power. The options are: Never,15
seconds, 30 seconds, 1 minute, 2 minutes, 5 minutes, 10 minutes and 30 minutes.
• Auto-rotate screen: Turn on to set auto-rotate screen ON.
• Font size: Set the font size of the text to be displayed on the screen.
• Display size: You can make the items on your screen smaller or larger. Some apps on your
screen might change position.
• Screen saver: You can set any of the applications as a screen saver.
• Lock screen display: Tap on lock screen display and turn On When to show > New notification.
The device screen is awake when you receive notifications.
Battery Settings
Battery
1. From Home screen or App menu, tap on Settings ( ) > Battery ( ).
• The graphic image of battery charging level is displayed.
• Last Full charge displays the time when the battery is fully charged.
• Screen usage since full charge displays the time duration the screen is used since the battery
the fully charged.
2. Under Power management the following options are displayed:
• Batter saver: Set the Battery saver to On by selecting the option given for Turn On.
Display Settings
14
15
17

Sound
1. From Notifications or App menu, tap on Settings ( ) > Sound ( ).
Set the following options to set the Sound settings in your device:
2. Media volume : Adjust the volume as per your requirement.
3. Alarm volume : Adjust the alarm volume as per your requirement.
4. Notification volume : Adjust the volume for notification as per your requirement.
• Default Notification sound: Select the required Notification sound from the list and tap on OK to
set as the ringtone. You can also add a new ringtone using Add ringtone ( ) option.
• Default alarm sound: Select the required alarm sound from the list and tap on OK to set as the
ringtone. You can also add a new ringtone using Add ringtone ( ) option.
5. Other sounds and vibrations
Turn ON the following options to access the sound:
• Screen locking sounds
• Charging sounds and vibration
• Scanning sounds
• Touch sounds
• Touch vibration
Sound Settings
16
18

Storage
1. From Notifications or App menu, tap on Settings ( ) > Storage ( ).
2. On Internal shared storage, the following options are displayed with memory used for each app:
• Photos and videos
• Music & audio
• Games
• Movie & TV apps
• Other apps
• Other
• System
Privacy Settings
Privacy
1. From Notifications or App menu, tap on Settings ( ) > Privacy ( ).
• Permission manager
• Show passwords
• Lock screen
• Autofill service from Google
• Advanced
• Google location history
• Activity controls
• Ads
Storage Settings
17
18
19
Other manuals for RS80
2
Other Sonim Tablet manuals

