-
2
-
LISTENINGTOTHE RADIO
Presetting Stations
Theunitcanstore atotalof20 stationsinmemory(10FM, 10MW).Presettingallowsyou totuneinto astationdirectly.
1. Tune in to a desired station.
2. Pressthe PROG/MEM/ button. Thepreset number willblink and the“MEMORY” indicator willbe shown onthe
display.
3. Press the MEM.UP/ button to select the preset number.
4. Press the PROG/MEM/ button again to store it in memory.
5. Repeat steps 1-4 to store other stations.
Tuning in to a Preset Station
Press the BAND/ STOP button to select MW or FM then press the MEM.UP/ button to select a preset number.
For Better Reception
FM: Fully unwind the antenna wire. Extend the antenna wire and place it in the position that sounds best.
Notes: Do not connect the FM antenna to an outside antenna.
MW: Reposition the unit to get better MW reception.
Note:
To prevent interference to the MW signal, please keep the AC adapter 1 meter (3.17 feet) away from the main unit.
To Pause Playback
• Press the PLAY/PAUSE button.
• To resume playback, press the PLAY/PAUSE button again.
To Stop Playback
• Press the BAND/ STOP button.
Skipping to Another Track
• Press either the or button according to the desired direction.
Press the button to skip to the start of the current track or skip to previous tracks. Press the button to skip to
the beginning of the next track.
Locating a Particular Point on a Track
• Keep either the or button pressed during playback, according to the desired direction, and release at the
desired point.
1. Press the STANDBY/ON button to turn on the unit.
2. Holdthe notch toopenthe CD door astherightfigure shown.
Place a disc in the centre with the label side facing front and
then close the CD door gently.
3. Press the FUNCTION button to CD mode. “- -” blinks on the
display, then the total track no. is shown on the display.
4. Press the PLAY/PAUSE button to start playing.
•Adjust the VOLUME levels to obtain the desired volume.
When the reception is good, the “((STEREO))” indicator will appear on the display.
CD PLAYBACK
REPEAT PLAYBACK
REPEAT PLAYBACK
Repeat Current Track
• Pressthe /MEM. UP buttonon theremote control until“ ”blinks onthe display.The currenttrack will beplayed
repeatedly.
Repeat the Entire CD
• Press the /MEM. UP button on the remote control until “ ” stops blinking and remains on.All tracks will be
playedrepeatedly.
Cancel Playback Mode
• Press the /MEM.UP button on the remote control until “ ”disappears.
RANDOM PLAYBACK
All tracks on the disc can be played in random order (Using the remote control only).
Random Playback
• Press the RANDOM button on the remote control until “RANDOM”appears on the display. All tracks will be played
randomly.
After all tracks have played, the unit will stop automatically.
Cancel Random Playback
• Press the RANDOM buttonon the remote controluntil “RANDOM”disappears.Theunit will return to normal playback.
A program of up to 20 tracks can be set to play in a preset order.
1. In CD stop mode, press the PROG/MEM/ button and “MEMORY” & "- -"
will blink on the display.
2. Press the or buttonto selectthe desired trackthen press the PROG/
MEM/ button to store the track in memory.
3. To add additional tracks, repeat step 2 (up to 20 tracks).
4. To start playback, press the PLAY/PAUSE button.
To Check the Program:
• Press the BAND/ STOP button and the or button.Each time the button is pressed, the track number
appears on the display.
To Change the Programmed Tracks during Program Playback:
• Press the BAND/ STOP button and press the PROG/MEM/ button repeatedly to search the program number,
then press either the or button to select the desired track. Press the PROG/MEM/ button again to register
the newly selected track into program.
To Erase the Whole Program,Do One of the Following:
• Press the FUNCTION button to change to radio/iPod/AUX IN mode.
• Press the STANDBY/ON button to turn off the unit.
• To open the CD door.
PROGRAMMABLE CD PLAYBACK
MEMORY
LISTENINGTOYOUR iPod
Removing the iPod Dock Adapter
1. Remove the iPod Dock Adapter as shown
in the figure to the right.
2. Replace it with another one you need.
iPod Dock
Adapter
iPod Dock Adaptor
BeforeconnectingyouriPod,youneedtoinstalltheappropriateiPod Dock Adaptor inthedockoftheunit.SixiPodDock
Adapters are included as shown below:
iPodCompatibility
TheCDMicroSystemworkswithiPodmini(4GB,6GB),iPodnano(1stgeneration)-1GB,2GB,4GB,iPod 5thgeneration
(video)-30GB, 60GB,80GB, iPodnano(2nd generation)-2GB, 4GB,8GB,iPod classic(80GB, 160GB),iPodnano 3rd
generation(video) - 4GB, 8GB andiPod touch (8GB,16GB). OtheriPod models aresupported throughthe AUX INjack
on the unit’s front panel (see “AUX IN CONNECTION” section).
iPod
Adaptor No. iPodDescription
iPod mini
3
8
9
10
Capacity
iPod nano (1st generation)
iPod 5th generation (video)
iPod 5th generation (video)
4GB, 6GB
1GB, 2GB, 4GB
30GB
60GB, 80GB
11 iPod nano (2nd generation) 2GB, 4GB, 8GB
13 iPod nano 3rd generation (video) 4GB, 8GB
iPod classic 160GB
iPod classic 80GB
Installing the iPod Dock Adapter
1. ChoosetheiPodDockAdapterthatfitsyour iPod(iftheadapter
is not included in the accessory, please use it that comes with
your iPod).
2. Insertyour iPod Dock Adapter into the dockuntil it sits firmlyin
place.
Note: Please refer to the owner’s manual that was included with your iPod for more details.
PausingPlayback
• Press the PLAY/PAUSE button.
• To resume playback, press the PLAY/PAUSE button again.
Skipping to a Another Track
• Press either the or button according to the desired direction.
• Press the button to skip to the beginning of the current track or previous track. Press the button to skip to the
beginning of the next track.
Locating a Particular Point on a Track
• Keepeitherthe or buttonpressedduringplayback,accordingtothedesireddirection,andreleaseatthedesired
point.
Inserting Your iPod
1. Ensure the appropriate iPod Docking Adapter is installed.
2. Insert your iPod into the connector in the dock.
3. Press the STANDBY/ON button to turn on the unit.
4. Press the FUNCTION button repeatedly until the indicator “iPod”
appears on the display.
5. Press the PLAY/PAUSE button to start playing.
Notes:
• The iPod will charge automatically (until fully charged) once it is
docked in the cradle.
• To prevent interference to the AM signal, please switch off the
iPod while the radio is playing.
This system supports a variety of equalizers and sound effects.
During playback, press the PRESET EQ button to select a desired music mode. Each time the PRESET EQ button is
pressed, the music mode will be changed to the next one as follows:
-> (ROCK) -> -> (CLASSIC)
PRESET EQ
TIMER SETTING
To CancelTimer
• Press and hold the TIMER button on the remote control until the TIMER indicator goes out.
To SetTimer
1. In standby mode, press and hold the TIMER button on the remote control until the TIMER indicator blinks.
2. Press and hold the PROG/MEM/ button until the hour digits blink.
3. Pressthe or buttonto adjust thedesired hours then pressthe PROG/MEM/ buttononce to confirm.Theminute
digits blink.
4. Press the or button to adjust the desired minutes then press the PROG/MEM/ button once to confirm.The
TIMER indicator will stop blinking and remain on.
5. The unit will wake up to “RADIO”, “ iPod” ,“CD” or “AUX IN” when the timer reaches the preset time.
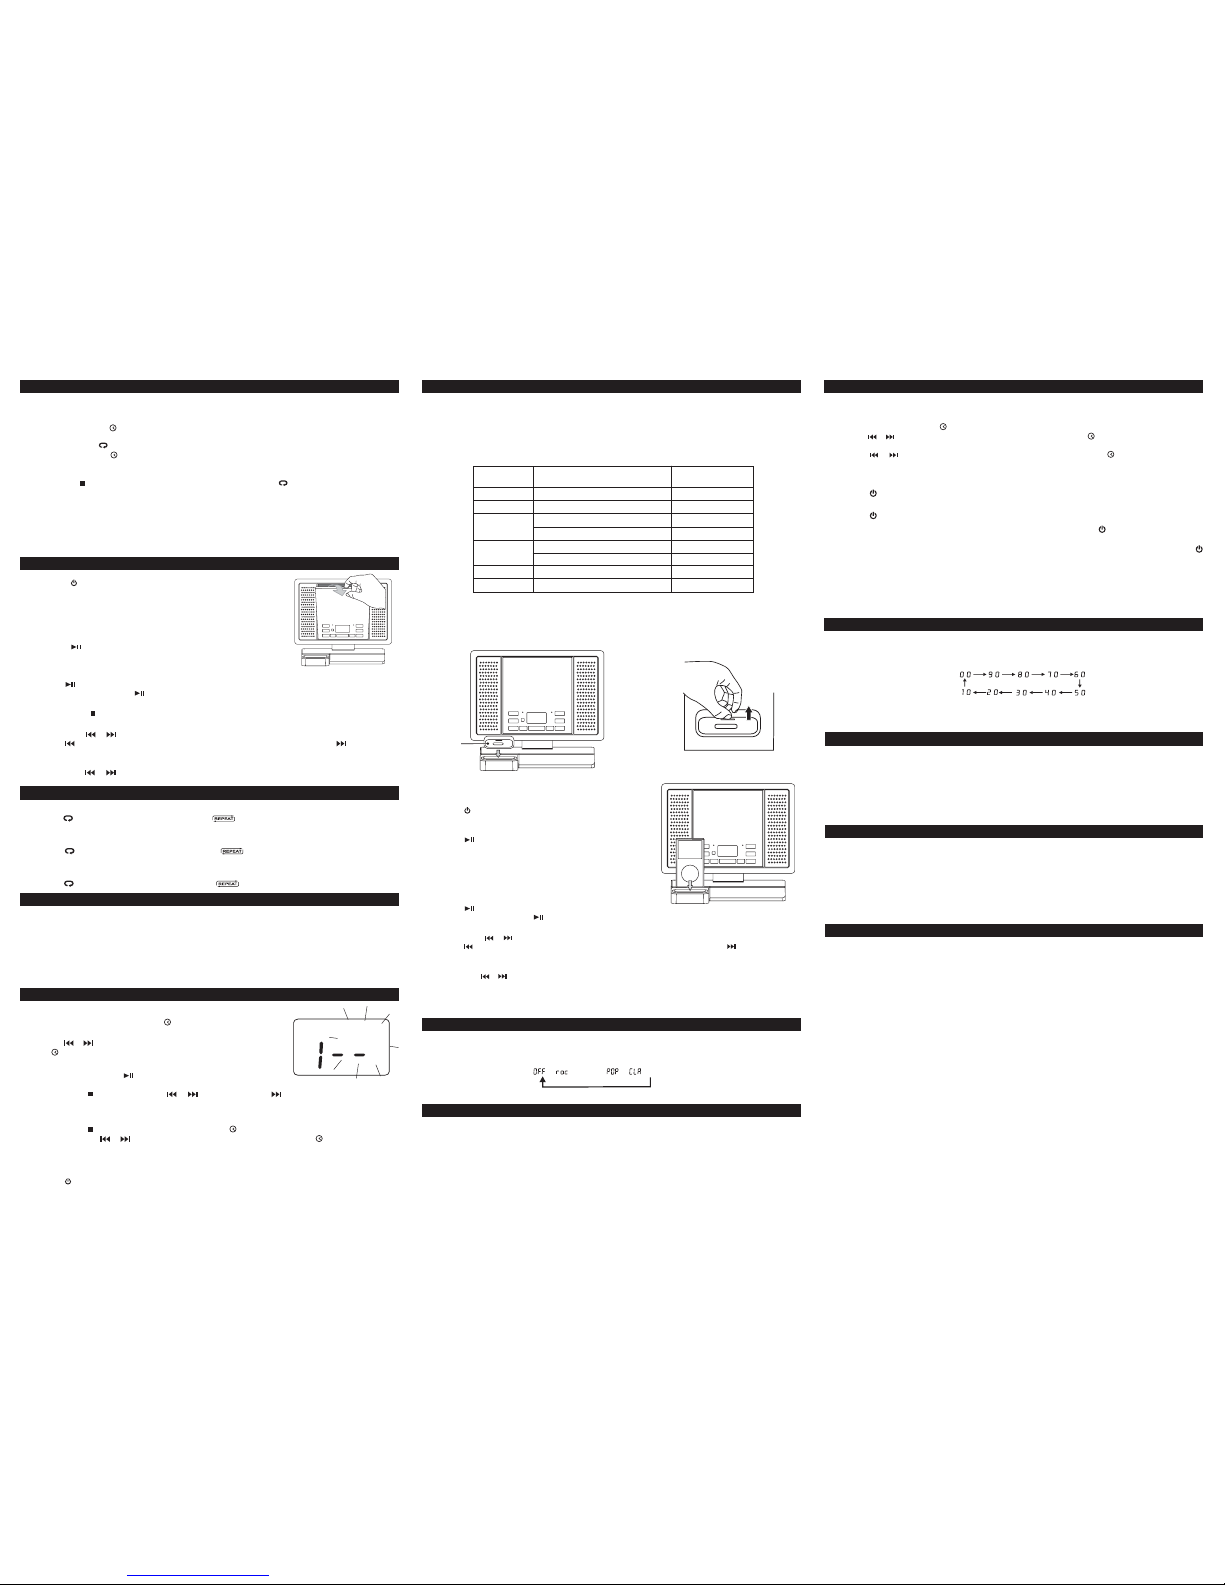
The sleep timer automatically turns the unit off after a certain time.
1. While the unit is on, press the SLEEP button and “
00
” appears on the display.
2. Press the SLEEP button repeatedly to select the desired sleep time as below:
3. The unit will automatically turn off once it counts down the sleep time.
• To clear the preset sleep time press the SLEEP button until “
00
” appears.
•For RADIO timer, first tune in to a desired station.
Press the STANDBY/ON button to enter standby mode, then set the timer following the above steps.
• For CD timer, first press the FUNCTION button to CD mode and insert one CD into the unit.
Press the STANDBY/ON button to enter standby mode, then set the timer.
• For AUX IN timer, first connect the plug to the AUX IN jack in back panel. Press the STANDBY/ON button to enter
standby mode, then set the timer.
The timer function will turn the unit on at a preset time.
• For iPod timer, first insert your iPod into the connector,Press the FUNCTION button to iPod mode. Press the
STANDBY/ON button to enter standby mode, then set the timer.
Note:Before setting timer, you can adjustthe volume levels in RADIO/ CD/iPod/AUX IN mode for the timer.
SLEEPTIMER SETTING
AUX IN CONNECTION
Listening to the Connected Device
1. Press the FUNCTION button to AUX IN mode and“AU”is shown on the display.
2. Turn on the audio device you’ve attached to the AUX IN jack.
Connecting to AUX IN for Other Sound Sources
You can connect audio devices such as your iPod or CD players to the unit through the AUX IN jack.Use the Line-in
cable (not supplied), connect the AUX IN jack on the back panel to the Line Out or Earphone jack of the other audio
devices.
MAINTENANCE
Cleaning the Unit
Cleaning the CD
If the CD skips or will not play, the disc may need to be cleaned.
Before playing, wipe the disc from the center outwards with a cleaning cloth. After playing, store the disc in its case.
Handling the Disc
Only touch the CD on the edge to avoid fingerprints on its surface.
Do not stick paper or tape nor write anything on the surface.
Do not use volatile chemicals on this unit. Clean by lightly wiping with a soft cloth.
TROUBLESHOOTING GUIDE
PROBLEMS SOLUTIONS
• Make sure FM antenna wire is fully extended.
• Electrical interference in your home can cause poor reception. Move the
unit away from them (especially those with motors and transformers).
• Rotate the unit horizontally.
RADIO
Poor FM reception
System does not turn on • Make sure AC adapter is secure in the outlet, and outlet has power.
• Make sure you’ve selected CD mode.
• Make sure disc label is facing up.
• Make sure disc is clean.
• Pause mode is activated.
• Disc may be damaged or dirty; check disc.
• Makesuretheunitisonasecurespot.Vibrationorjarringcancausethedisc
to skip.
Disc in place but unit won’t play
Disc skips
iPod does not dock properly or does
not install properly. • Remove your iPod from the dock and check for obstruction on the
connectors in the dock and on your iPod.
• Makesure that your iPodis working properly beforedocking into the unit.
Please refer to your iPod manual for details.
iPod does not respond to the speaker
system.
iPod
Poor MW reception
CD
Design and specifications are subject to change without notice. Printed in China
811-710791W040
CD Mode
1. During playback, press the DISPLAY button repeatedly to shuffle between the CD playback mode and the current
time.
2. When stopped, press the DISPLAY button to shuffle between the total number of CD tracks and the current time.
iPod/AUX IN Mode
• Press the DISPLAY button to shuffle the “iPod” or “AU”icon between the current time.
DISPLAY FUNCTION
Radio Mode
• Press the DISPLAY button to shuffle between the current radio station and the current time.
Note: No Alarm (Buzzer Timer) feature is provided in this unit.