SONIQ E40S12A-AU User manual
Printed in China
E40S12A-AU
HOTLINE
AUSTRALIA : 1300 765 663
NEW ZEALAND: 0800 100 236
.
.
40" LED LCD SmartTV
Instruction Manual

Table of Contents
Table of Contents
Table of Contents...................................................................................... ... .................1
IP Terms and Conditions...……….................................................................. ... ...... .....2-6
Introduction…………………….......................................................................... .............7-10
Package Contents…………................................................................................ . ....... ..11
Introduction…………….…................................................................................. .. .........11
Main Unit Control………....…………..................................................................... .......12-13
Front Panel…………………….......................................................................................12
Rear Panel…………………….................................................................................... . . ..13
Connection and Setup…………………………….............................................................14-17
Connecting the Power Cord…………………………............................................... . .. . . ... ..14
Connecting HDMI/VGA/PC Signals………….…………………........................... . . . ............14
YPbPr Connection…………….………………................................................................. ..15
OPTICAL/Line Out Connection………………............................................................. . ....15
USB Connection…….………….....................................................................................16
ANT IN Connection…………………............................................................. ... ... ............16
Ethernet/SD/MMC Connection………......................................................................... ...17
AV Connection………………….……............................................................. .... . . . . . ........17
Remote Control………………………....................................................................... ... ...18-20
Remote Control Key Functions……………......................................................................18
Remote control for Smart TV....…………….....................................................................19
Using the Remote Control....................................................................................... . . ...20
Remote Control……………………..................................................................................20
Notes on Using Batteries…………………........................................................................20
Smart TVFunction (HOME Menu)……...….....……………...............................................21-36
Accessing HOME menu ……….…………………....................................................... ... .......21
Wired Network Connection……….............................................................................22-23
Wireless Network connection……...................................................................... ... ...24-25
Tips for Network Setting.................................................................................... ...........26
Application Program Functions........................................................................ ........27-33
Updating the TV Firmware.......................................................................................34-36
OSD Menu Operation…………………………..................................................................37-44
CHANNEL MENU……….……………………………......................................................37-38
PICTURE MENU….……………………………………............................................. .......38-39
SOUND MENU….………………………………..................................................................39
TIME MENU…………………………………………….............................................. ... ....39-40
OPTION MENU……………………………………….............................................. ... ..........40
LOCK MENU………………………….…...........................................................................41
PVR FUNCTION…………………….……....................................................... ... .........41-43
EPG…………………………………………...................................................................43-44
Specification.............................................................................................................45-46
Troubleshooting........................................................................................................47-48
-1-
Smart TV Terms and Conditions
-2-
IP Terms and Conditions SONIQ Smart TV END USER SOFTWARE LICENCE AGREEMENT -
IMPORTANT, READ CAREFULLY BEFORE PROCEEDING
This is a licence agreement between You and Soniq granting you a licence to use the Software. By using the Software
you are deemed to have accepted the term s of this Agreement. If you do not accept the terms of this Agreement
do not use the Software.
Soniq does not store an individual copy of this Agreement entered into with you and we recommend that You save
a local copy of this Agreement for Your own record. A copy of this Agreement can be found at www.soniq.com.au/terms
If you are under 18 years of age you must obtain a parent/guardian's consent before using the Software.
1. Definitions
In this Agreement:
"Agreement" means this licence agreement between You and Soniq comprising the terms You accept by using
the Software;
"Authorised Purposes" means the non-commercial use by You of the Software as a platform to access Content;
"Content" means content provided by both Soniq and third parties via the internet that You access using the
Software;
“Smart TV" means the television sets produced by Soniq that are capable of connecting to, and downloading
content from, the internet through the use of the Software.
"Software" means the software integrated into Soniq's Smart TV sets;
"Soniq" means Quatius Digital Media Pty Ltd (ACN 133 185 681) trading as Soniq;
"Term" means the period beginning on the date you accept this Agreement and ending on termination of the
Agreement in accordance with clause 6;
"Third Party Content" means any Content that is created by someone other than Soniq; and
"You" or "Your" means you or any user of the Software.
2. Licence
2.1 Subject to the terms and conditions of this Agreement, Soniq grants to You a non-exclusive and non-transferable
licence during the Term to use the Software for the Authorised Purposes.
2.2 Use of the Software signifies Your acceptance of this Agreement.
2.3 Any use of the Software other than as expressly authorised by this Agreement, or any resale or further
distribution of the Software by You, constitutes a material breach of this Agreement and may violate applicable
copyright law.
3. Changes to this Agreement
3.1 Soniq is permitted to alter this Agreement from time to time by giving You seven (7) days notice.
3.2 Your continued use of the Software after the notice period ends constitutes your acceptance of the modified
Agreement.
3.3 If You do not accept the modified Agreement you must immediately stop using the Software.
4. Restrictions on use
4.1 You must not, and must not permit any third party to:
(a) access or duplicate the Software for any purpose other than as reasonably necessary to use the Software
as contemplated by this Agreement;
(b) publish the Software, or use the Software other than for the Authorised Purposes;
(c) except as expressly authorised by law, reverse engineer, disassemble, decompile, translate, reconstruct,
transform or extract the Software or any portion of the Software;
(d) except as expressly authorised by law or as permitted using the Software's standard menu option, change,
modify or otherwise alter the Software including by disabling any feature or blocking any advertisement
or message intended to be displayed;

Smart TV Terms and Conditions Smart TV Terms and Conditions
-3- -4-
(e) transfer, pledge, rent, share or sublicense the Software;
( f ) defeat or circumvent, attempt to defeat or circumvent, or authorize or assist any third party in defeating
or circumventing controls on the use of copies of the Software; or
(g) engage in any conduct or activity that may cause damage to the Software, disrupt access to the Software
or otherwise interfere or affect the performance of the Software.
5. Access and support
5.1 You are responsible for accessing and using the Software. Soniq is not obligated to provide You with any
services or technical support in relation to the Software under this Agreement.
5.2 Soniq may at any time and in its sole discretion:
(a) disable or suspend Your access to the Software; or
(b) screen, filter, review, modify, block or refuse access to any Content that may be accessed by the Software,
but is under no obligation to do so.
6. Termination
6.1 Without prejudice to any of its other rights, Soniq shall be entitled to terminate the licence granted by this
Agreement without liability:
(a) on five (5) days notice to You, at Soniq's sole discretion; or
(b) for cause at any time without notice if You commit a material breach of this Agreement.
6.2 You may terminate this Agreement on seven (7) days notice by giving notice to Soniq at support@soniq.com.au
or by permanently ceasing to use the Smart TV.
6.3 The termination of this Agreement does not affect any rights, obligations or liabilities that Soniq has accrued
under the Agreement prior to termination.
6.4 On the expiration or termination of this Agreement, Soniq will terminate Your access to the Software.
Sections 4, 7, 10, 12,13, and 14 will survive the expiration or termination of this Agreement.
7.I ntellectual Property
7.1 Content provided by Soniq forms part of Soniq's intellectual property.
7.2 Soniq reserves all rights in the Software not expressly granted by this Agreement. All copyrights, trademarks
and other conceivable intellectual property rights in and to the Software (including, but not limited to, all code,
data files, images appearing in the Software and screen displays as well as any and all documentation relating
to the Software) are owned or licensed by Soniq, and are protected by law.
7.3 Third Party Content may be subject to third party intellectual property rights, including but not limited to
copyright, trade mark and design rights.
7.4 The licence granted by this Agreement is a bare licence to use the Software and does not grant any right in
Soniq's intellectual property or any third party intellectual property displayed or accessed via the Software.
7.5 Soniq does not authorise any act that would infringe Soniq's intellectual property or any third party intellectual
property rights including but not limited to the reproduction, distribution, sale, modification or grant of licence
in any intellectual property owned by a third party.
7.6 You hereby indemnify Soniq for all loss and damage suffered by it due to Your breach of any of Soniq's or a
third party's intellectual property rights.
8. Internet Usage
8.1 Use of the Software requires an internet connection. It is Your responsibility to obtain and maintain an
internet connection at your cost.
8.2 Soniq uses the Software to promote goods and services offered by Soniq and third parties. These
advertisements will require You to download Content from the Internet and may incur costs from Your
internet service provider.
8.3 Any Content You access via the Software may result in additional downloads and may incur costs from Your
internet service provider.
8.4 You are entirely responsible for making enquiries with Your Internet Service Provider as to the costs incurred
by using the Software or downloading Content via the Software.
9. Software Usage
9.1 Soniq does not guarantee that Your use of the Software will be uninterrupted and Your ability to use the
Software will be affected by the performance of Your internet which is the responsibility of Your internet
service provider.
9.2 You must supervise and control the use of the Software and ensure that all use of the Software is for the
Authorised Purposes and in accordance with this Agreement.
10. Content
10.1 Soniq does not warrant that any Third Party Content, including any links to third party websites, is safe to
access, free from viruses and malware, correct or reliable. All Third Party Content is entirely the
responsibility of the third party supplier and is accessed at Your risk.
10.2 By using the Software You may be exposed to Third Party Content that You find offensive, indecent,
objectionable or unlawful.
10.3 You agree that Soniq is not responsible for examining or evaluating Third Party Content and Soniq makes
no representations as to the suitability of Third Party Content.
10.4 Soniq does not warrant, guarantee or make any representation:
(a) regarding the accuracy, adequacy, reliability, completeness or timeliness of the Content;
(b) that the Content is free from human or mechanical error, technical inaccuracies or other typographical
errors or defects; or
(c) that the Content is suitable for Your intended use.
10.5 The use of any Content is at Your own risk.
10.6 All warranties, representations and statutory guarantees and any liability which may arise in relation to
Your access to the Content is expressly excluded to the maximum extent permitted by law.
10.7 If You have any concerns about Content supplied by Soniq accessed through the Software please contact
Soniq at support@soniq.com.au. If you have concerns about the Third Party Content, please contact the
Australian Communications and Media Authority on 1300 850 115.
11. Updates
11.1 From time to time, Soniq may (but is not obliged to) create a new, updated or enhanced version of the
Software in which case Soniq may (but is not obliged to) make it available to You. A fee may apply.
11.2 If Soniq makes updated Software available to You:
(a) Soniq may require You to use it instead of a superseded version;
(b) changes to the Software or its content cannot be reversed;
(c) information or data provided by You under the superseded version may be cleared and may need to be
recreated or entered again;
(d) this Agreement will apply unless Soniq specify otherwise; and
(e) Soniq does not guarantee that any superseded version will remain available.
12. Liability and Disclaimers
12.1 All Software is provided on an "as is", "as available" basis. You acknowledge that the Software, due to its
nature, cannot be guaranteed error free and You accept that the existence of such errors shall not be
construed as a breach of this Agreement of section 54 of the Australian Consumer Law Schedule to the
Competition and Consumer Act 2010 (Cth) as amended ("ACL").
12.2 You are solely responsible for ensuring the Software is suitable for Your purposes, including the Approved
Purposes. You have not made known to Soniq any particular purpose for which You require the Software.
12.3 Except as specifically stated herein, or as contained in any express warranty provided in relation to the
Software, the Agreement does not include by implication any other term, condition or warranty in respect
of the quality, merchantability, acceptability, fitness for purpose, condition, description, assembly,
manufacture, design or performance of the Software or any contractual remedy for its failure.
12.4 You acknowledge that:
(a) You have not relied on any service involving skill and judgement, or on any advice, recommendation,

Smart TV Terms and Conditions Smart TV Terms and Conditions
-5- -6-
information or assistance provided by Soniq in relation to the Software or its use or application.
(b) You have not made known either expressly or by implication, to Soniq any purpose for which You require
the Software and You have the sole responsibility of satisfying Yourself that the Software is suitable
for Your intended use.
12.5 If You are a consumer as defined in the ACL, nothing in this Agreement restricts, limits or modifies Your
rights or remedies against Soniq for failure of a statutory guarantee provided under the ACL.
12.6 If clause 12.5 does not apply, then other than as stated in the Agreement or any written warranty
statement, Soniq is not liable to You in any way howsoever arising under or in connection with the sale,
licence, installation, use of, storage or any other dealings with the Software by You or any third party.
12.7 For clarity, except to the extent of any liability imposed by the ACL:
(a) Soniq will not be liable to any party in any way for any injury, loss or damage arising out of or related to
the use (or the inability to use) the Software,
(b) Soniq will not be liable for any direct, indirect, incidental, special or consequential loss or damage,
including loss of programs or data, corrupted programs or data, deleted programs or data, or the cost
of servicing or replacing equipment.
12.8 Nothing in this Agreement is to be interpreted as excluding, restricting or modifying the effect or application
of any legislation that cannot be so excluded, restricted or modified.
13. Privacy and Security
13.1 Any personal information provided by You to Soniq via the Software will be held on a database maintained
by or on behalf of Soniq.
13.2 The information on this database may be used, stored and transmitted by Soniq in accordance with the
Online Privacy Policy. For example, Soniq may use this information for marketing, planning, product
development, research and other commercial purposes. For further details, please refer to Soniq's
Online Privacy Policy www.soniq.com.au.
14. Miscellaneous
14.1 Notice. Soniq may deliver any notice to You via pop-up window, dialog box or other means, even though
you may not receive the notice unless and until You launch the Software. Any such notice will be deemed
delivered on the date Soniq first makes it available through the Software, irrespective of when You actually
receive it.
14.2 Complete Agreement. This Agreement constitutes the complete Agreement between the You and Soniq
and supersedes all previous communications and representations or agreements, either oral or written,
with respect to the Software.
14.3 Waiver. Any failure by Soniq to insist upon or enforce strict performance of any provision of this Agreement
shall not be construed as a waiver of any such provision or right. Any waiver is only valid if in writing and
only to the extent set out in the waiver.
14.4 Severability. If a provision is unenforceable it must be read down to be enforceable or, if it cannot be read
down, the provision must be severed from the Agreement, without affecting the enforceability of the
remaining provisions.
14.5 Governing Law. This Agreement will be governed by the laws of the State of Victoria, Australia.
14.6 No Third Party Beneficiaries. This Agreement is intended solely for the benefit of You and Soniq. No
person not a party to this Agreement may bring a cause of action pursuant to this Agreement as a third
party beneficiary hereof.
14.7 Spam. The publication of Soniq's email addresses in this Agreement is to facilitate communications
relating to the Software supplied by Soniq. It must not be inferred as consent by Soniq to receive
unsolicited commercial electronic messages.
15. Customer Comments and Improvements.
15.1 Soniq welcomes your comments concerning the Software, including notice that You have experienced a
Software failure, error or other malfunction and suggestions for additional or different features and
functions. Please send Soniq Your comments and suggestions to support@soniq.com.au or by using the
web form located at http://www.soniq.com.au/index.php/login-logout.html.
15.2 Soniq is under no obligation to respond or act on to any such comments or suggestions, but You grant
Soniq a perpetual, irrevocable, fully paid-up, royalty-free, worldwide right and licence under your
intellectual property rights (if any) to implement Your comments and suggestions in the Software and any
other products and services offered by Soniq, its affiliates, and their respective licensors, licensees,
successors and assigns.

-7- -8-
Safety Instruction Safety Instruction
IMPORTANT SAFETY INSTRUCTIONS
WARNING
TO PREVENT FIRE OR SHOCK HAZARD,DO NOT USE AN EXTENSION CORD,
RECEPTACLE OR OTHER OUTLET.
TO PREVENT FIRE OR SHOCK HAZARD,DO NOT EXPOSE THIS APPLIANCE
TO RAIN OR MOISTURE.
TO PREVENT ELECTRICAL SHOCK,INSERT THE MAIN PLUG FULLY INTO
THE SOCKET OUTLET.
This lightning flash with
arrowhead symbol in an
equilateral triangle alerts
users to the presence of
uninsulated dangerous
voltage within the
products enclosure that
may be of sufficient
magnitude to constitute
a risk of electric shock to
persons.
Warning:To reduce the risk of
electric shock,do not remove
cover(or back).No user
serviceable parts inside.Refer
servicing to qualified service
personnel.
The exclamation mark
within an equilateral
triangle alerts users
to the presence of
important operating
and maintenance
(servicing)instructions
in the literature
accompanying the
appliance.
This applianceshould not be exposed to water and no object filled with liquid such as a vase should be placed on
the unit.
IMPORTANT INFORMATION
If a television is not positioned in a sufficiently stable location,it can be potentially hazardous due to falling.
Many injuries,particularly to children,can be avoided by taking simple precautions such as:
Using cabinets or stands recommended by the manufacturer of the television.
Only using furniture that can safely support the television.
Ensuring the television is not overhanging the edge of the supporting furniture.
Not placing the television on tall furniture (for example,cupboards or bookcases)
without anchoring both the furniture and the television to a suitable support.
Not standing the televisions on cloth or other materials placed between the
televisionand supporting furniture.
Educating children about the dangers of climbing on furniture to reach the television
or its controls.
CAUTION
1. Read instructions-All the safety and operating instructions should be read before the appliance is operated.
2. Retain instructions-The safety and operating instructions should be retained for future reference.
3. Heed warnings-All warnings on the appliance and in the operating instructions should be adhered to.
4. Follow instructions-All operating instructions should be followed.
5. Battery-Batteries shall not be exposed to excessive heat such as sunshine,fire or the like.
6. Earthing Connection-The apparatus shall be connectsd to a MAINS socket outlet with a protective earthing
connection.
7. Water and Moisture-The appliance should not be used near water.
8. Cart and Stands-The appliance should only be used with a cart or stand that is recommended by the
manufacturer.
9. Wall or Ceiling Mounting-The appliance should be mounted to a wall or ceiling only as recommended by the
manufacturer.
10. Ventilation-The appliance should be well situated so that its location or position does not interfere with its proper
ventilation.
11. Heat-This appliance should be placed away from heat sources such as radiators, heat registers and stoves.
12. Power Sources-The appliance should only be connected to a power supply as described in the operating
instructions or as marked on the appliance.
13. Grounding or Polarization-Precautions should be taken.
14. Power Cord Protection-Power supply cord should be located so that it is not likely to be walked on, or pinched by
items placed upon it .
15. Cleaning-The appliance should be cleaned only as recommended by the manufacturer.
16. Power Lines-An outdoor antenna should be located away from power lines.
17. Outdoor Antenna Grounding-if an outside anternna is connected to the receiver,the antenna system must be
grounded so as to provide against voltages and built-uo static charges.
18. Non-use Periods-The power cord of the appliance should be unplugged from the outlet when left unused for a
long period pf time.
19. Objects and Liquids-Care should be taken so that objects do not fall,and liquids are not spilled into the
enclosure through openings.
20. Conditions Requiring Service-The appliance should be serviced by qualified service personnel
when:
The power-supply cord or the plug has been damaged.
Objects have fallen on or liquid has been spilled into the appliance.
The appliance has been exposed to rain.
The appliance does not appear to operate normally or exhibits a marked change in performance.
21. This appliance should not be exposed to water and no objects filled with liquids such as a vase should be placed
on the unit.

-9- -10-
Safety InstructionSafety Instruction
Warning
High voltages are used in the operation of this product.
Do not remove the back cover of the cabinet. Refer servicing
to qualified service personnel.
Warning
To prevent fire or electrical shock hazard, do not expose the
main unit to rain or moisture.
Warning
Do not insert foreign objects into the television’s slots
or openings. Never spill any kind of liquid on the television
receiver.
Caution
If the television is placed into a confined space, ensure
that the minimum distances are observed as shown.
Heat build up can reduce the service life of your
television, and can also be dangerous.
Caution
Never stand on, lean on, push or apply force to the
product or its stand.
You should pay special attention to children.
Caution
Do not place the main unit on an unstable cart stand,
sheif or table.
Serious injury to an individual, and damage to the
television, may result should it fall.
Caution
When the product is not used for an extended period
of time, it is advisable to disconnect the AC power
cord from the AC outlet.
Caution
Avoid exposing the main unit to direct sunlight and
other sources of heat. Do not position television
receiver directly on other products which give off heat.
e.g. video cassette players, audio amplifiers. Do not
block the ventilation holes in the back cover.
Ventilation is essential to prevent electrical failure.
Do not squash power supply cord under the main unit.
Caution
The panel used in this product is made of glass.
It can break if the product is dropped or if force is
applied to the panel. Individuals should execute caution
when dealing with broken glass should the panel break.
3cm
Exemptions
SONIQ is not liable for any damage caused by fires,natural disaster (such as thunderstorms,
earthquake,etc.),acts by the third parties,accidents,owner’s misuse or use in other
improper conditions.
SONIQ is not liable for incidental damages (such as profit loss or interruption in business,
modification or erasure of record data,etc.)caused by use or inability to use of product.
SONIQ is not liable for any damage caused by neglect of the instructions described in the
owner’s manual.
SONIQ is not liable for any damage caused by misuse or malfunction through simultaneous
use of this product and the connected equipment.
Power Indicator
Remote Control
Sensor Window
Extended
Warranty Cards
Warranty Card
Stand
AV CableYPbPr Cable
Main Unit Instruction Manual
Remote Control
AAA Batteries(x2)
Cleaning Cloth
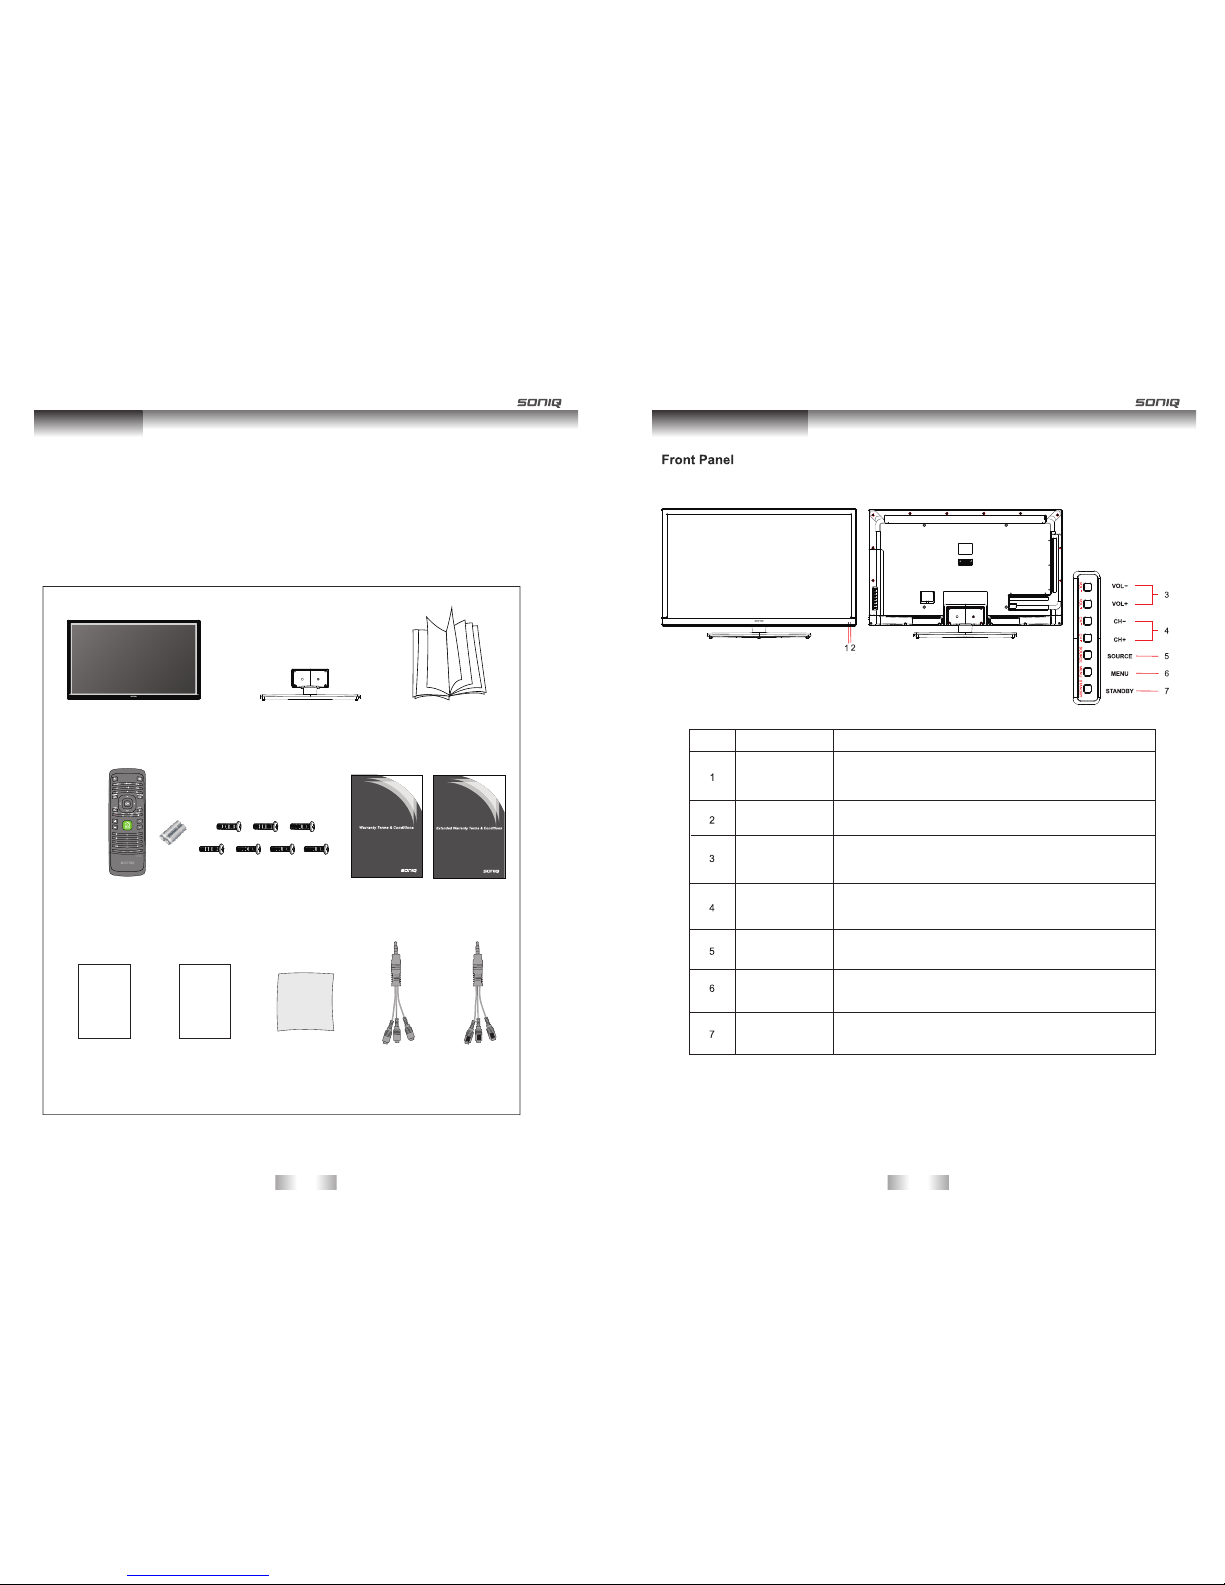
-11- -12-
Instruction Main Unit Control
Screws: 4x16mm BM(x7, Black,
one of them for spare)
Introduction
Thank you for purchasing the unit. Your unit will bring you years of high-quality viewing enjoyment. The television is
easy to operate and provides exceptionally high quality image. The manual will explain the operation of the unit,
including its functions, features and other important features. Before installing or operating your unit, please take the
time to thoroughly read this manual, particularly the sections on safety.
No. Name Description
Receives the signal from the remote control. Do not put any
objects in front of the window in order not to hinder the
reception of signals.
Flashes red when the unit is powered on;
Press VOL+ to increase volume,or VOL - to decrease.
At the OSD menu, press these buttons to move the selection
focus left and right to change settings.
Lights up red when the unit is in standby mode.
VOL+/-
CH+/-
SOURCE
MENU
STANDBY
Press these buttons to sequentially select channels.
When the OSD menu is on, press these buttons to move the
selection focus up or down to change settings.
Press to display all possible input signal sources.
Press to cycle through various sources.
Press this button to display the OSD menu.
When the OSD menu is on, press this button to exit the menu.
Press this button to turn the unit on when it is in standby mode.
Press this button once more to put it to standby mode.
Package Contents
Quick Start Guide Remote Control
Manual
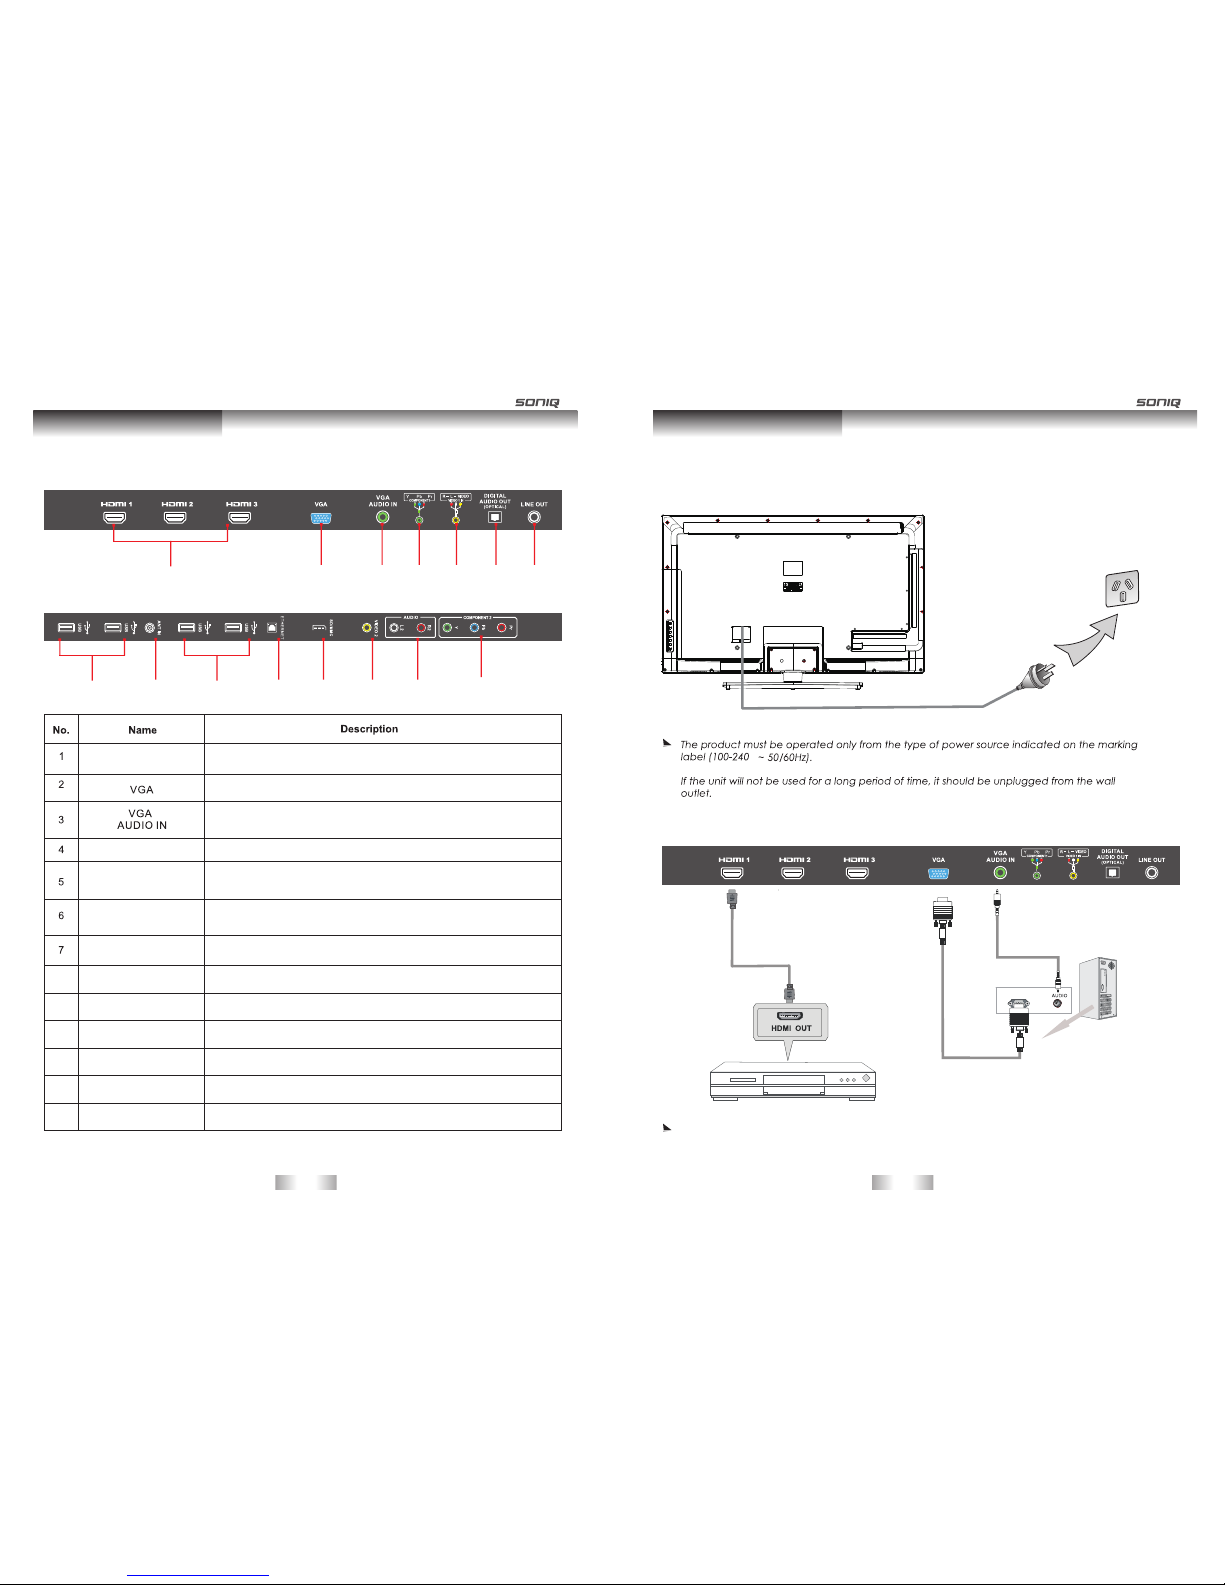
HDMI1/HDMI2
/HDMI3
COMPONENT1
/COMPONENT2
R-L-VIDEO VIDEO 1 IN
DIGITAL AUDIO OUT
OPTICAL
LINE OUT
Connect the HDMI signal.
Connect the PC VGA signal output of your personal computer.
DVI or PC VGA audio input.
Connect the component video signal .
Connect the OPTICAL to the Audio Amplifier using a optical cable.
8
9
10
11
12
13
USB
ANT IN
ETHERNET
SD/MMC
VIDEO 2
AUDIO(R L)
Connect it to the home network.
Connect the audio and video output of your AV equipment to the
unit using the AV cable included in the spare part.
SD/MMC card reader slot.
Connect to the LINE IN of the Audio Amplifier.
Connect the audio output jack of AV equipment to the unit.
Connect USB device,such as USB Disk,USB Wi-Fi Dongle, HID and so on.
Connect the video output jack of AV equipment to the unit
Connect to external antenna.
1 2 3 4 5 6 7
Main Unit Control
Rear Panel
HDMI/VGA/PC Connection
Connection and setup
Connect the power cord directly to the wall outlet.
Wall outlet
Power cord
HDMI
Cable
Blue-Ray DVD or HD STB
VGA Cable
Audio Cable
VGA
To ensure the highest quality, we recommend users use our 5.1 blu-ray home theatre system ( SONIQ H100)
and HDMI cable ( AAC-HD150).
Connecting the Power Cord
-13- -14-
v
8 8
9 10 11 12 13 4
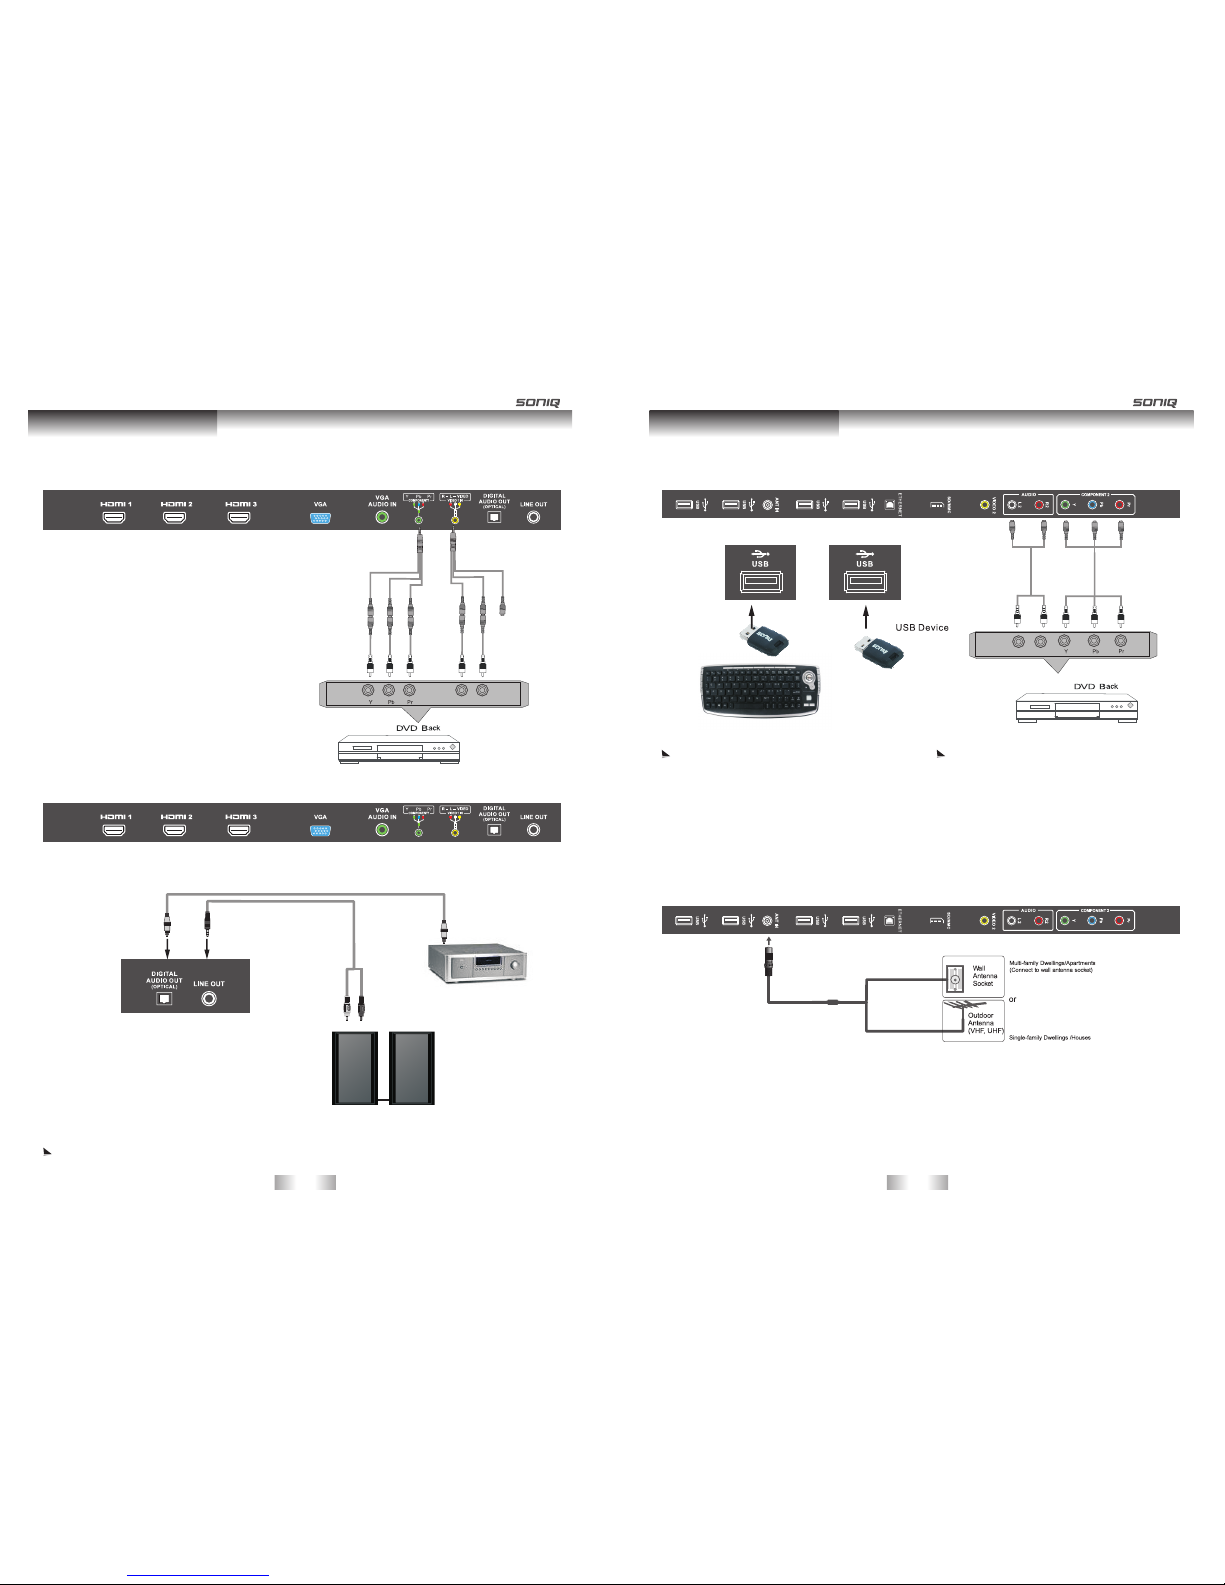
COMPONENT1 Connection
Audio Amplifier
OPTICAL/Line out Connection
Connection and setup
USB Connection /COMPONENT2
ANT IN Connection
Connection and setup
-15- -16-
To achieve excellent sound quality, we recommend users to use the high powered speakers such as the SONIQ CSA32 .
For more convenience, we recommend users use the SONIQ
CWK101 2.4G wireless keyboard.
We recommend users to use a USB drive for programme
such as the SONIQ CUD82.
SONIQ does not supply these cabl es.
USB Usage: This TV is equipped with four USB 2.0 Host interfaces, which can be used for the following functions:
- Connected for playing the media files stored in the memory storage.
- Connected for programe recording, i.e.PVR function
- Connect to the Wi-Fi Dongle for home network.
- Connect to the input device complying to the standard of HID for network and game operation.
RF Coa xi al C ab le(75 o hm )
Optical input
R L
YPbPr Cabl e AV Cable
YPbPr Outp ut
YPbPr Cabl e
YPbPr Outp ut
L R
AV Input Connection
Ethernet/SD/MMC Connection
Connection and setup
Router or Switch SD/MMC card
R L VIDEO
AUW 100 or AUW 300 802.11n Wi-Fi
Dongle with SONIQ brand when
there is no network cable. For details,
please consult the provider.
Remote Control
Turns the TV On or Off. Mute all sounds.
SUBTITLE button
Displays your preferred subtitle in
digital mode.
/AUDIO button
Press to select sound output mode.
INFO button
Views the information of the current
programme and screen.
Control buttons:
Controls the contents,PVR, USB or the
compatible devices.
/ / / / / buttons
MENU button
Press to display the main menu.
SOURCE button
Press to pop up all possible input sources.
Navigation buttons:( / / / )
Scrolls through menus or options .
OK:Selects menus or options and confirms
your input.
EXIT button
Press to exit the current menu.
REC button
Use to record a programme.
PVR.L button
Press to display the PVR Setting List.
All Apps button
Press to enter Apps interface under HOME mode.
SLEEP button
Press to activate sleep timer.
EPG button
Open or close EPG menu.
Adjusts the volume level.
/button
Accesses the HOME menu.
button
/button
Scrolls through the saved programme.
Numerical buttons:
Press 0-9 to select a TV channel
directly when watching TV.
Press to return to the previous channel.
button
button
Accesses your favorite programme list.
These access special functions in some
menus.
/button
/ /
button Mute button
-17- -18-
LAN
AV Cabl e
Wi-Fi Dongle
Router or Switch
Video/Audio output
Video/Audio output

Equiva lent to the left mouse button .
Caps Loc k button, under Character
mode, pr ess this button to dis play
supers cript.
Caps but ton
left mou se button
Enters h ttp://
button
Enters w ww
button
Enters . com
button
Insert s a space.
button
Enters l etters under ordinary mod e.
Letter b uttons
Direct ion buttons:( / / / )
Contro ls the direction movement s
of the mou se.
Remote Control for Smart TV
Press to e nter the ALL Apps interface under H OME menu.
button
Sets key board shortcuts to l aunch applications. (Th is
button c an only work when using toget her with another
key on the k eyboard remote control. )
Note: This function can be re alized by entering
Settin gs, then open the link of "quic k launch" to do the
follow ing ope rations.
button
Return s to the previous level.
button
Press to r eturn to the HOME menu .
button
Press this combination button to display lowercase of the Main Body under ordinary mode, press to switch to
capital letter. Press to enter Superscript input mode, whereas press to enter Subscript input mode.
Main Body
Superscript
Subscript
Remote Control
Enters c omma.
button
Enters f ull stop.
button
Press to s witch to the interne t link.
button
Equiva lent to the right mouse butto n.
Press to s witch between Table a nd
Point.
button
Alphanu meric buttons
Press th is button to switch am ong
capita l letters , numbers an d marks .
Delete s letters, numbers and mark s.
button
Remote Control
-19- -20-
with .
Right mo use button
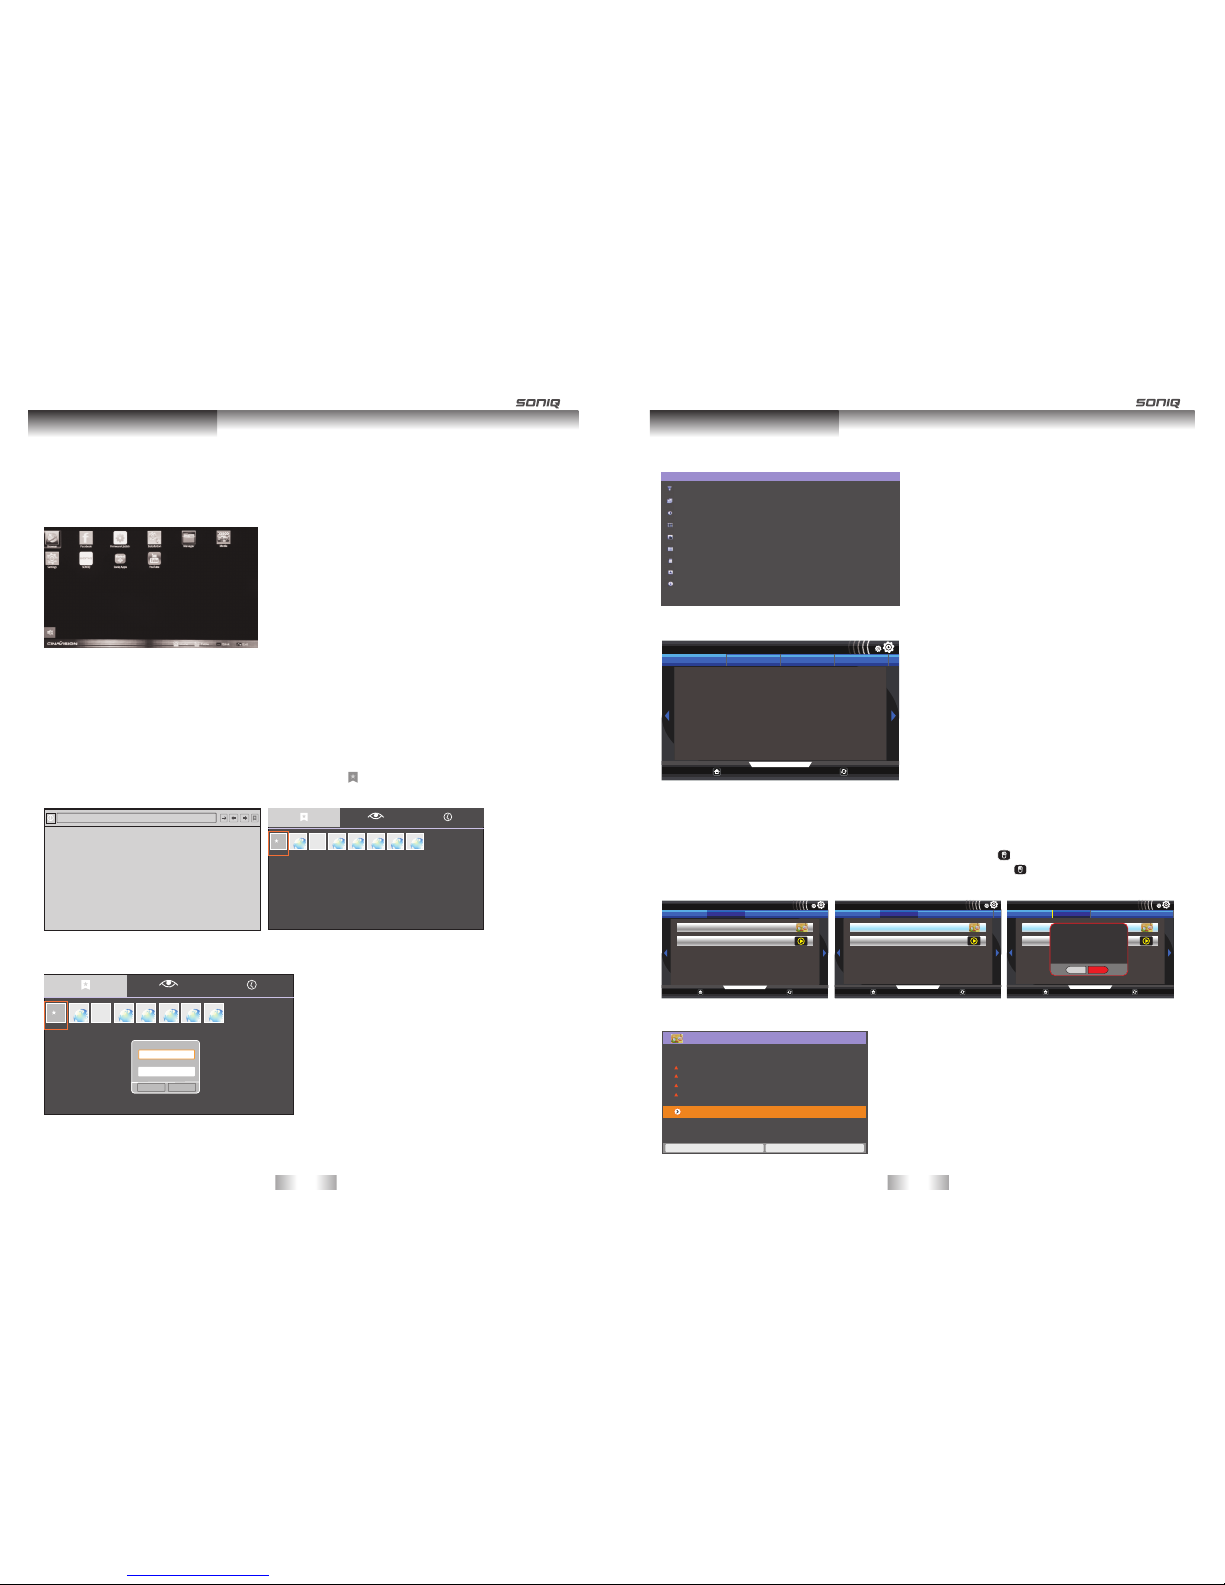
Accessing HOME menu.
1.Turning on the TV will automatically enter HOME menu, or you can either Press HOME button to access the
HOME menu.
2.Press the Navigation buttons or SOURCE button to scroll to one of the following menus and press OK.
3.Press the Navigation buttons to scroll to the setting or option you want and press OK. When finished, press EXIT.
Smart TV Function
12
3
5
6
7
4
Option
Description
① SOURCE section.
②
③ The current playing video or programme.
④ Online shops.
⑤ Online Apps.
⑥ Application program section.
⑦ Operating info section.
Status info, including date, time and network status.
Option
①
②
③
④
⑤
⑥
Description
Operating info section
Press HOME button on the remote control to open or close HOME menu.
Press this button on the remote control to switch between Table and Point.
Press red key on the remote control to highlight All Apps.
Press green color key on the remote control to pop up the “ current task”.
Press yellow color key on the remote control to enter Online Apps.
Press blue color key on the remote control to enter the website of online Shops.
Application Program Functions
SONIQ's Smart TV allows you to access a variety of online services or contents directly on your TV. Your TV offers
instant streaming of movies, weather, videos, and photo album services and internet connection. Enjoy entertainment
including not only entertainment content, but also up-to-the minute news, weather updates, photo management,
and more by simply using the TV's remote control without a separate PC.
Network Connection
Remark: Network speed requirement is pretty important to this TV. Please keep online network open, if there are
any problems with your network connection please contact your internet provider or refer to router manual.
Smart TV Function
Connecting to a wired network
Connect the TV to a local area network (LAN) via the LAN port as shown in the following illustration and set up the
network settings.
If wired and wireless networks are both available, wired is the preferred method.
After making a physical connection, a small number of home networks may require the TV network settings to be
adjusted. For most home networks, the TV will connect to automatically without any adjustments.
For detailed information, contact your internet pro vider or refer to router manual.
CAUTION
Do not connect a modular phone cable to the LAN port.
Since there are various connection meth ods, please follow the specifications of your
telecommunication carrier or internet service provider.
After connecting the LAN port, use SONIQ Apps menu.
To set up the network settings: (Even if your TV has already connected automatically, running settings again does
not harm anything), refer to below:
1. Press Home to access the Home menu.
2. Press the Navigation buttons to scroll to Settings and press OK.
LAN
Ethern et
Router
-21- -22-
3. Press the Navigation buttons to scroll to Ethernet configuration and press OK.
Settings
Wireless & networks
Ethernet configuration
Display
Security Settings
Applications
Privacy
External Storage & internal storage
Language & keyboard
About Device
Smart TV Function
4. Press Ok button to mark Connection Type and press Save for confirm.
5. If wired and wireless are simultaneously con nected, the system will automatically default as wired connection.
6. If you have already set the Network Setting, select Resetting. The new connection settings will reset the current
network settings.
7. Connection Type:
-Static IP: If selecting Static IP, press the Navigation and Number buttons. IP address es will need to be input
manually.
Ethernet configuration
Ethernet
Ethernet configuration
Turn off Ethernet
Configure Ethernet devices
Configure Ethernet Device
Ethernet Devices:
eth0
Connection Type
Dhcp
Static IP
Ip address
192.168.1.184
Netmask
255.255.255.0
Default Router
192.168.1.1
DNS address
221.5.88.88
Save Discard
-DHCP: Select this if there is a DHCP server(Router) on the local area network (LAN) via wired connection, the
TV will automatically be allocated an IP address. If you're using a broadband router or broad band modem that
has a DHCP (Dynamic Host Configuration Protocol) server function. The IP address will automatically be
determined.
Ethernet configuration
Ethernet
Ethernet configuration
Turn off Ethernet
Configure Ethernet devices
Configure Ethernet Device
Ethernet Devices:
eth0
Connection Type
Dhcp
Static IP
Ip address
Netmask
Default Router
DNS address
Save Discard
Smart TV Function
-IP Manual Setting: Select if there is no DHCP server on the network or you want to set the IP address manually.
8. When you are finished, press EXIT.
Ethernet configuration
Ethernet
Ethernet configuration
Turn off Ethernet
Configure Ethernet devices
Configure Ethernet Device
Ethernet Devices:
eth0
Connection Type
Dhcp
Static IP
Ip address
192.168.1.184
Netmask
255.255.255.0
Default Router
192.168.1.1
DNS address
221.5.88.88
Save Discard
eth0
NOTE
If you want to access the Internet directly on your TV, the broadband internet connection should always be on.
If you cannot access the Internet, check the network conditions from a PC on your network.
When you use network settings, check the LAN cable or check if the DHCP in the router is turned on.
If you do not complete the network settings, the network may not work properly.
Connecting to a wireless network
The SONIQ Wireless LAN for Broadband Adap tor, which is sold separately, allows the TV to con nect to a wireless
LAN network.
The network configuration and connection method may vary depending on the equipment in use and the network
environment. Refer to the setup instructions supplied with your access point or wireless router for detailed
connection steps and network settings.
Setting up the AP (Access Point) or the wireless router is required before connecting the TV to the network the
easiest method is the WPS button method.
To set up the wireless & network settings,
1. Press Home to access the Home menus.
2. Press the Navigation buttons to scroll to Settings and press OK.
Remark: the TV only supports SONIQ AUW100 or AUW300 USB Wi-Fi Dongle which is sold separately.
-23- -24-
Wi-Fi Dongle
Smart TV Function
3. Press the Navigation buttons to scroll to Wireless & network settings and press OK.
Settings
Wireless & networks
Ethernet configuration
Display
Security Settings
Applications
Privacy
External Storage & internal storage
Language & keyboard
About Device
Wireless & network settings
Wi-Fi
Wi-Fi settings
Turn on wi-fi
Set up & manage wireless access points
4. Press the Navigation buttons to select Wi-Fi settings and press OK.
-Scan the all available AP or wireless routers within range and display them as a list.
5. Press the Navigation buttons to select an AP or wireless router on the list. (If your AP is secured, you will be
prompted for the key.) And press OK.
Wireless & network settings
Wi-Fi
Wi-Fi settings
Set up & manage wireless access points
Con necte d to TestRo om
Wi-Fi settings
Wi-Fi
Network notification
Notify me when an open network is available
Con necte d to TestRo om
Wi-Fi networks
TestRoom
connected
GOLDWER
gaikk0-4
Add Wi-Fi network
Wi-Fi settings
Wi-Fi
Network notification
Notify me when an open network is available
Con necte d to TestRo om
Wi-Fi networks
GOLDWER
gaikk0-4
Add Wi-Fi network
TestR oo m
Secu rity WPA/ WPA2 PSK
Sign al stre ngth Go od
Pass word
Show p asswo rd.
Show p asswo rd. Canc el
Note: The search status will be different depending on the home network of the users'.
6. Press the Number buttons to input the security key of AP and press OK.
7.When you are finished ,Press EXIT.
-25- -26-
Smart TV Function
Tips for Network setting
The reception quality over wireless depends on many factors such as type of the access point, distance
between the TV and access point, and the location of the TV.
To connect wireless AP, an AP that supports the wireless connection is necessary, and the wireless connection
function of the AP needs to be activated. Please enquire to the AP supplier for the possibility of AP wireless
connections.
Please verify the security settings of AP SSID for wireless AP connection, and enquire to the AP supplier for
the AP SSID security settings.
The TV can become slower or malfunction with wrong settings of network equipments (wired/ wireless router,
hub, etc). Please install correctly by referring to the manual of the equipment, and set the network.
When AP is set to include 802.11 n, and if Encryption is designated as WEP or WPA(TKIP/AES) and WPA2
hardware encryption schemes, the connection may not be possible. There may be different connection
methods according to the AP manufacturers.
Use a standard LAN cable with a RJ45 connector.
Many network connection problems during set up can often be fixed by re-setting the router or modem. After
connecting the player to the home network, quickly power off and/or disconnect the power cable of the home
network router or cable modem. Then power on and/or connect the power cable again.
Depending on the internet service provider (ISP), the number of devices that can receive internet
service may be limited by the applicable terms of service. For details, contact your ISP.
SONIQ is not responsible for any malfunction of the TV and/or the internet connection feature due to communication
errors/malfunctions associ ated with your broadband internet connection, or other connected equipment.
SONIQ is not responsible for problems within your internet connection.
Some content available through the network connection may not be compatible with the TV. If you have questions
about such content, please contact the producer of the content.
You may experience undesired results if the network connection speed does not meet the requirements of the
content being accessed.
Some internet connection operations may not be possible due to certain restrictions set by theInternet service
provider (ISP) supplying your broadband Internet connection.
Any fees charged by an ISP including, without limitation, connection charges are your responsibility.
A 10 Base-T or 100 Base-TX LAN port is re quired when using a wired connection to this TV. If your internet
service does not allow for such a connection, you will not be able to connect the TV.
ADSL modem is required to use DSL service and a cable modem is re quired to use cable mo dem service.
Depending on the access method of and subscriber agreement with your ISP, you may not be able to use the
internet connection feature contained in this TV or you may be limited to the number of devices you can
connect at the same time. (If your ISP limits sub-scription to one device, this TV may not be allowed to con nect
when a PC is already connected.)
The use of a “Router” may not be allowed or its usage may be limited depending on the policies and restrictions
of your ISP. For details, contact your ISP directly.
The wireless network operates at 2.4 GHz radio frequencies that are also used by other household devices such
as cordless telephone, Bluetooth® devices, microwave oven, and can be affected by interference from them.
It may decrease the service speed using Wire less network by surrounding wireless condition.
Turn off all unused network equipment in your local home network. Some devices may gener ate network traffic.
In some instances, placing the wireless router or access point higher up away from the floor may improve the
reception.
Browser: The web browser allows you to view web pages on your TV.
Using Browser
4. Input the address by operating the keyboard on the remote control or either on the screen.
5. Press OK to begin searching.
6. You can add Bookmarks by operating this function:4. Click icon at the top right of the page to pop up a
page, from which you can add bookmarks, view Most visited and History.
Smart TV Function
1. Connect to the network.
2. Press HOME to access the HOME menu.
3. Press the Navigation buttons to scroll to the Browser and press OK.
7. Choose Bookmarks by pressing Navigation buttons, choose Add icon and press OK button to display a
dialog box. Set up Name and Location, then choose OK to confirm.
Book ma rk s Most v is it ed Hist or y
mp3 -Goog le Hao1 23 mp3- Googl e SONIQ J B Hi Fi Goo gle Yahoo AB C.net
Add
Name
mp3 -Goog le sear ch
Loca ti on
htt p://www.google.co m/m?g
Can cel
OK
Bookm ar ks Most vi si te d Histo ry
mp3 -Goog le Hao1 23 mp3- Googl e SONIQ J B Hi Fi Goo gle Yahoo AB C.net
Add
htt p: // tv.s on iq .c om /na vi ga ti on
1. All Apps: Press the Navigation buttons to scroll to the All Apps and press OK, from the displayed window
you can operate any of the downloaded apps . SONIQ is able to provide more software packages
for users to download for usage through the internet, users just need to follow the steps to perform
during the downloading. SONIQ is not responsible for the legality of the software packages, as
some packages may contain viruses.
-27- -28-
Installation Manager: You can install update or uninstall any APK files to this Manager.
Settings
Wireless & networks
Ethernet configuration
Display
Security Settings
Applications
Privacy
External Storage & internal storage
Language & keyboard
About Device
Smart TV Function
Settings: Press to check all the network setting menu or wireless network setting type menu.
Before operating this function, please insert USB device stored with APK files to the unit(The APK files that users
download themselves may cause the system to work improperly, SONIQ will not be responsible for these
consequences.), so that the system can find these files for installation, or if you like ,you can also uninstall or
move them to the external or internal storage by referring to the following steps:
Step 1: scroll the cursor to Installation Manager, then press OK button or Left mouse button to enter the main
interface of Installation Manager. Click Install by using OK button or Left mouse button to display the
APK file list, select any of the files for installation.
A pop up window displays to prompt you to confirm the installation. Choose Yes to automatically enter the next step
Click install in this section to start installing.
Widget Update
Update
Home
1 / 1
Refresh
Install UnInstall On External Storge
com .rai nma n.c utt her ope _v4 .0.0
au. com. jbh ifi .no w.an dro id_ v1.0
Widget Update
Update
Home
1 / 1
Refresh
Install UnInstall On External Storge
com .rai nma n.c utt her ope _v4 .0.0
au. com. jbh ifi .no w.an dro id_ v1.0
Widget Update
Update
Home
1 / 1
Refresh
Install UnInstall On External Storge
com .rai nma n.c utt her ope _v4 .0.0
au. com. jbh ifi .no w.an dro id_ v1.0
Do yo u want to i nstal l this wi dget?
No Yes
Cut the Rope
Do you want to install this application?
Allow this application to:
Storage
modify/delete SD card contents
Your location
coarse (network-based) locatlon.fine location
Network communication
full Internet access
phone calls
read phone state and identity
!
!
!
!
Show all
Install Cancel
Cut the Rope
Widget Update
Update
Home
0 / 0
Refresh
Install UnInstall On External Storge
After finished, a prompt window automatically pop up to show finished installation.
Cut the Rope
Installing...
Cut the Rope
Application installed
To exit the current operation , press .
Step 2. To uninstall APK files, the above operation can be applied to this function by just operating Uninstall.
Step 3. On External Storage is another feature of Installation Manager. Enter Installation Manager by pressing
OK or Left mouse button, After On External Storage is selected, Press OK button or Left mouse
button to move any of the files from the displayed list to the external storage or internal storage. Refer
o the following pics.
Step 4. Update: Users can at all times update the version of APK files by highlighting Update.
Widget Update
Update
Home
1 / 1
Refresh
Install UnInstall On External Storge
Youda o Dict_ v1.6. 1
Apps M arket _v2.3
Stra ight Fl ush_v V3.00 .01
Do yo u want to c hange t his wid get?
No Yes
Widget Update
Update
Home
1 / 1
Refresh
Install UnInstall On External Storge
蒙特祖 玛的宝藏2.V 1.0.3
Youda o Dict_ v1.6. 1
Apps M arket _v2.3
Stra ight Fl ush_v V3.0 0.01
Str aight F lush
vers ion V3. 00.01
For ce stop Uni nst all
stora ge
Total
Applic ation
Data
Cle ar data Mov e to Exte rnal St orage
Clear c ache
Clear d efaul ts
Permi ssio ns
This ap plica tion ca n acces s the fol lowin g on your d evice :
Cache
Cache
launc h by defa ult
No defa ults se t.
Network communication
full Internet access
Storage
modify/delete SD card contents
Phone calls
read phone state and identity
!
!
!
2.16MB
2.16MB
0.00B
0.00B
7. Media: This function can allow you to view the shared media from the memory storage.
Note: Before operating Media function, plug in USB device.
1. Press HOME button to access the HOME menu.
2. Press the Navigation buttons to scroll to Media and press OK.
3. The Media link section will be displayed, select any icon by pressing Navigation buttons or
Red/Green/Yellow button to view the shared media in that category.
Media
Music Movie Photo
usb.b1 usb.a1
1 of 2/usb b1
Smart TV Function
Press this button to switch between random playback and sequence playback.
Press to switch between single cycle playback and list cycle playback Press
again to stop cycle playback..
Press to set the playback time of the picture.
Press to display the files by the order of letters or by time.
Press to select memory storage under Photo section and press OK.
Use Navigation buttons to choose corresponding file fold for viewing and press OK, you can either exit the current
window by moving to the Return icon then press OK.
Media
Music Movie Photo
movie new file folder
1 of 2/usb b1
usb test file usbrecord
Png Picture Music Media
Game DCIM Audio GGGGG
txt
LOST.DIR
Select any of the picture that you want to browse by pressing Navigation buttons and press OK.
Picture will be played in full screen.
You can have related operating to this picture showing at the bottom of this picture.
Music section
Press to highlight Music section, related information will be showed from the displayed window..
Media
Music Movie Photo
Smart TV Function
-29- -30-

Media
Music Movie Photo
00: 00 0 0: 00
usb.b1
usb.a1
Press to stop current music file playback.
Pause or play.
Fast backward .
Fast forward.
Play the previous one.
Play the next one.
Press to select all the music files under current page.
Press this button to switch between random playback and sequence playback.
Press to play the files by the order of letters or by time.
Press to switch between single cycle playback and list cycle playback.
Press again to stop cycle playback.
Press to select memory storage and press OK.
Use Navigation buttons to choose corresponding file folder for viewing and press OK, you can either exit the current
window by moving to the Return icon then press OK.
Media
Music Movie Photo
00: 00 0 0: 00
Smart TV Function
dcxa.wma
dcxa.wma
dcxa.wma
dcxa.wma
dcxa.wma
dcxa.wma
dcxa.wma
select any of the songs that you want to play by pressing OK, press OK again to unselect it. Press or PLAY button
to play it.
Media
Music Movie Photo
00:00 00:00
0000000000000000
AUDIO
DCIM
GOME
LOST.DIR
MEDIA
music
00:22 03:50
.
Use Navigation buttons to choose corresponding file fold for viewing and press OK, you can either exit the current
window by moving to the Return icon then press OK.
select any of the movie that you want to view by pressing OK button.
Media
Music Movie Photo
0000000000000000
AUDIO
DCIM
GOME
LOST.DIR
MEDIA
music
picture
Movie section
Press to highlight Music section, related information will be showed from the displayed window.
Media
Music Movie Photo
usb _b 1
usb _c 1
usb _a 1
sdc ar d
1 of 4/u sb_b1
Press to select memory storage and press OK.
Smart TV Function
Media
Music Movie Photo
Ashley Tisdale-He said sh e Sa id .M P4
Ashley Tisdale-He said sh e Sa id .M P4
Ashley Tisdale-He said sh e Sa id .M P4
Ashley Tisdale-He said sh e Sa id .M P4
Ashley Tisdale-He said sh e Sa id .M P4
Press to switch between single cycle playback and list cycle playback.
Press to play the files by the order of letters or by time.
-31- -32-
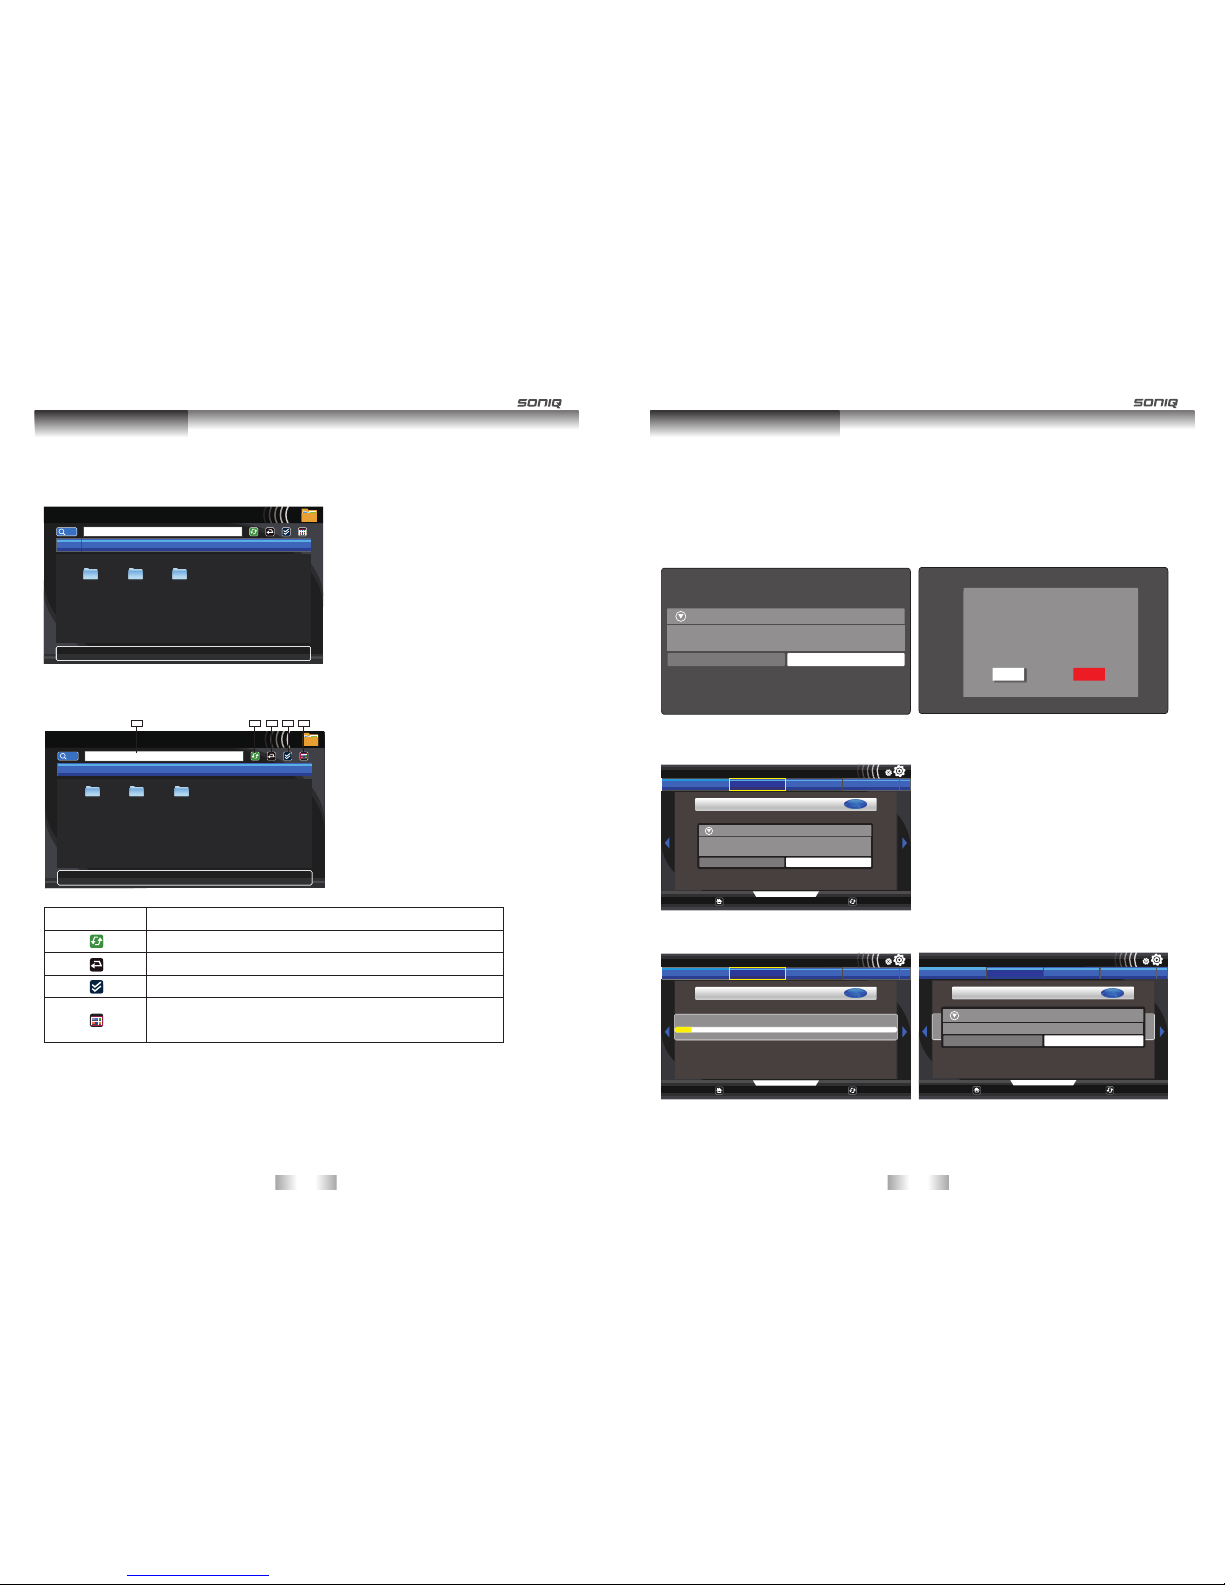
Press Navigation buttons to highlight Manager and press Ok to open the link of it.
File Manager
GO
home
usb .a 1 us b.b 1 usb .c1
Smart TV Function
Please first to insert the USB device to view shared files.
File Manager
GO
home
usb .a 1 us b.b 1 usb .c1
1 2 3 4 5
Input the file name to search the file you want from the USB.
Press to refresh the current files.
Press to return to the previous level.
Press to select one or multiselect the files.
Press to enter the multifunction interface , you can sort the files
by names or by sizes and so on by operating OK button.
Search Bar
The progress bar can be displayed at the bottom of the screen, press OK button to reveal or hide it.
Manager:Contents of APK can be viewed through this menu option.
Smart TV Function
Updating the TV firmware
In order to enhance the network quality of the TV, SONIQ will regularly through the internet provide software
updating, the process of updating is as simple as the following pictures indicated. Please refer to the following
steps for operation:
Auto Firmware Update
Turning on the TV will automatically detect the software package, when there is new software sent by
SONIQ through network server.
(under Android status) (under ordinary TV status)
2. Choose Yes to go to the next step
3.Select Yes to start network update, during software downloading ,you may press EXIT or HOME
button to exit.
The system has been detected a n ew s of tw ar e pa ck ag e fo r up da ti ng , do y ou n ee d to t er mi na te
the current progress and i mm ed ia te ly g o to t he u pg ra de ?
YES NO
Appli cat ion Upg rad e
Yes No
The Syst em ha s bee n detec ted a n ew soft war e
Pack age f or upda tin g, do you need t o ter minat e the
curr ent p rogre ss an d immediat ely g o to the up gra de?
18 Sec s
Firmware Update
Local Update
Home
1 /1
Refresh
Network Update Backup Flrmware Recovery Flrmware
Start Network Update
Do you want to clear user data?( Th e sy st em s ug ge st s cl ea ni ng t o ma ke
sure the application pro gr am s ru n re li ab ly )
YES NO
Appl icati on Upgr ade
Firmware Update
Local Update
Home
1 /1
Refresh
Network Update Backup Flrmware Recovery Flrmware
Start Network Update
Pro mpt: so ftwar e downl oadin g, due to t he diff erenc e of the ne twork s peed, y ou may ne ed some t ime for d ownlo ading ,Plea se wait
3% 3/ 100
Firmware Update
Local Update
Home
1 /1
Refresh
Network Update Backup Flrmware Recovery Flrmware
Start Network Update
Pro mpt: so ftwar e downl oadin g, due to t he diff erenc e of the ne twork s peed, y ou may ne ed some t ime for d ownlo ading ,Plea se wait
Are y ou sure t o exit fr om firm wareU pdate a pp? If ye s, the up date pr ogres s will be i ncomp lete!
YES NO
Networ k Up da te
-33- -34-
4. After software downloading is completed, it may take some time for decoding:
Smart TV Function
5. After this step ,the system will firstly back up the file then update the file system.
6. When the update is completed, the TV will automatically restart in 5 seconds.
7. Update completed
Remark: If updating fails or any abnormal phenomena, unplug the power cord, press and hold the POWER
button then plug in the power cord again, following these steps will restore the system to the previous level.
Network Manual Update
Network Update can also be realized through manual setting by following the below steps:
1 Press Home to access the Home menu.
2 Press the Navigation buttons to scroll to All Apps and press OK.
3 Press the Navigation buttons to scroll to Firmware Update and press OK.
4. Select Network Update by pressing direction keys.
5. Pressing Start Network Update from the displayed list will pop up a dialog box
6. Press Yes to go to the next step. Repeat step 2-7 on Network Update
Firmware Update
Local Update
Home
1 /1
Refresh
Network Update Backup Flrmware Recovery Flrmware
Do yo u want to u pdate f irmwa re? Rem ind you b ackup s ystem b efore
upd ate fir mware . Notic e!!! Th is ac tion ma y damag e your sy stem! !!Do no t
pow er off yo ur sy stem du ring up date.
NO Yes
Updating file system 42%
Prompt:
The system is in the process of up da ti ng a nd b ac ki ng u p yo ur d at a ,P le as e do
not cut off t he p ow er, o th er wi se t he s ys te m wi ll b re akdown and can not start up!
backup system.
Prompt:
The system is in the process of upda ti ng a nd b ac ki ng u p yo ur d at a ,P le as e do
not cut off t he p ow er, o th er wi se t he s ys te m wi ll b re akdown and can not start up!
Firmware Update
Local Update
Home
1 /1
Refresh
Network Update Backup Flrmware Recovery Flrmware
Start Network Update
Pro mpt: so ftwar e downl oaded h as been c omple ted, de co di ng i s in pr ogres s. Plea se wait .
20% 2 0/100
-35- -36-
Smart TV Function
Remark: Online software updating will erase the original data, so it is necessary for the user to backup the
important files.
Backup Firmware
1 Press Home to access the Home menu.
2 Press the Navigation buttons to scroll to All Apps and press OK.
3 Press the Navigation buttons to scroll to Firmware Update and press OK.
4. Select Backup Firmware by pressing direction keys.
5. Pressing Backup Firmware from the displayed list will pop up a dialog box.
6. Choose Yes to enter the next step.
7. After backup firmware is completed, the TV will automatically restart in 5 seconds, and a successfully message
will pop up for users to confirm.
Local Update
Users need to copy the file from the PC named update.zip to the SD card to start local update.
Note: Users need to go to to download the related new software package.
Recovery Firmware
Users can recover the data before backed up in the SD card through operating this function.
www.soniq.com
Firmware Update
Local Update
Home
1 /1
Refresh
Network Update Backup Flrmware Recovery Flrmware
Do yo u want to b ack up sy stem? N otice !!! Thi s act ion may d amage y our
sys tem. Do n ot powe r off you r sys tem dur ing bac k up.
NO Yes
Firmw are Up date stat us
congr atul ations,Firm ware Update bac k up suc cessful ly!!
OK
Note: Local Update and Recovery Firmware Functions will be available when there is SD card being installed.
B.DTV Manual
CHANNEL MENU
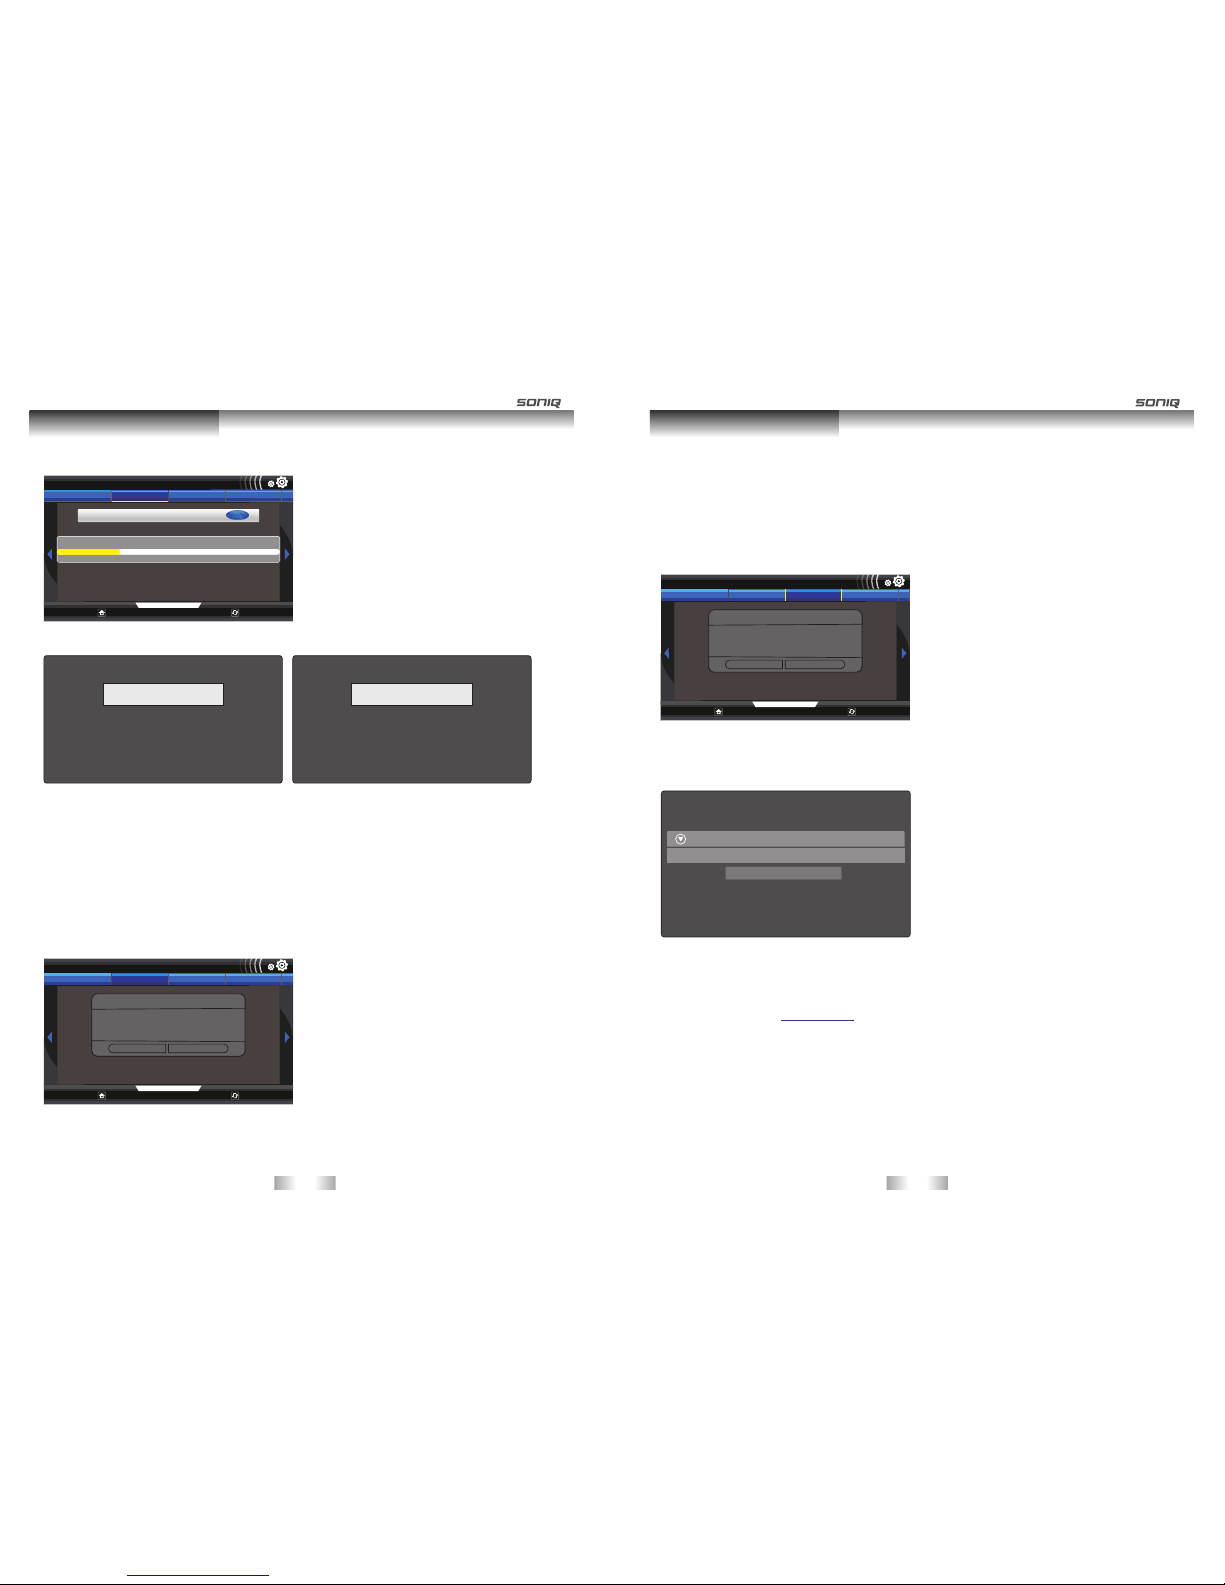
Press MENU button to enter the CHANNEL page as follows:
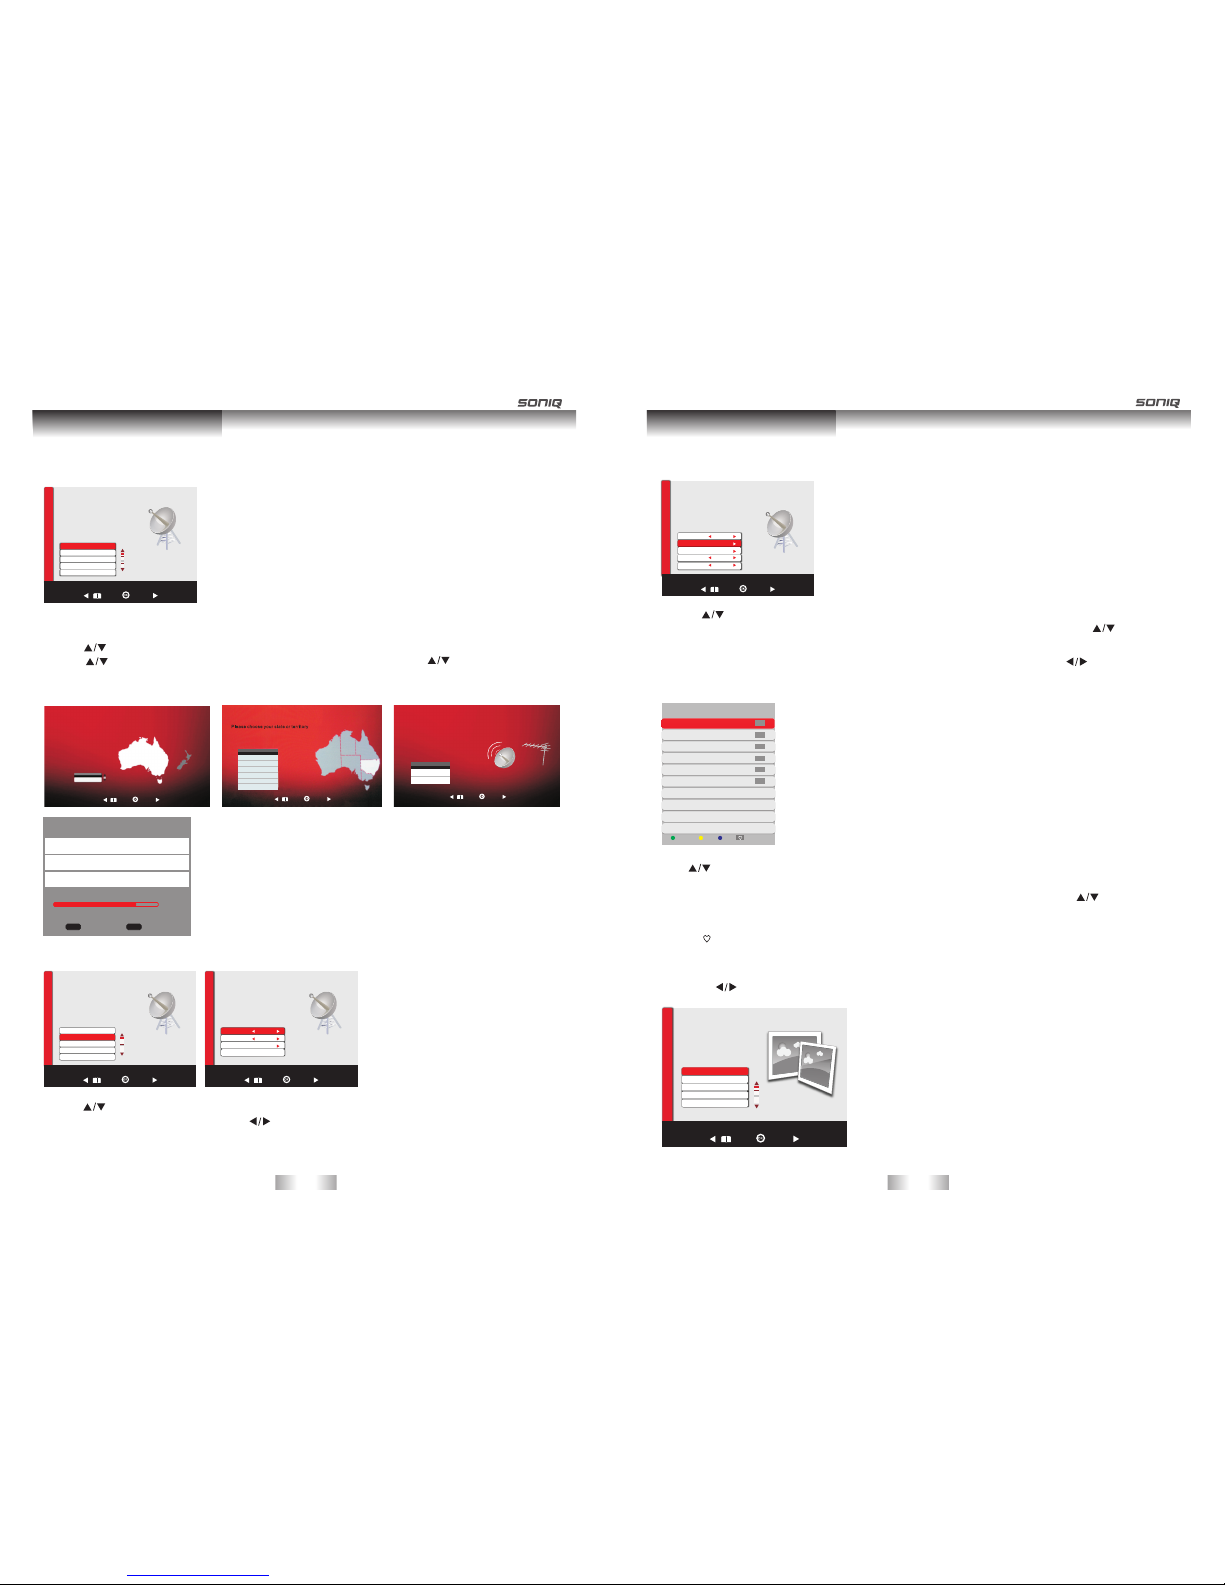
A. Auto Tuning
1. Auto Tuning will be highlighted upon displaying this menu. Press “OK” button to enter.
2. Press to select country, Press “OK” button to enter the next step.
3. Press to select your location ,then press “OK” button to enter, and then use to
choose the tuning type.
4. Press “OK” to start auto search.
1. Press to highlight DTV Manual Tuning, Press “OK” button to enter sub-menu.
2. Users can select channel number by pressing , and set frequency number by pressing numeric buttons.
3. Press “OK” to start.
CHANNEL
Auto Tuning
DTV Manual Tuning
ATV Manual Tuning
Channel Edit
Fine tune
Back Select
CHANN EL
Country Selection
Plea se s el ect you r co un try
Coun try
Aus tr ali a
New Ze ala nd
Bac k Sel ect
Channel Tuning
Please choo se y ou r ch an ne l tu ni ng m od e
Sca n Chann el
DTV +ATV
DTV
ATV DT V ATV
Bac k Sel ect
Tim e Zone
Time Zone Selection
Bac k Sel ect
New S outh Wal es/AC T
Vict or ia
Que ensla nd
Sou th Austr alia
West ern Aust ralia
Tasman ia
Nor thern Terr itory
NT
WA
SA
QLD
NSW/ ACT
CHANNEL
Back Select
CHANN EL
Dig ital Sc an Cht2
Fre quenc y 226.5 0MHz
Sta rt
Str ength 1 00
OSD Menu Operation
Scanning Ch58
Digital channels found: 11
Radio channels found: 0
Analog channels found: 0
EENU SK IP E XI T EX IT
CHANNEL
Auto Tuning
ATV Manual Tuning
Channel Edit
DTV Manual Tuning
Fine tune
Back Select
CHANN EL
1. Press to highlight ATV Manual Tuning, then press “OK” button to enter sub-menu.
2. All the items in this displayed menu can be adjusted, after all the settings being done, press to select “Scan
to Next” or “Scan to Pre”, then press “OK” to start.
Fine Tune: After Fine Tune was highlighted, press “OK” button to enter the submenu, then press to adjust.
Press to select Channel Edit, then press OK button to enter sub-menu.
1. Press green button to rename the current channel.(only available in ATV)
PICTURE MENU
Press MENU button to bring up the main menu under ordinary TV mode.
Then press to enter PICTURE page, it will highlight the first option, press OK button to enter.
CHANNEL
Back Select
CHANN EL
Ana log Sca n 200.2 5MHz
Sca n to Prev
Col or Syst em PAL
Sou nd Syst em I
Sca n to Next
PICTURE
PICTURE
Back Select
Pic ture mo de User
Noi se Redu ction M edium
Ene rgy Sav ing Mid dle
Asp ect Rat io Full
Col or Temper ature S tanda rd
C.ATV Manual Tuning
OSD Menu Operation
2. Press yellow button to change program order. Selected channel can be moved by using , then
press “OK” for confirm.
3. Press blue button to skip the selected channel.
4. Press on your remote control to add a channel to the favorite list.
-37- -38-
Chann el Edi t
DTV
DTV
Mov e
Ski p
Fav or it e
Radio
Ren am e
DTV
DTV
002 ABC TV Melbourn e
020 ABC HDTV
021 ABC2
022 ABC TV
200 ABC DiG Ra dio
201 ABC DiG Ja zz
Radio
Channel Edit
Table of contents
Other SONIQ LED TV manuals

SONIQ
SONIQ E43V15C-AU User manual

SONIQ
SONIQ E32W13A-AU User manual

SONIQ
SONIQ E32W13B-AU User manual

SONIQ
SONIQ S55UV16A-AU User manual

SONIQ
SONIQ S65UX16A-AU User manual

SONIQ
SONIQ S49VT15A User manual

SONIQ
SONIQ E48W13A-AU User manual

SONIQ
SONIQ W Series User manual

SONIQ
SONIQ S43V15A User manual

SONIQ
SONIQ S55UV16B-AU User manual


