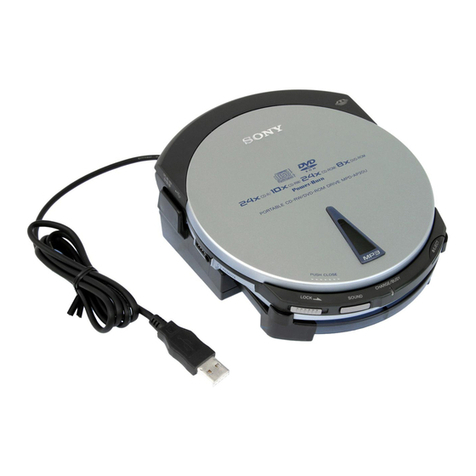
Sony PBD-D50 User manual

3-862-692-22(1)
1998 by Sony Corporation
PBD-D50
Portable
DVD-ROM Drive
Operating Instructions

2
WARNINGWARNING
To prevent fire or shock hazard,
do not expose the player to rain
or moisture.
To avoid electrical shock, do not
open the cabinet. Refer servicing
to qualified personnel only.
The socket outlet shall be installed near
the equipment and shall be easily
accessible.
The nameplate is located on the bottom.
This label is located on the bottom.
For customers in Germany
Directive: EMC Directive 89/336/EEC,
92/31/EEC
Low Voltage Directive 73/23/EEC,
93/68/EEC
This equipment complies with the EMC
regulations when used under the
following circumstances:
• Residential area
• Business district
• Light-industry district
(This equipment complies with the EMC
standard regulations EN 55022 Class B.)
CLASS 1
LASER PRODUCT
LASER KLASSE 1
PRODUKT
CAUTION
VISIBLE AND INVISIBLE LASER RADIATION WHEN OPEN.
DO NOT STARE INTO BEAM OR VIEW DIRECTLY WITH OPTICAL INSTRUMENTS.
VORSICHT
SICHTBARE UND UNSICHTBARE LASERSTRAHLUNG WENN ABDECKUNG GEÖFFNET.
NICHT IN DEN STRAHL BLICKEN ORDER MIT OPTISCHEN INSTRUMENTEN DIRECT ANSEHEN.
ATTENTION
RAYONNEMENT LASER VISIBLE ET INVISIBLE EN CAS D’OUVERTURE.
NE PAS REGARDER DANS LE FAISCEAU NI À L’ŒIL NU NI À L’AIDE D’INSTRUMENTS D’OPTIQUE.
The supplied interference Audio/Video
cable must be used with the equipment
in order to comply with the limits for a
digital device pursuant to EN 55022.

3
The latest information about this unit is in
the “Readme.txt” on the supplied floppy
disk.
Welcome!
Thank you for purchasing the Sony Portable
DVD-ROM Drive. Before operating the unit,
please read this manual thoroughly and
retain it for future reference.
Trademarks
•DVD-ROM Discman is a trademark of
Sony Corporation.
•Adaptec is a registered trademark of
Adaptec Inc.
•EZ-SCSI is a trademark of Adaptec Inc.
•Microsoft, MS, MS-DOS, and Windows
are registered trademarks of Microsoft
Corporation.
•PC/AT is a registered trademark of
International Business Machines
Corporation.
•i486SXand Pentium are trademarks of
Intel Corporation.
• Manufactured under license from Dolby
Laboratories Licensing Corporation.
DOLBY, the double-D symbol a, “PRO
LOGIC,” and AC-3 are trademarks of
Dolby Laboratories Licensing Corporation.
All other trademarks and registered
trademarks are trademarks or registered
trademarks of their respective owners.

4
Table of contents
Overview 6
This unit can play the following discs 8
Using as a DVD-ROM drive
Installing the software 13
1Checking the SCSI ID 14
2Connecting to the PC 15
3Installing the driver 16
4Checking if installation is
complete 18
Using with MS-DOS 19
Operating a DVD-ROM drive 20
Using as a DVD player
Getting started
Hooking up the system 25
Necessary setup before using the unit 28
Basic operation
Playing a DVD VIDEO 29
Playing a CD/VIDEO CD 37
Additional operations
Playing repeatedly (Repeat Play) 45
Playing in random order (Shuffle Play) 49
Creating your own programme
(Programme Play) 50
Resuming playback from the point where
you stopped a disc (Resume Play) 53
Changing the sounds 55
Using the sub-titles 56
Changing the angles 58

5
Preventing accidental pressing of the
buttons 59
Basic settings (INITIAL SETUP) 60
Limiting playback by children (Parental
Control) 64
Using the audio amplifier 68
Additional Information
Using the rechargeable battery pack 71
Precautions 75
Notes on discs 77
Specifications 78
Troubleshooting 80
Glossary 85
Self-diagnosis function 87
Index to parts and controls 88
Language code list 93
INITIAL SETUP items list 95
Index 96

6
pUsing as the portable DVD-ROM drive
You can use this unit as a DVD-ROM drive using with the supplied
SCSI PC card.
You can use this unit without the AC power adapter while using the
optional battery pack.
• Complete the set up uisng “Installing the software” (pages 13 to 19).
• For basic operations, see “Operating a DVD-ROM drive” (pages 20 to
24).
System requirements
You can connect this unit using the PC connecting kit to a PC as
follows:
• IBM PC/AT compatible personal computer
• CPU: i486SX 33MHz or higher (Pentium processor or higher
recommended)
• PC card slot: Type II ×1 slot
• Main memory: more than 16MB (32MB or higher recommended)
• Data capacity space on the hard disc: more than 10 MB
• A 3.5 inch or higher density floppy disk drive
• OS: Microsoft Windows 951), Windows 95 (OSR 2)2)
1) Using a lower version of Windows 95 other than OSR2 limits the capabilities
of use as a DVD-ROM drive. For the details, see page 19.
2) This unit is not compatible with Windows 3.1 or Windows NT or a Macintosh
system.
When using a desk top type PC, a SCSI board is required. (The Adeptec
AHA-2940AU SCSI board is recommended. Other SCSI boards compatibility
is not guaranteed.)
Please contact to the dealer or sales agency of the SCSI boad.
pUsing as the portable DVD player
You can play a DVD VIDEO, VIDEO CD, or audio CD. In addition, you
can enjoy powerful sound when connected to a digital component with
a built-in Dolby Digital decoder when playing DVD VIDEOs with
sound recorded in Dolby Digital (AC-3) format.
When using the optional battery pack, you can play back without the
AC power adapter.
Overview

7
Z
Icon Meaning
Indicates that you can use only the remote to do the task.
Indicates the functions for DVD VIDEOs.
Indicates the functions for VIDEO CDs.
Indicates the functions for AUDIO CDs.
Unpacking
Check to make sure you have received the following items.
• Audio/video cable (stereo mini plug ×1 ˜phono plug ×3) (1)
• AC-PBD1 AC power adapter (1)
• RM-PBD1 remote commander (remote) (1)
• VMC-91 Scart adapter (1)
• IC-PBD1 SCSI PC card (with cable) (1)
• Installing disc (3.5 inch floppy disk) (1)
CAUTION
Before using this unit, be sure to remove the packing materials (1and
2) from inside the front cover.
1Black, square shaped cushion near the lens.
2Black ring near the OPEN button.
If you turn on the unit without removing these materials, it may cause a
malfunction.
1
2
• Complete the set up uisng “Getting started” (pages 25 to 28).
• For basic operations, see “Playing a DVD VIDEO” (pages 29 to 36) and
“Playing a CD/VIDEO CD” (pages 37 to 44).
• For additional features, see pages 45 to 69.
• The icons shown below are used in this manual:

8
DVD-ROMs
CD-ROMs
CD-Rs
PHOTO CDs
CD EXTRAs (CD +)
DVD VIDEOs
VIDEO CDs
AUDIO CDs (CD-DA)
This unit can play the following discs
This unit only
G
G
g
2)
G
g
3)
g
g
g
With PC1)
g
g
g
g
g
G
g
g
1) Depending on the disc, optional software or an MPEG playing card may be
required for playback.
2) Depending on the CD-R, playback may not be possible.
3) You can play back the audio part only.
You cannot play the discs below:
• DVD-RAM
• DVD-R
• DVD+RW
• CD-RW
You can play a disc recorded in PAL or NTSC colour system. See page
28.

9
Notes on DVD VIDEO discs
Region code of DVD VIDEOs you can play
Region code indications such as 2are labelled on some DVD VIDEOs to
indicate which type of unit can play the discs.
Unless “2” is included in the indications or ALL is labelled on the DVD VIDEOs,
you cannot play the discs on this unit. If you try to play these DVD VIDEOs, the
message “PLAYING THIS DISC PROHIBITED BY AREA LIMITS” will appear
on the TV screen.
Depending on the DVD VIDEO, no region code indications may be provided,
even though playing the DVD VIDEO is prohibited by the area limits.
Note on playback operations of DVD VIDEOs and VIDEO CDs
Some playback operations of DVD VIDEOs and VIDEO CDs may be
intentionally fixed by software producers. Since this unit plays DVD VIDEOs
and VIDEO CDs according to the disc contents the software producers
designed, some playback features may not be available. Also refer to the
instructions supplied with the DVD VIDEOs or VIDEO CDs.

10
Meaning
The number of audio tracks
The number of sub-titles
The number of angles
The picture aspect ratio
Region code
16:9 LB
3
2
3
2
Logo marks of DVD VIDEOs
Logo marks on DVD VIDEO discs or cases are shown as below. These marks
show available contents or functions.
Some DVD VIDEOs do not have these marks even though you may be able to
use these functions.
For more details of the marks, refer to the instruction of the DVD VIDEO disc.
Logo
This product incorporates copyright protection technology that is protected by
method claims of certain U.S. patents and other intellectual property rights
owned by Macrovision Corporation and other rights owners. Use of this
copyright protection technology must be authorised by Macrovision
Corporation, and is intended for home and other limited viewing uses only
unless otherwise authorised by Macrovision Corporation. Reverse engineering
of disassembly is prohibited.

11
You can
Enjoy video playback (moving pictures) as well as
music.
Play interactive software using menu screens displayed
on the TV screen (PBC Playback), in addition to the
video playback functions of Ver 1.1 discs. Moreover,
you can play high-resolution still pictures, if they are
included on the disc.
Notes on VIDEO CDs with PBC (Playback Control)
functions
This unit conforms to Ver. 1.1 and Ver. 2.0 of VIDEO CD standards. You can
enjoy two kinds of playback according to the disc type.
Disc type
VIDEO CDs without
PBC functions
(Ver. 1.1 discs)
VIDEO CDs with PBC
functions
(Ver. 2.0 discs)

12
VIDEO
CD or CD
structure
Disc
Track
Index
Disc
Title
Chapter
Terms for discs
• Title
The longest sections of a picture or a music piece on a DVD VIDEO; a movie,
etc. for a picture piece on a video software or an album, etc. for a music piece
on an audio software. Each title is assigned a title number enabling you to
locate the title you want.
• Chapter
Sections of a picture or a music piece that are smaller than titles. A title is
composed of several chapters. Each chapter is assigned a chapter number
enabling you to locate the chapter you want. Depending on the disc, no
chapters may be recorded.
• Track
Sections of a picture or a music piece on a VIDEO CD or a CD. Each track is
assigned a track number enabling you to locate the track you want.
• Index
A number that divides a track into some sections to easily locate the point you
want on a VIDEO CD or a CD. Depending on the disc, no index may be
recorded.
• Scene
On a VIDEO CD with PBC functions, the menu screens, moving pictures, and
still pictures are divided into sections called “scenes.” Each scene is assigned
a scene number enabling you to locate the scene you want.
DVD
VIDEO
structure

13
Using as a DVD-ROM drive
Installing the
software
You can use this unit as a DVD-ROM drive with SCSI
PC card. You can play back not only a DVD-ROM, but
also a CD-ROM and a CD-R.
When you use this unit as a DVD-ROM drive, the
buttons (other than the POWER button and the OPEN
button on the unit) do not work on either the unit or
the remote.
Follow the instructions below to use this unit with
your PC.
2
1
4
3
Check that your PC can read from this unit.
Checking if installation is complete
(page 18)
Installing the driver (page 16)
Use the SCSI PC card supplied with this unit for
the connection of your PC.
Connecting to the PC (page 15)
Check the SCSI ID number of this unit.
Checking the SCSI ID (page 14)
Connect this unit with your PC, then install the
necessary software.

14
1Checking the SCSI ID
Before connecting to your PC, it is necessary to set the
SCSI ID using the DIP switch on the rear panel of the
unit to prevent an overlap with the other units
connected to your PC.
Change the default setting using a pointed object such
as the tip of a ballpoint pen.
If your PC is connected to one or more other units
using SCSI ID numbers, you cannot use the same SCSI
ID number for more than one unit.
The default number of the SCSI ID of this unit is “3.”
0
1
2
3
4
5
6
71)
2
OFF
OFF
OFF
OFF
ON
ON
ON
ON
1
OFF
OFF
ON
ON
OFF
OFF
ON
ON
0
OFF
ON
OFF
ON
OFF
ON
OFF
ON
Switch number
SCSI ID
1) The default number of the SCSI ID of the PC is usually “7.”
Therefore you need to use “0” to “6” to set the SCSI ID of
this unit.
To set the SCSI
terminator
It is not necessary to set
the SCSI terminator
because the SCSI
terminator of this unit is
always “ON.”
ON
012
OFF

15
Using as a DVD-ROM drive
Note
Do not pull on the plug of
the interface firmly. It
may cause a malfunction.
2Connecting to the PC
Before installing, follow the steps below to connect the
SCSI PC card (supplied).
1Insert the plug of the SCSI PC card into the SCSI
connector.
2Connect the AC power adapter to the unit and the
wall outlet.
AC power adapter
To the mains
To DC IN 10V

16
3Installing the driver
Install the SCSI Miniport Driver and the DVD Driver
after connecting this unit with your PC. There are two
ways of installing the SCSI Miniport Driver; the
standard installation and the manual installation. The
following steps explain the standard installation. For
more details on the manual installation, refer to the
“Readme.txt” file in the supplied floppy disk.
Installing the SCSI Miniport Driver
1Before inserting the SCSI PC card into your PC,
press POWER on this unit to turn the power on.
Remove the disc, if inserted into the drive.
2Turn on the power of your PC.
3After checking that the SCSI PC card and the unit
are connected correctry, then insert the SCSI PC
card into the PC card slot of your PC.
After the “New Hardware Found” window
appears, the driver is installed automatically. Go to
“Installing the DVD driver” (page 17).
If the “Insert a disk” window appears after “New Hardware
Found” window appears
1Insert the supplied install disk into the floppy disk
drive of your PC, then click “OK.”
2Type “A:\WIN95\WIN95_AT” in “Copy from:,” then
click “OK.”
3Follow the instructions on the screen to continue
installation.
4When installation finishes, remove the install disk, then
restart your PC.
This unit
SCSI PC card

17
Using as a DVD-ROM drive
Note
Make sure to restart your
PC after installing. If not,
this unit may not work as
the DVD-ROM drive.
If the “New Hardware” does not appear
The PC card device driver on your PC does not work or the
PC card device is not set to use the 32 bit support.
1Double click the “PC card (PCMCIA)” icon on the
Control Panel.
“PC card (PCMCIA) wizard” appears.
2Follow the instructions on the screen.
3When it finishes, restart your PC, then follow the
instructions of “Installing the SCSI Miniport Driver.”
Installing the DVD driver
1Click “Start,” then set the pointer to “Settings” and
click “Control Panel.”
2Double click “Add/Remove Program Properties,”
then click “Setup.”
The “Install Program From Floppy Disk or CD-
ROM” window appears.
3Insert the supplied install disk into the floppy disk
drive of your PC, then click “Next.”
4Enter “A:\DVD\Setup.exe” on “Command line for
installation program:,” then click “Finish.”
5Follow the instructions on the screen to continue
installation.
6When installation finishes, remove the install disk,
then restart your PC.
Reinstalling the ASPI manager
For smooth operation when using this unit with other
SCSI units are also connected, reinstalling the ASPI
manager is highly recommended.
1Follow Steps 1 to 3 in “Installing the DVD driver.”
2Enter “A:\WIN95\Setup32.exe” on “Command
line for installation program:,” then click “Finish.”
3Follow the instructions on the screen to continue
installation.
4When installation is complete, remove the install
disk, then restart your PC.
Go to “4Checking if installation is complete.”
Note
Make sure to restart your
PC after installing. If not,
this unit may not work as
the DVD-ROM drive.

18
4Checking if installation is complete
Double-click the “My Computer” icon.
When the icon shown below appears, you can use
this unit.
When using a CD-ROM drive, more than one
icon appears.
If the icon shown above does not appear, see
“Troubleshooting.”

19
Using as a DVD-ROM drive
Using with MS-DOS
The DOS prompt of Windows 95 can read this unit,
but you cannot use this unit with MS-DOS as the
DVD-ROM drive. (However, you can use MS-DOS for
the CD-ROM drive.)
When using a unit with MS-DOS or reinstalling
Windows 95 from this unit, you need to install the
driver separately. To install the CD-ROM drive
software, PCMCIA Release2.1 or higher is required.
Make sure your PC is installed with either Card
Service or Socket Service before installing the driver
into MS-DOS. Refer to the instructions of your PC for
more details.
1Before inserting the SCSI PC card into your PC,
press POWER on this unit to turn the power on.
Remove the disc, if inserted into the drive.
2After checking that the SCSI PC card is connected
to this unit correctly, insert the SCSI PC card into
the PC card slot of your PC.
3Insert the supplied install disk into the floppy disk
drive of your PC.
4Enter keys as below on the DOS command line to
change the DOS directory to the floppy drive.
a: ÷
5Enter keys as below on the DOS command line.
cd dos ÷
dosinst ÷
6Follow the instructions on the screen to continue
installation.
7When installation finishes, restart your PC.
When using the PC installed with IBM Card
Service or Socket Service
Refer to “Readme.txt” of the supplied floppy disk.
Note
Make sure to restart
your PC after installing.
If not, this unit may not
work as the DVD-ROM
drive.

20
Operating a DVD-ROM
drive
Make sure, following the operations below, to connect
with other equipment and to turn the power on. If you
turn the power on in the wrong order, you can not use
the DVD-ROM drive.
1Turn on this unit.
2After checking that the SCSI PC card is connected
to this unit correctly, insert the SCSI PC card into
the PC card slot of your PC.
3Turn on your PC.
If your PC has already been turned on, you don‘t
have to restart.
Notes
• Make sure to turn on
this unit before
connecting to your PC.
If not, Windows 95
cannot read the
connection with this
unit.
• When using a game or
some CD-ROM or
DVD-ROM software
with sound, a sound
system is necessary on
your PC.
• Depending on the CD-
ROM and DVD-ROM,
you can listen to the
sound or music
through the
headphones jack on
this unit.
• Do not turn off this
unit while your PC is
scanning the unit. If
you turn off the unit
accidentally, the PC
may not operate.
Restart the PC.
• When this unit is idle
for more than 5
minutes when
connected to a PC, the
disc will stop rotating
due to the power
saving function.
Table of contents
Other Sony DVD Drive manuals

Sony
Sony DRX-510ulk User manual

Sony
Sony DRU-530AX User manual

Sony
Sony PCGA-DVD51 User manual

Sony
Sony VRD-VC20 User manual

Sony
Sony VRD-MC1 Nero 6 User manual

Sony
Sony DRXS50U - DRX S50U User manual

Sony
Sony VGP-UDRW1 - VAIO - DVD±RW User manual

Sony
Sony VRD-VC10 User manual

Sony
Sony MPD-AP20U User manual

Sony
Sony DW-G120A User manual

Sony
Sony XDCAM XDBK-J102 User manual

Sony
Sony 2-586-675-11 (1) User manual

Sony
Sony DRU-510A User manual

Sony
Sony ODS-D280U User manual

Sony
Sony DRXS50U - DRX S50U User manual

Sony
Sony DDU220E User manual

Sony
Sony VRD-MC1 Nero 6 User manual
Sony
Sony DW-Q28A User manual

Sony
Sony DRX-510ulk User manual
Sony
Sony Vaio PCGA-CRWD1 User manual