manuals.online logo
Brands
  1. Home
  2. •
  3. Brands
  4. •
  5. Sony
  6. •
  7. Game Console
  8. •
  9. Sony Xbox Setup guide

Sony Xbox Setup guide

Index
OPEN AN XBOX
Open a Controller
Cleaning your Xbox DVD drive
Xbox DVD repair
USB POR INS ALLA ION
USING PC DVD DRIVE
HARD DRIVE UPGRADES
F P MAS ERCLASS
Linux on your XBOX
Open an Xbox
Step 1 - Start with the necessary tools and a clear work area.
Helpful tools:
Insulated screw grabber (comes with many PC repair kits)
X- cto Knife useful for removing stickers and feet.
Wax paper, good for keeping those stickers in shape.
Required tools:
Torx 20
Torx 10
Step 2 - peel back the stickers. If you’re not too worried about looks a Torx
#20 punches right through the stickers with ease. If you want to keep it
looking tidy cut a piece of wax paper to size to help preserve the stickers.
Step 3 - The other case screws, a total of 6.
Getting at the screws under the feet. Just peel back the outer edge of the
rubber foot. Leave the other half of the adhesive rubber foot to hold it in
place. This is a good time to get out the X- cto knife to help peel back the
adhesive. (Update, I find I just cut the feet when I try to use the X-acto knife,
try wedging the #20 Torx in there and twist it using the "fins" on the driver to
pull up the pad just enough to get to the screw) Once you are able to get the
feet up just enough to get at the screw start un screwing, let the screw push
the foot out of the way rather than trying to peel it back further this way the
pad is only removed as much is absolutely necessary.
Once all six screws are removed, flip the box upright and grab the sides and
shake it a little bit and the bottom should drop away from the cover. I find this
is done most easily by putting the Xbox in my lap.
Step 4 - Drive removal, there are 3 screws total holding in both drives. First
remove the one for the hard drive; it is located under the IDE cable.
Two others are on either side of the front of the DVD drive. Once the screws
are removed unplug the IDE cable to the Hard Drive and loosen the power
cord from the track it sits in on the drive tray if you miss this step you wont be
able to remove the drive. The power cord can be left plugged in on the hard
drive, the cord is long enough to allow you to position as desired. The hard
drive needs to be lifted straight up for removal and there is no really good way
to grab it, I find sticking a finger in the hole in the front right of the carrier and
grasping the rear of the carrier with the other hand works to get it loose,
moved up about an inch or so and then lifting it with both hands from the sides
to remove it.
Step 5 - With the Hard drive out of the way we get a good shot of the
mounting screws for the power supply and DVD drive. Get those two screws
at the front of the DVD drive after removing the IDE cable and Yellow cord
from the motherboard. You may have a little difficulty removing the DVD
drive, it does not slip out easily but as long as you have the two screws in the
front and the two cables in the rear removed it can come out, again the trick is
to go straight up.
Now with the drives gone it is starting to look like a normal PC.
Removing the power cord from the motherboard. Most sites tell you to use
pliers to remove the power plug; it is in there pretty good. I personally pull on
the wires themselves, I risk yanking a wire out of the crimp in the socket, and
if I screw one up I am willing to repair it. Use your best judgment, the key is to
grab half of the wires and pull evenly on all of them at a 45 degree angle, to
raise one side of the plug first and then the other, it will not come out straight
up.
Once the power cord is removed from the motherboard and the two mounting
screws are off the power supply, grasp the heat sink on the power supply or
use the cord that was going to the motherboard to move it about a quarter
inch forward, this releases the power supply from the plastic tabs that hold it
down on the side opposite the screws. Now the front of the power supply can
be raised to allow the leading edge to clear the front of the case and it can
safely be pulled forward and removed.
Step 6 - Eleven screws on the motherboard
Remove them all and be careful not to scratch the surface of the board with
the driver.
Step 7 - Board removal
You will need to disconnect the yellow wires coming from the fan, power and
reset switches and also the connections to the USB game controller ports, the
USB daughter board itself can be left in place or removed. To remove the
motherboard lift the front to a 25-degree angle as shown in the picture it can
then be pulled forward and removed.
You should now have a pile of parts like this
To get to the power and reset buttons you will need to remove the front
faceplate. I have only done this by completely disassembling the case
including the fan and inner tray. By doing this bottom of the case becomes
flexible and you will have an easier time popping off the front. You will find
three tabs inside the case that are holding it, careful these are fragile. To get
the plate off you will need to loosen the three and both sides of the front plate
where it clips to the sides of the case (the side clips are the most difficult), all
three inside tabs need to be loosened simultaneously while popping off one
side or the other of the front plate. I think there is a possibility of doing this
without removing everything but for now complete disassembly is my best
advice. (Update, check out Removing Front Face Plate for directions)
Open a Controller
This should not even require a tutorial. By far the easiest fix. Quit being
annoyed and spend the 30 minutes it takes to clean them up. Nothing sucks
more than dieing because of a missed shot, jump, weapon switch, whatever
that you have to blame on the controller. So for those of you that need a little
encouragement here we go.
Start with a controller with sticky buttons.
Get the necessary tools, a Philips #1
Find the screw holes
Unscrew and remove them, flip the controller back so the screw holes are
down. Lift off the top cover.
The buttons will be falling all over the place, don't worry about that it goes
together easy.
You can now safely remove all the buttons and rubber cups they sit in.
.
I gave all the buttons and D-pad a nice bath in warm soapy water. If the
board has become drenched with your favourite soda or whatever use some
mild soapy water on a rag to clean it up, stay away from window cleaner and
other harsh cleaners. Yes, you can put soapy water onto a board and it does
not burst into flames or anything, just don't soak it and try to stay away from
components as much as possible. The most important thing is to let it dry
COMPLETELY before attempting to use it.
It turns out the drain in my sink has a little bar that goes across that is just
small enough to prevent an Xbox button from going down the drain than
further than a forceps can reach... Nice design.
Speaking of nice design, look the controller while we have it all apart.
Somebody was thinking, the rubber pads act as a little cup to contain any
drips of liquid, the controller sticks act like little umbrellas to keep the
important pieces underneath clean and each of the buttons are keyed so they
can only go back into the controller the right way.
Once the buttons are all nice clean and dry, get the top cover out and start
putting the buttons back in place.
Now put the rubber cups in place, these are keyed as well and only fit
properly one way.
ll right, now we are ready to take the bottom and lower it on top of the
buttons and top cover.
Put the screws back where they were and we are done!
Don't soak the top cover in water as I did, the little emblem gets a little misty, it
cleared up in a couple days so no big deal. I had to go after the button
sockets with a rag to get them cleaned out properly so the soaking didn't do it
for that component anyway.
Cleaning your Xbox DVD drive
If you are getting constant dirty disk errors, what do you have to loose, give
this a try. The majority of the drives are not really dirty cleaning it will not fix
the problem; they are getting out of adjustment or just getting weak. Try not to
get your hopes up; too much sometimes you will be improving a DVD from
constant errors to less frequent glitching and pausing during movies and
games. But I guess that is better than nothing.
See disassembly procedure here for details on how to get at your Xbox DVD
drive.
Necessary tools:
Torx #10
Philips #1
Q-Tips
Lens Cleaner
Compressed air
Helpful tools:
Magnetized Philips #1 or screw grabber
Words of advice before we begin leave the small ribbon cables that connect
components within the drive alone. If you feel you must disconnect and
reconnect a few while you are in there, note that there is a brown wedge in
each of the sockets that needs to be pulled out to allow the ribbon to be
released.
There are four screws that need to be removed. Two in the rear
and two in the top, mid drive.
Remove all four screws, the ones mid drive are a little hard to get out, screw
grabber makes it easy, shaking the drive upside down works too.
Remove the bottom tray first, flip the drive so the bottom is facing up. You
need to pull the metal tab in the back over the IDE connector and then it will
then slip off. Pull out then up.
Now remove the top, you have to push in two catches near the front on either
side of the drive to allow you to tip up the front of the top panel like this.
Now you have access to both the lens.
and the mirror
Blast the optics with canned air, then continue on to the blast the rest of the
DVD chassis trying to blow the remainder of the dust away from the optics.
Using a Q-tip, clean the mirror and the lens with a high quality lens cleaner. I
like to use anti static lens cleaner but any glass cleaner should work, I have
even heard of plain alcohol being used. The goal is to leave a streak free
finish and use one end of the wetted q-tip to clean and the other to dry. BE
C REFUL NOT TO SCR TCH THE MIRROR
One DVD in my collection had a single fibber from cloth on the outside of the
mirror, this seemed to be the major cause of the problem but the drive still
suffers from occasional errors.
UPD TED 8/28/03 Thanks CPU64!
"Here's a picture I just made showing all the parts involved in
directing the
laser to the disc and back. Here you'll see that just cleaning the
top lens
and the bottom mirror isn't really enough.
This is the lens piece without the top lens section. In total, there
are 11
sections in that little piece that need to be cleaned to bring the
drive back
to full potential.
lso notice in the picture the SENSOR is detached from the
main body. The
little opening in between the sensor and the last focus lens
(bottom left) is the
most important place to be cleaned and can easily be done with
compressed
air."
Re-assembly is the reverse of assembly, start with the top and then attach the
bottom. If you do not have a handy screw grabber or magnetized screwdriver,
have fun getting the top two back in place.
You will probably need to pinch the top and bottom together and shift them
back and fourth to get the screw holes to line up perfectly. Finish off with the

Other Sony Game Console manuals

Sony Playstation 2 Assembly instructions

Sony

Sony Playstation 2 Assembly instructions

Sony PlayStation 5 User manual

Sony

Sony PlayStation 5 User manual

Sony PlayStation2 SCPH-75008 User manual

Sony

Sony PlayStation2 SCPH-75008 User manual

Sony CECH-2006A User manual

Sony

Sony CECH-2006A User manual

Sony PlayStation Portable PSP-2001 User manual

Sony

Sony PlayStation Portable PSP-2001 User manual

Sony PlayStationPortable Operator's manual

Sony

Sony PlayStationPortable Operator's manual

Sony PSP-1001K User manual

Sony

Sony PSP-1001K User manual

Sony PLAYSTATION PSP-3002 Installation instructions

Sony

Sony PLAYSTATION PSP-3002 Installation instructions

Sony PlayStation 3 (Uncharted: Drake's Fortune Limited Edition... User manual
Sony

Sony PlayStation 3 (Uncharted: Drake's Fortune Limited Edition... User manual

Sony 120GB Playstation 3 CECH-2001B User manual

Sony

Sony 120GB Playstation 3 CECH-2001B User manual

Sony SCPH-77004 User manual

Sony

Sony SCPH-77004 User manual

Sony 40GB Playstation 3 3-285-687-13 User manual

Sony

Sony 40GB Playstation 3 3-285-687-13 User manual

Sony PS2 SCPH-39002 User manual

Sony

Sony PS2 SCPH-39002 User manual

Sony PS4 FORTNITE PRO Installation and operating manual

Sony

Sony PS4 FORTNITE PRO Installation and operating manual

Sony PS4 PRO CUH-7215B Installation and operating manual

Sony

Sony PS4 PRO CUH-7215B Installation and operating manual

Sony PSVITA User manual

Sony

Sony PSVITA User manual

Sony CFI-1216A User manual

Sony

Sony CFI-1216A User manual

Sony PSX DESR-5000 Technical manual

Sony

Sony PSX DESR-5000 Technical manual

Sony PlayStation 4 Quick start guide

Sony

Sony PlayStation 4 Quick start guide

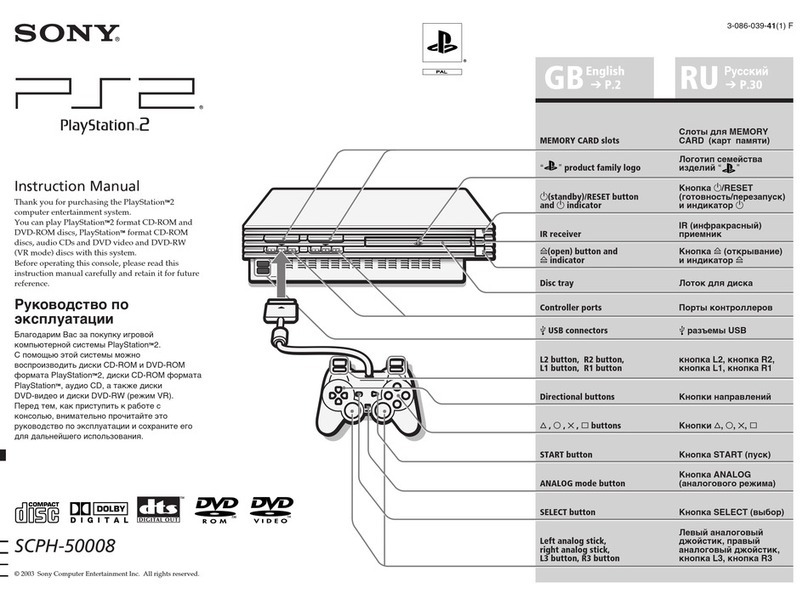
Sony PlayStation PlayStation 2 User manual

Sony

Sony PlayStation PlayStation 2 User manual
Sony PlayStation 5 User manual

Sony

Sony PlayStation 5 User manual

Sony CECHP06 User manual

Sony

Sony CECHP06 User manual

Sony CUH-7116B Installation and operating manual

Sony

Sony CUH-7116B Installation and operating manual

Sony PSVITA User manual

Sony

Sony PSVITA User manual

Popular Game Console manuals by other brands

IGS Wonderland Operator's manual

IGS

IGS Wonderland Operator's manual

Emax BingoConsole Operator's manual

Emax

Emax BingoConsole Operator's manual

Atari 5200 owner's manual

Atari

Atari 5200 owner's manual

LEXIBOOK PLASMA CONSOLE IG810 instruction manual

LEXIBOOK

LEXIBOOK PLASMA CONSOLE IG810 instruction manual

Casio JD-6500 Service manual & parts list

Casio

Casio JD-6500 Service manual & parts list

Mattel Electronics HOCKEY instructions

Mattel Electronics

Mattel Electronics HOCKEY instructions

Excalibur Free Cell 485-P operating manual

Excalibur

Excalibur Free Cell 485-P operating manual

Multilaser Rock Legend JS027 user manual

Multilaser

Multilaser Rock Legend JS027 user manual

Radica Games NoLimit texas holdem instruction manual

Radica Games

Radica Games NoLimit texas holdem instruction manual

Nintendo Wii U  Deluxe Set Faq

Nintendo

Nintendo Wii U Deluxe Set Faq

Hyperkin RetroN 5 instruction manual

Hyperkin

Hyperkin RetroN 5 instruction manual

Atari 2600 quick start guide

Atari

Atari 2600 quick start guide

Sears Tele-Games 637.99743 owner's manual

Sears

Sears Tele-Games 637.99743 owner's manual

Sega 32X instruction manual

Sega

Sega 32X instruction manual

Ice Buster Bubbles manual

Ice

Ice Buster Bubbles manual

Leapster L-Max Parent guide & instructions

Leapster

Leapster L-Max Parent guide & instructions

Diamond Multimedia 1080 HD Game Capture installation manual

Diamond Multimedia

Diamond Multimedia 1080 HD Game Capture installation manual

Tiger Electronics e-Fortunes 03-140 instruction manual

Tiger Electronics

Tiger Electronics e-Fortunes 03-140 instruction manual

manuals.online logo
manuals.online logoBrands
  • About & Mission
  • Contact us
  • Privacy Policy
  • Terms and Conditions

Copyright 2025 Manuals.Online. All Rights Reserved.