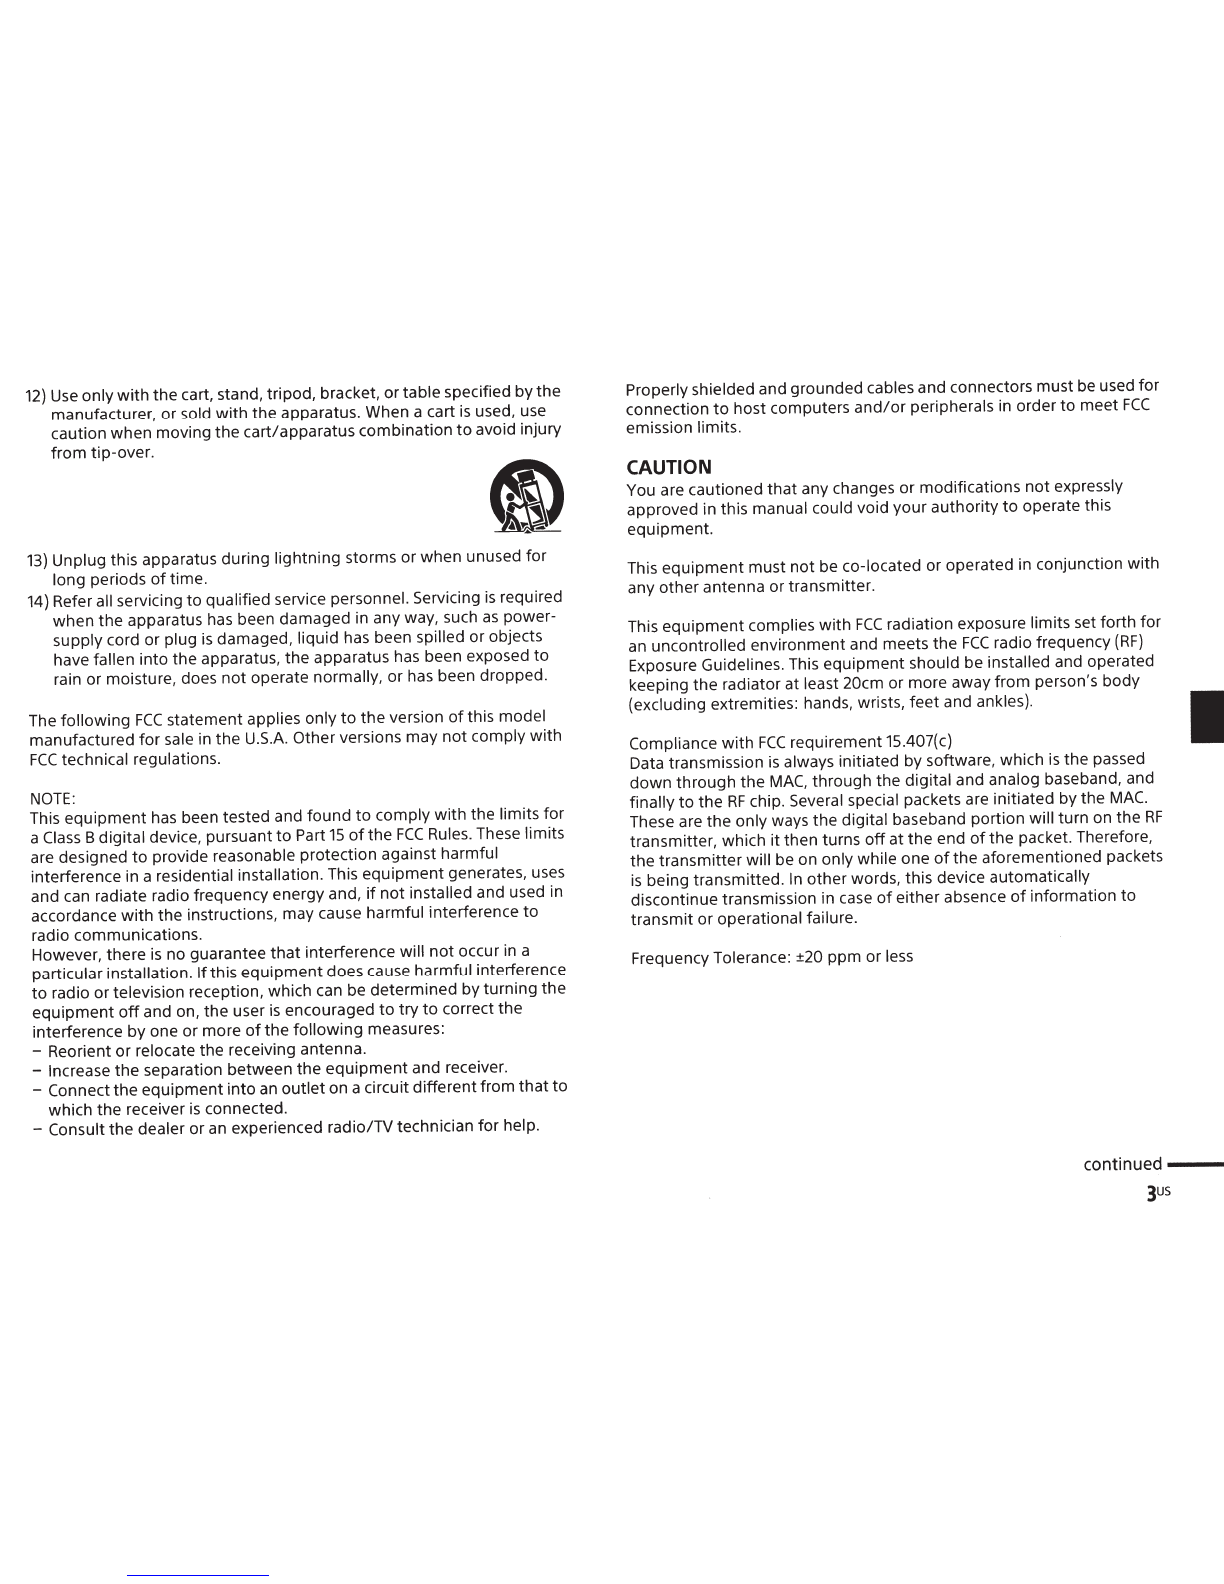
Sony HT-ST9 User manual

SONY.:
Sound
Bar
Operating Instructions
Manuel d'instructions

Owner's Record
The model and serial numbers are located on the rear
of
the
Bar
Speaker.
Record the serial numbers in the space provided below. Refer to
them
whenever you call upon your Sony dealer regarding this product.
Model
No.
HT
-ST9
Serial
No.
-------------------------
WARNING
To
reduce
the
risk
of
fire or electric shock, do not expose this
apparatus
to
rain or moisture.
The unit
is
not
disconnected from the mains
as
long
as
it
is
connected
to
the
AC
outlet, even
if
the unit itself
has
been turned off.
To
reduce the risk
of
fire, do not cover the ventilation opening
of
the
appliance with newspapers, tablecloths, curtains, etc.
Do
not expose the appliance
to
naked flame sources (for example,
lighted candles).
To
reduce the risk
of
fire or electric shock, do
not
expose this appliance
to
dripping orsplashing, and
do
not
place objects filled with liquids, such
as
vases, on the appliance.
As
the main plug
is
used
to
disconnect the unit from the mains, connect
the unit
to
an
easily accessible
AC
outlet. Should you notice
an
abnormality in the unit, disconnect the main plug from the
AC
outlet
immediately.
Do
not install
the
appliance in a confined space, such
as
a bookcase or
built-in cabinet.
Do
notexpose batteries orappliances with battery-installed
to
excessive
heat, such
as
sunshine and fire.
Indoor use only.
For
the
customers in
the
U.S.A.
This symbol
is
intended
to
alert the user
to
the presence
of
uninsulated "dangerous voltage" within the product's enclosure
that
may
be
of
sufficient magnitude
to
constitute a risk
of
electric shock
to
persons.
This symbol
is
intended
to
alert the user
to
the presence
of
importantoperating and maintenance (servicing) instructions in
the literature accompanying the appliance.
Important Safety Instructions
1)
Read
these instructions.
2)
Keep these instructions.
3)
Heed all warnings.
4) Follow all instructions.
5)
Do
not
use this apparatus near water.
6)
Clean only
with
dry cloth.
7)
Do
not
block any ventilation openings. Install in accordance with the
manufacturer's instructions.
8)
Do
not
install near any heat sources such
as
radiators, heat registers,
stoves, or other apparatus (including amplifiers)
that
produce heat.
9)
Do
not
defeat the safety purpose
of
the polarized or grounding-type
plug. A polarized plug has
two
blades with one
wider
than the other.
A grounding type plug has
two
blades and a third grounding prong.
The wide blade or the third prong are provided
for
your safety. Ifthe
provided plug does
not
fit
into your outlet, consult
an
electrician for
replacement
of
the obsolete outlet.
10)
Protect the power cord from being walked on or pinched particularly
at plugs, convenience receptacles, and the point where theyexitfrom
the apparatus.
11)
Only use attachments/accessories specified by the manufacturer.

12)
Use
only
with
the cart, stand, tripod, bracket, ortable specified bythe
manufacturer, or sold with the apparatus. When a cart
is
used, use
caution when moving the cart/apparatus combination
to
avoid injury
from tip-over.
13)
Unplug this apparatus during lightning storms or when unused for
long periods
of
time.
14)
Refer all servicing
to
qualified service personnel. Servicing
is
required
when the apparatus
has
been damaged in any way, such
as
power-
supply cord or plug
is
damaged, liquid has been spilled or objects
have fallen into the apparatus, the apparatus has been exposed
to
rain or moisture, does
not
operate normally, or has been dropped.
The following
FCC
statement applies only
to
the version
of
this model
manufactured
for
sale in the
U.S.A.
Other versions may not comply with
FCC
technical regulations.
NOTE:
This equipment
has
been tested and found
to
comply with the limits for
a
Class
Bdigital device, pursuant to Part
15
of
the
FCC
Rules. These limits
are designed
to
provide reasonable protection against harmful
interference in a residential installation. This equipment generates, uses
and
can
radiate radio frequency energy and,
if
not installed and used in
accordance with the instructions, may cause harmful interference
to
radio communications.
However, there
is
no guarantee
that
interference will
not
occur
in
a
particular installation.
If
this equipment does cause harmful interference
to
r~dio
ortelevision reception, which can be determined by turning the
equ1pment
off
and on, the user
is
encouraged
to
try
to
correct the
interference by one or more
of
the following measures:
-Reorient or relocate the receiving antenna.
-Increase the separation between the equipment and receiver.
-Connect the equipment into
an
outlet on a circuit differentfrom
that
to
which the receiver
is
connected.
-Consult the dealer or
an
experienced radio/TV technician for help.
Properly shielded and grounded cables and connectors must
be
used for
connection
to
host computers
and/or
peripherals
in
order
to
meet
FCC
emission limits.
CAUTION
You are cautioned that any changes or modifications
not
expressly
approved in this manual could void your authority
to
operate this
equipment.
This equipment must
not
be co-located or operated in conjunction with
any other antenna or transmitter.
This equipment complies with
FCC
radiation exposure limits set forth for
an uncontrolled environment and meets the
FCC
radio frequency
(RF)
Exposure Guidelines. This equipment should be installed and operated
keeping the radiator at least 20cm or more away from person's body
(excluding extremities: hands, wrists, feet and ankles).
Compliance
with
FCC
requirement 15.407(
c)
Data transmission
is
always initiated by software, which
is
the passed
~own
through the
MAC,
through the digital and analog baseband, and
fmally
to
the
RF
chip. Several special packets are initiated by the
MAC.
These are the only ways the digital baseband portion will turn on the
RF
transmitter, which it then turns
off
at the end
of
the packet. Therefore,
the transmitter will be on only while one
of
the aforementioned packets
is
being transmitted.
In
other words, this device automatically
discontinue transmission in
case
of
either absence
of
information
to
transmit or operational failure.
Frequency Tolerance: ±20 ppm or
less
continued
---
3us

For
the
customers in Canada
Properly shielded and grounded cables and connectors must be used
for
connection
to
host computers
and/or
peripherals.
This device complies
with
Industry Canada's licence-exempt
RSSs.
Operation
is
subject
to
the following
two
conditions:
(1)
This device may
not
cause interference; and
(2)
This device must accept any interference, including interference
that
may cause undesired operation
of
the device.
This equipmentcomplies
with
IC
radiation exposure limits set forth for
an
uncontrolled environment and meets
RSS-102
of
the
IC
radio frequency
(RF)
Exposure rules. This equipment should
be
installed and operated
keeping the radiator at least 20cm or more away from person's body
(excluding extremities: hands, wrists, feet and ankles).
5.15
-
5.25
GHz
band
is
restricted
to
indoor operations only.
High-power radars are allocated
as
primary users {i.e. priority users)
of
the bands 5250-5350 MHz and 5650-5850 MHz and
that
these radars
could cause interference
and/or
damage
to
LE-LAN
devices.
About
These
Operating
Instructions
•The instructions in these Operating Instructions describe the controls on
the remote control. You
can
also use the controls on the Bar Speaker
if
they have the same
or
similar names
as
those on the remote control.
• Some illustrations are presented
as
conceptual drawings, and may be
different from the actual products.
•The items displayed on the
TV
screen may vary depending on the area.
•The default setting
is
underlined.
•The text enclosed in brackets ([--))appears on the
TV
screen, and the
text enclosed
in
double quotation
marks(~~-")
appears on the
front
panel
display.

Connecting -+ Startup Guide (separate
document)
About
These Operating Instructions .................................... 4
Listening/Viewing
Listening
to
Sound
from
a
TV,
Blu-ray
Disc™
Player,
Cable/Satellite Box, etc....................................................7
Playing
Music/Photo
from
a
USB
Device .............................. 8
Listening
to
Music
from
a
BLUETOOTH
Device .................... 8
Playing
Music/Photo
from
Other Devices via
the
Network
Function ........................................................................... 8
Sound Adjustment
Enjoying Sound Effects (Football mode, etc.) ...................... 9
Using
the
OSEE
HX
Function (Reproducing Audio Codec
Files
with
Natural Sound Quality) ...................................
10
BLUETOOTH
Functions
Listening
to
Music
from
a
BLUETOOTH
Device ....................
11
Listening
to
Sound by Transmitting
to
a
BLUETOOTH-compatible Receiver .................................
13
Network Functions
Connecting
to
a Wired Network ...........................................
15
Connecting
to
a Wireless Network ......................................
16
Playing
Music/Photo
Files on a Home Network ..................
16
Displaying
the
Screen
of
the
Mobile Device on a
TV
(Screen
mirroring) ........................................................................
18
Enjoying Various Online Services (Music Services) ..............
18
Viewing Copyright-protected 4K Content
Connecting a
4K
TV
.............................................................20
Connecting
4K
Devices .........................................................
21
Settings and Adjustments
Using
the
Setup Display ......................................................
22
Using
the
Options Menu ..................................................... 28
Other Functions
Controlling
the
System Using a Smartphone or Tablet
Device (Song
Pal)
............................................................30
Using
the
Control
for
HOM
I Function
for
"BRAVIA" Sync
....
31
Deactivating Buttons on
the
Bar Speaker (Child Lock) .......
33
Saving Power in Standby Mode ..........................................
33
Enabling
theIR
Repeater Function (when you cannot
control
the
TV)
...............................................................
33
Further Setting
for
the
Wireless System (Subwoofer) ........ 34
Modifying
the
Angle
of
the
Bar Speaker ............................ 36
Mounting
the
Bar Speaker on a Wall .................................. 36
Attaching
the
Grille Frame ...................................................
37
continued
--
sus

Additional Information
Precautions ..........................................................................38
Troubleshooting
...................................................................
41
Guide
to
Parts
and
Controls ................................................
46
Playable Types
of
Files .........................................................
49
Supported
Audio
Formats ...................................................
50
Specifications .......................................................................
50
On BLUETOOTH
Communication
.........................................53
Index
.....................................................................................54
END
USER
LICENSE
AGREEMENT ..........................................56

Listening/Viewing
Listening
to
Sound
from
a
TV,
Blu-ray
Disc™
Player,
Cable/Satellite
Box,
etc.
1
Press HOME.
The
home
menu appears on the
TV
screen.
2 Press
+!+!+/+to
select
the
desired
input,
and
then
press
8.
You can also use
INPUT
on the remote control.
[TV]
"TV"
Device
{TV,
etc.)
that
is
connected
to
the
TV
(DIGITAL
IN
(TV))
jack,
or
a
TV
that
is
compatible
with
the
Audio
Return Channel
function
and connected
to
the
HDMI
OUT
{ARC)
jack
[HDMI1]/[HDMI2]/[HDM13]
"HDMI1"
/"HDMI
2"
/"HDMI
3"
Device
that
is
connected
to
HDMIIN
1,
HDMIIN 2
or
HDMIIN 3
[Biuetooth
Audio]
"BT"
BLUETOOTH
device
that
supports A2DP
[Analog]
"Analog"
Device
that
is
connected
to
the
ANALOG
IN
jacks
[USB]
"USB"
USB
device
that
is
connected
to
the
~
{USB)
port
[Screen
mirroring]
"SCRM"
Screen
mirroring-compatible
device
[Home
Network]
"H.Net"
Content stored on a server
[Music Services]
"M.Serv"
Content
of
music services offered on
the
Internet
Tip
You can also press
PAIRING
and
MIRRORING
on
the
remote control
to
select
[Biuetooth
Audio] and [Screen
mirroring]
respectively.

Playing
Music/Photo
from
a
USB
Device
You can play
music/photo
files stored on a connected
USB
device.
For playable types
of
files, see
I/
Playable Types
of
Files" (page 49).
1
Connect
the
USB
device
to
the
f
(USB)
port.
Refer
to
the
operating
instructions
of
the
USB
device
before
connecting.
2
Press HOME.
The
home
menu
appears on
the
TV
screen.
3
Press
+!+I+/+
to
select [USB],
and
·then press
8.
4
Press+!+
to
select n [Music]
or~
[Photo].
5
Select
the
desired
content
using+/+/+/+
and
8.
-
Do
not
remove
the
USB
device
during
operation. To avoid data
corruption
or
damage
to
the
USB
device,
turn
the
system
off
before
connecting
or
removing
the
USB
device.
sus
Listening
to
Music
from
a
BLUETOOTH
Device
Refer
to
1/BLUETOOTH
Functions" (page
11).
Playing
Music/Photo
from
Other
Devices
via
the
Network
Function
Refer
to
I/
Network
Functions" (page
15).

Sound
Adjustment
Enjoying
Sound
Effects
(Football
mode,
etc.)
You
can
easily enjoy pre-programmed sound fields
that
are tailored
to
different kinds
of
sound sources.
Press SOUND
FIELD
repeatedly
during
playback.
[
ClearAudio+]
The
appropriate sound setting
is
automaticallyselected
for
the sound source.
[Movie]
Sound effects are optimized for movie-viewing.
[Music]
Sound effects are optimized for music.
[Game Studio]
Sound effects are optimized for game play.
[Music Arena]
Sound effects allow you to enjoy live music concerts filled with great
excitement created by Sony's unique Audio
DSP
technology.
[Standard]
Sound effects are optimized for the individual source.
Tip
You can also press
CLEARAUDIO+
to
select [CiearAudio+].
To
select
the
sound
field
from
the
options
menu
1 Press
OPTIONS
and+!+
to
select [Sound Field], and
then
press
(B.
2 Press +!+to select
the
desired sound field, and
then
press
(±).
To
select
the
football
mode
Sound effects are produced
to
give you agenuine in-stadium feeling
when watching live football broadcasts.
Press
FOOTBALL
repeatedly
while
watching
a
football
match
broadcast.
• [Narration On]: Creates
an
immersive feeling
of
being
in
a football
stadium through enhanced stadium cheers.
• [Narration Off]: Creates a more immersive feeling
of
being in a
football stadium by minimizing the volume level
of
narration
in
addition
to
enhancing cheers.
• [Off]: The football mode
is
turned off.
em
•
We
recommend
that
you select the football mode when watching a
football match broadcast.
•If
you hear unnatural sound
in
the content when [Narration Off]
is
selected, you should use [Narration On].
•The
football mode
is
automatically set
to
[Off] when you perform the
following.
-Turn
off
the system.
-Press
any
of
the sound field buttons (page 48).
•This feature does not support monaural sound.
•If
the stereo audio signal input
is
detected, Sony's proprietary up-mixer
gets activated depending on the selected sound field.
Tips
•You can also select [Football] from the options menu (page
28).
•If
5.1
channel audio stream
is
available, we recommend
that
you select
it on your
TV
or cable/satellite box.
"'
0
c
::J
a.
)>
a.
-·
c
"'
r+
3
tD
:::::s
r+
continued
----
gus

To
select
the
night
mode
Sound
is
output
at
low
volume
with
minimum
loss
of
fidelity
and
clarity
of
dialogue.
Press NIGHT repeatedly.
• [On]: Activates
the
night
mode
function.
• [Off]: Deactivates the
night
mode
function.
Tip
You
can
also select [Night] from the options menu (page
28).
To
select
the
voice
mode
This helps make dialogues clearer.
Press
VOICE
repeatedly.
• [Type 1]: Standard
• [Type 2]: Dialogue range
is
enhanced.
• [Type 3]: Dialogue range
is
enhanced, and
the
parts
of
range
difficult
to
be discerned by the elderly are boosted.
Tip
You
can
also select [Voice] from the options menu (page
28).
1QUS
Using
the
OSEE
HX
Function
(Reproducing
Audio
Codec
Files
with
Natural
Sound
Quality)
OSEE
HX
upscales existing sound sources
to
near hi-resolution
sound quality, and it makes you feel
as
if
you are really there
at
the
recording studio
or
concert.
This function
is
only available when [Music]
is
selected
as
the
sound
field.
Ia
• Only the fine sound restoration feature
of
the
OSEE
HX
function will be
applied
to
PCM
audio sources with lossless compression. The
OSEE
HX
function does not work for
OSD
(DSDIFF,
DSF)
format files. The file
is
expanded
to
a maximum 96 kHz/24 bit equivalent.
•This function works with 2-channel digital input signals
of
44.1
kHz
or
48kHz.
•This function does
not
work when [Analog]
is
selected.
•This function does not work when [Transmitter] in [Biuetooth Mode]
is
selected. (page
24).
1
Press HOME.
The
home
menu appears on
the
TV
screen.
2 Select
~
[Setup]-
~·>
[Audio
Settings]
from
the
home
menu.
3
Select
[OSEE
HX].
4 Select
[On].

BLUETOOTH
Functions
Listening
to
Music
from
a
BLUETOOTH
Device
®®:1
DLJo)
o:
Indicator (blue)
To
pair
the
system
with
the
device (Pairing)
1
Press PAIRING.
The indicator (blue)
of
the
Bar Speaker flashes quickly during
BLUETOOTH
pairing.
2 Turn on
the
BLUETOOTH
function, and
then
select "HT-ST9"
after
searching
for
it
on
the
BLUETOOTH
device.
If
a Passkey
is
requested, enter
"0000."
3
Make sure
that
the
indicator(blue)
of
the
Bar Speaker lights up.
(This indicates
that
a connection has been established.)
To
cancel
pairing
operation
Press
the
HOME
or
INPUT.
Tip
Once
the
BLUETOOTH
connection
is
established, an
indication
recommending
which
application
to
download
will
be
displayed
according
to
what
device
you
have connected.
Following
the
instructions displayed, an
application
called "SongPal,"
which
will
enable
you
to
operate
this system, can be
downloaded.
Refer
to
"Controlling
the
System Using a
Smartphone
or
Tablet Device
{SongPal}" (page 30)
for
details on "SongPal."
To
listen
to
sound
from
the
paired device
1
Press HOME.
The
home
menu
appears on
the
TV
screen.
2 Select [Biuetooth Audio].
The
indicator
(blue)
of
the
Bar Speaker flashes while
attempting
BLUETOOTH
pairing.
3
On
the
BLUETOOTH
device, select "HT-ST9."
4
Make sure
that
the
indicator(blue)
of
the
Bar Speaker lights up.
(This indicates
that
a connection has been established.)
5
Start
audio
playback
with
the
music software on
the
connected
BLUETOOTH
device.
11m
Once
the
system and
the
BLUETOOTH
device are
connected,
you
can
control
playback by pressing...,...,
II,
•,
..._/.._..and~~~-
m
r-
c:
m
.....
0
0
.....
::::t
"T1
c:
::l
n
r+
(5'
::l
"'
continued
---
11us

By
holding
an NFC-compatible
BLUETOOTH
device
near
to
the
N
mark
on
the
Bar Speaker,
the
system and BLUETOOTH device
will
pair and make a BLUETOOTH
connection
automatically.
Indicator (blue)
Compatible devices
Smartphones, tablets, and music players with the
NFC
function built-in
(OS:
Android™ 2.3.3 or later, excluding Android 3.x)
11m!
• Depending on
your
device, you may need
to
perform
the
following
items on
your
remote device in advance.
-Turn
on
the
NFC
function.
-Download
the
"NFC
Easy
Connect" application
from
Google
Play™
and
start the application. (The application may
not
be available in some
countries/regions.) For details, refer
to
the
operating instructions
of
your device.
•This feature does
not
work
with
BLUETOOTH-compatible receivers (such
as
headphones).
To
listen
to
sound using a BLUETOOTH-compatible
receiver, see "Listening
to
Sound by Transmitting
to
a
BLUETOOTH-compatible Receiver" (page
13).
1 Touch
the
N
mark
of
the
Bar Speaker with
the
BLUETOOTH
device.
2
Make
sure
that
the
indicator (blue)
of
the
Bar Speaker lights
up. (This indicates
that
a connection has been established.)
3 Start playback
of
an audio source on
the
BLUETOOTH device.

Listening
to
Sound
by
Transmitting
to
a
BLUETOOTH-compatible
Receiver
You can listen
to
sound
of
the
source
playing
via
this
system
by
using
a BLUETOOTH-compatible receiver (such
as
headphones).
1 Press HOME.
The
home
menu
appears
on
the
TV screen.
2 Select
iii
[Setup]-
0 [Biuetooth Settings] from the
home
menu.
3
Select [Biuetooth Mode].
4 Select [Transmitter].
5
Turn on
BLUETOOTH
function on
the
BLUETOOTH receiver.
6
Select
the
BLUETOOTH
receiver's
name
from the [Device
List]
in [Biuetooth Settings] (page 24).
When
the
BLUETOOTH
connection
is
established,
the
indicator
(blue)
lights
up.
If
you
cannot
find
your
BLUETOOTH receiver's
name
in
the
list,
select [Scan].
IE
The [Device List] screen appears after a confirmation dialog when
you change [Biuetooth Mode]
to
[Transmitter] from other modes.
7 Start playback
of
the audio source via this system.
The
sound
is
output
from
the
BLUETOOTH receiver.
8 Adjust the volume.
Adjust
the
volume
level
of
the
BLUETOOTH receiver first.
If
the
volume
level
is
still
too
low,
adjust
the
volume
level on
the
system.
When
connected
with
a BLUETOOTH receiver,
volume
level
of
the
system
cannot
be
controlled.
VOLUME+/-
on
the
Bar
Speaker
and~
+I-
on
the
remote
control
only
work
for
the
BLUETOOTH receiver.
m:mD
•You can register up
to
9
BLUETOOTH
receivers.
If
a10th
BLUETOOTH
receiver
is
registered, the least recently connected
BLUETOOTH
receiver
will be replaced by the new one.
•The system
can
display up
to
15
detected
BLUETOOTH
receivers in the
[Device List].
•You cannot change the sound effect or settings in the options menu
while transmitting sound.
• Some content cannot
be
output
due to content protection.
•The audio
output
from the
BLUETOOTH
receiver may
be
delayed from
that
on the system because
of
the characteristics
of
BLUETOOTH
wireless technology.
•
No
sound
is
output
from speakers and
HDMI
OUT
(ARC)
jack when a
BLUETOOTH
receiver
is
successfully connected to the system.
• [Screen mirroring], [Biuetooth Audio] and Home Theatre Control
function are disabled when the system
is
in transmitter mode.
Tips
•You can enable or disable the reception
of
AAC
or
LDAC
audio from the
BLUETOOTH
device {page
25).
•You can also switch the [Biuetooth Mode] using
RX/TX
on the remote
control.
When the
BLUETOOTH
device
in
step 5 has finished pairing and
that
is
the most recently connected device, you can connect it to the system
automatically by simply pressing
RX/TX
on the remote control.
In
this
case,
you do not need
to
perform step
6.
CD
r-
c::
m
-4
0
0
-4
:X:
.,
s::
:::;,
n
,...
c;·
:::;,
"'
continued---
13us

To disconnect
the
BLUETOOTH receiver
Perform any
of
the
following
items.
-Disable
the
BLUETOOTH
function
on
the
BLUETOOTH
receiver.
-Set
[Biuetooth Mode]
to
[Receiver] or [Off] (page 24).
-Turn
off
the
system or
the
BLUETOOTH
receiver.
To
delete
a registered BLUETOOTH receiver
from
the
device list
1
Follow
steps 1
to
6
of
"Listening
to
Sound
by
Transmitting
to
a
BLUETOOTH-compatible Receiver."
2 Select
the
device,
and
then
press OPTIONS.
3 Select [Remove].
4
Follow
the
on-screen
instructions
to
delete
the
desired
BLUETOOTH
device
from
the
device list.
14US

Network
Functions
Connecting
to
a
Wired
Network
The
following
illustration
is
an example configuration
of
the
network.
We
recommend a wired connection
for
stable
network
functioning.
0 Server
(9
LAN
cable (not supplied)
(9
Router
G)
Modem
0
Internet
Tip
We
recommend
that
you use a shielded straight interface cable
(LAN
cable).
You can set
up
a wired network connection by the
following
procedure.
1 Press HOME.
The
home
menu appears on the
TV
screen.
2
Select
;i;
[Setup]-
~
[Network Settings] from the home
menu.
3
Select [Internet Settings].
4 Select [Wired Setup].
The screen
for
selecting the
IP
address acquisition method
appears on the
TV
screen.
5
Select [Auto].
The system starts connecting
to
the
network.
The confirmation screen appears.
6 Press
+!+
to browse information, and then press
•.
7
Select [Save
&
Connect].
The system starts connecting
to
the network.
For
details, refer
to
the
messages
that
appear on the
TV
screen.
If
using a fixed IP address
Select [Custom] in step 5 and
follow
the
on-screen instructions.
Tip
See
[Network
Connection Status]
when
checking
the
network
connection
status.
15US
2
tD
....
:e
0
...
""'
.,
c:
:::l
n
....
(5'
:::l
"'

Connecting
to
a
Wireless
Network
Before performing network settings
When
your
wireless
LAN
router
(access
point)
is
Wi-Fi Protected
Setup (WPS)-compatible, you can easily set
the
network
settings
with
the
WPS
button.
If
not, you will be required
to
select
or
enter
the
following
information.
Check
the
following
information
in advance.
• The
network
name
(SSID)*
of
the
wireless
LAN
router/access
point
• The security key (password)**
for
the
network
*
SSID
(Service
Set
Identifier)
is
aname that identifies aparticular
access
point.
**
This
information should
be
available from alabel
on
your wireless
LAN
router/access point, from the operating instructions, from the person
who set up yourwireless network, orfrom the information provided
by
your Internet service provider.
1 Press HOME.
The
home
menu
appears on
the
TV
screen.
2
Select
;i;
[Setup]-
~
[Network Settings] from the
home
3
4
5
6
7
menu.
Select [Internet Settings].
Select [Wireless Setup(built-in)].
Select [Wi-Fi Protected Setup (WPS)].
Select [Start].
Press
the
WPS
button on the access point.
The system starts connecting
to
the
network.
16US
If
selecting
the
network
name (SSID) you
want
Select
the
network
name
(SSID)
you
want
in step
5,
enter
the
security
key (or passphrase) using
the
software
keyboard, and
then
select
[Enter]
to
confirm
the
security key. The system starts connecting
to
the
network. For details, refer
to
the
messages
that
appear
on
the
TV
screen.
If using a fixed
IP
address
Select [New connection registration] in step 5 and
follow
the
on-
screen instructions.
If
using a (WPS) PIN code
Select [New
connection
registration] in step
5,
and
then
select [(WPS)
PIN
Method].
Tip
See
[Network Connection Status] when checking the network connection
status.
Playing
Music/Photo
Files
on
a
Home
Network
You can play
music/photo
files on
other
home
network-compatible
devices
by
connecting
them
to
your
home
network.
This system can be used
as
a player and renderer.
• Server: Stores and shares digital media
content
• Player: Finds and plays digital media
content
from
the
server
• Renderer: Receives and plays
digital
media
content
from
the
server
and can be operated
by
another
device (controller)
• Controller: Operates
the
renderer device
Prepare to use
the
Home
Network
function.
• Connect
the
system
to
a network.
• Prepare
another
home
network-compatible
device. For details,
refer
to
the
operating
instructions
of
the
device.

Player
(This
system)
1
Press HOME.
The
home
menu appears on
the
TV
screen.
2 Select [Home Network].
3 Select
the
desired device.
4 Press
+!+
to select n[Music] or
~
[Photo] and then press
e.
5
Select
the
desired content
using+!+!+!+
and
e.
You can operate
the
system
with
a
home
network
contr~ller-.
compatible
device
(a
mobile phone app, etc), when play1ng
f1les
stored on a server.
Server Renderer
L1
(This system)
~
.
Lm
~
[~I
:
~:::;;::
0
===:;:=;:
(@);=;~:;;=;o~(@)~(@)~o
:==~==o
~~;;=
:
iJ
Controller
For details on operation, refer
to
the
operating instructions
of
the
home
network
controller-compatible device.
m:ml
Do
not
operate
the
system
with
the supplied remote control and a
controller at
the
same time.
Tip
The system
is
compatible
with
the "Play To"
function
of
Windows Media®
Player
12,
which comes standard
with
Windows
7.
2
tD
...
:e
0
...
"
.,
c:
::l
n
~.
0
::l
"'

Displaying
the
Screen
of
the
Mobile
Device
on
a
TV
{Screen
mirroring)
[Screen
mirroring]
is
a function
to
display
the
screen
of
a
mobile
device on
the
TV
by
Miracast technology.
The system can be connected directly
with
a Screen
mirroring-
compatible
device (e.g. smartphone, tablet). You can
enjoy
using
the display screen
of
the device on
your
large
TV
screen. No wireless
router (or access
point)
is
required
to
use this feature.
1
Press MIRRORING.
2 Follow
the
on-screen instructions.
Activate
the
Screen mirroring function
from
your
mobile
device.
For details on
how
to
activate
the
function, refer
to
the
operating
instructions supplied
with
your
mobile
device.
To
connect to an Xperia smartphone using One-touch
mirroring function
(NFC)
Press MIRRORING,
then
hold the Xperia
smartphone
near
to
theN-
Mark on
the
Bar Speaker.
To
exit mirroring
Press
HOME
or
INPUT.
Ga
•When using Screen mirroring, the quality
of
picture and sound may
sometimes be deteriorated due
to
interference from other networks.
• Depending on
the
usage environment, the quality
of
the picture and
sound may be deteriorated.
•Some network functions may not be available during Screen mirroring.
• Make sure
that
your device
is
compatible with Miracast. Connectivity
with
all Miracast compatible devices
is
not
guaranteed.
Tip
Ifyou
see
that
the
quality
of
picture and sound
is
often deteriorated, try
setting the [Screen mirroring
RF
Setting] (page 26).
18US
Enjoying
Various
Online
Services
{Music
Services)
You can listen
to
music services offered on
the
Internet
with
this
system. To use
this
function,
the
system
must
be connected
to
the
Internet.
-
You may have
to
register your system before using some music services.
For
details on registration, visit the customer support site
of
the service
provider.
1
Press
HOME.
The
home
menu
appears on the
TV
screen.
2
Select [Music Services].
The music services list appears on
the
TV
screen.
Tip
You can update the service provider list by pressing
OPTIONS,
followed by select [Update List].
3 Select
the
desired music service.

You can enjoy listening
to
content from a variety
of
music services
offered on the Internet.
To
check
the
registration code
You may be required
to
enter the registration code
of
the
system
when you use a
new
music service.
1 Select [Music Services]
from
the
home
menu.
The service provider list appears on the
TV
screen.
2 Press
+/+to
select
the
music service you
want,
then press G).
The registration
information
including
the
registration code
appears on
the
TV
screen.
-
You may
see
the registration information on the
TV
screen when you
entera music service. The timing this information appears depend on the
music service.
19US
2
tD
,..
:e
0
..,
""'
"T1
r:::
:::J
n
:!:
0
:::J
"'

Viewing
Copyright-protected
4K
Content
Connecting
a
4K
TV
To
view
copyright-protected
4K
content
and listen
to
sound
from
the
Bar Speaker, connect the Bar Speaker and
the
TV
via an
HDCP
2.2-
compatible HDMI jack.
You can only
view
copyright-protected
4K
content
through
the
HDCP
2.2-compatible HDMI jack connection. For details on
whether
the
TV
is
equipped
with
HDCP
2.2- compatible HDMI jack, refer
to
the
operating instructions supplied
with
the
TV.
2QUS
Hii:Jml
INPUT
HDCP
2.2-
compatible
HDMI jack
HDMI cable
(High Speed type, supplied)
*
ARC
(Audio Return Channel)
The
ARC
function
sends digital sound
from
a
TV
to
this system
or
an
AV
amplifier, using
just
an HDMI cable.
Other manuals for HT-ST9
7
Table of contents
Other Sony Speakers System manuals

Sony
Sony SS-T505 User manual

Sony
Sony 5RS-ZX1 User manual

Sony
Sony SA-VE155 User manual

Sony
Sony WH-L600 User manual

Sony
Sony SRS-A25 User manual

Sony
Sony SA-NS500 User manual

Sony
Sony PMC-D307L User manual

Sony
Sony SRS-GU10iP Marketing User manual

Sony
Sony SRS-PC21L User manual

Sony
Sony HT-X9000F User guide