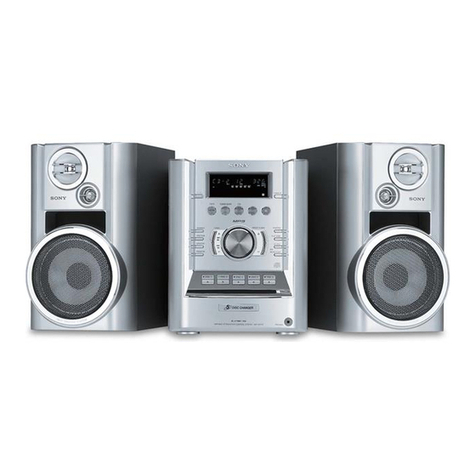
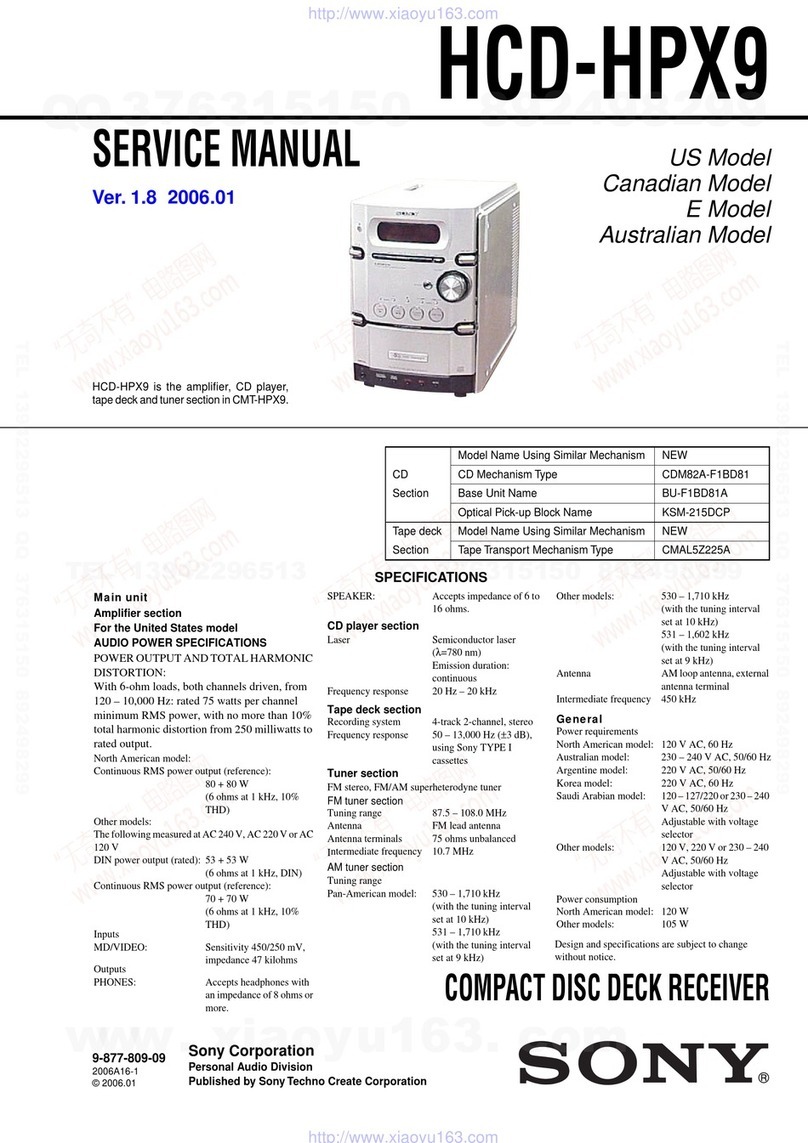
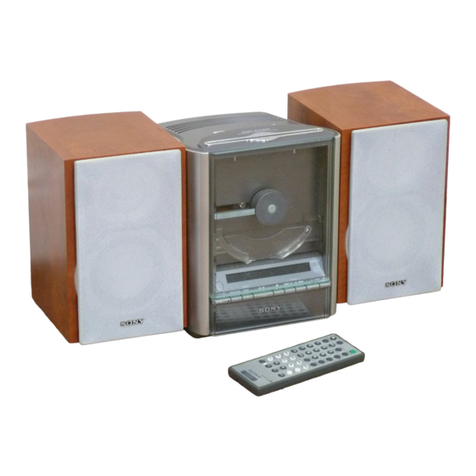
Sony LBT-D560 User manual

SON'TY.
Compact
Hi-Fi
Stereo
System
Operating
instructions
Wisc
LBT-D560
©
y
Sony
Corporation

2
To
prevent
fire.or
shock
hazard,
do
not
expose
the
unit
to
rain
or
moisture.
CAUTION
RISK
OF
ELECTRIC
SHOCK
DO
NOT
OPEN
CAUTION:
TO
REDUCE
THE
RISK
OF
ELECTRIC
SHOCK,
00
NOT
REMOVE
COVER
(OA
BACK).
NO
USER-SERVICEABLE
PARTS
INSIDE.
REFER
SERVICING
TO
QUALIFIED
SERVICE
PERSONNEL.
This
symbol
is
intended
to
alert
the
user
to
the
presence
of
uninsulated
“dangerous
voltage”
within
the
product's
enclosure
that
may
be
of
sufficient
magnitude
to
constitute
a
risk
of
electric
shock
to
persons.
This
symbol
is
intended
to
alert
the
user
to
the
presence
of
important
operating
and
maintenance
(servicing)
instructions
in
the
literature
accompanying
the
appliance.
INFORMATION
This
equipment
has
been
tested
and
found
to
comply
with
the
limits
for
a
Class
B
digital
device,
pursuant
to
Part
15
of
the
FCC
Rules.
These
limits
are
designed
to
provide
reasonable
protection
against
harmful
interference
in
a
residential
installation.
This
equipment
generates,
uses,
and
can
radiate
radio
frequency
energy
and,
if
not
installed
and
used
in
accordance
with
the
instructions,
may
cause
harmful
interference
to
radio
communications.
However,
there
is
no
guarantee
that
interference
will
not
occur
in
a
particular
installation.
If
this
equipment
does
cause
harmful
interference
to
radio
or
television
reception,
which
can
be
determined
by
turning
the
equipment
off
and
on,
the
user
is
encouraged
to
try
to
correct
the
interference
by
one
or
more
of
the
following
measures:
-Reorient
or
relocate
the
receiving
antenna.
~
Increase
the
separation
between
the
equipment
and
receiver.
~
Connect
the
equipment
into
an
outlet
on
a
circuit
different
from
that
to
which
the
receiver
is
connected.
-
Consult
the
dealer
or
an
experienced
radio/TV
technician
for
help.
CAUTION
You
are
cautioned
that
any
changes
or
modification
not
expressly
approved
in
this
manual
could
void
your
authority
to
operate
this
equipment.
;
Note
to
CATV
installer:
This
reminder
is
provided
to
call
CATV
system
installer’s
attention
to
Article
820-40
of
the
NEC
that
provides
guidelines
for
proper
grounding
and,
in
particular,
specifies
that
the
cable
ground
shall
be
connected
to
the
grounding
system
of
the
building,
as
close
to
the
point
of
cable
entry
as
practical.
Owner’s
Record
The
model
and
serial
numbers
are
located
at
the
rear
of
the
unit.
Record
the
serial
number
in
the
space
provided
below.
Refer
to
them
whenever
you
call
upon
your
Sony
dealer
regarding
this
product.
Model
No.
LBT-D560
Serial
No.
Before
operating
the
unit
Remove
the
transit
key
on
the
bottom
of
the
unit
by
following
the
instructions
on
the
label,
and
keep
it
in
a
safe
place.
The
transit
key
protects
the
optical
system
against
shock
during
transportation.
Transit
key
To
re-install
the
transit
key
when
transporting
the
unit
1
Remove
all
CDs.
2
Press
2
OPEN/CLOSE
to
close
the
disc
tray
and
confirm
that
“Y
(or
Y,
J
...)”
has
disappeared
from
the
display.
3
Turn
off
the
power.
4
Insert
the
transit
key
into
its
hole
to
lock.
Welcome
!
Thank
you
for
purchasing
the
Sony
Hi-Fi
Component
System.
This
series
is
packed
with
fun
features.
Here
are
just
a
few:
©
DBFB
(Dynamic
Bass
Feedback)
system
that
boosts
low
frequency
range audio
to
provide
deep,
powerful
bass
sound
¢
A
preset
feature,
that
lets
you
store
and
recall
up
to
30
of
your
favorite
radio
stations
*
A
graphic
equalizer
that
lets
you
adjust
the
audio
quality
to
fit
five
music
types
¢
A
timer
that
lets
you
set
the
CD
player,
tape
player
or
radio
to
turn
on
and
off
whenever
you
want
¢
A
dual
tape
deck
that
lets
you
record
from
the
radio,
CD
player
or
from
the
other
tape
deck
and
relay
play
from
both
decks
*
ACD
player
that
lets
you
play
up
to
5
CDs
in
a
row
¢
A
remote
that
lets
you
control
the
music
from
your
seat

NF\e)(=Meyj
Contents
Chapter
1:
Setting
Up
Connecting
the
Stereo
4
Inserting
the
Batteries
5
Setting
the
Clock
6
Chapter
2:
the
CD
Player
Playing
CDs
(normal
play)
7
Playing
Tracks
in
Random
Order
(shuffle
play)
8
Playing
Tracks
in
the
Desired
Order
(program
play)
8
Playing
Tracks
Repeatedly
(repeat
play)
9
Chapter
3:
the
Radio
©
Listening
to
the
Radio
10
Presetting
Radio
Stations
11
Playing
Preset
Radio
Stations
11
Chapter
4:
the
Tape
Player
Playinga
Tape
12
RecordingaCD
13
Recording
a
CD:
Specifying
Tape
Length
(time
edit)
14
Recording
a
CD:
Specifying
Track
Order
(program
edit)
14
Recording
From
the
Radio
15
Recording
From
Another
Tape
(dubbing)
15
Chapter
5:
Sound
Adjustment
Adjusting
the
Sound
17
Selecting
the
Audio
Emphasis
17
Adjusting
the
Audio
Emphasis
18
Making
Your
Personal
Audio
Emphasis
File
(personal
file)
18
Chapter
6:
Additional
Features
Falling
Asleep
to
Music
19
Waking
Up
to
Music
19
Timer-Recording
Radio
Programs
20
Connecting
Optional
Equipment
20
For
Your
Information
Precautions
21
Troubleshooting
Guide
21
Maintenance
22
Specifications
22
Index
to
Parts
and
Controls
23
Index
(Back
cover)
3

Chapter
1:
Connecting
the
Stereo
Inserting
the
Batteries
Setting
the
Clock
4
|
Chapter
1:
Setting
Up
eae
pe
aa
iene
PO
eee
Connecting
the
Stereo
Use
the
illustrations
below
to
connect
your
stereo.
If
you.
want
to
connect
any
optional
components
to
the
stereo,
see
“Connecting
Optional
Equipment”
in
Chapter
6.
|
step
1
|
Connecting
the
Speakers
1
Twist
the
speaker
cable
coating
and
strip
it
from
the
end
of
the
cable.
Se.
oe
2
Connect
the
right
speaker
to
R
connectors
and
the
left
speaker
to
L
connectors
with
the
red
cord
to
+
and
the
black
cord
to
-.
Bore
Connecting
the
Antenna
FM
wire
antenna*
AM
loop
antenna
(supplied)
*Note:
Extend
it
horizontally
To
improve
the
FM
reception
Connect
an
outdoor
FM
antenna
to
the
FM
75Q.
terminal,
using
a
75-ohm
coaxial
cable.
important
Ground
the
external
antenna
from
-#
terminal
against
lightning
with
the
screw
clamp.
To
prevent
a
gas
explosion,
do
not
connect
the
ground
wire
to
a
gas
pipe.
75-ohm
coaxial
cable
(not
supplied)
Ground
Wire
To
improve
the
AM
reception
After
you
connect
the
AM
antenna,
connect
a
6-
to
15-
meter
(20-
to
50-
feet)
insulated
wire
to
the
AM
terminal.
Connect
the
+
terminal
to
earth.
important
Ground
the
external
antenna
from
+h
terminal
against
lightning
with
the
screw
clamp.
To
prevent
a
gas
explosion,
do
not
connect
the
ground
wire
to
a
gas
pipe.
Insulated
wires
(not
supplied)
Ground
Wire
STEP
3
|
Connecting
the
Power
Connect
the
power
cord
to
a
wall
outlet
after
you
have
made
all
the
above
connections.
to
a
wall
outlet

AM
loop
antenna
(supplied)
Right
speaker
FM
antenna
(supplied)
to
a
wall
outlet
un
ee
er
eae
Inserting
the
Batteries
Install
two
size
AA
(R6)
batteries
in
the
supplied
remote
for
remote
control.
1
Open
the
lid.
oS
eae
2
insert
two
size
AA
(R6)
batteries.
Match
the
+
and
-
to
the
diagram
in
the
battery
compartment.
Left
speaker
1Do
this
connection
last!
3
Close
the
lid.
Battery
life
You
can
expect
the
remote
to
operate
for
about
six
months
(using
Sony
SUM-3
(NS)
batteries)
before
the
batteries
run
down.
When
the
batteries
no
longer
operate
the
remote,
replace
all
the
batteries
with
new
ones.
To
avoid
battery
leakage
If
you
are
not
going
to
use
the
remote
for
a
long
time,
remove
the
batteries
to
avoid
damage
caused
by
corrosion
from
battery
leakage.
Chapter
1:
Setting
Up
5

=
ee
Setting
the
Clock
The
built-in
clock
shows
the
time
in
the
display.
1
2,4
Hl
|
—$—————————
1
Keep
pressing
CLOCK
SET
until
the
hour
indicator
begins
flashing.
i
SEI
ieee
flashing
2
Set
the
current
hour
by
pressing
&
or
¥
(CURSOR
CONTROL)
until
the
correct
hour
appears.
4
ry
SET
aoa
“T
flashing
3
Press
ENTER/NEXT.
The
minutes
indicator
begins
flashing.
A
zit
Lt
Ue
flashing
us
tm
~4
4
set
the
current
minute
by
pressing
A
or
V
until
the
correct
minute
appears.
flashing
5
Press
ENTER/NEXT.
Use
the
time
signal
to
set
the
clock
accurately.
“OK”
appears
in
the
display
and
the
clock
starts
running.
Cc
=
wQ
my
Ln
a
2
Chapter
1:
Setting
Up
To
check
the
time
while
power
is
on
Press
DISPLAY.
The
current
time
appears
for
a
few
seconds.
To
correct
the
clock
setting
Repeat
steps
1
to
5.

Gal]
0)
<=)
as
the
CD
Player
Playing
CDs
(normal
play)
Playing
Tracks
in
Random
Order
(shuffle
play)
Playing
Tracks
in
the
Desired
Order
(program
play)
Playing
Tracks
Repeatedly
(repeat
play)
SSeS
ae
eee
eee
Playing
CDs
(normal
play)
After-you
insert
up
to
five
CDs
at
one
time,
you
can
play
all
tracks
or
discs
in
the
original
order
consecutively
(normal
play).
Besides,
you
can
play
them
in
four
modes:
normal,
shuffle,
program
or
repeat.
Before
you
play
the
CD,
decrease
the
sound
level
by
turning
the
VOLUME
control
counterclockwise,
to
prevent
damage
to
the
speakers.
SYSTEM
POWER
7ON
DISPLAY
1
Press
FUNCTION
repeatedly
until
“CD”
appears
in
the
display.
CD
is
selected.
2
Press
2
OPEN/CLOSE
to
open
the
disc
trays.
3
Holding
the
CD
by
the
edge,
place
the
CD
on
the
disc
tray
with
the
label
side
up.
(When
you
play
an
8-cm
CD,
place
it
without
an
adaptor
on
the
inner
circle
of
the
disc
tray.)
4
Press
DISC
SKIP
to
place
up
to
four
more
CDs
in
the
tray.
The
next
tray
appears
each
time
you
press
DISC
SKIP.
The
disc
on
the
front
tray
will
be
selected
first.
5
press
2
OPEN/CLOSE
again.
The
disc
number
appears
in
the
display.
=
=——>
or
wee
VIP”
Te
ry
6
Press
CONTINUE
on
the
remote
to
choose
whether
to
play
"1
DISC"
or
“ALL
DISCS”.
Choose
1
DISC
To
play
Only
a
CD
you
have
selected.
ALL
DISCS
All
CDs
consecutively
in
the
order
of
disc
number.
Empty
disc
trays
are
skipped.
MEE»
em
7
Press
[>
(or
CD
PLAY
on
the
remote)
or
DISC
1-5.
Play
starts
from
the
beginning
of
the
selected
CD.
Disc
calendar
Track
number
Music
calendar
Disc
number
Playing
time
8
Adjust
the
volume.
Turn
VOLUME
clockwise
to
turn
up
the
volume,
or
counterclockwise
to
turn
down.
(Or
press
VOL
+/-
on
the
remote.)
To
Press
Stop
play
a
Pause
ou
Resume
play
C
or
fl
Remove
the
CD
@
OPEN/CLOSE
continue
to
next
page
>
Chapter
2:
the
CD
Player
7

~
continued
To
check
the
remaining
or
total
playing
time
Press
DISPLAY
repeatedly.
Each
time
you
press
DISPLAY
while
playing
a
CD,
the
display
changes
as
follows.
Playing
time
on
the
current
track
|
Remaining
time
on
the
current
track
Remaining
time
on
the
CD
(1
DISC
play
mode)
or
“PLAY”
indication
(ALL
DISCS
play
mode)
Clock
(appears
for
a
few
seconds)
Note
e”.-.--"
appears
in
the
display
when
the
time
is
100
minutes
or
more.
One
Touch
Play
feature
Press
CD
(function)
(or
CD
PLAY
on
the
remote)
when
the
power
is
off.
You
can
listen
to
the
last
selected
CD
without
pressing
any
other
buttons
when
a
CD
is
in
the
player.
If
no
CD
is
inserted,
the
system
turns
on,
and
“CD
no
disc”
appears
in
the
display.
If
you
press
CD
(function)
or
DISC
1-5
while
other
source
is
selected,
the
CD
player
is
selected
and
the
play
starts
automatically.
Locating
a
Specific
Track
You
can
quickly
locate
any
track
while
playing
or
pausing
a
CD.
To
locate
Press
the
next
or
PP
PDI
(or
PPI
on
the
succeeding
remote)
repeatedly
until
tracks
you
find
the
track
the
currentor
Ki
(or
Kéd
on
the
preceding
remote)
repeatedly
until
tracks
you
find
the
track
Locating
a
Particular
Point
in
a
Track
You
can
locate
a
particular
point
in
a
track
while
playing
or
pausing
a
CD.
Use
the
buttons
on
the
unit
to
operate
this
feature.
8
Chapter
2:
the
CD
Player
To
locate
a
Press
point
While
PDP
(forward)
or
monitoring
the
#«K)<4#4
(backward)
and
sound
hold
down
until
you
find
pas
the
point.
Quickly
by
PDD
(forward)
or
observing
the
KkKi<44
(backward)
and
display
during
hold
down
until
you
find
pause
the
point.
You
will
not
hear
the
sound
during
this
operation.
Locating
a
Specific
cD
You
can
locate
the
beginning
of
any
CD
during
play,
pause,
or
stop
mode.
To
locate
the
beginning
of
a
particular
CD
and
start
playing
Press
the
corresponding
DISC
1
-
5.
To
change
to
the
next
CD
Press
DISC
SKIP.
[a
Playing
Tracks
in
Random
Order
(shuffle
play)
You
can
play
all
the
tracks
on
a
CD
or
all
CDs
in
random
order.
1
Press
FUNCTION
repeatedly
until
“CD”
appears
in
the
display.
2
Press
SHUFFLE
on
the
remote
to
choose
whether
to
play
“1
DISC”
or
“ALL
DISCS”.
“ALL
DISCS
SHUFFLE”
or
“1
DISC
SHUFFLE”
appears
in
the
display.
3
Press
>
(or
CD
PLAY
on
the
remote).
“
t3”
appears
and
then
all
the
tracks
play
in
random
order.
To
skip
to
the
next
track,
press
PDI.
To
replay
the
current
track,
press
KiK1<44.
You
cannot
replay
the
previous
track.
To
stop
playing
Press
@.
To
cancel
shuffle
play
Press
CONTINUE
on
the
remote.
To
select
the
desired
CD
Press
DISC
1
-
5
during
“1
DISC
SHUFFLE”
play.
Playing
Tracks
in
the
Desired
Order
(program
play)
You
can
program
up
to
32
tracks
from
all
the
CDs
in
the
order
you
want
them
to
be
played.
Use
the
buttons
on
the
remote
to
do
this
operation.
1
Press
FUNCTION
repeatedly
until
“CD”
appears
in
the
display.
om
|
wi
&
Fee
eS
eee
ee
ee
ee

2
Press
PROGRAM
.
“PROGRAM”
appears
in
the
display.
3
Press
DISC
SKIP
repeatedly
(or
DISC
1
-
5
on
the
unit)
to
choose
a
CD.
4
Press
kd
or
BPI
to
choose
a
track.
The
disc
number,
track
number
and
the
total
playing
time
appear.
5
Press
PROGRAM.
The
chosen
track
is
programmed
and
its
number
lights
up
in
the
music
calendar.
If
the
track
number
disappears
before
you
press
PROGRAM,
go
back
to
step
3.
To
program
additional
tracks
from
the
same
CD,
repeat
steps
4
and
5.
To
program
additional
tracks
from
another
CD,
repeat
steps
3
to
5.
Note
elf
“--.--”
appears
instead
of
the
total
playing
time,
this
means
-you
have
programmed
a
track
number
which
exceeds
20.
—the
total
time
has
exceeded
100
minutes.
6
Press
CD
PLAY
(or
>).
All
the
tracks
play
in
the
order
you
chose.
To
Press
CHECK
repeatedly*'
Check
the
program
Program
a
pause
oo"?
Stop
play
a
Cancel
the
program
CONTINUE”
play
Erase
a
track
from
CLEAR
in
stop
mode
the
end
Erase
a
specific
CHECK
repeatedly
track
so
the
number
of
the
track
lights
up,
and
press
CLEAR
Erase
the
entire
@
once
in
stop
mode
program
*
After
the
last
track
appears,
“CHECK
End”
appears
in
the
display.
#2
“P”
appears
in
the
display
and
the
total
playing
time
is
reset
to
0.00.
*
The
program
is
erased.
To
change
the
order
of
programmed
tracks
Erase
the
entire
program
and
create
a
new
one.
The
whole
program
is
erased
also
when:
¢
you
select
other
play
modes.
#
you
remove
the
CDs.
8
SS
Fe
Playing
Tracks
Repeatedly
(repeat
play)
The
repeat
play
function
repeats
a
single
CD
or
all
CDs
in
normal
,
program
,
and
shuffle
play.
In
normal
play
mode
only,
the
player
can
also
repeat
a
single
track.
Use
the
button
on
the
remote
to
do
this
operation.
Repeating
all
the
tracks
Press
REPEAT
once
so
that
“REPEAT”
lights
up
in
the
display.
Playing
mode
Tracks
played
Normal
play
Repeats
all
the
tracks
(ALL
DISCS)
on
all
CDs
(REPEAT),
or
the
current
track
(REPEAT
1).
Normal
play
Repeats
all
the
tracks
(1
DISC)
on
the
current
CD
(REPEAT),
or
the
current
track
(REPEAT
1).
Shuffle
play
All
tracks
on
the
all
(ALL
DISCS)
CDs
are
reshuffled.
Shuffle
play
All
tracks
on
the
CD
(1
DISC)
are
reshuffled.
Program
play
Repeats
all
the
programs
in
their
programmed
order.
Repeating
a
single
track
(in
normal
play
only)
Press
REPEAT
twice
while
playing
the
desired
track
so
that
“REPEAT
1”
lights
up
in
the
display.
To
cancel
repeat
play
Press
REPEAT
so
that
“REPEAT”
or
“REPEAT
1”
disappears
from
the
display.
Chapter
2:
the
CD
Player
9

Chapter
3:
the
stelelley
Listening
to
the
Radio
Presetting
Radio
Stations
Playing
Preset
Radio
Stations
10
Chapter
3:
the
Radio
Pi
ae
ne
al)
Listening
to
the
Radio
When
you
want
to
play
a
radio
programme,
you
can
have
the
tuner
automatically
scan
the
radio
frequencies
and
tune
in
the
stations
with
clear
signals.
This
feature
saves
your
time
in
searching
for
stations
with
clear
signals.
However,
stations
with
weak
signals
may
be
skipped
by
automatic
tuning.
Manually
tune
in
the
ones
skipped
by
automatic
tuning.
SYSTEM
POWER
3ON
STEREO/MONO
‘1
Press
TUNER/BAND
(or
BAND
on
the
remote)
repeatedly
until
the
band
you
want
appears
in
the
display.
As
you
press
this
button,
the
band
changes
as
follows:
FM
4—>
AM
ween
vovos
FH
eel
ee
OIC
2
Press
TUNING
MODE
repeatedly
until
“AUTO
TUNING”
appears
in
the
display.
omooo
3
Press
TUNING
(+/-).
The
tuner
starts
scanning
radio
frequencies,
and
stops
when
it
finds
a
clear
station.
“TUNED”
appears
in
the
display
window.
“STEREO”
also
appears
if
the
FM
station
tuned
is
broadcasting
in
stereo.
4
If
you
don’t
want
to
listen
to
the
station
selected,
press
TUNING
(+/-)
to
restart
the
scan.
When
the
desired
station
is
not
tuned
in
Automatic
tuning
may
skip
the
stations
with
weak
signal
and
continue
scanning
without
a
stop.
In
this
case,
tune
in
the
station
manually.
4
Press
TUNING
MODE
repeatedly
until
“TUNING”
appears
in
the
display.
2
Press
TUNING
(+/-)
repeatedly
until
the
desired
station
is
tuned
in.
To
improve
AM
broadcast
reception
Reorient
the
supplied
AM
loop
antenna
for
a
To
change
the
AM
tuning
interval
The
AM
tuning
interval
is
preset
to
10
kHz
in
the
factory.
If
you
need
to
change
the
interval,
do
as
follows:
1
Turn
on
the
power.
2
Change
the
band
to
AM.
3
Turn
off
the
power.
4
Turn
the
power
back
on
while
pressing
TUNING
MEMORY.
After
changing
the
tuning
interval,
reset
the
preset
AM
radio
stations.
When
an
FM
program
is
not
clear
to
receive
Press
STEREO/MONDO
on
the
remote
so
i
that
“MONO”
appears
in
the
display.
There
will
be
no
stereo
effect,
but
the
reception
will
improve.
Press
STEREO/MONO
on
the
remote
again
to
restore
the
stereo
effect.
One
Touch
Play
feature
Press
TUNER/BAND
(or
BAND
on
the
remote)
when
the
power
is
off
or
when
you
are
listening
to
another
sound
source.
You
can
listen
to
the
last
received
station
without
pressing
any
other
buttons.
You
tune
stat
ord
stat

ie
a
ee
eet
Presetting
Radio
Stations
es
You
can
store
radio
frequencies
in
the
tuner’s
memory
to
tune
in
your
favorite
stations
quickly.
You
can
preset
up
to
20
FM
stations
and
10
AM
stations
in
any
order.
Use
the
buttons
on
the
unit
for
presetting
stations.
1
Press
TUNER/BAND
(or
BAND
on
the
remote)
repeatedly
until
the
band
you
want
appears
in
the
display.
FM
<4—>
AM
2
Press
TUNING
(+/-)
to
tune
in
the
station
you
would
like
to
store.
3
Press
TUNING
MEMORY.
“MEMORY”
appears
in
the
display.
lowe
we
ME
oma
.--vove»
Com
»)
“na
‘
fiiapaletn)
v4
2
ie
&
[apr
fofee]
me
Preset
channel
number
4
Press
TUNING
(+/-)
to
display
the
preset
channel
number
you
decided
on
(1
to
20
for
FM,
1
to
10
for
AM).
5
Press
TUNING
MEMORY.
“MEMORY”
disappears,
and
the
station
is
stored
at
the
preset
channel
number
you
decided
on.
Station
frequency
Preset
channe!
number
6
Repeat
steps
1
to
5
for
each
station
you
would
like
to
store.
To
erase
a
stored
station
Store
a
new
station
at
a
previously
used
preset
station
number.
It
will
erase
the
old
station
and
replace
it
with
the
new
station.
tf
you
have
trouble
storing
a
station
Make
sure
“MEMORY?
is
lit
in
the
display.
If
not,
press
TUNING
MEMORY
again
so
that
“MEMORY”
lights
up
(for
about
eight
seconds)
in
the
display,
and
then
proceed
with
steps
4
and
5.
a
ae
Playing
Preset
Radio
Stations
Once
you
have
preset
the
stations,
use
the
TUNING
(+/-)
buttons
to
quickly
tune
in
your
favourite
stations.
SYSTEM
POWER
30N
1
Press
TUNER/BAND
(or
BAND
on
the
remote)
repeatedly
until
the
band
you
want
appears
in
the
display.
FM
<—»
AM
2
Press
TUNING
MODE
repeatedly
so
that
“PRESET”
appears
in
the
display.
=
a
=
wl
27229
8
Pal
nm
=
ver
We.
I)
Ue
3
Press
TUNING
(+/~)
(or
PRESET
(+/-)
_
on
the
remote)
to
tune
in
a
preset
station.
The
station
frequency
appears
and
the
station
begins
broadcasting.
Station
frequency
Preset
channel
Chapter
3:
the
Radio
11

Chapter
4:
the
Tape
Player
Playing
a
Tape
Recording
a
CD
Recording
a
CD:
Specifying
Tape
Length
(time
edit)
Recording
a
CD:
Specifying
Track
Order
(program
edit)
Recording
From
the
Radio
Recording
From
Another
Tape
(dubbing)
1
2
Chapter
4:
the
Tape
Player
Playing
a
Tape
SYSTEM
POWER
30N
DOLBY
NR
</>
NSa
<4
TAPE
REWIND
1
Press
FUNCTION
repeatedly
until
“TAPE”
appears
in
the
display.
TAPE
is
selected.
2
Press
&
EJECT
to
open
the
tape
compartment.
Insert
a
recorded
tape
in
deck
A
or
B
with
the
tape
side
facing
down
and
the
side
you
want
to
play
facing
forward.
Push
to
close
the
compartment.
The
tape
will
start
playing
from
the
front
side.
3
Press
DECK
SELECT
to
select
the
deck
you
want
to
play.
_
The
selected
deck
indicator
lights
up.
4
Press
DIRECTION
MODE
to
choose
single-side,
dual-side,
or
relay
play.
The
DIRECTION
MODE
setting
affects
both
decks.
To
play
Set
DIRECTION
MODE
to
One
side
of
the
tape
==
Both
sides.*
Cc
Both
decks
in
RELAY
succession.**
*
The
deck
stops
automatically
after
repeating
the
sequence
5
times.
**
See
“To
play
both
decks
in
succession
(relay
play)”.
5
Press
5
(to
play
the
front
side)
or
<I
(to
play
the
reverse
side).
The
tape
starts
playing.
——
To
Press
'
Stop
play
_
Pause
(deck
Boniy)
0
Resume
play
after
lor
<
or
>
|
pause
Fast
forward
bP
for
front
side,
:
44
or
44
TAPE
REWIND"
for
reverse
side
i
Rewind
44
or
44
TAPE
|
REWIND"
for
front
side,
bP
for
reverse
side
Remove
the
@
EJECT
cassette
*
You
can
use
<4
TAPE
REWIND
even
if
TAPE
is
not
selected.
To
stop
rewinding,
press
this
button
again.
To
play
both
decks
in
succession
(relay
play)
Relay
play
always
follows
the
following
sequence.
When
the
reverse
side
of
the
tape
in
deck
B
finishes
playing,
the
following
sequence
continues
4
more
times.
(Front
side)
(Reverse
side)
Deck
B
(Front
side)
(Reverse
side)
4
Press
&
EJECT
and
insert
recorded
tapes
in
both
decks.
2
Press
DIRECTION
MODE
repeatedly
until
“RELAY”
appears
in
the
display.
3
Press
or
<J.
To
stop
relay
play
Press
&.
When
listening
to
a
tape
recorded
with
the
Dolby*
B-type
noise
reduction
system
Set
the
DOLBY
NR
selector
to
ON.
Dolby
noise
reduction
system
reduces
tape
hiss
noise
in
low-level
high-frequency
signals.
*
Dolby
noise
reduction
manufactured
under
license
from
Dolby
Laboratories
Licensing
Corporation.
“DOLBY”
and
double-D
symbol
DU
are
trademarks
of
Dolby
Laboratories
Licensing
Corporation.
One
Touch
Play
feature
Press
TAPE
(function)
when
the
power
is
off
or
when
you
are
listening
to
another
sound
source.
You
can
listen
to
the
tape
without
pressing
any
other
buttons
when
a
tape
is
in
the
player.
If
no
tape
is
inserted,
the
system
will
just
turn
on.
Tol
you
Re
At
By
+a;
W
IFIO|
BB

————E
ae
Recording
a
CD
You
can
record
from
a
CD
fra
tape.
Use
TYPE
I
(normal)
or
TYPE
II
(CrOz)
tapes.
To
listen
to
other
sources
while
recording,
you
must
stop
recording.
Recording
a
CD
Automatically
By
using
CD
SYNCHRO
button,
you
can
record
from
a
CD
to
a
tape
easily.
Use
the
buttons
on
the
unit
for
this
operation.
SYSTEM
POWER
7ON
1
Press
2
OPEN/CLOSE
and
place
a
CD.
Then,
press
2
OPEN/CLOSE
again
to
close
the
tray.
Make
sure
the
CD
you
want
to
record
is
on
the
front
tray.
Total
number
of
tracks
and
the
total
playing
time
appear
in
the
display.
2
Press
&
EJECT
and
insert
a
blank
tape
into
deck
B
with
the
side
you
want
to
record
on
facing
forward.
Recording
will
start
from
the
front
side
of
the
tape,
unless
you
have
changed
the
playing
direction
before
recording.
Make
sure
the
tabs
on
the
cassette
have
not
been
removed.
3
Select
dual
or
single-sided
recording.
To
record
Set
DIRECTION
MODE
to
One
side
=
Both
sides
C>
or
RELAY
4
When
you
want
to
reduce
the
hiss
noise
in
low-level
high-frequency
signals,
set
DOLBY
NR
to
ON.
5
Press
CD
SYNCHRO.
The
@
REC
and
00
(pause)
lamps
light
and
deck
B
stands
by
for
recording.
The
[>
lamp
lights
and
the
<I]
lamp
flashes
for
a
few
seconds,
then
disappears.
|
|
Side
in
recording
pause
mode
If
you
want
to
start
recording
from
the
reverse
side,
press
<<]
so
that
the
<1
lamp
lights
steadily.
6
Press
00
to
release
recording
pause.
Recording
starts.
After
about
10
seconds,
the
CD
starts
playing.
If
the
last
track
on
side
A
has
abruptly
been
cut,
the
track
will
record
again
from
the
beginning
on
side
B
when
you
choose
dual-sided
recording.
If
you
set
DIRECTION
MODE
to
C>
or
RELAY,
recording
always
stops
at
the
end
of
the
reverse
side.
To
stop
recording
Press
@.
Note
¢
Turn
the
audio
emphasis
off
when
the
sound
level
of
the
CD
you
want
to
record
is
very
high,
because
it
may
distort
the
recording
sound.
Adjusting
the
volume
or
DBFB
will
not
affect
the
recording
level
But
these
controls
will
change
the
sound
levels
you
hear
through
speakers
or
headphones.
Recording
a
CD
Manually
You
can
record
a
CD
as
you
like,
for
instance,
record
just
the
songs
you
want
or
record
from
the
middle
of
the
tape.
SYSTEM
POWER
30ON
-~NUAWUI
1
Press
&
OPEN/CLOSE
and
place
a
CD.
Then,
press
2
OPEN/CLOSE
again
to
close
the
tray.
Make
sure
the
CD
you
want
to
record
is
on
the
front
tray.
Total
number
of
tracks
and
the
total
playing
time
appear
in
the
display.
2
Press
&
EJECT
and
insert
a
blank
tape
into
deck
B
with
the
side
you
want
to
record
on
facing
forward.
Recording
will
start
from
the
front
side
of
the
tape,
unless
you
have
changed
the
playing
direction
before
recording.
Make
sure
the
tabs
on
the
cassette
have
not
been
removed.
3
Select
dual
or
single-sided
recording.
To
record
Set
DIRECTION
MODE
to
One
side
—
Both
sides
C>
or
RELAY
4
when
you
want
to
reduce
the
hiss
noise
in
low-level
high-frequency
signals,
set
DOLBY
NR
to
ON.
5
Press
FUNCTION
repeatedly
until
“CD”
appears
in
the
display.
6
i
you
want
to
record
the
specific
track
of
the
CD,
press
00.
The
CD
player
pauses
for
playing.
If
you
do
not
need
to
choose
the
track,
skip
to
step
7.
7
Press
Kil
or
PR
DDI
to
choose
the
track
you
want
to
record.
8
Press
@
REC.
The
@
REC
and
00
(pause)
lamps
light
and
deck
B
stands
by
for
recording.
The
>
lamp
lights
and
the
<<]
lamp
flashes
for
a
few
seconds,
then
disappears.
|<
|
-
Sy
Side
in
recording
pause
mode
If
you
want
to
start
recording
from
the
reverse
side,
press
<]
so
that
the
<I]
lamp
lights
steadily.
9
Press
00
to
release
recording
pause.
Recording
starts.
If
you
set
DIRECTION
MODE
C=
or
RELAY,
recording
always
stops
at
the
end
of
the
reverse
side.
10
Press
CD
(function).
The
CD
player
starts
playing.
To
Press
Stop
recording
a
Pause
recording
00
Note
¢
If
you
want
to
record
the
specific
tracks
of
the
CD,
the
“program
edit”
feature
will
make
it
easier.
Adjusting
the
volume
or
DBFB
will
not
affect
the
recording
level
But
these
controls
will
change
the
sound
levels
you
hear
through
speakers
or
headphones.
Chapter
4:
the
Tape
Player
1
3

Recording
a
CD:
Specifying
Tape
Length
(time
edit)
You
can
have
the
stereo
system
create
programs
based
on
tape
length.
The
CD
player
makes
programs
that
will
fit
the
tape
length.
For
example,
if
you
use
a
46-minute
tape
to
record
a
50-minute
CD,
the
CD
player
will
automatically
choose
tracks
that
will
fit
within
the
46-minutes,
filling
as
much
of
the
tape
as
possible.
The
player
will
not
program
those
tracks
beyond
track
number
20.
SYSTEM
POWER
ON
W
UI
atad
CONTINUE
CHECK
1
Press
FUNCTION
repeatedly
until
“CD”
appears
in
the
display.
2
Press
2
OPEN/CLOSE
and
place
a
CD.
Then,
press
2
OPEN/CLOSE
again
to
close
the
tray.
Make
sure
the
CD
you
want
to
record
is
on
the
front
tray.
Total
number
of
tracks
and
the
total
playing
time
appear
in
the
display.
3
Press
&
EJECT
and
insert
a
blank
tape
into
deck
B
with
the
side
you
want
to
record
on
facing
forward.
Recording
will
start
from
the
front
side
of
the
tape,
unless
you
have
changed
the
playing
direction
before
recording.
Make
sure
the
tabs
on
the
cassette
have
not
been
removed.
14
|
Chapter
4:
the
Tape
Player
4
select
dual
or
single-sided
recording.
To
record
Set
DIRECTION
MODE
to
One
side
—
Both
sides
C>
or
RELAY
5
When
you
want
to
reduce
the
hiss
noise
in
low-level
high-frequency
signals,
set
DOLBY
NR
to
ON.
6
Press
EDIT
on
the
remote
once.
“TIME
EDIT”
appears
in
the
display.
7
Press
KKI<¢é4
or
PP
DDI
to
designate
the
tape
length
or
“HALF”.
Choose
the
indicator
for
tapes
of
corresponding
minute
length.
Choose
“HALF”
if
you
want
the
CD
player
to
play
just
half
the
total
playing
time
of
the
CD.
You
cannot
select
“HALF”
when
you
want
to
record
CD
which
has
more
than
20
tracks.
As
you
press
the
button,
the
indicator
changes
as
follows:
HALF
<-©C-46<—>C-54
?
(23.00)
eb
_
C90»
C-74<-+C-60
(45.00)
(37.00) (30.00)
=
ge
a
aie
Osaan
:
c-4
8
Press
EDIT.
The
player
determines
the
tracks
to
be
recorded
on
side
A
automatically
.
Tracks
to
be
recorded
on
side
A
Total
playing
time
on
side
A
flashing
9
When
you
record
on
both
sides,
press
EDIT
again.
The
player
determines
the
tracks
to
be
recorded
on
side
B.
Tracks
to
be
recorded
on
both
sides
Last
track
Total
playing
time
on
side
B
10
Press
CD
SYNCHRO.
The
@
REC
and
OD
(pause)
lamps
light
and
deck
B
stands
by
for
recording.
The
C
lamp
lights
and
the
<]
lamp
flashes
for
a
few
seconds,
then
disappears.
Pah
|
Side
in
recording
pause
mode
If
you
want
to
start
recording
from
the
reverse
side,
press
<]
so
that
the
<1)
_.
lamp
lights
steadily.
11
Press
00
to
release
recording
pause.
Recording
starts.
After
about
10
seconds,
the
CD
starts
playing.
If
the
last
track
on
side
A
has
abruptly
been
cut,
the
track
will
record
again
from
the
beginning
on
side
B
when
you
choose
dual-sided
recording.
If
you
set
DIRECTION
MODE
to
@
or
RELAY,
recording
always
stops
at
the
end
of
the
reverse
side.
To
stop
recording
Press
@.
To
check
the
order
Press
CHECK
repeatedly.
To
select
the
desired
tracks
beforehand
You
can
place
priority
on
some
tracks
to
be
recorded
by
selecting
them
before
programming
them
up
to
20
tracks.
See
“Playing
Tracks
in
the
Desired
Order
(program
play)”.
If
you
have
programmed
a
track
number
which
exceeds
20,
you
cannot
use
this
feature.
To
cancel
time
edit
Press
CONTINUE.
Recording
a
CD:
Specifying
Track
Order
(program
edit)
You
can
adjust
the
total
recording
time
to
the
tape
length
while
making
a
program.
SYSTEM
POWER
ON
‘
rcv
=8
|
|
|
f
CONT

1
Following
the
procedure
“Playing
Tracks
in
the
Desired
Order
(programme
play)”,
program
the
tracks
you
want
to
record
for
side
A.
Make
sure
to
program
the
tracks
so
that
the
total
playing
time
of
side
A
does
not
exceed
the
tape
length
of
one
side.
2
Press
f0.
“P”
appears
in
the
display
and
the
total
playing
time
is
reset
to
0.
3
Program
the
tracks
you
want
to
record
for
side
B
in
the
same
way
as
you
did
for
side
A.
4
Press
&
EJECT
and
insert
a
blank
tape
into
deck
B
with
the
side
you
want
to
record
on
facing
forward.
Recording
will
start
from
the
front
side
of
the
tape,
unless
you
have
changed
the
playing
direction
before
recording.
Make
sure
the
tabs
on
the
cassette
have
not
been
removed.
5
select
dual
or
single-sided
recording.
To
record
Set
DIRECTION
MODE
to
One
side
=
Both
sides
CC}
or
RELAY
6
When
you
want
to
reduce
the
hiss
noise
in
low-level
high-frequency
signals,
set
DOLBY
NR
to
ON.
7
Press
CD
SYNCHRO.
The
@
REC
and
00
(pause)
lamps
light
and
deck
B
stands
by
for
recording.
The
&
lamp
lights
and
the
<J
lamp
flashes
for
a
few
seconds,
then
disappears.
Peri
If
you
want
to
start
recording
from
the
reverse
side,
press
<J
so
that
the
<I]
lamp
lights
steadily.
Side
in
recording
pause
mode
&
Press
0
to
release
recording
pause.
Recording
starts.
After
about
10
seconds,
the
CD
starts
playing.
If
the
last
track
on
side
A
has
abruptly
been
cut,
the
track
will
record
again
from
the
beginning
on
side
B
when
you
choose
dual-sided
recording.
If
you
set
DIRECTION
MODE
to
C>
or
RELAY,
recording
always
stops
at
the
end
of
the
reverse
side.
To
stop
recording
Press
@.
To
cancel
program
edit
|
Press
CONTINUE.
SS
eee)
Recording
From
the
Radio
You
can
record
from
the
tuner
onto
a
tape.
Use
TYPE
I
(normal)
or
TYPE
II
(CrO2)
tape.
SYSTEM
POWER
30N
Wuhw
oO
=
1
Press
TUNER/BAND
several
times
until
the
desired
radio
band
appears.
2
Tune
in
the
radio
station
you
want
to
record.
(See
“Listening
to
the
Radio”,
or
“Playing
Preset
Radio
Stations”
for
details.)
3
Press
@
EJECT
and
insert
a
blank
tape
into
deck
B
with
the
side
you
want
to
record
on
facing
forward.
Recording
will
start
from
the
front
side
of
the
tape,
unless
you
have
changed
the
playing
direction
before
recording.
Make
sure
the
tabs
on
the
cassette
have
not
been
removed.
4
select
dual
or
single-sided
recording.
To
record
Set
DIRECTION
MODE
to
One
side
=
Both
sides
C>
or
RELAY
5
When
you
want
to
reduce
the
hiss
noise
in
low-level
high-frequency
signals,
set
DOLBY
NR
to
ON.
6
Press
@
REC.
The
@
REC
and
00
(pause)
lamps
light
and
deck
B
stands
by
for
recording.
The
[>
lamp
lights
and
the
<J
lamp
flashes
for
a
few
seconds,
then
disappears.
Pia
If
you
want
to
start
recording
from
the
reverse
side,
press
<-]
so
that
the
<<]
lamp
lights
steadily.
Side
in
recording
pause
mode
7
Press
00
to
release
recording
pause.
Recording
starts.
If
you
set
DIRECTION
MODE
to
>
or
RELAY,
recording
always
stops
at
the
end
of
the
reverse
side.
To
stop
recording
Press
@.
Adjusting
the
volume
or
DBFB
will
not
affect
the
recording
level
But
these
controls
will
change
the
sound
levels
you
hear
through
speakers
or
headphones.
a
ees
Recording
From
Another
Tape
(dubbing)
Dubbing
Another
Tape
Automatically
You
can
record
the
whole
tape
onto
another
automatically
by
using
high
speed
dubbing.
Use
the
buttons
on
the
unit
and
TYPE
I
(normal)
or
TYPE
II
(CrOz)
tape
for
dubbing.
SYSTEM
POWER
2ON
—=—a
ND
W
continue
to
next
page
>
Chapter
4:
the
Tape
Player
15

=»
continued
1
Press
&
EJECT,
and
insert
a
recorded
tape
in
deck
A
with
thegide
you
want
to
play
facing
forward.
Also,
insert
a
blank
tape
in
deck
B
with
the
side
you
want
to
record
on
facing
forward.
Recording
and
playback
will
start
from
the
front
side
of
the
tape,
unless
you
have
changed
the
playing
direction
before
recording.
Make
sure
the
tabs
on
the
cassette
in
deck
B
have
not
been
removed.
2
Choose
how
you
want
the
tape
to
record
and
press
DIRECTION
MODE
repeatedly
until
the
desired
mode
appears.
Position
Operation
—
pd
th
ht
=
Dubbing
stops
at
the
end
of
one
side
Cc
When
the
tape
in
one
deck
comes
to
the
end
of
the
front
side,
it
reverses
immediately
regardless
of
the
tape
position
in
the
other
deck.
RELAY
When
the
tape
in
one
deck
reaches
its
end
of
the
front
side,
it
stops
until
the
other
tape
come
to
its
end,
and
then
both
tapes
reverse
together.
3
Press
HIGH
SPEED
DUBBING.
The
@
REC
and
00
(pause)
lamps
light
and
deck
B
stands
by
for
recording.
4
Press
01.
Dubbing
starts.
If
you
set
DIRECTION
MODE
to
>
or
’
RELAY,
recording
always
stops
at
the
end
of
the
reverse
side.
To
stop
dubbing
Press
Ml.
if
you
select
other
sound
sources
while
dubbing
Dubbing
stops.
Audio
emphasis
is
cancelled
while
dubbing
And
it
is
restored
when
dubbing
is
completed.
You
do
not
have
to
set
DOLBY
NR
selector
The
tape
in
deck
B
is
automatically
recorded
in
the
same
state
as
tape
in
deck
A.
Dubbing
Another
Tape
Manually
When
you
want
to
dub
only
part
of
the
ah
SYSTEM
POWER
#ON
ONWAUI
ond
Press
&
EJECT,
and
insert
a
recorded
tape
in
deck
A
with
the
side
you
want
to
play
facing
forward.
Also,
insert
a
blank
tape
in
deck
B
with
the
side
you
want
to
record
on
facing
forward.
Recording
and
playback
will
start
from
the
front
side
of
the
tape,
unless
you
have
changed
the
playing
direction
before
recording.
Make
sure
the
tabs
on
the
cassette
in
deck
B
have
not
been
removed.
2
Select
dual
or
single-sided
recording.
To
dub
Set
DIRECTION
MODE
to
One
side
—
Both
sides
C>
or
RELAY
3
Press
FUNCTION
repeatedly
until
“TAPE”
appears
in
the
display.
4
Press
@
REC.
The
@
REC
and
00
(pause)
lamps
light
and
deck
B
stands
by
for
recording.
The
[>
lamp
lights
and
the
<I]
lamp
flashes
for
a
few
seconds,
then
disappears.
[<a
|S
Side
in
recording
pause
mode
If
you
want
to
start
recording
from
the
reverse
side,
press
<J
so
that
the
J]
lamp
lights
steadily.
5
press
00
to
release
recording
pause
on
deck
B.
‘
Recording
starts
on
deck
B.
If
you
set
DIRECTION
MODE
to
>
or
RELAY,
recording
always
stops
at
the
end
of
the
reverse
side.
6
Press
DECK
SELECT
to
select
deck
A.
7
press
>
or
<1.
tape,
dub
manually
at
normal
speed.
Use
The
tape
on
deck
A
starts
playing.
TYPE
|
(normal)
or
TYPE
If
(CrO2)
tape
for
recording.
To
stop
dubbing
Press
M
and
deck
A
will
stop.
Press
DECK
SELECT
to
select
deck
B
and
Press
™@
deck
B
will
stop.
16
|
Chapter
4:
the
Tape
Player

Chapter
5:
Sound
PANe
SUC
dealers
Adjusting
the
Sound
Selecting
the
Audio
Emphasis
Adjusting
the
Audio
Emphasis
Making
Your
Personal
Audio
Emphasis
File
(personal
file)
eee
ee
Adjusting
the
Sound
To
fully
enjoy
the
sound
coming
from
your
stereo
system,
make
the
following
audio
adjustments.
See
sections
following
this
one
for
additional
sound
adjustments.
SYSTEM
POWER
+ON
VOLUME
DBFB
PHONES
To
adjust
the
volume
Rotate
VOLUME
on
the
unit
or
press
VOL
(+/~-)
on
the
remote.
To
reinforce
bass
Press
DBFB*
repeatedly
and
choose
DBFB@N\
or
DBFBRANN
.
“DBFBANNNN
”
is
more
effective
than
“DBFBENA
”.
*
DBFB
=
Dynamic
Bass
Feedback
To
listen
through
the
headphones
Connect
the
headphones
to
the
PHONES
jack.
No
sound
will
come
from
the
speakers.
Selecting
the
Audio
Emphasis
Your
stereo
system
has
been
factory
set
to
five
specially
recommended
audio
emphases.
Choose
from
among
these
five
preset
settings
according
to
the
type
of
music
you
are
listening
to.
SYSTEM
POWER
ON
DISPLAY
1
if
the
indicator
of
P-FILE
is
lit,
press
P.FILE
so
that
the
indicator
turns
off.
2
Press
the
desired
preset
equalizer
setting
button
on
the
unit
or
PRESET
EQ
on
the
remote
repeatedly
until
the
indicator
of
the
desired
setting
button
lights
up.
The
equalizer
setting
affects
the
recording
sound
level
on
a
tape.
Press
To
get
ROCK
Powerful,
clear
sounds,
emphasizing
low
and
high
audio
POPS
Light,
bright
sounds,
emphasizing
high
and
middle
range
audio
JAZZ
Percussive
sounds,
emphasizing
bass
audio
CLASSIC
Broad,
open
sounds
with
plenty
of
reverberations
DANCE
Sounds
similar
to
a
disco
by
intensifying
bass
sound
To
cancel
the
audio
emphasis
Press
the
selected
button
again
(or
press
PRESET
EQ
on
the
remote
repeatedly)
so
that
the
indicator
of
the
button
lights
off.
Then,
“EFFECT
OFF”
appears
in
the
display.
The
audio
emphasis
except
DBFB
enhances
the
recording
sound
Therefore,
we
recommend
you
to
cancel
the
audio
emphasis
when
recording.
If
the
audio
emphasis
is
on
and
the
sound
level
of
the
CD
you
want
to
record
is
very
high,
the
recording
sound
may
become
distorted.
Otherwise,
if
you
want
to
record
the
enhanced
sound
for
special
uses
such
as
your
car
stereo,
walkman,
etc.,
turn
the
audio
emphasis
on.
Also,
we
recommend
you
to
cancel
it
when
you
play
a
tape
recorded
with
audio
emphasis,
because
the
sound
may
be
affected
doubly
and
become
distorted
if
it
is
left
on.
Chapter
5:
Sound
Adjustment
|
7
7

To
change
the
equalizer
display
Each
time
you
keep
pressing
DISPLAY
for
a
few
seconds,
the
equalizer
display
changes
to
show
one
of
the
four
displays
below.
If
the
sound
does
not
come
in
for
about
a
minute,
the
spectrum
analyzer
display
turns
to
a
picture.
The
display
is
restored
when
the
sound
comes
in.
Spectrum
analyzer
1
os
Seo
ee
4%
Spectrum
analyzer
2
SaaS
ee
eee
Adjusting
the
Audio
Emphasis
This
feature
lets
you
arrange
the
audio
emphasis
by
raising
and
lowering
the
level
of
specific
frequency
ranges.
Use
the
buttons
on
the
unit
to
do
this
operation.
SYSTEM
POWER
3ON
SURROUND
1
Press
the
desired
equalizer
setting
button.
2
Press
one
of 4,
>,
&
or
¥
(CURSOR
CONTROL).
The
graphic
equalizer
curve
and
18
Chapter
5:
Sound
Adjustment
fequency
range
appears
in
the
display,
and
the
level
vaiue
flashes.
flashing
3
Press
>
or
<
to
select
the
frequency
range
you
want
to
change.
flashing
4
Press
A
or
¥
to
raise
or
lower
the
level
of
the
frequency
range.
flashing
5
Repeat
steps
3
and
4
to
adjust
other
frequency
ranges.
To
create
the
atmosphere
of
a
movie
theater
or
concert
hall
Press
SURROUND
so
that
the
SURI)
indicator
lights
up.
[aS
a
aR
a
Ll
Making
Your
Personal
Audio
Emphasis
File
(personal
file)
You
can
create
a
personal
file
of
audio
patterns
and
store
them
in
the
memory
of
the
player.
Later,
call
up
an
audio
pattern
to
play
a
favourite
tape,
CD,
or
radio
programme.
Create
up
to
five
audio
files.
SYSTEM
POWER
3ON
1,5
ee
.o
CHF
cae)
=TSE
1
Press
the
desired
equalizer
setting
button.
2
Press
SURROUND
to
activate
or
deactivate
the
surround
effect
to
suit
your
taste.
3
Adjust
the
sound
using
CURSOR
CONTROL.
(See
“Adjusting
the
Audio
Emphasis”
for
details.)
4
Press
EQ
MEMORY.
“MEMORY”
appears
and
a
file
number
flashes
in
the
display.
flashing
5
Press
a
file
number
button
that
you
decide
on.
“MEMORY”
disappears.
The
adjusted
equalizer
curve
and
the
surround
effect
settings
are
stored
at
the
file
number
you
selected.
To
call
up
the
personal
file
Press
P.FILE
so
that
the
indicator
of
P.FILE
lights
up
and
then,
press
the
desired
file
number
button,
or
press
P.FILE
on
the
remote
repeatedly.
To
hear
the
effect
of
the
adjustment
Press
the
selected
button
repeatedly.
You
can
compare
the
difference
between
the
adjusted
sound
(the
indicator
is
lit)
and
the
sound
with
no
equalizer-effect
(the
indicator
is
not
lit).

Chapter
6:
PXololitrerats||
Features
Falling
Asleep
to
Music
Waking
Up
to
Music
Timer-Recording
Radio
Programmes
Connecting
Optional
Equipment
Se
ie
ae
|
Falling
Asleep
to
Music
You
¢an
set
the
stereo
system
to
turn
off
automatically
so
you
can
go
to
sleep
to
music
(Sleep
timer).
Before
setting
sleep
timer,
make
sure
the
clock
has
been
set
correctly.
SYSTEM
POWER
ON
i1__
2
207
Lae
SS
Pg
osm
erica
Oa
co
J
fk
ul
|
|
|
t
l
1
Play
your
favourite
sound
source.
2
Press
SLEEP
repeatedly
to
choose
how
long
you
want
the
music
to
play.
“SLEEP”
and
minutes
indication
appear
in
the
display.
The
power
will
turn
off
after
90
to
10
minutes
depending
on
the
length
of
time
you
choose.
=
90—> 80—>
70
74
OFF
4—10
4-20
¢—--:-.-
To
cancel
the
sleep
timer
Press
SLEEP
repeatedly
until
“OFF”
appears
in
the
display.
To
check
the
remaining
time
Press
SLEEP
once.
The
remaining
time
appears
in
minutes
for
several
seconds.
Note
©
When
the
sleep
timer
is
activated,
you
cannot
use
the
other
timer-related
function.
Waking
Up
to
Music
You
can
wake
up
to
music
at
a
preset
time.
You
need
only
set
the
timer
once.
Before
setting
the
timer,
make
sure
the
clock
has
been
set
correctly.
To
wake
up
to
the
sound
of
the
tuner,
preset
the
station
you
want
to
hear
beforehand.
(See
“Presetting
Radio
Stations”.
SYSTEM
POWER
ON
1
Prepare
the
sound
source.
To
wake
up
to
a
radio
Tune
in
the
preset
station.
To
wake
up
to
the
sound
of
the
cD
Insert
the
CD.
If
you
want
to
play
it
from
a
desired
track,
make
a
programme.
(See
“Playing
Tracks
in
the
Desired
Order”.)
Note
The
stereo
system
memorizes
the
last
programme
you
made
when
you
turn
off
the
unit.
To
wake
up
to
the
sound
of
the
tape
Insert
the
tape
with
the
side
you
want
to
play
facing
forward.
If
you
insert
tapes
in
both
decks,
you
hear
the
sound
from
deck
A.
2
Turn
VOLUME
to
adjust
the
volume.
3
Press
TIMER
SET.
“SELECT
TIMER”
appears
in
the
display.
A
Press
DAILY.
“DAILY”
and
“ON”
appear
and
the
hour
digits
flash
in
the
display.
flashing
5
Set
the
hour
you
want
the
music
to
go
on
by
pressing
4
or
V
(CURSOR
CONTROL),
then
press
ENTER/NEXT.
Set the
minutes
in
the
same
way.
“OFF
TIME”
appears,
and
the
hour
digits
flash
again.
fiashing
flashing
Chapter
6:
Additional
Features
|
19

6
set
the
hour
you
want
the
music
to
go
off
by
pressing
A
or
VY,
then
press
ENTER/
NEXT.
Set
the
minutes
in
the
same
way,
then
press
ENTER/NE§XT.
The
sound
source
flashes.
7
Choose
a
sound
source
by
pressing
A
or
v.
Each
time
you
press
the
button,
the
display
changes
as
follows:
eee
|
pats)
flashing
8
Press
ENTER/NEXT.
The
preset
items
appear
in
the
display
sequentially.
9
Press
SYSTEM
POWER
to
turn
off
the
system.
At
the
preset
time,
the
power
will
go
on
and
the
music
will
play.
At
the
turn-off
time,
the
power
will
go
off
again.
To
cancel
the
timer
Press
DAILY
so
that
“TIMER”
disappears
from
the
display.
Press
DAILY
again
to
activate
the
timer.
To
check
timer
settings
Press
DAILY
twice
in
succession.
To
change
timer
settings
Repeat
steps
1
to
9.
en
a
ie
|
Timer-Recording
Radio
Programs
You
can
set
the
timer
to
record
the
radio.
This
timer
works
only
once
for
each
setting.
The
volume
level
is
automatically
set
to
the
minimum.
Preset
the
station
beforehand.
(See
“Presetting
Radio
Stations”).
Make
sure
the
clock
is
set
correctly.
SYSTEM
POWER
7ON
20
|
Chapter
6:
Additional
Features
1
Press
TUNER/BAND
repeatedly
until
the
band
you
want
appears
in
the
display.
2
Press
TUNING
MODE
repeatedly
until
“PRESET”
appears
in
the
display.
3
Press
TUNING
(+/-)
(or
PRESET
(+/-)
on
the
remote)
to
tune
in
a
preset
station.
4
Press
TIMER
SET.
“SELECT
TIMER”
appears
in
the
display.
5
Press
REC.
“REC”
and
“ON”
appear
and
the
hour
digits
flash
in
the
display.
——
flashing
6
set
the
hour
you
want
to
start
recording
by
pressing
4
or
V
(CURSOR
CONTROL),
then
press
ENTER/NEXT.
Set
the
minutes
in
the
same
way.
“OFF”
appears
and
the
hour
digits
flash
again.
flashing
flashing
7
Set
the
hour
you
want
to
stop
recording
by
pressing
A
or
V,
then
press
ENTER/
NEXT.
Set
the
minutes
in
the
same
way.
The
preset
items
appear
in
the
display
sequentially.
8
insert
a
tape
in
deck
B
with
the
side
you
want
to
record
facing
forward.
Recording
always
starts
from
the
front
side.
If
necessary
select
the
direction
mode.
You
can use
TYPE
I
(normal)
or
TYPE
II
(CrO2)
tape.
9
Press
SYSTEM
POWER
to
turn
off
the
system.
To
cancel
the
timer
Press
REC
so
that
“TIMER”
disappears
from
the
display.
Press
REC
again
to
activate
the
timer.
To
check timer
settings
Press
REC
twice
in
succession.
To
change
timer
settings
Repeat
steps
1
to
9.
Note
¢
The
timer
does
not
work
if
the
system
power
is
on.
a
Me
pe
ae
TG]
Connecting
Optional
Equipment
For
greater
enjoyment
of
your
stereo
system,
you
can
connect
other
components
to
the
stereo.
You
can
connect:
©
a
VCR
to
the
VIDEO
IN
jacks
*
a
turntable
to
the
PHONO
IN
jacks
headphones
to
the
PHONES
jack
on
the
front
panel
To
connect
a
VCR
1
Connect
the
VCR
or
other
video
equipment
to
the
VIDEO
IN
jacks.
2
Press
FUNCTION
repeatedly
until
“VIDEO”
appears
in
the
display.
The
connected
sound
source
comes
through
the
speakers.
You
can
also
record
the
VCR
sound.
To
connect
a
turntable
14
Connect
the
turntable
PS-LX56
(optional)
to
the
PHONO
IN
jacks
on
the
rear
panel
of
the
stereo.
2
Press
FUNCTION
until
“PHONO”
appears
in
the
display.
The
turntable
sound
comes
through
the
speakers.
You
can
also
record
the
turntable
sound.
Table of contents
Other Sony Stereo System manuals

Sony
Sony ZS-D50 Operating Instructions (primary... User manual

Sony
Sony HCD-H991AV User manual

Sony
Sony SRS-XB3 User manual

Sony
Sony MHC-GTX88 User manual

Sony
Sony SRS-X9 User manual

Sony
Sony LBT-XB5 User manual

Sony
Sony ZS-D55 User manual

Sony
Sony HCD-VX77 User manual

Sony
Sony SRS-ZR7 User manual
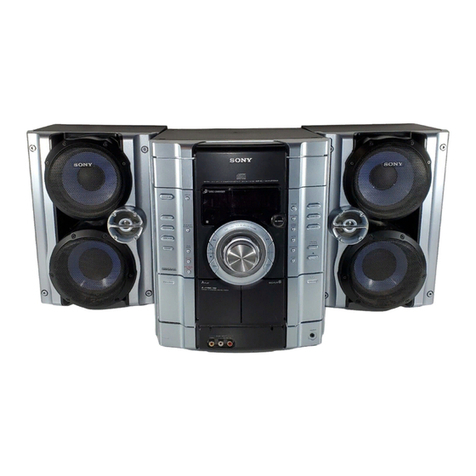
Sony
Sony CMT-EH45DAB User manual

Sony
Sony CMT-MX550I User manual

Sony
Sony CFD-S70 User manual

Sony
Sony MHC-VX88 User manual

Sony
Sony HCD-MG510AV User manual

Sony
Sony HCD-LV80 User manual

Sony
Sony SHAKE-99 User manual

Sony
Sony HCD-H1000 User manual

Sony
Sony CPF-IX001 - Wireless PC-Linked Audio System Use and care manual

Sony
Sony HCD-VX777 User manual

Sony
Sony MHC-M500AV User manual