a
Fs10)(-moym
@xe)ani=aie>
Introduction
PFECOULIONS
vn
ciisveieassctsncesseacescacedsdscushedacesiessoassctsh
onsisonnsvasseeeds
3
Note
on
the
transit
key
0.0.0...
cssccsssssecsscsseerrenssneceeeeers
3
Getting
Started
ReEMOte
COMMANGET
.........csccssrescrsersersscressrsossssssesseeseeenseens
4
Hooking
up
the
SySteM
uu...
cssssstccensssssecsessecesersees
5
Using
Your
Stereo
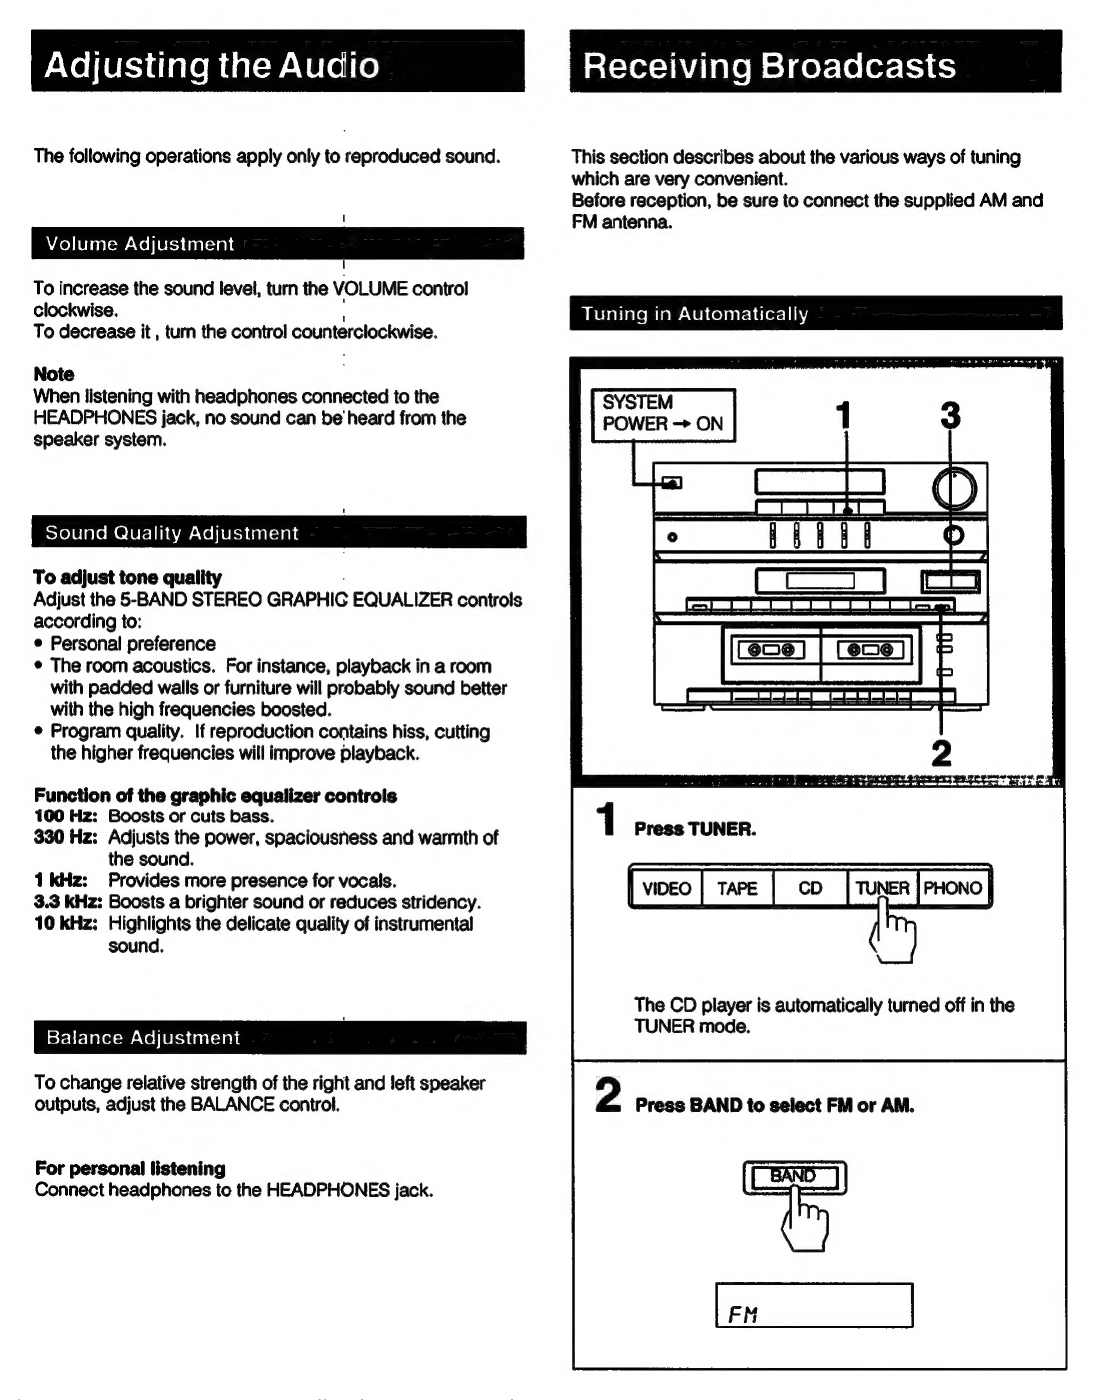
Adjusting
the
AUCIO
..............cssssccnrserssserssessesssseseseerssstenees
7
VOIUME
ACGjUSTMENE
..........scerssserssssrersreerscssessscesseesseesseeees
7
Sound
quality
adjustMent
..........
cc
ssencssesssessseesecsreneees
7
Balance
AdjUStMeNt
............cccercsscsssoreseessesssssrssosesssesoes
7
Receiving
broadcasts
........cccsesssecsesssesesssessesessesersesees
7
Tuning
in
AUtOMALICAlly
.......
es
eecesetseensseststesssereeersees
7
Tuning
IN
MANUA
IY
.......
cc
cseseersesstssesenesscsesssseeseeeees
8
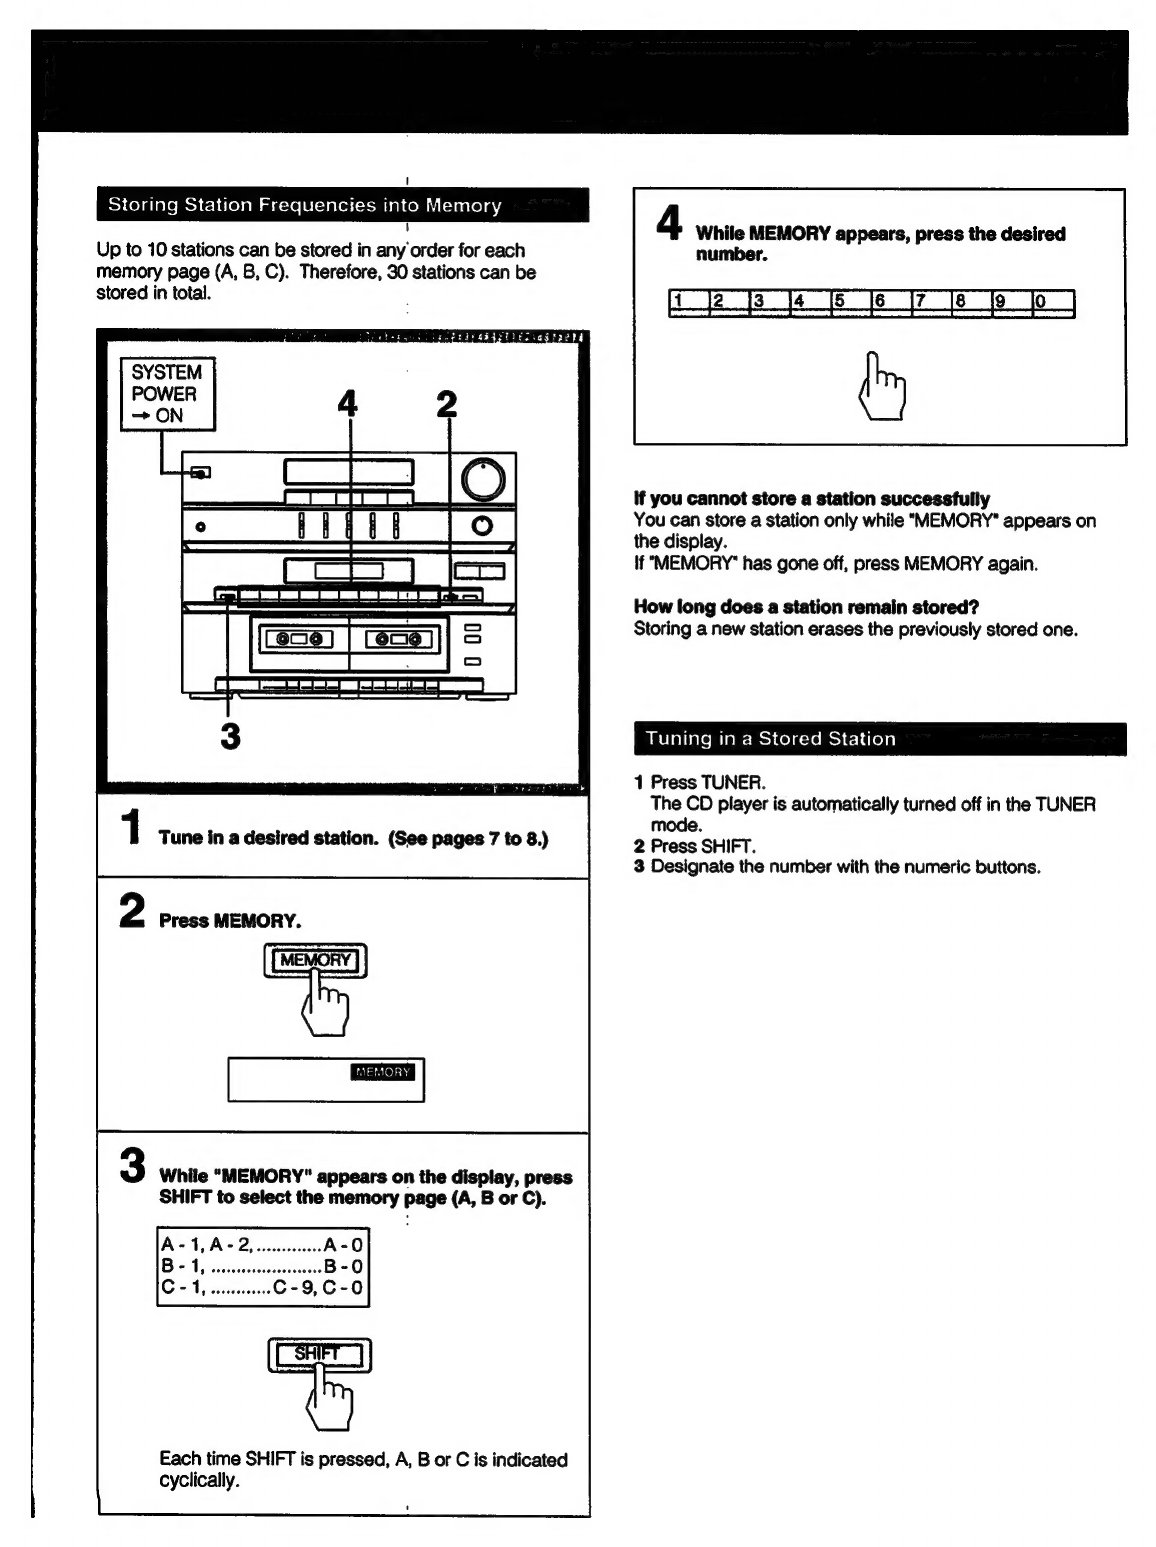
Storing
station
frequencies
into
MEMOTY
..........cceseseeeees
9
Tuning
in
a
stored
station
.............ccscscscsersssssscnsesrssossoeees
9
Playing
back
tapes
(on
either
deck
A
of
B)
......
cee
10
Recording
on
tapes
(DOCK
B).......cecrsvsssessercsscssesorseees
11
Dubbing
tapes
(from
deck
A
to
B)
oc
cusssssessscrsosssreenees
12
Playing
the
discs
-
Continuous
play
0...
cesetesssetecees
13
Information
display
........sccscscsrseresssessccssssetserssesssesseroes
14
Selecting
&
desired
ISC
..........csescscsserscssssesrsossesscssoees
15
Locating
a
particular
SeleCtion
...........cscccssssserserecsees
15
Locating
a
particular
point
in
a
selection
..........
ese
15
Playing
in
a
random
order
-
Shuffle
play...
16
To
play only
desired
disc
in
a
random
order
.........
sasatives
16
Playing
in
a
desired
order
-
Program
play..........sreereeres
17
Locating
the
loudest
portion
of
the
disc
-
Peak
search
..18
Designating
the
total
playing
time
-
Time
edit
...............06
19
Playing
repeatedly
-
Repeat
play
...........sssccrssscsseeereeres
20
TIPS
ON
EITING
TAPES
0...
ecsrcsscsecsrscrscesssesssecseesnseeeseres
21
Fading
out
after
a
desired
duration
-
Time
fade
.............
21
General
Maintenance
isc
ciccssinisscsieseiisastecadecstuaiscdoccansendecccsecvavessncetsoees
21
BS]
9]
1011
[07-104
|:
ee
22
TrOUbleSHOOting
........cscsscrssocrsesserssessscsscssercecsssserecersesseeeses
23
s{syaato)
=m
Oxelpalaatsiale(sie
The
remote
commander
supplied
with
this
unit
can
control
the
unit
from
a
distance.
The
remote
commander
is
divided
into
6
sections
according
to
the
functions
as
shown
below.
[1]
POWER
button
[2]
DBFB
button
(This
button
does
not
operate.)
(3)
TUNER
PRESET
+/-
buttons
[4]
VOL
(volume)
+/-
buttons
[5]
CD
player
operation
buttons
In
the
TUNER
mode:
When
you
press
CD
&
once,
the
unit
enters
the
CD
mode.
When
you
press
CD
»
twice,
the
CD
player
starts
playback.
In
the
mode
other
than
the
TUNER
mode:
When
you
press
CD
&
once,
the
unit
enters
the
CD
mode
and
starts
playback.
[6]
Function
selectors
Battery
life
About
half
a
year
of
normal
operation
can
be
expected
when
using
the
Sony
SUM-3
(NS)
batteries.
When
the
batteries
are
exhausted,
the
remote
commander
can
no
longer
operate
the
unit.
If
this
happens,
replace
both
batteries
with
new
ones.
To
avoid
battery
leakage
When
the
commander
is
not
to
be
used
for
a
long
time,
remove
the
batteries
to
avoid
damage
caused
by
battery
leakage
and
corrosion.
Inserting
the
batteries
into
the
remote
commander
2
Insert
two
size-AA
(R6)
batteries
with
correct
1
Open
the
cover.
7;
==


 User manual")