Sony Black Trinitron KV-14V5U User manual

© 1997 by Sony Corporation Printed in Spain
3-860-137-21 (1)
GB
Operating Instructions
KV-14V5U
KV-14V6U
KV-21V5U
KV-21V6U
Trinitron Colour Video TV
PAL NTSC 4.43

2Getting Started
For safe installation:
•Leave a clear space of 5 cm around the unit for
adequate ventilation.
•Do not install the unit in hot, humid, or excessively
dusty places.
•Do not install the unit where it may be exposed to
mechanical vibrations.
For your protection, refer all servicing to qualified
personnel.
About Moisture
Condensation
If the unit is brought directly from a cold place to a warm
place, moisture may condense on the video head drum.
If this happens, the tape may stick to the head drum and
it may be damaged or the unit may not operate correctly.
To avoid possible damage caused by moisture
condensation, be sure not to leave a cassette inside the
compartment when the unit is not in use. When bringing
the unit from a cold place to a warm place, wait for about
10 minutes before operating it.
If the tape operation buttons do not work due to
moisture condensation, leave the power on for more than
one hour.
rIMPORTANT
If the plug supplied is not suitable for the socket outlets
in your home, it should be cut off and an appropriate
plug fitted in accordance with the following
instructions:
The wires in this mains lead are coloured in accordance
with the following code:
Blue Neutral
Brown Live
As the colours of the wires in the mains lead of this
apparatus may not correspond with the coloured
markings identifying the terminals in your plug,
proceed as follows:
The wire which is coloured blue must be connected to
the terminal which is marked with the letter N or
coloured black. The wire which is coloured brown
must be connected to the terminal which is marked
with the letter L or coloured red. Do not connect either
wire to the earth terminal in the plug which is marked
by the letter E or by the safety earth symbol Yor
coloured green or green and yellow.
rWARNING
To prevent shock hazard, do not insert the plug cut off
from the mains lead into a socket outlet. This plug
cannot be used and should be destroyed.
rTo prevent fire or shock hazard, do not expose the unit
to rain or moisture.
rDangerously high voltages are present inside the set.
Do not open the cabinet. Refer servicing to qualified
personnel only.
How to replace the fuse
Open the fuse compartment with a blade screwdriver,
and replace the fuse.
WARNING
To prevent fire or shock hazard, do not expose the unit to
rain or moisture.
Dangerously high voltages are present inside the set. Do
not open the cabinet. Refer servicing to qualified
personnel only.
Caution
Television programmes, films, video tapes and other
materials may be copyrighted.
Unauthorized recording of such materials may be
contrary to the provisions of the copyright laws.
Colour System of Your
Set
This video TV is designed to receive TV programmes
based on PAL (I) colour system and to record and play on
PAL colour system. The video TV can also play tapes on
NTSC colour system.
Precautions
Safety Information
For general safety:
•Do not expose the unit to rain or moisture.
•Do not open the rear cover.
For safe operations:
•Do not operate the unit on anything but 220–240 V AC,
50 Hz.
•Do not operate the unit if any liquid or solid object falls
in it—have it checked immediately.
•Unplug the unit from the wall outlet if you do not
intend to use it for an extended period of time. To
disconnect the cord, pull it out by the plug, never by the
cord.
NOTICE FOR CUSTOMERS IN THE UNITED
KINGDOM
A moulded plug complying with BS1363 is fitted to this
equipment for your safety and convenience.
Should the fuse in the plug supplied need to be replaced,
a 5 AMP fuse approved by ASTA or BSI to BS 1362 (i.e.
marked with 2or @must be used.
When an alternative type of plug is used it should be
fitted with a 5 AMP FUSE, otherwise the circuit should
be protected by a 5 AMP FUSE at the distribution board.
If the plug supplied with this equipment has a detachable
fuse cover, be sure to attach the fuse cover after you
change the fuse. Never use the plug without the fuse
cover. If you should lose the fuse cover, please contact
your nearest Sony service station.
FUSE

Getting Started 3
Contents
Getting Started
Step 1—Preparation ................................................... 4
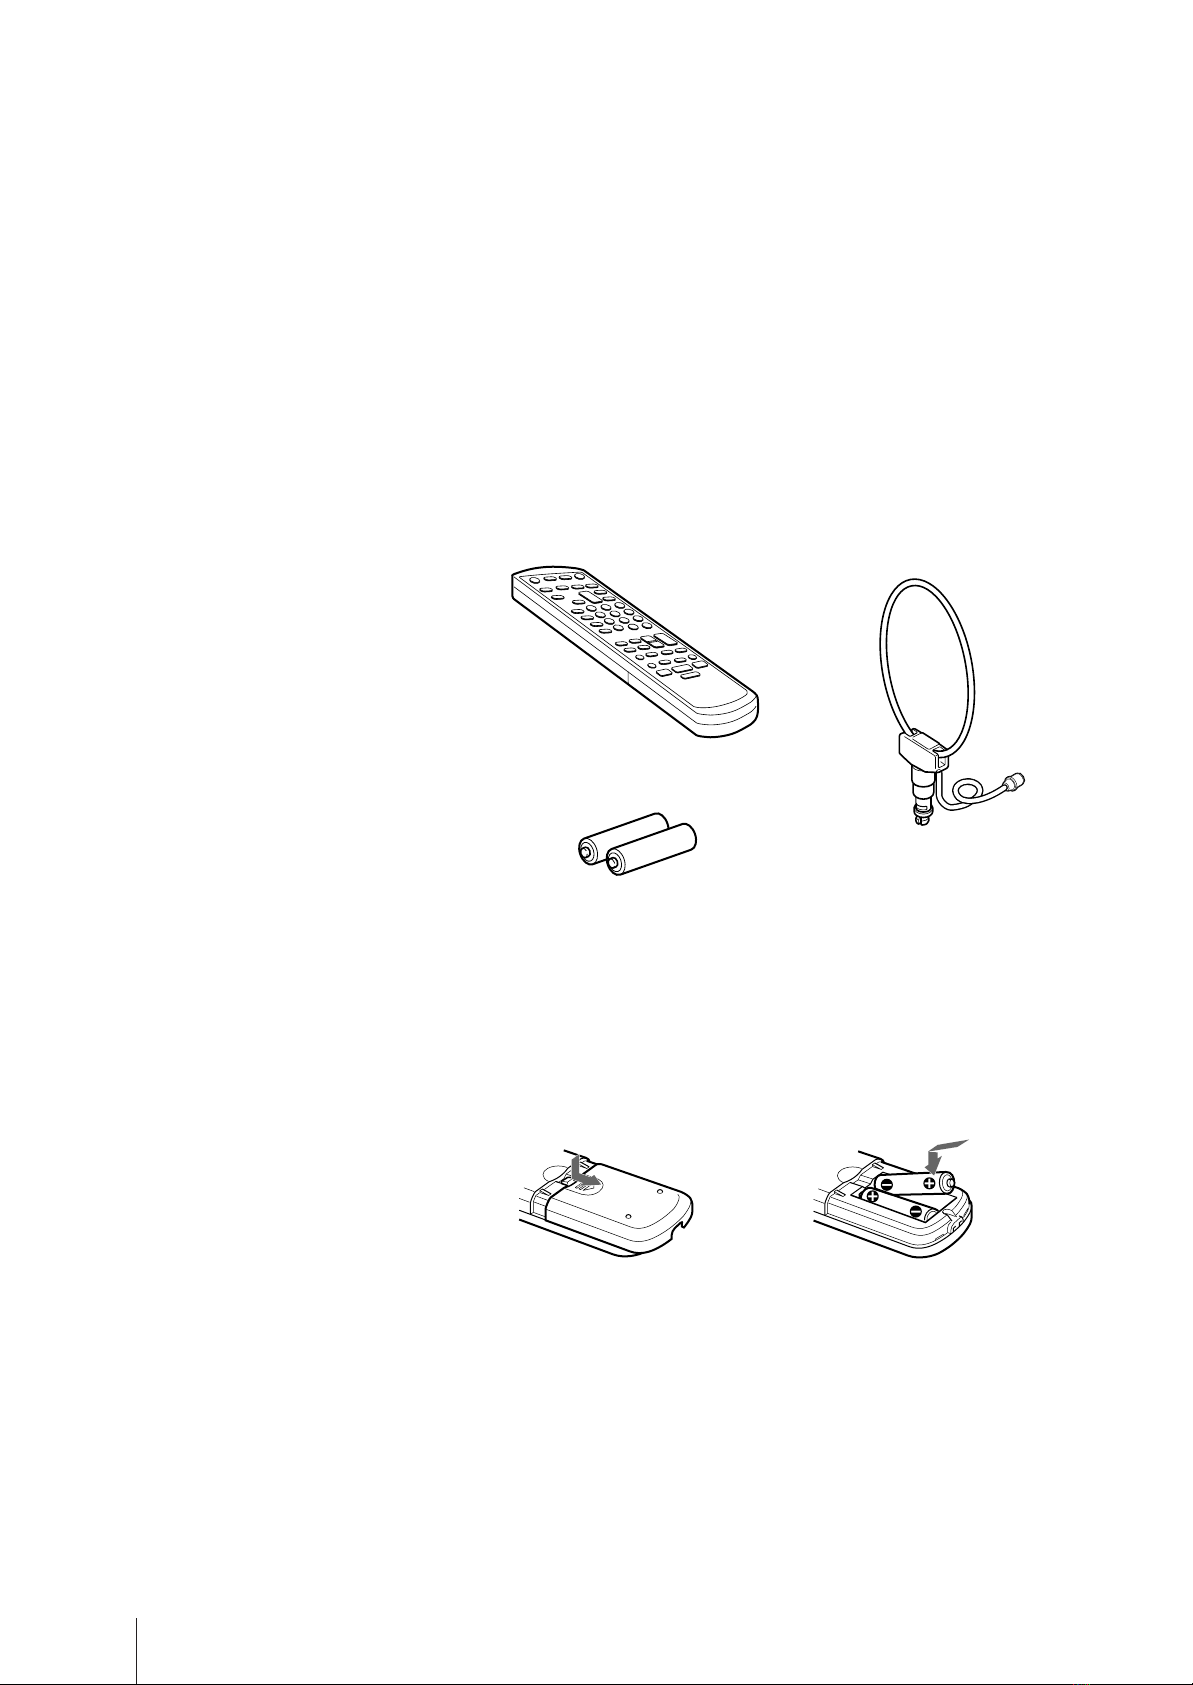
Checking the supplied accessories ....................... 4
Inserting batteries into the remote
control.................................................................... 4
Step 2—Connecting the Aerial ................................. 5
Connecting an indoor aerial (KV-14V5U,
KV-14V6U only) ................................................... 5
Connecting an outdoor aerial................................5
Step 3—Tuning in to TV Stations .............................6
Selecting the menu language................................. 6
Presetting channels automatically ........................7
Presetting channels manually ............................... 8
Skipping programme positions ............................ 9
Captioning a TV station name ............................ 10
Manual fine-tuning ............................................... 11
Tuning in to a channel temporarily.................... 12
Setting a Pay-TV channel (KV-14V6U,
KV-21V6U only) ................................................. 13
Step 4—Setting up VIDEO Plus+* Manually........ 14
Setting the guide channels ................................... 14
Step 5—Setting the Clock ........................................ 16
Basic Operations
Watching the TV ....................................................... 17
Switching the video TV on and off..................... 17
Selecting TV programmes.................................... 17
Adjusting the volume ........................................... 17
Adjusting the picture............................................ 18
Muting the sound.................................................. 19
Displaying the on-screen information ............... 19
Watching line input ..............................................19
Listening with headphones ................................. 19
Viewing Teletext ....................................................... 20
Switching Teletext on and off.............................. 20
Using Fasttext ........................................................ 20
Playing a Tape........................................................... 22
Inserting a video cassette ..................................... 22
Ejecting a video cassette ....................................... 22
Protecting your cassette against accidental
erasure ................................................................ 22
Playing a tape ........................................................ 23
Resetting the tape counter ................................... 23
Playing a tape repeatedly (AUTO REPEAT) .... 24
Replaying a scene automatically......................... 24
Setting the colour system ..................................... 25
Displaying the on-screen indications ................. 25
Viewing programmes in 16:9 mode ................... 26
Recording TV Programmes..................................... 27
Recording TV programmes ................................. 27
Recording with the TV off ................................... 27
Watching a TV programme while recording
another (KV-14V6U, KV-21V6U only) ............ 27
Recording TV Programmes Using the Timer ....... 28
Setting the timer .................................................... 28
Using the video TV before timer recording
starts..................................................................... 30
Checking the timer settings .................................31
Changing or cancelling the timer settings......... 31
Recording using QUICK TIMER ........................ 32
Timer recording with PDC signals ..................... 33
Recording TV Programmes Using VIDEO
Plus+ ....................................................................... 34
Additional Operations
Switching Off Automatically—Sleep Timer ......... 36
Switching On at Your Desired Time—
On Timer ................................................................ 37
Using FUNCTION LOCK ....................................... 38
Searching Using the INDEX Function ...................39
Enhancing Video Picture Quality........................... 40
Adjusting the tracking.......................................... 40
Adjusting with the optimum picture control
(OPC) ................................................................... 41
About the Auto Head Cleaner ............................ 41
Connecting Optional Equipment ........................... 42
Watching the picture input from optional
equipment ........................................................... 42
Editing with another VCR ................................... 43
Watching the Pay-TV channel (KV-14V6U,
KV-21V6U only) ................................................. 43
Additional Information
Troubleshooting........................................................ 44
Taking Care of Your Video TV ............................... 46
Video head cleaning ............................................. 46
Worn video heads ................................................. 46
Check the video heads after 1,000 hours
of use.................................................................... 46
Specifications ............................................................. 47
Television Channel Number Guide ....................... 48
Index to Parts and Controls .................................... 49
Video TV set—front .............................................. 49
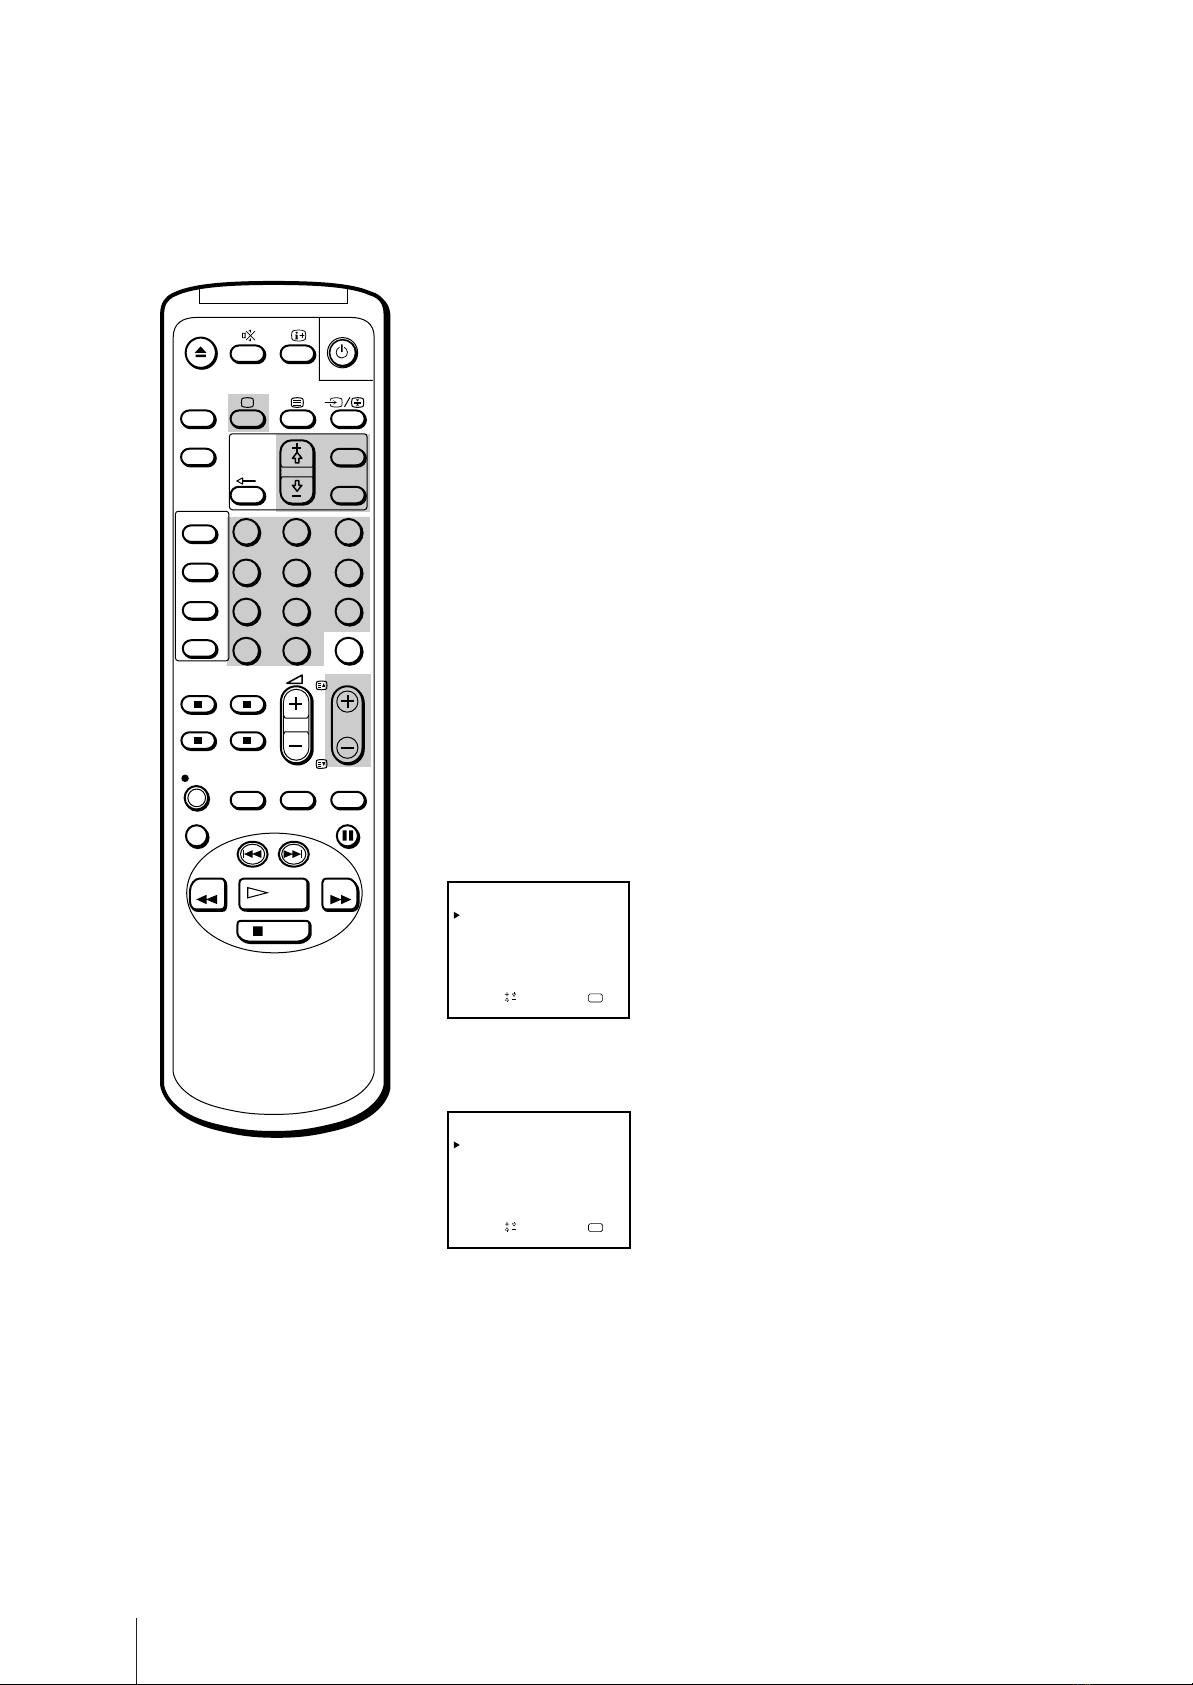
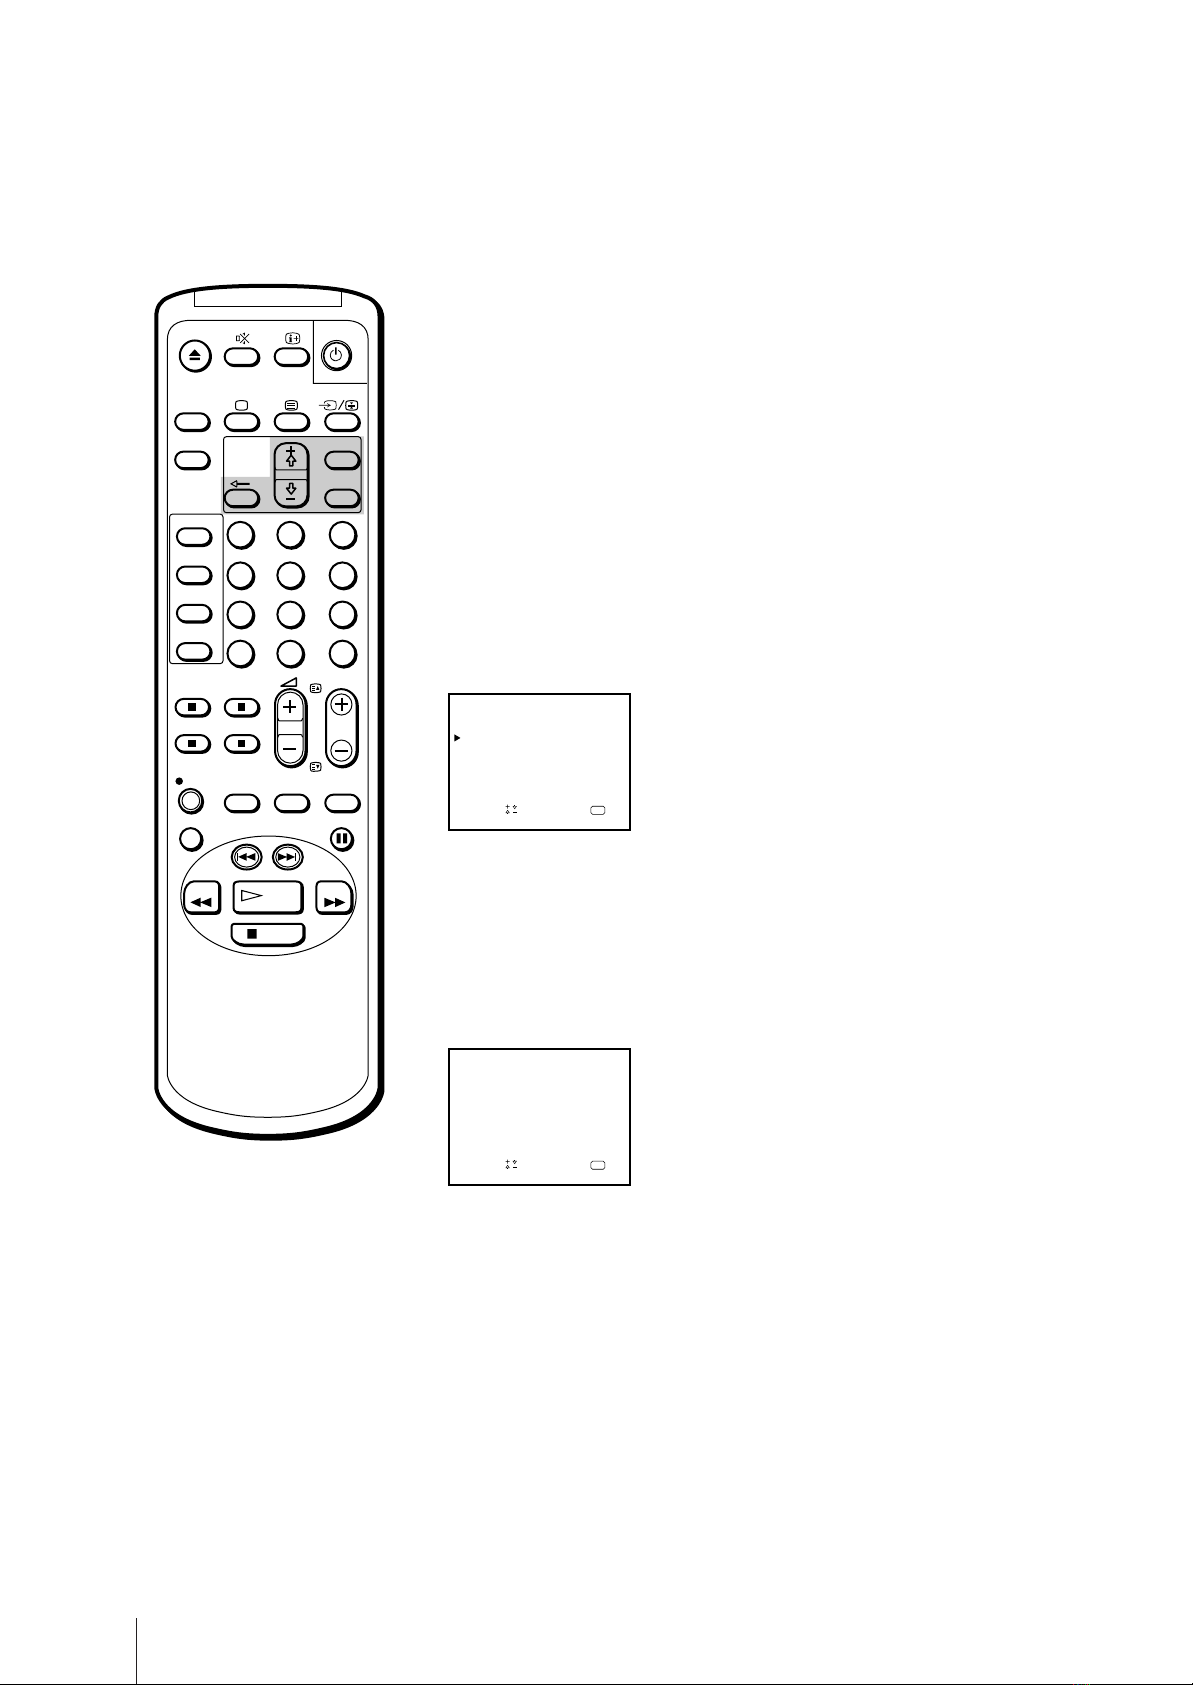
Remote control ...................................................... 50
* VIDEO Plus+ and PlusCode are trademarks applied for by
Gemstar Development Corp. VIDEO Plus+ system is
manufactured under license from Gemstar Development
Corporation.
The instructions in this manual are for models
KV-14V5U, KV-14V6U, KV-21V5U and KV-
21V6U. Before you begin to read this manual,
refer to the model number located on the rear of
your video TV. Model KV-14V6U is used for
illustration purposes throughout this manual.
Any differences in operation are indicated in the
text, for example, “KV-14V5U, KV-14V6U only.”

4Getting Started
Checking the supplied accessories
When you have taken everything out of the carton, check that you have
these items:
• Remote control
• Two R6 (size AA) batteries
• Loop aerial (KV-14V5U, KV-14V6U only)
Inserting batteries into the remote
control
Getting Started
Step 1 — Preparation
Turn the remote control
over, and remove the cover. Check the polarities and position
two R6 batteries correctly.
Close the cover.
(KV-14V5U, KV-14V6U only)
Note
Always remember to dispose of
used batteries in an environmentally
friendly way.

Getting Started 5
Connecting an indoor aerial (KV-
14V5U, KV-14V6U only)
If your local VHF/UHF signal is strong, an indoor aerial can be used to
obtain a clear picture. Connect the supplied loop aerial as follows:
1Insert the aerial until it clicks.
2Connect to the ˘(aerial) socket.
After turning on the video TV, adjust the aerial for the best reception.
Be sure to adjust the aerial for the channel you want to record as well. If
reception is poor, connect an outdoor aerial to your video TV.
Connecting an outdoor aerial
For better TV reception and clearer recording, connect an outdoor aerial to
your video TV.
To connect a VHF aerial or a combination
VHF/UHF aerial—75-ohm coaxial cable (round)
Attach an IEC aerial connector to 75-ohm coaxial cable.
Plug the connector into the (aerial) socket, located at the rear of the
video TV.
To connect both VHF and UHF aerials
Attach the aerial cable ends to the VHF/UHF mixer (not supplied).
Plug the mixer into the (aerial) socket, located at the rear of the video
TV.
After connecting the aerial, connect the mains lead to a wall outlet.
Rear
or
On a wall
VHF/UHF aerial
Rear
300-ohm twin-lead cable
VHF/UHF mixer
75-ohm coaxial cable
UHF aerial VHF aerial
Step 2 — Connecting the Aerial
Aerial
connector
(supplied)
Note
Do not use the supplied loop aerial
with any other TV product.

6Getting Started
You can preset up to 80 TV channels, either automatically or manually.
The automatic method is easier if you want to preset all receivable
channels at once. Use the manual method if you want to allocate
programme numbers to the channels one by one.
Before you begin
• Depress the U(MAIN POWER) switch, located behind the cover on the
front of the video TV, to turn the TV on.
If the ulamp on the video TV is lit in red (indicating that the video TV
is in standby mode), press ;, PROGR +/– or a number button on the
remote control.
Selecting the menu language
You can select one of several languages for the menu and on-screen
information.
The initial setting is English.
1Press MENU.
The main menu appears.
2Move the cursor (z) to “LANGUAGE” with + ◊or – √and press OK.
The LANGUAGE menu appears.
3Select the language you want with + ◊or – √and press OK.
The selected language is coloured green, and the menu appears in the
selected language.
4Press MENU to return to the original screen.
123
456
789
-/--
0C
PROGR
PAUSE
PLAY
MENU
SLEEP
OK
ON
TIMER
TIMER
ON SCREEN
TIMER REC
ON/OFF
TIMER REC
CLEAR
REC QUICK
TIMER TAPE
SPEED COUNTER
RESET
REPLAY INDEX SEARCH
REW
STOP
FF
VIDEO Plus+
OK
LANGUAGE
ENGLISH
DEUTSCH
FRANÇAIS
ITALIANO
ESPAÑOL
NEDERLANDS
PORTUGUÊS
Sapelect nd ress
OK
MENU
PICTURE CONTROL
ON TIMER SET
CLOCK SET
LANGUAGE
PROGRAMME PRESET
VCR MODE
FUNCTION LOCK
Sapelect nd ress
Step 3 — Tuning in to TV Stations

Getting Started 7
Presetting channels automatically
1Press MENU to display the main menu.
2Move the cursor (z) to “PROGRAMME PRESET” with + ◊or – √and
press OK.
The PROGRAMME PRESET menu appears.
3Move the cursor (z) to “AUTO PROGRAMME” with + ◊or – √and press
OK.
The AUTO PROGRAMME menu appears.
4Press OK.
The programme number you previously watched appears in red in the
“PROG” position.
Using + ◊or – √, select the programme number from which you want to
start presetting and press OK. You cannot begin presetting at 00.
The CH position turns red.
5Select the channel with + ◊or – √and press OK.
The video TV starts scanning and presetting all receivable channels from
the programme number selected in step 4.
The preset programme and channel numbers are displayed on the screen
in sequence. When presetting is finished, the original screen reappears.
All available channels are now stored on successive number buttons.
OK
AUTO PROGRAMME
SYSTEM
I
Sapelect nd ress
PROG CH
01 C22
OK
AUTO PROGRAMME
SYSTEM
I
Sapelect nd ress
PROG CH
–– –––
123
456
789
-/--
0C
PROGR
PAUSE
PLAY
MENU
SLEEP
OK
ON
TIMER
TIMER
ON SCREEN
TIMER REC
ON/OFF
TIMER REC
CLEAR
REC QUICK
TIMER TAPE
SPEED COUNTER
RESET
REPLAY INDEX SEARCH
REW
STOP
FF
VIDEO Plus+
SET UP GUIDE CH
OK
PROGRAMME PRESET
AUTO PROGRAMME
MANUAL PROGRAMME
Sapelect nd ress
To stop automatic channel
presetting
Press ?on the remote control.

8Getting Started
Presetting channels manually
1Press MENU to display the main menu.
2Move the cursor (z) to “PROGRAMME PRESET” with + ◊or – √and
press OK.
The PROGRAMME PRESET menu appears.
3Move the cursor (z) to “MANUAL PROGRAMME” with + ◊or – √and
press OK.
The MANUAL PROGRAMME menu appears.
4Using + ◊or – √, move the cursor (z) to the programme position (number
button) to which you want to preset the channel, and press OK.
The SYS position turns red.
5Select the system with + ◊or – √and press OK.
The CH position turns red.
6Select the channel you want to preset with + ◊or – √and press OK.
7The video TV starts scanning receivable channels. When the channel is
found, it stops. If you want to preset this channel, press OK. If not, press
+ ◊or – √to search for another channel.
8Repeat steps 4 through 7 to preset other channels.
9After you finish presetting, press MENU to return to the original screen.
MANUAL PROGRAMME
PRG SYS CH
1 C22 –––
LABEL AFT
2
3I
I
–– ON
a
OK
ndSelect press
I
I4
5
6
C24 ––––– ON
C26 ––––– ON
C32 ––––– ON
C36 ––––– ON
C38 –––––
ION
D
–
–
–
–
–
–
I
MANUAL PROGRAMME
PRG SYS CH
1 C22 –––
LABEL AFT
2
3I
I
–– ON
a
OK
ndSelect press
I
I4
5
6
C24 ––––– ON
C26 ––––– ON
C32 ––––– ON
C36 ––––– ON
C38 –––––
ION
D
–
–
–
–
–
–
I
123
456
789
-/--
0C
PROGR
PAUSE
PLAY
MENU
SLEEP
OK
ON
TIMER
TIMER
ON SCREEN
TIMER REC
ON/OFF
TIMER REC
CLEAR
REC QUICK
TIMER TAPE
SPEED COUNTER
RESET
REPLAY INDEX SEARCH
REW
STOP
FF
VIDEO Plus+
SET UP GUIDE CH
OK
PROGRAMME PRESET
AUTO PROGRAMME
MANUAL PROGRAMME
Sapelect nd ress
For programme positions
beyond 6
The display scrolls by pressing – √
repeatedly.
If you have made a mistake
Press ?to return to the previous
position.

Getting Started 9
Skipping programme positions
You can skip unused programme positions when selecting programmes
with PROGR +/– buttons.
1Press MENU to display the main menu.
2Move the cursor (z) to “PROGRAMME PRESET” with + ◊or – √and
press OK.
The PROGRAMME PRESET menu appears.
3Move the cursor (z) to “MANUAL PROGRAMME” with + ◊or – √and
press OK.
The MANUAL PROGRAMME menu appears.
4Using + ◊or – √, move the cursor (z) to the programme position which
you want to skip and press OK.
The “SYS” position turns red.
5Press + ◊or – √until “---” appears in the “SYS” position and press OK.
When you select programmes using the PROGR +/– buttons, the
programme position is skipped.
6Repeat steps 4 and 5 to skip other programme positions.
7Press MENU to return to the original screen.
MANUAL PROGRAMME
PRG SYS CH
1 C22 –––
LABEL AFT
2
3
I
–– ON
a
OK
ndSelect press
I
I4
5
6
C24 ––––– ON
C26 ––––– ON
C32 ––––– ON
C36 ––––– ON
C38 –––––
ION
D
–
–
–
–
–
–
I
–––
MANUAL PROGRAMME
PRG SYS CH
1 C22 –––
LABEL AFT
2
3I
I
–– ON
a
OK
ndSelect press
I
I4
5
6
C24 ––––– ON
C26 ––––– ON
C32 ––––– ON
C36 ––––– ON
C38 –––––
ION
D
–
–
–
–
–
–
I
123
456
789
-/--
0C
PROGR
PAUSE
PLAY
MENU
SLEEP
OK
ON
TIMER
TIMER
ON SCREEN
TIMER REC
ON/OFF
TIMER REC
CLEAR
REC QUICK
TIMER TAPE
SPEED COUNTER
RESET
REPLAY INDEX SEARCH
REW
STOP
FF
VIDEO Plus+
For programme positions
beyond 6
The display scrolls by pressing – √
repeatedly.

10 Getting Started
Captioning a TV station name
You can name a channel using up to five characters (letters or numbers) to
be displayed on the TV screen (e.g. MTV). Using this function, you can
easily identify which channel you are watching.
1Press MENU to display the main menu.
2Move the cursor (z) to “PROGRAMME PRESET” with + ◊or – √and
press OK.
The PROGRAMME PRESET menu appears.
3Move the cursor (z) to “MANUAL PROGRAMME” with + ◊or – √and
press OK.
The MANUAL PROGRAMME menu appears.
4Using + ◊or – √, move the cursor (z) to the programme position you want
to caption and press OK repeatedly until the first element of the “LABEL”
position turns red.
5Select a letter or number with + ◊or – √and press OK.
The next element turns red. Select other characters in the same way. For
the element you want to leave blank, select “-” and press OK.
6After selecting all the characters, press OK repeatedly until the cursor
appears. Now the caption you chose is stored.
7Repeat steps 4 through 6 to caption other channels.
8Press MENU to return to the original screen.
MANUAL PROGRAMME
PRG SYS CH
1 C22 –––
LABEL AFT
2
3I
I
–– ON
a
OK
ndSelect press
I
I4
5
6
C24 –– ON
C26 ––––– ON
C32 ––––– ON
C36 ––––– ON
C38 –––––
ION
D
–
–
–
–
–
–
IMTV
MANUAL PROGRAMME
PRG SYS CH
1 C22 –––
LABEL AFT
2
3I
I
–– ON
a
OK
ndSelect press
I
I4
5
6
C24 ––––– ON
C26 ––––– ON
C32 ––––– ON
C36 ––––– ON
C38 –––––
ION
D
–
–
–
–
–
–
I
123
456
789
-/--
0C
PROGR
PAUSE
PLAY
MENU
SLEEP
OK
ON
TIMER
TIMER
ON SCREEN
TIMER REC
ON/OFF
TIMER REC
CLEAR
REC QUICK
TIMER TAPE
SPEED COUNTER
RESET
REPLAY INDEX SEARCH
REW
STOP
FF
VIDEO Plus+
If you have made a mistake
Press ?to return to the previous
position.

Getting Started 11
Manual fine-tuning
Normally, the automatic fine-tuning (AFT) is already working. However, if
the picture of a programme is distorted, you can use the manual fine-
tuning function to obtain better picture reception.
1Press MENU to display the main menu.
2Move the cursor (z) to “PROGRAMME PRESET” with + ◊or – √and press
OK.
The PROGRAMME PRESET menu appears.
3Move the cursor (z) to “MANUAL PROGRAMME” with + ◊or – √and
press OK.
The MANUAL PROGRAMME menu appears.
4Using + ◊or – √, move the cursor (z) to the programme position which
you want to manually fine-tune, and press OK repeatedly until the AFT
position turns red.
5Fine-tune the channel while holding down + ◊or – √so that you get the
best TV reception. As you press these buttons, the frequency changes from
–15 to +15.
6After fine-tuning, press OK.
The cursor (z) appears. The fine-tuned level is now stored.
7Repeat steps 4 through 6 to fine-tune other channels.
8Press MENU to return to the original screen.
MANUAL PROGRAMME
PRG SYS CH
1 C22 –––
LABEL AFT
2
3I
I
–– ON
a
OK
ndSelect press
I
I4
5
6
C24 ––––– ON
C26 ––––– –3
C32 ––––– ON
C36 ––––– ON
C38 –––––
ION
D
–
–
–
–
–
–
I
MANUAL PROGRAMME
PRG SYS CH
1 C22 –––
LABEL AFT
2
3I
I
–– ON
a
OK
ndSelect press
I
I4
5
6
C24 ––––– ON
C26 ––––– ON
C32 ––––– ON
C36 ––––– ON
C38 –––––
ION
D
–
–
–
–
–
–
I
123
456
789
-/--
0C
PROGR
PAUSE
PLAY
MENU
SLEEP
OK
ON
TIMER
TIMER
ON SCREEN
TIMER REC
ON/OFF
TIMER REC
CLEAR
REC QUICK
TIMER TAPE
SPEED COUNTER
RESET
REPLAY INDEX SEARCH
REW
STOP
FF
VIDEO Plus+
To reactivate automatic fine-
tuning (AFT)
Repeat from the beginning and
select “ON” in step 5.

12 Getting Started
C24
-/--
PROGR
PAUSE
PLAY
MENU
SLEEP
OK
ON
TIMER
TIMER
ON SCREEN
TIMER REC
ON/OFF
TIMER REC
CLEAR
REC QUICK
TIMER TAPE
SPEED COUNTER
RESET
REPLAY INDEX SEARCH
REW
STOP
FF
12
5
3
8
4
7
6
0C
9
VIDEO Plus+
Tuning in to a channel temporarily
You can tune in to a channel temporarily, even when the channel has not
been preset.
1Press C on the remote control.
The indication “C” (for UHF channels) will appear on the screen.
2Enter the double digit channel number using the remote control number
buttons (e.g. for channel 24, press 2, then 4).
The channel will appear. However, this channel will not be stored in the
video TV’s memory.
Note (KV-14V6U, KV-21V6U
only)
In order to record a programme
received through a Pay-TV decoder,
you must preset the channel
according to the method on page 8
“Presetting channels manually”, or
page 13 “Setting a pay-TV channel,”
and then tune in to the channel
according to the method on page 17
“Selecting TV programmes”.

Getting Started 13
Setting a Pay-TV channel
(KV-14V6U, KV-21V6U only)
You can watch Pay-TV channels by connecting a Pay-TV decoder to the
:1/W1 connector on the rear of the video TV.
1Press MENU to display the main menu.
2Move the cursor (z) to “PROGRAMME PRESET“ with + ◊or – √and
press OK.
The PROGRAMME PRESET menu appears.
3Move the cursor (z) to “MANUAL PROGRAMME“ with + ◊or – √and
press OK.
The MANUAL PROGRAMME menu appears.
4Move the cursor (z) to the programme position to which you want to set
the pay-TV decoder, and press OK until the D position turns red.
5Press + ◊or – √until rappears in the D position and press OK.
6Press MENU to return to the original screen.
MANUAL PROGRAMME
PRG SYS CH
1 C22 –––
LABEL AFT
2
3I
I
–– ON
a
OK
ndSelect press
I
I4
5
6
C24 ––––– ON
C26 ––––– ON
C32 ––––– ON
C36 ––––– ON
C38 –––––
ION
D
–
–
–
–
–
I
MANUAL PROGRAMME
PRG SYS CH
1 C22 –––
LABEL AFT
2
3I
I
–– ON
a
OK
ndSelect press
I
I4
5
6
C24 ––––– ON
C26 ––––– ON
C32 ––––– ON
C36 ––––– ON
C38 –––––
ION
D
–
–
–
–
–
–
I
123
456
789
-/--
0C
PROGR
PAUSE
PLAY
MENU
SLEEP
OK
ON
TIMER
TIMER
ON SCREEN
TIMER REC
ON/OFF
TIMER REC
CLEAR
REC QUICK
TIMER TAPE
SPEED COUNTER
RESET
REPLAY INDEX SEARCH
REW
STOP
FF
VIDEO Plus+
Note
While you are recording a program
which is being recorded through the
Pay-TV decoder, you will not be
able to view other programmes
through the decoder.

14 Getting Started
SET UP GUIDE CH
PROG CH
1 C22 GUIDE CH
2
3
a
OK
ndSelect press
4
5
6
C24
C26
C32 –– –
C36 –– –
C38
–––
–––
–––
–––
123
456
789
-/--
0C
PROGR
PAUSE
PLAY
MENU
SLEEP
OK
ON
TIMER
TIMER
ON SCREEN
TIMER REC
ON/OFF
TIMER REC
CLEAR
REC QUICK
TIMER TAPE
SPEED COUNTER
RESET
REPLAY INDEX SEARCH
REW
STOP
FF
VIDEO Plus+
The VIDEO Plus+ function allows you to simplify the task of
programming your video TV to make timer recordings. You should
coordinate the programme position of each channel with the guide
channel (the number that’s assigned to each TV station in advance). To
find the guide channel numbers, look in the programme guide for your
area that features PlusCodes. See “Guide channels for VIDEO Plus+” on
the next page.
Before you begin
•If the ulamp on the video TV is lit in red (indicating that the video TV is
in standby mode), press ;, PROGR +/– or a number button on the
remote control.
Setting the guide channels
1Press MENU to display the main menu.
The main menu appears.
2Move the cursor (z) to “PROGRAMME PRESET” with + ◊or – √and
press OK.
The PROGRAMME PRESET menu appears.
3Move the cursor (z) to “SET UP GUIDE CH” with + ◊or – √and press
OK.
The SET UP GUIDE CH menu appears.
SET UP GUIDE CH
OK
PROGRAMME PRESET
AUTO PROGRAMME
MANUAL PROGRAMME
Sapelect nd ress
OK
MENU
PICTURE CONTROL
ON TIMER SET
CLOCK SET
LANGUAGE
PROGRAMME PRESET
VCR MODE
FUNCTION LOCK
Sapelect nd ress
Step 4 —
Setting up VIDEO Plus+
Manually
If you have made a mistake
Press ?to return to the previous
position.

Getting Started 15
SET UP GUIDE CH
PROG CH
1 C22 GUIDE CH
2
3
a
OK
ndSelect press
4
5
6
C24 99C26
C32 –– –
C36 –– –
C38
–––
–––
–––
4Using + ◊or – √, move the cursor (z) to the programme position (number
button) to which you want to preset the guide channel, and press OK.
The GUIDE CH position turns red.
5Select the guide channel you want to preset with + ◊or – √, and press OK.
6Repeat steps 4 and 5 to preset other channels.
7After you finish presetting, press MENU to return to the original screen.
SET UP GUIDE CH
PROG CH
1 C22 GUIDE CH
2
3
a
OK
ndSelect press
4
5
6
C24
C26
C32 –– –
C36 –– –
C38
–––
–––
–––
–––
123
456
789
-/--
0C
PROGR
PAUSE
PLAY
MENU
SLEEP
OK
ON
TIMER
TIMER
ON SCREEN
TIMER REC
ON/OFF
TIMER REC
CLEAR
REC QUICK
TIMER TAPE
SPEED COUNTER
RESET
REPLAY INDEX SEARCH
REW
STOP
FF
VIDEO Plus+
Guide channels for VIDEO plus+
Guide Station name
channel
001 BBC1
002 BBC2
003 ITV
004 CHANNEL 4
005 RTE (IRELAND)
006 NETWORK 2 (IRELAND)
101 SKY ONE
102 SKY NEWS
103 SKY MOVIES
104 THE MOVIE CHANNEL
105 SKY SPORT
106 NICKELODEON
VH-1 GERMANY
107 EUROSPORT
108 GALAVISION
109 MTV EUROPE
110 CHILDERN’S CHANNEL
THE FAMILY CHANNEL
111 SKY MOVIES GOLD
112 BBC WORLD SERVICE
113 RTL 4
114 SUPER SPORT
FILMNET 2
FILMNET +
115 RTL PLUS
INTERNATIONAL
116 SAT 1
117 PREMIERE
118 3 SAT
119 ARD
120 PRO 7
121 TELE 5
Guide Station name
channel
122 TELECLUB
123 UK GOLD
124 DISCOVERY
THE LEARNING
CHANNEL
125 BRAVO
ADULT CHANNEL
126 CNN
127 EURONEWS
129 QVC
130 UK LIVING
131 RAI 1
132 RAI 2
133 TV5 EUROPE
134 TVE INTERNATIONAL
135 MBC/ARABIC
136 VTM
137 SPORTNET
138 COUNTRY MUSIC TV
139 VIDEO HITS ONE
VH-1
140 SKY SPORT 2 & SOAPS &
TRAVEL
141 TV ASIA
142 LA-5
143 LIVE TV
144 SUPERCHANNEL
145 JAPAN TV
146 SELECT TV
147 MOVIE CHANNEL
FILMNET 1 149
149 TNT
CARTOON NETWORK

16 Getting Started
You need to set the clock in order to use timer recording and quick-timer
recording functions.
1Press MENU to display the main menu.
2Move the cursor (z) to “CLOCK SET” with + ◊or – √and press OK.
The CLOCK SET menu appears.
3Press OK to start setting the clock.
The day section turns red.
4Set the day with + ◊or – √and press OK.
The month section turns red.
5Using + ◊or – √and OK, set the month, year, hour and minute in the same
way as in step 4.
6After setting the minute, press OK.
The clock starts working.
7Press MENU to return to the original screen.
CLOCK SET
4. 2. 19 97 THU 15 : 301
a
OK
ndSelect press
CLOCK SET
4. 1. 1997 SAT 0:00
a
OK
ndSelect press
CLOCK SET
1. 1. 1997 WED 0:00
a
OK
ndSelect press
123
456
789
-/--
0C
PROGR
PAUSE
PLAY
MENU
SLEEP
OK
ON
TIMER
TIMER
ON SCREEN
TIMER REC
ON/OFF
TIMER REC
CLEAR
REC QUICK
TIMER TAPE
SPEED COUNTER
RESET
REPLAY INDEX SEARCH
REW
STOP
FF
VIDEO Plus+
CLOCK SET
––. ––. –––– ––– ––:––
OK
press
OK
MENU
PICTURE CONTROL
ON TIMER SET
CLOCK SET
LANGUAGE
PROGRAMME PRESET
VCR MODE
FUNCTION LOCK
Sapelect nd ress
Step 5 — Setting the Clock
If you have made a mistake
Press ?to return to the previous
position.
If the clock has stopped and
“--/--” is displayed
You have to re-set the clock.

Basic Operations 17
123
456
789
-/--
0C
PROGR
PAUSE
PLAY
MENU
SLEEP
OK
ON
TIMER
TIMER
ON SCREEN
TIMER REC
ON/OFF
TIMER REC
CLEAR
REC QUICK
TIMER TAPE
SPEED COUNTER
RESET
REPLAY INDEX SEARCH
REW
STOP
FF
VIDEO Plus+
CL
OPEN
REC
TIMER REC
EJECT
PLAYREW3STOP #FF PAUSE
REC
TIMER REC
ON/OFF
REC
TIMER REC
ON/OFF
PROOR
This section explains the basic functions you use while watching the TV.
Most of the operations can be done using the remote control.
Switching the video TV on and off
Switching on
Depress the U(MAIN POWER) switch, which is located behind the cover
on the front of the video TV.
Press ;, PROGR +/– or number buttons on the remote control, or PROGR
+/– on the video TV when the ulamp is lit in red (indicating that the
video TV is in standby mode).
Switching off temporarily
Press u.
The video TV enters standby mode and the ulamp on the front of the
video TV lights up in red.
To switch on again
Press ;, PROGR +/– or number buttons on the remote control, or PROGR
+/– on the video TV.
To switch off the main power
Press the Uswitch on the video TV.
Selecting TV programmes
Press PROGR +/– or number buttons on the remote control, or PROGR
+/– on the video TV.
To select a double-digit number using the
number buttons
Press ÷, then the numbers.
For example, if you want to choose 24, press ÷, 2 and 4.
Adjusting the volume
Press Á+/–.
Basic Operations
Watching the TV
Note
When the Uswitch is turned off, the
video operations do not work.

18 Basic Operations
123
456
789
-/--
0C
PROGR
PAUSE
PLAY
MENU
SLEEP
OK
ON
TIMER
TIMER
ON SCREEN
TIMER REC
ON/OFF
TIMER REC
CLEAR
REC QUICK
TIMER TAPE
SPEED COUNTER
RESET
REPLAY INDEX SEARCH
REW
STOP
FF
VIDEO Plus+
Adjusting the picture
1Press MENU to display the main menu.
2Move the cursor (z) to “PICTURE CONTROL” with + ◊or – √and press
OK.
The PICTURE CONTROL menu appears.
3Using + ◊or – √, select the item you want to adjust and press OK.
4Adjust the picture with + ◊or – √and press OK.
With each press the vertical bars increase or decrease and the figure at the
right margin changes to show the control level. (See the table below.)
5Repeat steps 3 and 4 to adjust other items.
6Press MENU to return to the original screen.
The adjusted control levels are stored.
Effect of each control
Effect
Less More
Less More
Darker Brighter
Greenish Reddish
Softer Sharper
Resets all the items to the factory preset levels.
OK
PICTURE CONTROL
CONTRAST
Sapelect nd ress
COLOUR
BRIGHTNESS
HUE
RESET
80
50
50
00
SHARPNESS 50
OK
MENU
PICTURE CONTROL
ON TIMER SET
CLOCK SET
LANGUAGE
PROGRAMME PRESET
VCR MODE
FUNCTION LOCK
Sapelect nd ress
PICTURE CONTROL
CONTRAST
COLOUR
BRIGHTNESS
HUE
SHARPNESS
RESET
Note
The HUE adjustment is available
only for the NTSC colour system.

Basic Operations 19
ABC
24
4.12THU
20:00
C02
123
456
789
-/--
0C
PROGR
PAUSE
PLAY
MENU
SLEEP
OK
ON
TIMER
TIMER
ON SCREEN
TIMER REC
ON/OFF
TIMER REC
CLEAR
REC QUICK
TIMER TAPE
SPEED COUNTER
RESET
REPLAY INDEX SEARCH
REW
STOP
FF
VIDEO Plus+
Muting the sound
Press ¤.
The ¤indicator appears and stays on the screen.
To resume normal sound, press ¤again or Á+.
Displaying the on-screen
information
Press to display the following on-screen information.
To have the programme number, channel number and caption stay on the
screen, press again.
To make the indications disappear, press until no indications are
displayed on the screen.
Watching line input
Press …repeatedly until the desired input indicator appears.
To return to the normal TV picture, press …until the programme position
appears, or press ;on the remote control once. For details of the video
input picture, see page 42.
Listening with headphones
Plug the headphones (not supplied) into the 2(headphones) jack which is
located behind the cover on the front of the video TV.
The sound from the speaker is turned off.
CL
OPEN
REC
TIMER REC
EJECT
PLAYREW3STOP #FF PAUSE
REC
TIMER REC
ON/OFF
REC
TIMER REC
ON/OFF
PROOR
Current date and time
Caption
Programme position
Channel number

20 Basic Operations
123
456
789
-/--
0C
PROGR
PAUSE
PLAY
MENU
SLEEP
OK
ON
TIMER
TIMER
ON SCREEN
TIMER REC
ON/OFF
TIMER REC
CLEAR
REC QUICK
TIMER TAPE
SPEED COUNTER
RESET
REPLAY INDEX SEARCH
REW
STOP
FF
VIDEO Plus+
TV stations broadcast an information service called Teletext via the TV
channels. The Teletext service allows you to receive various information,
such as weather forecasts or news, at any time.
Switching Teletext on and off
1Select the TV channel which carries the Teletext service you want to watch.
2Press Vto display Teletext.
A Teletext page (normally the index page) is displayed. If there is no
Teletext broadcast, the indication P100 is displayed on a black screen.
3Press the number buttons to enter the three digits of the Teletext number
you want.
The numbers are displayed on the screen and the requested page appears
in a few seconds.
If you have made a mistake, type in any three digits, then re-enter the
correct page number.
4Press ;to return to the TV mode.
Using Fasttext
This feature allows you to access a Teletext page by pressing only one
button. When a Fasttext page is broadcast, a colour-coded menu appears
at the bottom of the screen. The colours of the menu correspond to the
red, green, yellow and blue buttons on the remote control. These coloured
buttons function as the Fasttext buttons in Teletext mode.
Press the coloured button which corresponds to the colour-coded menu.
The page is displayed after a few seconds.
Viewing Teletext
To change the Teletext channel
• First press ;to return to the TV
mode, then repeat steps 1 through
3.
• If the signal of a TV channel is
weak, Teletext errors may occur.
This manual suits for next models
3
Table of contents
Other Sony TV VCR Combo manuals

Sony
Sony KDL-32S20L1 - 32" Bravia Lcd Digital Color... User manual

Sony
Sony Video Walkman GV-S50 User manual

Sony
Sony KV-20VS42 User manual

Sony
Sony Trinitron KV-V1430K User manual

Sony
Sony KV-13VM40 User (English, Espa& User manual

Sony
Sony Trinitron KV-14V4D User manual

Sony
Sony KV-13VM40 User (English, Espa& User manual

Sony
Sony KV-14VM5MT, KV-21VM6MT User manual

Sony
Sony Trinitron KV-21V4U User manual

Sony
Sony RM-V310 User manual