Soon CARE SBM-010WP User manual

CARE
USER MANUAL
Digital Baby Monitor
2.4" TFT LCD Display
SBM-010WP

About this manual.
We have made every effort to ensure that the contents of this ma
manual are correct and up to date. However, there is no guarantee
-
-
-
that new software versions will not contain changes that render so
me parts of this manual obsolete. If the contents of this manual do
not correspond to all your baby monitor, please contact our support
service.
We reserve the right to change the contents or specifications with
out prior notice. If the accessories do not match the contents of the
the actual product packaging, please contact your retailer.
Thank you for purchasing our products. We hope that its use will si
gnificantly improve your daily comfort.

Contents
Safety instructions......................................................................... 2
Appearance of the device.............................................................. 3
Camera Transmitter................................................................ 3
Handheld display......................................................................4
Button description.......................................................................... 5
Description of functions ................................................................ 6
Camera functions.................................................................... 6
Handheld display functions.................................................... 7
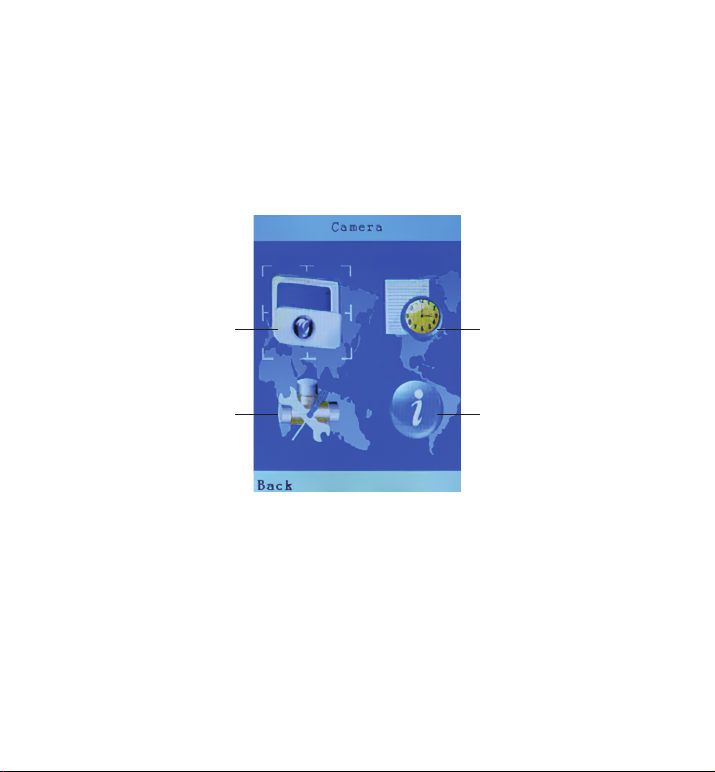
Camera...................................................................................... 9
Alarm clock............................................................................. 10
Settings..................................................................................11
Time and date.................................................................11
Selecting temperature measurement units .................. 12
Light source frequency...................................................13
Mode of operation ..........................................................13
Sound sensitivity level ........................................................14
LCD backlight..................................................................15
System Information...............................................................16
Mounting.......................................................................................17
Baby monitor maintenance ............................................................. 17
Disposal of the Device .................................................................... 19
Help ............................................................................................... 20
Warranty ........................................................................................ 23
Technical Specifications ................................................................. 26

2
Safety instructions
1. Please remember that the baby monitor does not replace the
need for responsible adult supervision
2.
This product should be placed in a location where the child will
not come into contact with it, and there should be at least 1.5
to 2 meters distance between the smart baby monitor and the
child to ensure that the child and this product have an appro-
priate safety zone.
3. Do not place the DC power cord where a child can rereach it,
and do not allow a child to wrap the cord around his body.
4. Please remember that the baby monitor is not a toy and child
ren are not allowed to play with it.
5.
Use only the supplied 5V/1A power adapter.

3
Appearance of the device
Camera Transmitter
1. Camera.
2. Photosensitive
device.
3. Infrared sensors
4.
Microphone port.
5.
Base.
6.
Stand
7.
Speaker.
8.
RX antenna.
9. Power connector.
10. Power indicator.
11. Pairing button.
12. Temperature sensor.
13. Wall mounting hole.

4
Handheld display
1.
Power/Charging
indicator.
2.
2,4-inch display.
3.
Power/Menu
button.
4.
Handheld antenna.
5.
Volume level
indicator.
6.
Volume up button.
Volume down7.
button.
8.
Microphone hole.
9.
Talkback button.
10.
OK button.
11.
Up/Down/Left/Right
button.
12.
Power connector.
13.
Speaker
14. Battery cover.
Bracket for15.
securing.
Bracket fastener.16.

5
Button description
Power / Menu button:
OK button: confirms the selection in the menu. Long press to activate/
deactivate the lullaby.
Pairing button: connects the handheld display and the camera to each other.
Up button: moves up one menu item. Increase the brightness on the
main screen.
Down button: moves down one menu item. Decrease the brightness
on the main screen.
Left button:
moves one menu item to the left. Press it on the home scre-
en to switch the lullaby.
Right button: move one menu item to the right. Press it
on the home
screen to switch the lullaby.
Talkback button: on the Home screen, press and hold this button to
talk to your child.
Volume up or down button: adjusts the volume of the speaker.
allows you to switch the unit on and off
and use or exit the pop-up menu.

6
Description of functions
Camera functions
This unit is powered by 5 V 1 A DC.
When the device is switched on, the blue LED lights up, indicating
that the baby monitor is switched on and ready for use.
Note: please use only the supplied power adapter.
Night vision: the baby monitor is equipped with 9 infrared sensors
that allow you to see a clear picture even in total darkness without
disturbing your child in any way.
The infrared sensor is activated automatically: the camera’s soft
ware monitors the amount of incoming light and adjusts its settings
to give you the best possible picture.
Place the device in relative (but not excessive) proximity to your child
so that it can record quality audio and video. Move it to another loca-
tion if you don't like the picture quality.

7
Handheld display functions
The handheld display operates with a 3.7 V lithium battery
a 5V\1A DC adapter. You can use the charging adapter when the
lithium battery is empty (note: only use the supplied power
adapter)
To start the device, connect it to a power source, then press and
hold the power button for a few seconds.
This is what the main menu looks like:
1.
Signal power indicator.
2.
Temperature in child’s room
(you can
choose to display
in degrees Fahren-
heit or
Celsius in the menu).
3.
Playing lullaby icon. A total of
preset melodies are available, 9
means playing them all on repeat.
4.
Alarm clock icon.
5.
The battery charge level indicator.
6. Date and time.
123 4 5
6

8
Press the «power/menu» button to access the menu.
This is what the settings menu looks like:
1 3
2 4
1. Camera
2. Settings
3. Alarm clock
4. System information
Navigate through the menu using the direction buttons, press
OK to select an item.

9
Press the «power/menu» button to return to the home screen.
Camera
Select the camera icon and
press the OK button once to
then press the pairing
button on the baby monitor
itself. The camera will be
paired as shown below.
start the pairing process;
at right: then you can press
the Power/Menu button to
return to the home screen.
Pair OK appears as shown
the pairing is completed.
Wait a few seconds until

10
cedure
again.
Alarm clock
-
-
Press the «up» and «down» buttons to set the alarm time, the «left» and
«right» buttons to move the cursor.
You can enter an alarm ti
me of up to 5 different al
arms. Select the alarm of
interest in the menu as
shown on the right.
Press OK to enter the alarm
settings.
If this fails, you will see
the message «Pair Failed».
Please try the pairing pro
-

11
After setting the desired alarm time, press «OK» to confirm.
Then press the «power/menu» button to return to the
main menu.
Settings
the right.
Time and date
-
picture on the right:
Enter the settings menu.
Here you see 6 submenus
as shown in the picture on
Select time and date and
press OK. The two options
for time and date are dis
played, as shown in the

12
Use the «up» and «down» buttons to change values.
screen.
Selecting temperature measurement units
Use the «up» and «down» buttons to select, then press OK to confirm.
The default measurement system is in Celsius.
After setting the time and date, press OK to confirm. Then
press the «power/menu» button to return to the main
Select the temperature unit
option and press OK. You
will have two options (dis
played in degrees Celsius
or Fahrenheit), as shown at
right:

13
Light source frequency
-
Mode of operation
Select the light source spe
ed option and press the OK
button. Two options (50 Hz
and 60 Hz) will appear as
shown in the picture on the
right:
Use the up and down arrow buttons to select, then press OK to
confirm. The default frequency is set to 50 Hz.
Select the operating mode
option and press the OK
button. The two options are
displayed: standard mode
and voice activation mode
(VOX), as shown in the pic
ture on the right.
-

14
Use the «up» and «down» buttons to select, then press OK to confirm.
-
The default setting is standard mode.
Sound sensitivity level
-
Note:
Select the voice sensitivity
option and press the OK
button. The three options
are displayed: low, medi
um and high sensitivity as
shown at the picture on the
right.
Use the up and down arrow buttons to select, then press OK to
The audio sensitivity levels can only be used when VOX
mode (voice activation mode) is activated
When activated by voice, the baby monitor can transmit
sound with some distortion for the first few moments. The
confirm. The default setting is «Medium».

15
LCD backlight
This function only works in the main menu.
adjustment, the default setting is level 5.
device adapts to the surrounding noise and concentrates on
the voice after a couple of seconds.
Select the LCD backlight
option and press OK button.
You will have two settings
available: LCD backlight
brightness and activity
time.
Use the «up» and «down» buttons to select, press the «left» and
«right» buttons to change the brightness and activity time of the
LCD screen, then press the OK button to confirm.
The brightness of the LCD screen has 5 levels of brightness

16
System information
-
The LCD backlight save time also has 5 options available:
The default screen backlighting time is 60 seconds.
(20 seconds, 40 seconds, 60 seconds, 80 seconds, 100 seconds).
Enter the system informa
tion menu as shown in the
illustration on right
You can view the device ID,
software version, hardware
version and the date the
system information was
created.

17
Mounting
Baby monitor maintenance
Place the baby monitor at an appropriate height and carefully
You can place the baby monitor on the wall using the mounting
The baby monitor requires no special maintenance — just keep
From time to time, gently wipe off fingerprints and dust on the
Do not use a rough or hard cloth that could scratch the out-
side of the unit.
lens and LCD screen with a soft, dry cloth.
the lens clean to ensure you get the clearest, most detailed
pictures.
hole and the special screw supplied.
adjust the angle of the camera to have the best viewing angle for
monitoring your child.

18
Note:
To reduce the risk of electric shock, do not open or repair the
Store the device in a dry place. Do not use the baby monitor in an
The design and specifications of this product are subject
to change without notice.
excessively humid environment: use in a humid environment may
cause the unit to malfunction.
unit yourself.
Table of contents
Other Soon Baby Monitor manuals