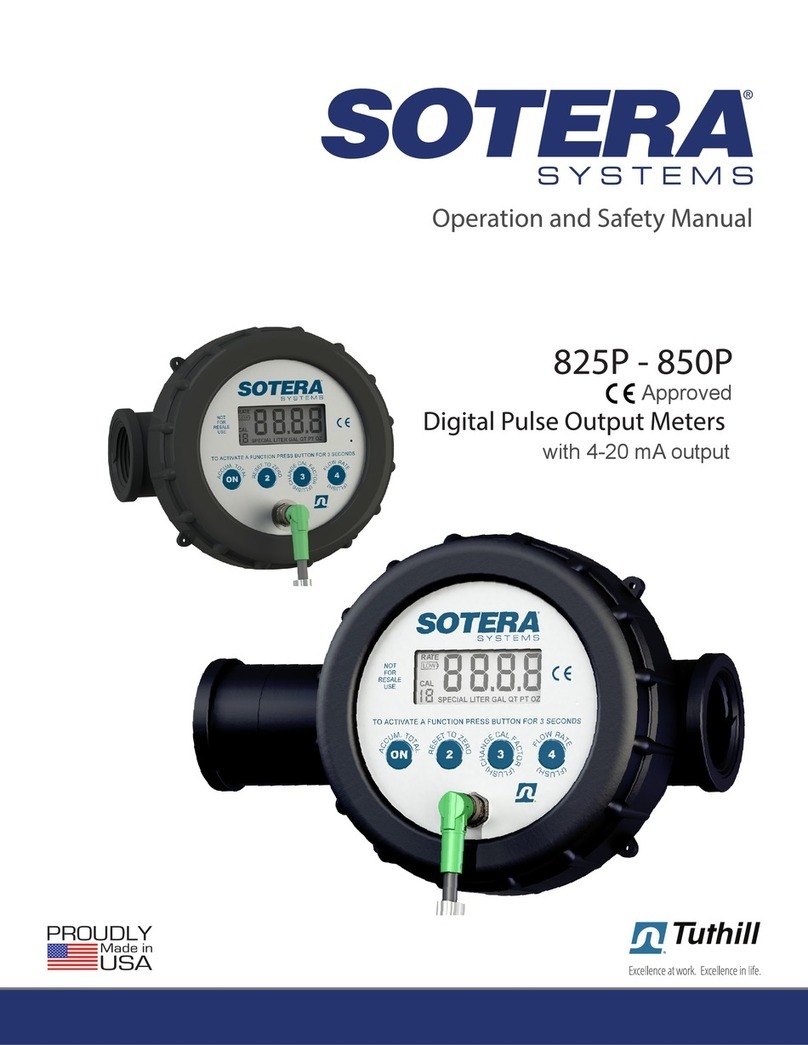
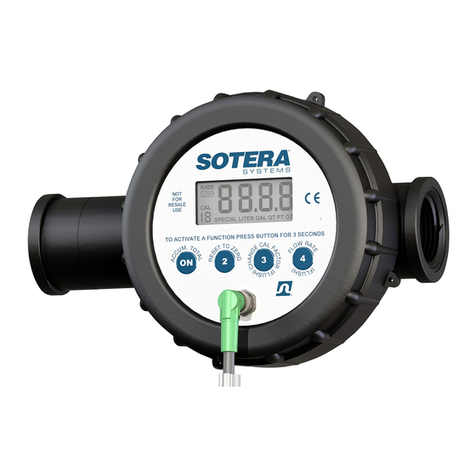
Sotera 825P User manual

sotera.com 2
| 825P-850P DIGITAL PULSE OUTPUT METERS INSTALLATION AND OPERATION MANUAL
Table of Contents
MODEL#
SERIAL#
PURCHASE DATE:
Thank You!
Thank you for your loyalty to the Sotera®brand of chemical, lubricant,
and mixed hydrocarbon transfer pumps. Your safety is important, so
please read and thoroughly understand the procedures set forth in this
manual. Protect yourself as well as those around you by observing all
safety instructions and adhering to all danger, warning, and caution
symbols. Please save these instructions for future reference and
record the model, serial number, and purchase date of your Sotera
digital meter. Please register your Sotera product via
info.fillrite.com/sotera_product_registration.
IMPORTANT RETURN POLICY
Please do not return this product to the store. For all warranty
and product questions, please contact Technical Support at
1 (800) 720-5192 or via email at SoteraTech@fillrite.com
(M-F, 8 AM – 5 PM ET).
About This Manual ............................................................................. 3
Symbols and Definitions..................................................................... 3
General Description............................................................................ 3
General Safety Information................................................................. 4
Technical Information......................................................................... 4
Fluid Compatibility............................................................................. 5
Installation......................................................................................... 5
Operational Functions........................................................................ 6
Use..................................................................................................... 6
Calibration Using the CAL Factor ....................................................... 6
Calibration Procedure Using the CAL Factor....................................... 7
Batteries ............................................................................................ 8
Repair and Maintenance.................................................................... 8
Electrical Wiring Information.............................................................. 9
Pulse Output Configuration and Flow Rate....................................... 10
Troubleshooting Guide...................................................................... 11
Parts List.......................................................................................... 12
Appendix A ....................................................................................... 13
Appendix B – Water Calibration ....................................................... 14
Appendix C – Fluid Calibration (Other Than Water).......................... 15
Appendix D – Flow Performance....................................................... 16
4-20 mA Ouput Information ............................................................. 17
Trademark Information..................................................................... 17
CE Certification Information............................................................. 17
Limited Warranty Policy.................................................................... 18

sotera.com 3
| 825P-850P DIGITAL PULSE OUTPUT METERS INSTALLATION AND OPERATION MANUAL
About This Manual
From initial concept and design through final production, your Sotera product is built to provide years of trouble-free use. To ensure
the safety of yourself and those around you, it is critical that this manual is read in its entirety prior to attempting to install or
operate your new purchase. We strongly urge that any installer and operator become familiar with the terms, diagrams, and technical
data in this manual and pay close attention to any DANGER, WARNING, CAUTION, or NOTICE information. At Sotera, your satisfaction
with our products is paramount to us. If you have questions or need assistance with your product, please contact us
at 1 (800) 720-5192 or via email at SoteraTech@fillrite.com (M-F, 8 AM – 5 PM ET).
Symbols and Definitions
General Description
The Sotera 825P and 850P Meters are nutating disk, positive displacement meters that use magnetic coupling to convert fluid flow
into digital display information. The meter can store and display the current total,or cumulative total in any of five programmed units
(ounces, pints, quarts, liters, and gallons) or special units (e.g. per acre volume). The meter can be calibrated without dispensing
fluid by selecting a calibration factor from the 20 stored settings. Power is supplied by two CR2032 batteries that can be replaced
in the field. 825P / 850P models feature pulse output and 4-20mA output for connection to fluid management systems and batch
controllers for the control and monitoring of dispensed fluid.
Emphasizes an area in which personal injury or even death may result from failure to follow instructions properly. Mechanical damage may also occur.
These boxes contain information that illustrates a point that may save time, or be key to proper operation, or clarifies a step.
Failure to observe a “Caution” may cause damage to the equipment.
WARNING
CAUTION
NOTICE
DANGER Indicates a hazardous situation which, if not avoided, will result in death or serious injury.

sotera.com 4
| 825P-850P DIGITAL PULSE OUTPUT METERS INSTALLATION AND OPERATION MANUAL
Technical Information
Flow ports 1" NPT inlet / outlet ports, female threads (3/4"
BSPP also available)
Flow Range 2 to 20 U.S GPM / 7.6 to 75.7 LPM
Pressure 120 PSI / 8.2 Bar maximum @ 70°F / 21°C 50
psi / 3.4 Bars maximum @ 130°F / 54°C
Temperature Min. operating temperature = 0°F / 17°C
Max. operating temperature = 130°F / 54°C
Meter can be stored at lower temperatures but
display may not work below 0°F.
Accuracy ± 0.5%
Units of Measure Ounces, pints, quarts, liters, gallons; special
calibration option also available.
Range 9999 current total; 10,000,000
accumulated total
DANGER Not for use with fluids that have a flash point below 100°F (37.8°C, ie: gasoline, alcohol). Refer to NFPA 325M (Fire Hazard Properties of Flammable
Liquids, Gases, and Volatile Solids) for flash points of common liquids. Static electricity buildup and discharge could result in arc and explosion!
To ensure safe and efficient operation,it is essential to read and follow each of the following warnings and precautions.
1. Agricultural herbicides flowing through the meter may be harmful to your health. Use and disposal of these products is controlled by
federal, state, or local laws and procedures.
2. Conform to fluid manufacturer’s recommended handling procedures when using product and when cleaning meter.
3. Do not exceed an internal meter pressure of 120PSI/8.2 Bars.
4. Improper use or installation of this product can cause serious bodily injury or death.
5. The 825 & 850 Digital Meter is not for use with flammable fluids. DO NOT use with fluids with a flashpoint below 100°F (such as gasoline
and alcohol).
6. DO NOT remove printed circuit board! Damage to LCD could occur, and warranty is void.
WARNING
General Safety Information
Technical Information
Materials of Construction
Body Polypropylene
Chamber Polyphenylene sulfide (PPS) and 303
Stainless Steel
Wetted Seals Fluorocarbon (EPDM optional)
Weather & Dust
Body Seal
BUNA-N
Display LCD (Liquid Crystal Display)
Power Two CR2032 Lithium batteries and external
5 - 24V DC (see page 8)

sotera.com 5
| 825P-850P DIGITAL PULSE OUTPUT METERS INSTALLATION AND OPERATION MANUAL
The 825P & 850P Digital Meters will handle most pesticides,
automotive fluids (except gasoline), and mild acids. It is also
compatible with the following fluids**:
100 Surpass® EC
3.38EC Pursuit®
Aatrex 4L®
Abate 4E®
Agrotain®
Apron®
Assure II®
Atraz ine 4L
Banvel SFG®
Banvel®
Bicep®
Blazer®
Broadstrike®+
Broadstrike®+
Camix TM
Caustic Soda (50%)
Clarity®
Command®3ME
Conclude®
Conclude®xtra
Contour
Detail™
Diesel Exhaust Fluid (DEF)
Diesel Fuel
Doubleplay®
Dual II®
Dual®
Dual®
Eptam 7E®
Ethylene Glycol
Fallowmaster®
Flexstar®
Frontier®
Fultime®
Furadan®
Fusion®
Gramoxone Extra®
* Requires EPDM Seals.
**Trademark information on page 17.
The 825P & 850P Digital Meters are NOT compatible with very strong
acids or if fluid flash point is below 100°F (38°C). If in doubt about
compatibility of a specific fluid, contact supplier of fluid to check for
any adverse reactions to the following wetted materials:
Polypropylene Body Stainless Steel Screws/Shaft
Fluorocarbon Seals PPS Chamber
Gramoxone lnteon™
Guardsman®
Harness xtra®
Karate®
Laddock S-12®
Lasso Micro Tech®
Lumax TM
Manifest™
Marksman®
Maxim®
Methyl Parathion
Motor Oil
Nufos®
Oil.Adend®
Phosphoric Acid
Poast HC®
Poast Plus®
Poast®
Princep 4L®
Prowl®
Prowl®
Reflex®
Rezult®
Ridomil Gold®
Roundup®
Sodium Hydroxide (50%)
Squadron®
Storm®
Superboll®
Surpass®
Topnotch®
Touchdown®
Treflan®
Treflan™
Treflan™ HFP
Water
Use PTFE tape or thread compound on all threaded joints.
1. Determine direction for fluid flow and point arrow on meter body
in that direction.
2. Thread hose or pipe into ports until snug. Be careful not to cross
thread when starting threads.
Installation Hint
To prevent cross threading, turn the pipe / hose backwards
(counterclockwise) until you feel it engage threads, then tighten.
Changing Meter Readout Position
If it is necessary to change position of the meter readout,
follow these steps (Refer to exploded view).
1. Unscrew meter cap (item 1, page 12). Use a strap type oil
filter wrench or 5" open jaw type wrench if too tight to
unscrew by hand.
2. Insert a wide, flat-head screwdriver into the upper slot and
gently pry up electronics module (see Figure 1).
3. Gently rotate electronics module to desired location.
4. Press electronics module down into meter cover in the correct
orientation.
5. Thread on meter cap until hand tight. To check tightness, there
should be approximately 1/16" gap between the cap and ridge
on outlet port (see Figure 3).
UPPER PRY SLOT
LOWER PRY SLOT
FIGURE 1
O-RING
FIGURE 3
1/16" GAP
APPROXIMATE GAP
WHEN TIGHT
NOTE: If cap is not
sufficiently tight,
fluid can enter the
electronics and cause
permanent damage.
FIGURE 2
Fluid Compatibility Installation

sotera.com 6
| 825P-850P DIGITAL PULSE OUTPUT METERS INSTALLATION AND OPERATION MANUAL
• Turns meter on when off.
• Displays accumulated total as long as it
is pressed. If accumulated total is larger
than 9999, the numbers will scroll across
the screen.
• When held for 3 seconds, it resets current
total to zero. Also resets to normal operating
mode when in CAL or FLSH mode.
• When held for 3 seconds, it allows changes to
the calibration factor displayed in the bottom
left corner. Repeated pressing will step the
number up to 19 and back to zero. When
desired number is displayed, press button
2to lock in the new number and return to
normal operation.
• When held for 3 seconds, flow rate is displayed.
Fluid dispensed is still added to the accumulated
total and current total. Press button 4to return
to normal operation.
1. Press button to turn meter on. Current total, unit of
measure, and calibration factor are displayed. The meter
also turns on automatically and begins recording when
fluid starts flowing through it.
2. Hold button 2for one second to reset current total
to “0.00.”
3. Begin dispensing.
NOTE: Meter display automatically goes blank after 60
seconds of inactivity and automatically comes back on when
flow resumes. No data is lost during periods of inactivity.
The THINNER the fluid, the LOWER the CAL number.
The THICKER the fluid, the HIGHER the CAL number.
• CAL 4 is set for thin fluids like water.
• CAL 19, the highest number, is set for very thick fluids like
cold molasses.
• Each number changes the meter accuracy by about 1%.
Table #1: Suggested CAL Factor Settings for Common Fluids
0 1 2 3 4 5 6 7 8 9 10 11 12 13 14 15 16 17 18 19
Water
Kerosene
GRAMOXONE INTEON™ @ 50°F
Antifreeze @ 70° F
ROUNDUP® @ 50°F
TREFLAN™ @ 50°F
ATRAZINE 4L @ 70°F
10W Oil @ 70°F
DUAL® @ 70°F
BICEP® @ 70°F
Molasses @ 32°F
NOTE: The suggested CAL factors are for REFERENCE ONLY.
Wear proper safety equipment when handling
hazardous fluids.
CAUTION
Operational Functions Use
Calibration Using the CAL Factor
CAL Factor
Meter will count air if you dispense air. Before initial
operation or when air has entered the system, prime
the meter by dispensing fluid until all trapped air has
been removed. Meter is now ready to operate.
CAUTION

sotera.com 7
| 825P-850P DIGITAL PULSE OUTPUT METERS INSTALLATION AND OPERATION MANUAL
Changing the CAL Factor
• Hold button 3until the display only shows CAL and number.
• Press 3repeatedly until you reach the desired number.
Note – number will step up to 19, then back to zero.
• Press 2to return to normal operating mode.
Calibration Procedure
A) Set CAL factor to 10.
Hold button 3for three seconds. Press 3again until the
number 10 shows below “CAL” (NOTE: If you go past 10 keep
pressing 3because the number will return to 0 after
passing 19).
Press 2to get back to normal operating mode.
NOTE: If your fluid is listed on Table 1, use that number in step
A above in place of 10.
B) Prime pump and meter by dispensing 2 - 3 gallons of fluid
back into the bulk tank.
With the outlet valve closed and the pump still running, reset
the meter to 0.00.
C) Fill the Proving Can exactly to the 5.0 gallon line.
Focus on the Proving Can, do not look at the meter at this point.
Keep the hose end nozzle wide open as long as possible for
best accuracy.
D) Adjust Meter CAL Factor.
• If meter reads high, increase the CAL factor. Each CAL #
changes the accuracy by about 1%. For a 5 gallon
proving can, 1% = 0.05 gallons.
• If 5.10 is displayed, this is 2% over 5.00; the CAL
factor should be changed to CAL 12.
• If the meter reads low, lower the CAL factor.
For example, if 4.90 is displayed, it is 2% less
than 5.00, so the CAL factor should be set to 8.
• When finished with the CAL factor procedure, press
2to return to normal mode and to reset the meter to
0.00. The meter is now calibrated and ready to use.
Calibration Procedure Using the CAL Factor

sotera.com 8
| 825P-850P DIGITAL PULSE OUTPUT METERS INSTALLATION AND OPERATION MANUAL
NOTE: Low battery icon will appear when batteries require
replacement. Meter still functions properly for several days after
the icon appears. Neither calibration, current total or totalizer
quantities will be lost when you replace batteries.
To Replace Batteries (refer to exploded view).
1. Unscrew meter cap (item 1, page 12). Use a strap type oil
filter wrench or large 5" jaw pipe wrench if needed.
2. Insert a flat-head screw driver into the top slot (see Figure
4) and gently pry up electronics module.
3. Remove old batteries and insert new batteries, making sure
battery polarity is correct, or meter damage could occur
(positive side facing up when installed).
4. As noted in Figure 5, reinstall O-ring on electronics module.
Align sensor receptacle in proper location. Press module
gently down into meter cover.
5. Thread on meter cap until hand tight. To check tightness,
there should be approximately 1/16" gap between cap and
ridge on outlet port. (See Figure 6).
If any meter components are damaged, they should be replaced.
See meter kits drawing on page 12 for correct replacement part
information before ordering.
Meter should be flushed between uses with water to prevent
chemicals from drying and plugging meter.
Thorough Cleaning (refer to exploded view)
If meter is plugged due to hardened chemical or debris, do the
following:
1. Drain all fluid from meter.
2. Unscrew meter cap (item 1, page 12). Use a strap type oil
filter wrench or large 5" jaw pipe wrench if necessary.
3. Insert a flat-head screwdriver in the lower slot (see Figure 7)
and turn to pry up meter cover (item 6).
4. The meter chamber (item 8, page 12) can now be removed.
5. Rinse all meter components with flushing fluid. DO NOT
submerge display assembly. Be careful not to get any fluid
or dirt in the electronics module. Permanent damage to
the electronics will occur.
6. Reassemble meter.
CALIBRATION NOTE: Over time, the chamber inside the meter will
wear, requiring the meter to be re-calibrated with water. When this
should be done depends on the amount and type of fluid dispensed.
In most crop protection fluid uses (less than 1000 gallons of a
clean fluid per year), the meter will remain accurate for many years
without recalibration. On the other hand, dispensing an abrasive
fluid may require more frequent recalibration.
The 825P / 850P meter is designed to be calibrated with clean
water for safe handling. See “Water Calibration” section in
Appendix B.
Storage
Store in a cool, dry place. Drain out all fluid that could freeze in
the meter.
FIGURE 6
LOWER PRY SLOT
FIGURE 7
O-RING
FIGURE 5
UPPER PRY SLOT
FIGURE 4
LOWER PRY SLOT
1/16" GAP
APPROXIMATE GAP
WHEN TIGHT
NOTE: If cap is not
sufficiently tight, fluid can
enter the electronics and
cause permanent damage.
DO NOT get fluid or dirt in electronics area.
CAUTION
Follow fluid manufacturer’s recommended procedures
for handling and disposing of metered fluids.
CAUTION
Batteries Maintenance
Repair

sotera.com 9
| 825P-850P DIGITAL PULSE OUTPUT METERS INSTALLATION AND OPERATION MANUAL
NOTE: If the meter is to be used in environments with high
levels of EMC or RF sensitive equipment, connect the braided
shield of the cable to an earth ground.
The 825P / 850P meters are designed to conduct ESD and EMC
surges through the braided shield.
NOTE: The pulse width for volumetric output and air detect is 10ms.
DO NOT connect the braided shield to the ground of the Power
Supply, or the 4-20mA loop power.
DO NOT install or operate this meter in an explosive atmosphere!
825P / 850P Series Digital Meters are equipped with an integral
pulser for use with Fuel Management Systems and batching
equipment. These meters must also be connected to an auxiliary
external power supply to operate the pulsing feature. 5-24V DC
external power is required for the pulse outputs on pins 2 and 3
to operate. Failure to attach external power can cause premature
battery failure. External power must be from 5 - 24V DC.
NOTE: When powering the 4-20mA loop, a minimum of 7V DC
is required at the 825P/850P meter for consistent operation.
The manufacturer of the 4-20mA receiver will supply voltage
drop information as well as their minimum voltage require-
ments in their literature.
CONNECTOR PINOUT
FUNCTION PIN COLOR
5-24V DC 1 BROWN
GROUND 5 GREY
4-20mA SUPPLY 6 PINK
4-20mA RETURN 4 BLACK
PULSE OUTPUT (S+) 2 WHITE
AIR DETECT (S+)* 3 BLUE
PULSE OUTPUT AND AIR DETECT ARE CURRENT SINKING OUT-
PUTS (OPEN COLLECTOR)
* THE AIR DETECT OUTPUT IS NOT AVAILABLE ON 825P MODELS
RECOMMENDED PULL-UP
RESISTOR VALUES
5V DC 330 Ohm 1/8 WATT MIN
12V DC 1k Ohm 1/4 WATT MIN
24V DC 2.4k Ohm 1/2 WATT MIN
PULSE AND AIR DETECT
OPERATIONAL LIMITS
100mA MAXIMUM PER OUTPUT
24V DC MAXIMUM PER OUTPUT
PULSE WIDTHS ARE A FIXED 10 mS ON TIME
Electrical Wiring Information

sotera.com 10
| 825P-850P DIGITAL PULSE OUTPUT METERS INSTALLATION AND OPERATION MANUAL
Pulse Output Configuration
A) Press the and 4buttons simultaneously for 3 seconds.
• Rate icon will display.
• Current pulse options will be displayed (1 - 5) in the large
left most digit.
B) Press the button repeatedly until the desired pulse
output configuration number is displayed.
C) Press button 2to save and return to normal operating
mode.
Gallons Liters Raw
Option 1 **
100:1
Option 2
10:1
Option 3
25:1
Option 4
10:1
Option 5
Raw
Configured Unit
of Measure
Gal** 100 10 94.64 37.85
Quart 25 2.5 23.66 9.46
Liters
Pints
Oz
Special
26.42 2.64 25 10
Raw counts, equivalent to 117-125 counts per gallon
Regardless of unit of measure selection, the meter will generate
a 4mA output at 0-1 GPM and scale linearly to 4-20mA from
1 - 25 GPM. At 25 GPM or higher, output stays at 20mA.
See chart on page 17 for 4 - 20 mA specifications.
Flow Rate
A) When button 4is held for 3 seconds, flow rate is displayed.
Fluid dispensed is still added to the accumulated total and
current total.
“Rate” icon will be displayed.
Meter will continue to display flow rate until button 4is
pushed again.
NOTE: 4-20 mA out and pulse output are always active and not
impacted by flow rate display.
Pulse Configuration Options
Pulse width is 10 ms.
Internal pulse resolution per unit of measure (raw count)
**Option 1 and Gallons are factory default.
Pulse Output Configuration and Flow Rate

sotera.com 11
| 825P-850P DIGITAL PULSE OUTPUT METERS INSTALLATION AND OPERATION MANUAL
Problem Possible Cause Solution Notes
Meter won’t turn on • Dead batteries
• Damaged or contaminated
electronics module.
• Replace batteries.
• Replace electronics module & gaskets.
Seal to electronic chamber
is broken if display label is
removed or punctured.
Flashing decimal Current total has rolled over. Reset display to zero by pressing button 2.Meter will continue to
operate normally.
Flashing or dim display Low batteries. Replace batteries. Use CR2032 batteries.
Leaking fluid at inlet/
outlet port
• Need thread sealant.
• Cross-threaded port.
• Add Teflon pipe tape to joint.
• Replace body.
Fluid flows; meter won’t
count
• Meter disk sticking.
• Damaged driver or magnet.
• Meter failure.
• Clean out meter chamber.
• Repair or replace chamber assembly.
• Repair or replace meter.
Meter reads high • Air in system.
• Wrong calibration factor.
• Prime system, fix suction leak at
pump.
• Use a higher calibration factor. See
1-Step procedure.
• See “Check Meter” in Appendix A.
Meter will count air.
Chemical formulations
sometimes change.
Meter reads low by
10% or less
Wrong calibration factor. • Use a lower calibration factor.
• See 1-Step procedure on page 7.
Chemical formulations
sometimes change.
Temperature also affects
accuracy.
Meter reads low by
more than 10%
• Meter chamber is worn.
• Chamber is partially
plugged.
• Damaged or very worn
chamber.
• Recalibrate meter with water. See
Appendix B. See “Check Meter” in
Appendix A.
• Clean chamber.
• Replace chamber and recalibrate
meter.
Meter is not consistent • Air in system.
• Particulates in fluid.
• Worn or damaged meter
chamber.
• Prime system, fix suction leak at
pump.
• Put screen in front of meter.
• Clean chamber.
• Replace chamber.
40 mesh minimum.
Err0 • Calibration error.
• Damaged chamber.
• Recalibrate meter with a more
accurate container.
• Replace chamber.
Indicates fluid calibration is
out of acceptable window.
Volumetric container may
be off, there may be air in
the system, or the meter
chamber may be damaged.
Err1 • Damaged electronics.
• Software fault.
• Repair or replace electronics.
• Press 2then recalibrate meter
Contact factory.
Err2 Bad eeprom. Replace electronics. Meter still functions, but all
data will be lost if batteries
are removed.
Troubleshooting Guide

sotera.com 12
| 825P-850P DIGITAL PULSE OUTPUT METERS INSTALLATION AND OPERATION MANUAL
825P / 850P Meter Parts List
Item # Part # Description Qty.
1 KITCBL Power and Signal Cable 1
2 KIT825P Replacement Electronics Kit 1
3 KIT850P Replacement Electronics Kit 1
4 825F1582 Meter Chamber Kit and Seals 1
NOTE: EPDM seals are optional.
Please specify what seals your meter
is equipped with when ordering your kit.
When ordering repair parts, be
sure to give the replacement part
number, the date of manufacture,
and the meter series number.
This will ensure the correct
replacement part is supplied.
Technical Support:
(800) 720-5192

sotera.com 13
| 825P-850P DIGITAL PULSE OUTPUT METERS INSTALLATION AND OPERATION MANUAL
To Change Units of Measure
The units of measure can be changed to ounces (OZ), pints (PT),
quarts (QT), gallons (GAL), or liters (LITER) without recalibrating
the meter. If special units are desired, see note below.
1. Hold buttons 2and 4for three seconds. Display will
show current software revision level (i.e: r1.02).
2. Press button 3. Display will show the current units.
3. To change units, press the button repeatedly until the
desired unit is displayed.
4. Press button 2. Display will show firmware revision.
5. To return to normal operating mode press button 2again.
6. The units selected will be displayed. Current or accumulated
total will change to reflect the new units.
Special Units
To use special units, you need to know how many ounces are in
your special unit. Here is an example: You want to use “acres”
as your “special” unit. The fluid is to be applied at 18 ounces per
acre. These are the additional steps to set the meter to “special”
units (ignore steps 4 & 5 above):
1. After selecting “special” in step #3 above, press button 2.
2. Enter the number of ounces in a special unit by pressing
button 4to increment the digit, and the button to
move the flashing digit to the right. If you make a mistake,
press button 2to start back at the left most digit. Per our
example, we would enter 018.0.
3. Press the button again. Current firmware will display.
4. To get back to the normal operating mode, press button 2.
Reset Accumulated Total
1. Press 2and 4simultaneously and hold for 3 seconds.
Display will read the version of the software loaded in the meter
(example: “r1.02”).
2. Press to display accumulated total. If over 9999,
display will scroll across the screen.
3. Hold buttons and 4for 5 seconds to reset
accumulated total.
4. Press button 2twice to get back to normal operating mode.
Meter Check
You can check the calibration in your meter.
1. Set to CAL 4 (See “to change the calibration factor”).
2. Hold button 3and 4for 3 seconds.
Meter will display “FLSH”.
3. Hold buttons & 3together. A number will display
that indicates the pulses per unit used to calculate flow
(ie: pulses per gallon). When new, this number is between
120.0-127.0 pulses per gallon.
If you find a number higher than 127, recalibrate with water (see
Appendix B). If this number is lower than 120, the meter chamber
may need to be replaced.
4. Press 2to get back to normal operating mode.
FLSH (Flush) Mode
The 825P/850P Meter can be flushed without adding to the
totalizer. Turn meter on by pressing the button.
Press 3and 4simultaneously and hold for 3 seconds. Display
will show FLSH. Flush meter with suitable fluid (water is suitable
for most herbicides). When completed, press 2to leave FLSH
mode and return to normal operation. Quantity of fluid flushed
will not be added to total.
APPENDIX A

sotera.com 14
| 825P-850P DIGITAL PULSE OUTPUT METERS INSTALLATION AND OPERATION MANUAL
The 825P / 850P meter is designed to be re-calibrated with water
for safe handling. Over time, the chamber inside the meter will
wear. Recalibrating the meter with clean water will insure that
Table #1 (calibration table page 6) is most accurate.
You will need a container of known volume, at least 5 gallons or
larger. Do not exceed a 60 gallon container.
1. Press the 2& 4buttons simultaneously and hold
for 3 seconds.
The display will read the version of the software loaded in the
meter (example: “r1.02”).
2. Press button 3to enter calibration mode.
The unit of measure will be displayed.
3. Press button 3.
The display will read “FILL”.
4. Now dispense water into your container. “FILL” will flash on
the display.
5. After dispensing, press the button.
The left digit of the display will blink.
6. Press the 4button to increment the digit to the amount of
fluid dispensed (example: 05.00). Press the button to
move to the right.
If you make a mistake, press button 2to start back at the
left-most digit.
7. After number is loaded, press the button again
to accept.
8. Display now shows .
Since you are calibrating with water, accept this by pressing
the button again. If calibrating with a fluid other than
water, see Appendix C. Display will again show “r1.02”.
NOTE: If the value entered is out of an acceptable range, the
display will read “Err0” and the meter will revert to the previous
settings. See Troubleshooting Guide for more information.
9. Press 2to get back to the normal operating mode.
APPENDIX B – Water Calibration

sotera.com 15
| 825P-850P DIGITAL PULSE OUTPUT METERS INSTALLATION AND OPERATION MANUAL
You will need a container of known volume, at least 5 gallons or
larger. Do not exceed a 60 gallon container.
1. Press the 2& 4buttons at the same time and hold for 3
seconds.
The display will read the version of the software loaded in
the meter (example: “r1.02”).
2. Press button 3to enter calibration mode.
The unit of measure will be displayed.
3. Press the button to change unit of measure, if required.
This is ONLY necessary if calibrating a different unit
of measure.
4. Press button 3.
The display will read “FILL”.
5. Now dispense fluid into your container. “FILL” will flash on
the display. For best results, dispense fluid at the same flow
rate that will be used in actual use.
6. After dispensing, press the button.
The left digit of the display will blink.
7. Press the 4button to increment the digit to the amount of
fluid dispensed (example: 05.00).
Press the button to move to the right.
If you make a mistake, press button 2to start back at the
left- most digit.
8. After number is loaded, press button again to accept.
9. Display now shows .
This is the default for water. Check Table 1 for your fluid.
Press 3to change the Cal #. Press to accept. Display will
again Show “r1.02”.
NOTE: IF YOU ACCEPT CAL 4, USE THE METER ON CAL 4 WHEN
DISPENSING THIS FLUID.
NOTE: If the value entered is out of an acceptable range, the
display will read “Err0” and the meter will revert to the previous
settings. See Troubleshooting Guide for more information.
10. Press 2to get back to the normal operating mode.
DO NOT perform this calibration unless you fully understand how CAL factors work.
CAUTION
APPENDIX C - Fluid Calibration (Other Than Water)
Calibrating with a fluid other than water voids
Table #1 (calibration table page 6).
After calibration, set the meter to CAL 4, and
use the meter on CAL 4 (unless you input a
different number during step 9 below).
CAUTION

sotera.com 16
| 825P-850P DIGITAL PULSE OUTPUT METERS INSTALLATION AND OPERATION MANUAL
NOTE: Graphs are accurate with original factory calibration, or a water calibration. See page 10.
METER CALIBRATION FACTOR SELECTION BASED ON FLUID VISCOSITY
VISCOSITY (CPS)
VISCOSITY (CPS)
VISCOSITY (CPS)
CALIBRATION FACTORCALIBRATION FACTOR CALIBRATION FACTOR
Low
Viscosity
(thin)
Fluids
High
Viscosity
(very thick)
Fluids
Medium
Viscosity
Fluids
APPENDIX D – Flow Performance

sotera.com 17
| 825P-850P DIGITAL PULSE OUTPUT METERS INSTALLATION AND OPERATION MANUAL
Aatrex®, Aatrex® 4L., Bicep®, Bicep 11®, Dual®, and Dual 11® are registered trademarks of Syngenta Corporation. Broadstrike
and Treflan are registered trademarks of Dow AgroSciences. Banvef®, BanvelSGF®, Blazer®, Camix, Clarity®, Conclude®, Galaxy®,
Guardsman®, Lumax, Manifest “Marksman” Poast®, Poast HC®, Poast Plus®. Rezult®, and Storm® are registered trademarks of
BASF. DoublePlay®, Eptam® 7E, FulTime, Fusion®, Gramaxone® Extra, Karate®, ReHex®, Surpass®. TopNotch, and Touchdown®
are registered trademarks of Syngenta. Contour®.Detail, Pursuit®, Prowl®, and Squadron® are registered trademarks of American
Cyanimld. Harness® Xtra and Roundup® are registered trademarks of Monsanto Company. Command® and Furadan® are registered
trademarks of FMC. Agrotain® is a registered trademark of IMCAgrico. Superboll® is a registered trademark of Griffin.
The 825P and 850P meters bearing the CE mark have been certified to the following European directives:
2011/65/EU = Restriction of the use of certain hazardous substances in electrical and electronic equipment.
2004/108/EC = Electromagnetic Compatibility
The following standards were used to test and show compliance:
Emissions
EN 55011:2009/A1:2010 Group 1, Class B, Industrial, Scientific, and Medical (ISM) Equipment
Immunity
EN 61326-1:2006, Electrical Equipment for Measurement, Control and Laboratory Use
IEC 61000-4-2: ESD
IEC 61000-4-3: Radiated Immunity
IEC 61000-4-4: EFT
IEC 61000-4-6: Conducted Immunity
IEC 61000-4-8: Magnetic Field
Sotera supplies a high quality shielded power and signal cable with the 825P and 850P Series that meets the criteria for
CE certification. Substitution of the provided cable may impair Immunity resistance.
Bonding of the cable screen is not required to meet CE certification and ground loops may introduce noise and false counts.
4-20mA Output Information
Trademark Information (from Page 5)
CE Certification Information

sotera.com 18
| 825P-850P DIGITAL PULSE OUTPUT METERS INSTALLATION AND OPERATION MANUAL
DC001536-000 Rev. 5
Revision Date: August 1, 2014 Fill-Rite and Sotera Products
Sotera (“Manufacturer”) warrants each consumer buyer of its products (“Buyer”) from date of sale that goods of its manufacture
(“Goods”) shall be free from defects of materials and workmanship.
The duration of the warranty is as follows:
*proof of purchase should be presented to place of purchase
** see Appendix for definition of “Heavy Duty” and “Standard Duty” products
End users must contact the place where they purchased the product to process a warranty. “Place of purchase” is defined as any
authorized Sotera Distributor, including any and all retail stores, mail order houses, catalogue houses, on-line stores, commercial
distributors. Manufacturer’s sole obligation under the foregoing warranties will be limited to either – at Manufacturer’s option –
replacing defective goods (subject to limitations hereinafter provided) or refunding the purchase price for such Goods theretofore
paid by the buyer, and Buyers exclusive remedy for breach of any such warranties will be enforcement of such obligations of the
Manufacturer. If the Manufacturer so requests the return of such Goods, the Goods will be redelivered to the manufacturer in
accordance with Manufacturer’s instructions FOB Factory.
The remedies contained herein shall constitute the sole recourse of the Buyer against the Manufacturer for breach of
warranty. IN NO EVENT SHALL THE MANUFACTURER’S LIABILITY FOR ANY CLAIM FOR DAMAGES ARISING OUT OF THE
MANUFACTURE, SALE, DELIVERY, OR USE OF THE GOODS EXCEED THE PURCHASE PRICE.
The foregoing warranties will not extend to goods subject to misuse, neglect, accident, improper installation or maintenance,
or have been repaired by anyone other than the Manufacturer or its authorized representative.
THE FOREGOING WARRANTIES ARE EXCLUSIVE AND IN LIEU OF ALL OTHER WARRANTIES OF MERCHANTABILITY, FITNESS FOR
PURPOSE OF ANY OTHER TYPE, WHETHER EXPRESSED OR IMPLIED.
No person may vary the forgoing warranties or remedies, except in writing signed by a duly authorized officer of the Manufacturer.
The Buyer’s acceptance of delivery of the Goods constitutes acceptance of the foregoing warranties and remedies, and all conditions
and limitations thereof.
From Date of Sale Not to Exceed the Following Period
from Date of Manufacture Product Series
Five Years 60 Months SP100 Series Pump 400 Series Pumps
Two Years 27 Months Heavy Duty Pumps and Meters,
820, 825, and 850 Meters
Cabinet Pumps, Cabinet
Meters, TN Meters, TS Meters
One Year 15 Months Standard Duty Pumps Accessories, Parts
Fill-Rite Company
8825 Aviation Dr, Fort Wayne, IN 46809 USA
P (800) 720-5192 | (260) 747-7524
F (800) 866-4861
fillrite.com | sotera.com | gormanrupp.com
Limited Warranty Policy

Manuel d’utilisation et de sécurité
825P - 850P

sotera.com 2
| COMPTEURS DE SORTIE D‘IMPULSIONS NUMÉRIQUES 825P-850P MANUEL D’UTILISATION ET DE SÉCURITÉ
Table des matières
N° DE MODÈLE
N° DE SÉRIE
DATE D’ACHAT:
Merci!
Merci de votre fidélité à la marque Sotera® de pompes de transfert
de produits chimiques, de lubrifiants et d’hydrocarbures mixtes. Votre
sécurité est importante, veuillez donc lire et bien comprendre les
procédures décrites dans ce manuel. Protégez-vous ainsi que ceux
qui vous entourent en observant toutes les consignes de sécurité
et en respectant tous les symboles de danger, d’avertissement et
d’avertissement. Veuillez conserver ces instructions pour référence
future et enregistrer le modèle, le numéro de série et la date d’achat
de votre compteur numérique Sotera. Veuillez enregistrer votre produit
Sotera via info.fillrite.com/sotera_product_registration.
POLITIQUE DE RETOUR - IMPORTANT
Veuillez ne pas retourner ce produit au magasin. Pour toutes les
questions sur la garantie et les produits, veuillez contacter le support
technique de au 1 (800) 720-5192 ou par e-mail à
SoteraTech@fillrite.com (M-V, 8h00 - 17h00 HE).
À propos de ce manuel....................................................................... 3
Symboles et définitions ...................................................................... 3
Description générale .......................................................................... 3
Informations générales de sécurité.................................................... 4
Information technique........................................................................ 4
Liquides compatibles......................................................................... 5
Installation......................................................................................... 5
Fonctions d’exploitation ..................................................................... 6
Utilisation .......................................................................................... 6
Étalonnage à l’aide du facteur CAL.................................................... 6
Procédure d’étalonnage à l’aide du facteur CAL................................. 7
Piles................................................................................................... 8
Réparations et entretien..................................................................... 8
Information sur le câblage électrique................................................. 9
Configuration de sortie d’impulsions et débit .................................. 10
Guide de dépannage ........................................................................ 11
Nomenclature des pièces ................................................................. 12
Annexe A........................................................................................... 13
Annexe B – Étalonnage à l’eau......................................................... 14
Annexe C – Étalonnage avec un liquide (autre que l’eau)................. 15
Annexe D – Caractéristiques d’écoulement...................................... 16
Caractéristique de sortie 4-20 mA................................................... 17
Information sur les marques de commerce...................................... 17
Informations sur la certification CE................................................. 17
Garantie limitée ............................................................................... 18
Other manuals for 825P
1
This manual suits for next models
1
Table of contents
Languages:
Other Sotera Measuring Instrument manuals
Popular Measuring Instrument manuals by other brands
Emerson
Emerson TopWorx 4310 instruction manual
Trotec
Trotec BH30 operating manual

MANN+HUMMEL
MANN+HUMMEL SPB 358 manual

PCB Piezotronics
PCB Piezotronics IMI SENSORS 603C00 Installation and operating manual
Ripley
Ripley ODM DLS 355 quick start guide
National Instruments
National Instruments PXIe-6570 specification

