Sound Sation Zeus II D Series User manual

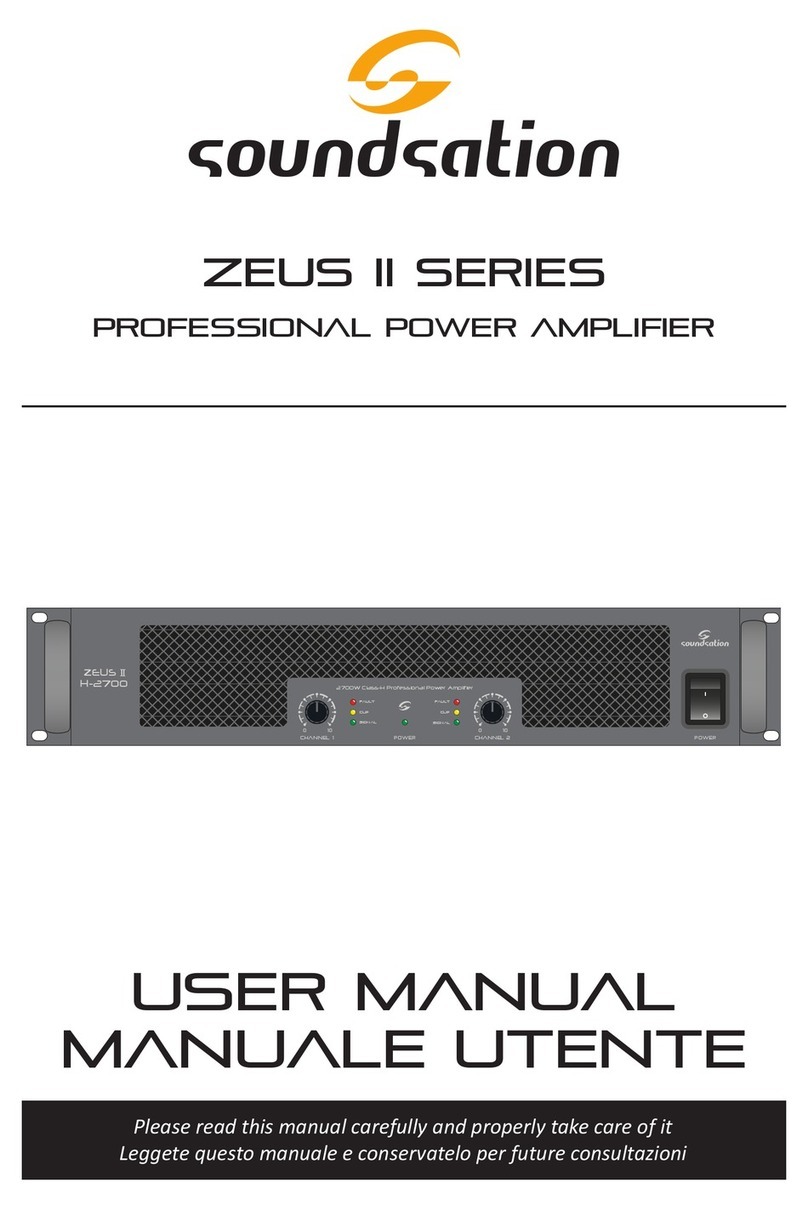
ZEUS II D-series
PROFESSIONAL POWER AMPLIFIER
Please read this manual carefully and properly take care of it
USER MANUAL
Leggete questo manuale e conservatelo per future consultazioni
MANUALE UTENTE
ZEUS II
D-5600
CH 2
CH 1
-80
-30
-15
-10
-6
-3
-1
0dB
-80
-30
-15
-10
-6
-3
-1
0dB
ACT SIG -15dB -10dB -7dB CLIP PROT
ACT SIG -15dB -10dB -7dB CLIP PROT
PAR BRIDGE
AC: 220V~
50-60Hz
CH-2 CH-1
POS NEG
1+ 1-
POS NEG
1+ 1-
POS NEG
2+ 2-
POS NEG
1+ 2+
CH-2 INPUT CH-2 LINK
XLR: PIN 2 = + PIN 3 = -PIN 1 =
CH-1 INPUT CH-1 LINK
XLR: PIN 2 = + PIN 3 = -PIN 1 =
OPERATION MODE BASS PROCESSING
BRIDGE STEREO PARALLEL 0N 0FF 26dB 32dB 1.2V
GAIN SENSITIVITY

Dear customer,
First of all thanks far purchasing a SOUNDSATION® product. Our mission is to satisfy
all possible needs of musical instrument and professional audio users offering a wide
range of products using the latest technologies.
We hope you will be satised with this item and, if you want to collaborate, we are
looking for a feedback from you about the operation of the product and possible
improvements to introduce in the next future. Go to our website www.soundsation-
music.com and send an e-mail with your opinion, this will help us to build instruments
ever closer to customer’s real requirements.
One last thing: read this manual before using the instrument, an incorrect operation
can cause damages to you and to the unit. Take care!
The SOUNDSATION Team
Gentile Cliente,
Grazie per aver scelto un prodotto SOUNDSATION®. La nostra missione è quella di
offrire ai nostri utenti una vasta gamma di strumenti musicali ed apparecchiature audio
e lighting con tecnologie di ultima generazione.
Speriamo di aver soddisfatto le vostre aspettative e, se voleste collaborare, saremmo
lieti di ricevere un vostro feedback sulla qualità del prodotto al ne di migliorare co-
stantemente la nostra produzione. Visitate il nostro sito www.soundsationmusic.com ed
inviateci una mail con la vostra opinione, questo ci aiuterà a sviluppare nuovi prodotti
quanto più vicini alle vostre esigenze.
Un’ultima cosa, leggete il presente manuale al ne di evitare danni alla persona ed al
prodotto, derivanti da un utilizzo non corretto.
Il Team SOUNDSATION

3
ENGLISH
TABLE OF CONTENTS
1. UNBOXING.................................................................................................................5
2. ACCESSORIES .............................................................................................................6
3. OVERVIEW..................................................................................................................6
3.1. MAIN FEATURES.....................................................................................................................................................6
4. FRONT PANEL ............................................................................................................7
5. REAR PANEL...............................................................................................................8
6. AUDIO CONNECTIONS............................................................................................10
7. OPERATION MODES................................................................................................10
7.1. STEREO MODE ......................................................................................................................................................11
7.2. PARALLEL MODE ..................................................................................................................................................12
7.3. BRIDGE MODE.......................................................................................................................................................13
7.4. STEREO / PARALLEL MODE CABLE WIRING...............................................................................................14
7.5. BRIDGE MODE CABLE WIRING.......................................................................................................................15
8. RACK MOUNTING AND DIMENSIONS..................................................................16
9. SPECIFICATION ........................................................................................................17
10. WARRANTY AND SERVICE .....................................................................................18
11. WARNING ................................................................................................................18

4
ENGLISH
ZEUS II D-series User manual
IMPORTANT SAFETY SYMBOLS
The symbol is used to indicate that some hazardous live terminals are
involved within this apparatus, even under the normal operating con-
ditions, which may be sufcient to constitute the risk of electric shock
or death.
The symbol is used in the service documentation to indicate that spe-
cic component shall be replaced only by the component specied in
that documentation for safety reasons.
Protective grounding terminal
Alternating current/voltage
Hazardous live terminal
Denotes the apparatus is turned on
Denotes the apparatus is turned off
WARNING: Describes precautions that should be observed to prevent the danger
of injury or death to the operator.
CAUTION: Describes precautions that should be observed to prevent danger of
the apparatus.
TAKING CARE OF YOUR PRODUCT
fRead these instructions
fKeep these instructions
fHeed all warning
fFollow all instructions
1)^Water / Moisture
The apparatus should be protected from moisture and rain and can not be used near
water; for example near a bathtub, a kitchen sink, a swimming pool, etc.
2)^Heat
The apparatus should be located away from heat sources such as radiators, stoves or
other appliances that produce heat.

5
ENGLISH
ZEUS II D-series User manual
3)^Ventilation
Do not block areas of ventilation opening. Failure to do could result in re. Always
install according to the manufacturer’s instructions.
4)^Object and Liquid Entry
Objects do not fall into and liquids are not spilled into the inside of the apparatus for
safety.
5)^Power Cord and Plug
Protect the power cord from being walked on or pinched particularly at plugs, conve-
nience receptacles, and the point where they exit from the apparatus. Do not defeat
the safety purpose of the polarized or grounding-type plug. A polarized plug has two
poles; a grounding-type plug has two poles and a third grounding terminal. The third
prong is provided for your safety. If the provided plug does not t into your outlet, refer
to an electrician for replacement.
6)^Electrical Connection
Improper electrical wiring may invalidate the product warranty.
7)^Cleaning
Clean only with a dry cloth. Do not use any solvents such as benzene or alcohol.
8)^Servicing
Do not implement any servicing other than those means described in the manual. Refer
all servicing to qualied service personnel only. Only use accessories/attachments or
parts recommended by the manufacturer.
9)^Warning
Unplug this apparatus during lightning storms or when unused for long periods of
time.
1. UNBOXING
Thank you for purchasing your ZEUS II D-Series Amplier. Each unit has been well test-
ed and shipped in perfect operating conditions. Carefully unpack the carton and check
the contents to ensure that all parts are present and in good conditions:
f1 Amplier
f1 User manual
If anything damaged during transport, notify the shipper immediately and keep pack-
ing material for inspection. Again, please save the carton and all the packing materials.
If the unit must be returned to the manufacturer, it is important that the unit is returned
in the original manufacturer’s packing. Please do not take any action without rst con-
tacting us.

6
ENGLISH
ZEUS II D-series User manual
WARNING: Packaging box is not a toy! Keep out of reach of children!!! Keep
in a safe place the original packaging material for future use.
2. ACCESSORIES
SOUNDSATION can supply a wide range of quality accessories that you can use with
ZEUS II D-Series ampliers, like Mixers, Speakers, Cable, Stands, etc.
All products in our catalogue has been long tested with this device so we recommend
to use Genuine SOUNDSATION Accessories and Spare Parts.
Ask your SOUNDSATION dealer for any accessories you could need to ensure best
performance of the product.
3. OVERVIEW
ZEUS II D series is ideal for high-performance professional applications at high powers.
It offers the most demanding users a very high dynamic response, a high damping
factor and a very advanced protection system. It is designed with an excellent cooling
system, with compact and stable mechanical capabilities, and can be used in live con-
certs, discos, night clubs, etc., due to its high reliability.
3.1. MAIN FEATURES
fUp to 2 x 1200W @ 8ohm in just 7kg and 1U height standard rack
fUltimate reliability through innovative cool-running high-density class-D technology
with near-zero thermal buildup
fUltra-efcient switch-mode power supply for noise-free audio, superior transient
response and low power consumption
fExcellent designed ow-through air path and solid aluminum heat sinks can gain the
maximum cooling
fLightweight and rugged design, 1U height standard rack

7
ENGLISH
ZEUS II D-series User manual
4. FRONT PANEL
1
4
52
876
3
9
1)^POWER Switch
Press the switch to the (1) position to turn ON the amplier and to the (0) position to
turn it OFF.
Note: When the power switch is turned OFF, the device is not completely
disconnected from the mains. So if the amplier is not used for a long time,
please disconnect the power cord from the outlet.
2)^OPERATIVE MODE INDICATORS
This two LEDs indicate the amplier operative mode. The yellow LED lights up when
the amplier is in PARALLEL MODE. The orange LED lights up when the amplier is in
BRIDGE MODE. If both LEDs are off the amplier is in STEREO MODE.
3)^ACTIVE LED
The green LED, when lit, indicates that the amplier has been turned on and AC power
is available. This indicator (LED) is present in both channels.
4)^LEVEL CONTROLS
Two knob level controls,one for each channel.
5)^RACK MOUNTING BRACKETS
The amplier is designed to be mounted in a 19 “standard rack. On the front panel
there are 2 brackets and 4 holes for xing the amplier to the rack with right phil-
lips-head screws.
6)^CHANNEL SIGNAL METER INDICATORS
These are four green LEDs those indicate the presence and the level of the signal at the
correspondent amplier channel input (SIG, -15dB, -10dB, -5db).
if these LEDs light up even in the absence of a signal, there may be some interferences
or some other abnormal operating condition.

8
ENGLISH
ZEUS II D-series User manual
7)^CLIP indicator
Two orange LEDs, each assigned to a channel, indicate when the corresponding channel
has an output overload. Some ashing may be normal but if these LEDs remain on for a
long time, please reduce the input signal levels until the LEDs turn off.
8)^PROTECT indicator
Two red LEDs, each assigned to one channel. When these LEDs light up it means that
the corresponding channel is in protection mode (speaker is cut off by relay) and that a
possible damage is in progress.
9)^VENTILATION grille
It allows constant ventilation between the front and back of the amplier. It is suggest-
ed not to obstruct this grill.
5. REAR PANEL
12
3 4
567
1)^AC POWER CABLE AND AC VOLTAGE
D-Series ampliers is set to suit the specic AC voltage. Products can safely work under
the normal variation range of AC voltage, but rated performance can be only reected
at rated voltage.
Note: If you happen to damage the AC line-cord, always use a three-pin plug
with a ground pin. The wire correspondence is as follow:
Cable Pin International
Brown Live L
Blue Neutral N
Yellow/Green Earth
Always connect the earth! Pay attention to your safety!
Before taking into operation for the rst time, the installation has to be approved by an
expert.
2)^OUTPUT CONNECTORS
Each channel has one Speakon® output for connecting to the loudspeakers.

9
ENGLISH
ZEUS II D-series User manual
3)^VENTILATION grille
It allows constant ventilation between the front and back of the amplier. It is suggest-
ed not to obstruct this grill.
4)^INPUT AND LINK CONNECTORS
Each channel has one balanced female XLR connector, which accepts a XLR plug from
almost any type of equipment with a balanced or unbalanced outputs.
The male LINK connectors are connected in parallel with the respective INPUT, so the
LINK is wired at the same way.
Note: Whenever possible, always use balanced cables. Unbalanced cables can
also be used, but there may be noise problems. In any case, avoid using a
balanced cable for one channel and one unbalanced for the other.
5)^GAIN SENSITIVITY SECTION
This section has three indicators (LED) and a three-positions switch to allow the selec-
tion of the input signal sensitivity of the so that you always have an adequate margin
(Headroom) between the nominal level of a signal and the maximum level that the am-
plier can handle correctly before saturation occurs with consequent reduction of the
signal. The selector (three-positions switch )allows you to choose, as the input sensitiv-
ity, 26dB (Red LED), 32dB (Green LED) or 1.2V (Orange LED).The positions of the switch
for selecting the gain sensitivity correspond to the positions of the LEDs.
BASS PROCESSING SECTION
This section has two indicators (LED) and a two positions switch. Moving the switch to
the green LED (ON), will increase the bass level inuencing the 80Hz/90Hz frequencies
and the green LED will light up. If the switch is in the OFF position (orange LED on),
there is no effect on the audio signal.
6)^OPERATION MODE SECTION
This section has three indicators (LED) and a three positions switch to allow the selec-
tion of BRIDGE, STEREO or PARALLEL operation modes. The positions of the switch for
selecting the operation mode correspond to the positions of the LEDs.

10
ENGLISH
ZEUS II D-series User manual
6. AUDIO CONNECTIONS
You will need XLR cables for the connections to the amplier. See the pictures below
that show the internal wiring of these cables. Be sure to use only high quality cables.
You can, of course, also connect unbalanced equipment to balanced inputs. Use either
mono and stereo jack, making sure ring and collar are connected together (or pins 1 &
3 in the case of XLR connectors).
Balanced use of XLR connectors
1= Ground/Shield
2= Hot (+)
3= Cold (-)
INPUT OUTPUT
In case of unbalanced use Pins 1 and 3 will be jumped
7. OPERATION MODES
The ZEUS II D-Series Ampliers have three operation modes:
• Stereo Mode
• Bridge Mode
• Parallel Mode

11
ENGLISH
ZEUS II D-series User manual
7.1. STEREO MODE
S/N:
CH-1
MIXER
LOUDSPEAKER 2
1+
1-
2-
2+
-
SPEAKON
LOUDSPEAKER SIDE
CHANNEL 2
+
CH-2
LOUDSPEAKER 1
1+
1-
2-
2+
-
SPEAKON
LOUDSPEAKER SIDE
CHANNEL 1
+
In STEREO MODE you have:
• Separate 1 and 2 channel inputs
• Separate 1 and 2 channel outputs
Each channel has its level control.
This is the typical setting for amplifying stereo signals. The input signal of channel 1 will
be present on the output speaker of channel 1 and the input signal of channel 2 will be
present on the output speaker of channel 2.
To set the amplier in STEREO MODE, the MODE selector should be set to the STEREO
position (Center/Green LED ON) and connect the outputs as shown above. Concerning
the cable wiring of STEREO MODE please refer to paragraph 8.2. STEREO / PARALLEL
MODE CABLE WIRING on page 14

12
ENGLISH
ZEUS II D-series User manual
7.2. PARALLEL MODE
S/N:
CH-1
MIXER
LOUDSPEAKER 2
1+
1-
2-
2+
-
SPEAKON
LOUDSPEAKER SIDE
CHANNEL 2
+
LOUDSPEAKER 1
1+
1-
2-
2+
-
SPEAKON
LOUDSPEAKER SIDE
CHANNEL 1
+
The PARALLEL MODE, with a mono input and two mono outputs, allows you to insert
a mono signal into an input and have the mono signal in both outputs, with separately
adjustable level controls. The input signal (Channel 1 or Channel 2) will be present on
both Channels 1 and 2.
To set the amplier in PARALLEL MODE, the MODE selector should be set to the
PARALLEL position (Right/Orange LED ON) and connect the outputs as shown above.
Concerning the cable wiring of PARALLEL MODE please refer to paragraph 7.4. STEREO
/ PARALLEL MODE CABLE WIRING on page 14.

13
ENGLISH
ZEUS II D-series User manual
7.3. BRIDGE MODE
S/N:
CH-1
MIXER
LOUDSPEAKER 1
1+
1-
2-
2+
-
SPEAKON
LOUDSPEAKER SIDE
CHANNEL 1
+
BRIDGE mode with a mono input and a mono output, allows you to add the respective
signals of the two amplication channels and make them available on a single output.
The input signal of channel 1 will be present on the Speakon of the CHANNEL 1 OUT-
PUT. Use the channel 1 control to adjust the volume.
To set the amplier in the BRIDGE MODE, set the MODE selector to the BRIDGE position
(Left/Red LED ON) and connect the output as shown above.
Concerning the cable wiring of BRIDGE MODE please refer to paragraph 7.5 BRIDGE
MODE CABLE WIRING on page 15.

14
ENGLISH
ZEUS II D-series User manual
7.4. STEREO / PARALLEL MODE CABLE WIRING
COLD
TO AMPLIFIER
TO LOUDSPEAKER
HOT
COLD
HOT
1+
1+
1–
1–
2–
2+
1+
1–
2–
2+
1+
1–

15
ENGLISH
ZEUS II D-series User manual
7.5. BRIDGE MODE CABLE WIRING
COLD
TO AMPLIFIER
TO LOUDSPEAKER
HOT
COLD
HOT
1+
1+
1–
1–
2–
2+
1+
1–
2–
2+
1+
2+

16
ENGLISH
ZEUS II D-series User manual
8. RACK MOUNTING AND DIMENSIONS
Use four screws and washers to mount the amplier to the equipment rack rails. To use
the amplier outside a rack, attach the self-adhesive rubber feet to the bottom.
In the applications where the rack assembly may be moved, we strongly recommend
supporting the rear of the amplier. Optional rack handles provide nger grips at each
end, making lifting and setting into the rack more comfortable.
483 mm
45 mm
329 mm
364 mm
384 mm
433 mm

17
ENGLISH
ZEUS II D-series User manual
9. SPECIFICATION
MODEL ZEUS II D-3750 ZEUS II D-4700 ZEUS II D-5600
8Ω Stereo Output Power 800W 1000W 1200W
4Ω Stereo Output Power 1300W 1650W 2000W
8Ω Bridge Output Power 2300W 2850W 3450W
4Ω Bridge Output Power 3750W 4700W 5600W
Input Sensitivity 1.2V/32dB/26dB
Input Impedance >10KΩ balanced or unbalanced
Frequency response(1W, 8Ω)
+0/-3dB 6.8Hz-34kHz
1KHz THD 0.01—0.03%
Damping Factor > 600
Crosstalk > 70
S/N Ratio > 104dB
Amplier Class D
Power Requirements 220V – 50/60Hz
Input Connectors XLR
Output Connectors Speakon®
Cooling
3 fans
Airow from front panel to the rear panel
Variable wind speed, according to the temperature
Dimension(WxHxD) 483 x 45 x 364.8 mm
Packing Size (WxHxD) 580 x 80 x 565 mm
Height 1 Rack Unit
Net Weight 7,1 Kg 7,2 Kg 7,3 Kg
Carton Weight 8,8 Kg 9 Kg 9 Kg
NOTE: Ourproductsaresubjecttoaprocessofcontinualfurtherdevelopment.Thereforemodicationstothe
technical features remain subject to change without further notice.

18
ENGLISH
ZEUS II D-series User manual
10. WARRANTY AND SERVICE
All SOUNDSATION products feature a limited two-year warranty. This two-year warranty is specic
to the date of purchase as shown on your purchase receipt.
The following cases/components are not covered from the above warranty:
• Any accessories supplied with the product
• Improper use
• Fault due to wear and tear
• Any modication of the product effected by the user or a third party
SOUNDSATION shall satisfy the warranty obligations by remedying any material or manufacturing
faults free of charge at SOUNDSATION’s discretion either by repair or by exchanging individual
parts or the entire appliance. Any defective parts removed from a product during the course of a
warranty claim shall become the property of SOUNDSATION.
While under warranty period, defective products may be returned to your local SOUNDSATION
dealer together with original proof of purchase. To avoid any damages in transit, please use the
original packaging if available. Alternatively you can send the product to SOUNDSATION SERVICE
CENTER – Via Enzo Ferrari , 10 – 62017 Porto Recanati - Italy . In order to send a product to service
center you need an RMA number. Shipping charges have to be covered by the owner of the prod-
uct.
For further information please visit www.soundsationmusic.com
11. WARNING
PLEASE READ CAREFULLY – EU and EEA (Norway, Iceland and Liechtenstein) only
This symbol indicates that this product is not to be disposed of with your household waste, ac-
cording to the WEEE Directive (2202/96/EC) and your national law.
This product should be handed over to a designated collection point, e.g., on an authorized one-
for-one basis when you buy a new similar product or to an authorized collection site for recycling
waste electrical and electronic equipment (WEEE).
Improper handling of this type of waste could have a possible negative impact on the environment
and human health due to potentially hazardous substances that are generally associated with EEE.
At the same time, your cooperation in the correct disposal of this product will contribute to the
effective usage of natural resources.
For more information about where you can drop off your waste equipment for recycling, please
contact your local city ofce, waste authority, approved WEEE scheme or your household waste
disposal service.

19
ITALIANO
SOMMARIO
1. DISIMBALLAGGIO ...................................................................................................21
2. ACCESSORI ...............................................................................................................22
3. DESCRIZIONE GENERALE........................................................................................22
3.1. Caratteristiche principali....................................................................................................................................22
4. PANNELLO FRONTALE ............................................................................................23
5. PANNELLO POSTERIORE.........................................................................................24
6. CONNESSIONI AUDIO.............................................................................................26
7. MODI OPERATIVI.....................................................................................................26
7.1. MODO STEREO ....................................................................................................................................................27
7.2. MODO PARALLELO..............................................................................................................................................28
7.3. MODO BRIDGE......................................................................................................................................................29
7.4. CABLAGGIO PER I MODI STEREO / PARALLELO.......................................................................................30
7.5. CABLAGGIO PER IL MODO BRIDGE..............................................................................................................31
8. MONTAGGIO SU RACK E DIMENSIONI.................................................................32
9. SPECIFICHE...............................................................................................................33
10. GARANZIA E ASSISTENZA......................................................................................34
11. AVVISO .....................................................................................................................34

20
ITALIANO
MANUALE D’USO ZEUS II D-series
IMPORTANTI SIMBOLI DI SICUREZZA
Il simbolo è usato per indicare che in questa apparecchiatura sono
presenti alcuni terminali sotto tensione pericolosi, anche in condizioni
di normale funzionamento, che possono costituire rischio di scosse
elettriche o di morte
Il simbolo viene utilizzato nella documentazione di servizio per indi-
care che uno specico componente può essere sostituito esclusiva-
mente dal componente specicato nella documentazione per motivi di
sicurezza.
Terminale di Terra
Corrente/Tensione alternata
Terminale in tensione pericoloso
Indica che l’apparato è acceso
Indica che l’apparato è spento
WARNING: Precauzioni da osservare per evitare il pericolo di ferimento o di morte
per l’utilizzatore.
CAUTION: Precauzioni da osservare per evitare danni all’apparecchio.
CURA DEL PRODOTTO
fLeggete queste istruzioni
fConservate queste istruzioni
fRispettate tutte le avvertenze
fSeguite tutte le istruzioni
1)^ACQUA / UMIDITA
L’apparecchio deve essere protetto dall’umidità e dalla pioggia, non può essere usato
in prossimità di acqua; ad esempio nei pressi di una vasca da bagno, di un lavandino, di
una piscina, etc.
2)^Calore
L’apparecchio deve essere posto lontano da fonti di calore come radiatori, stufe o altri
apparecchi che producono calore.
This manual suits for next models
3
Table of contents
Languages:
Other Sound Sation Amplifier manuals

Sound Sation
Sound Sation ZEUS v120 User manual
Sound Sation
Sound Sation HA 4000 User manual

Sound Sation
Sound Sation PMX-4 MKII User manual
Sound Sation
Sound Sation ZEUS II H-QX Series User manual

Sound Sation
Sound Sation POCKET LIVE U16 Series User manual
Sound Sation
Sound Sation ZEUS D User manual
Sound Sation
Sound Sation ZEUS II series User manual

Sound Sation
Sound Sation Zeus D User manual
