sound4 VOICE ULA Instruction manual

BEFORE YOU USE THIS PRODUCT
In order to be able to enjoy all the benefits of owning your new
SOUND4 product, please verify first that the latest software
and firmware releases were installed.
Visit www.sound4.com/downloads
software and firmware downloads, prior the installation.
for the most recent
65 Aleksandar Stamboliyski Str., 8000 Burgas, Bulgaria
Tel.: +359 56 710710, Fax: +359 56 836700
SOUND4 Limited is an ISO 9001:2015 certified company.
Quick User Guide
3-Band Voice Processor
2/4/8 channels
SOUND4
VOICE ULA

SOUND4 proposes you to install the software package under your own Ubuntu. Compatibility with Ubuntu
distributions:
?Lucid Lynx - 10.04 LTS
?Precise Pangolin - 12.04 LTS
?Trusty Tahr - 14.04 LTS
?Xenial Xerus - 16.04 LTS
?Bionic Beaver – 18.04 LTS
Installation for a PC running compatible Ubuntu version:
– Click on the following link to add SOUND4 repository -
www.sound4.biz/repository/ubuntu/sound4-repository.deb
If you also want to install:
– Install the driver with following link: apt://sound4exp1?refresh=yes
– Install the SOUND4 server with following link: apt://sound4server
–And to install SOUND4 Remote Control, please use the following link: apt://sound4remote
If you prefer to manage package installation by yourself, please follow the instructions below:
1.Add the following source to your Ubuntu repository list (example for lucid) -
deb http://www.sound4.biz/repository/ubuntu lucid non-free
2. Then get the SOUND4 GPG signature key -
wget -q http://www.sound4.biz/repository/sound4.gpg -O- | sudo apt-key add -
3. Install required packages -
sudo apt-get update && sudo apt-get install sound4exp1 sound4server sound4remote
4.Add the user to the audio group (needed forAlarm Stacker GUI) -
sudo adduser $USER audio
5. Log off and on to make the settings effective.
This Quick user guide will make the installation of SOUND4 quick and easy.Applying these principles, you
can simplify the process and save yourself extra time and effort.
The screenshots used for the purposes of this manual, unless clearly indicated, are from SOUND4 VOICE
ULA8. Please refer to the User manual for detailed information on how to configure and explore your
device. We routinely release new versions to add features and fix bugs. Check the www.sound4.com web
site for the latest information available.
The Universal Products Installer is the complete installation kit for all SOUND4 Products. The program is
provided free of charge and can be downloaded from www.sound4.com/downloads. Installation packages
for MS Windows and Linux Ubuntu OS are available.
Upon entering the section, click on and download Universal All Products Installer, additionally it is
necessary to download Stream Extension, in order to add necessary encoders to the system. Once the
process is completed install the .exe file. SOUND4's products are compatible with the Microsoft Windows
Operating Systems listed below:
Universal Installer
STEP 1
Windows users
STEP 1.1
Linux Ubuntu OS
STEP 1.2
?Windows 7 - 32 & 64 bits
?Windows 8 - 32 & 64 bits
?Windows 10 - 32 & 64 bits
?Windows Server 2008 - R2
?Windows Server 2012
?Windows Server 2019 (except Core version)
IMPORTANT NOTE: Due to Microsoft security changes, your operating system must be up-to-date, if not
SOUND4 Driver will be disabled by Operating System and you will be not able to run the SOUND4 Remote
Control Software.

Connection
STEP 2
Double click on the software will
open the main control window.
The Remote control software
can maintain several devices at
once. There are two options of
adding a new device. Both are
explained in details below.
Software
STEP 3
Scan interactive button
STEP 3.1
1. Press the [Scan] button;
2. A window with all network interfaces on the PC will appear. Select
the IP address (the interface) on which the scan should be made,
and press [ Run Scan];
3. Wait until the scan is completed;
4. Upon completion, the Add Custom Network message will appear;
5. To add the device to the list, select the connection and press [OK];
6. The device will be added automatically (as depicted in Step
3.2). Double click on the icon will open the device's interface
(Step 3.3).The default access credentials are user name:
admin and password: admin
2
4
3
For the initial set-up of the device you will only need to do the following:
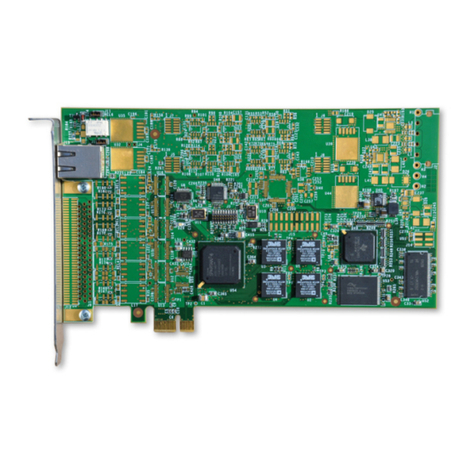
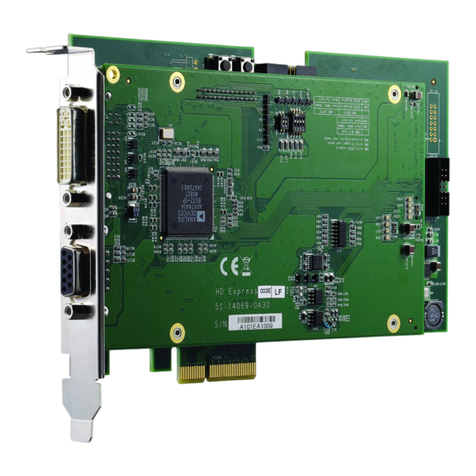
1. Take your new SOUND4 card out of the box, open your computer and insert the card into available PCI
express slot. The card can be plugged into a full height PCI express slot type x1, x4, x8, x16.
2. Connect RJ45 network cable to the corresponding connector on the board in order for it to be properly
integrated into your existing signal chain.
2

1. Press the [New] button.
2. Anew screen requiring the following information will appear:
3. If you are not aware of SOUND4's IP address, it can be seen via the front panel. When the Main screen
is on, press the soft button labeled [INFO]. Then using the [Up] and [Down] buttons navigate to IP (2/4)
where the IP address of the device will be depicted.
4. Enter the required information. If not changed by the user, use the default value of the Port (3001). The
username and password are as follows:
– User name:admin
– Password:admin
5. Press [OK]. A new device will be added. Double click on the newly added icon will open the control
interface (Step 3.3).
Add Device manually
STEP 3.2

Asuccessful log-in the system will open SOUND4 VOICE ULAmain control window:
Successful Log-in
STEP 3.3
License Upload
STEP 4
There are two options of loading a new license/s. Both are explained in details below.
Expired License
STEP 4.1
If your license has expired,a warning message " Your main license has expired! Please contact SOUND4
for renew your main license" will appear on the screen
To upload a new license follow the
steps listed below:
1.Press [OK]. The following screen
will appear;
2. Press [License upload] and a new
window requiring license file to be
selected will open;
3.Go to the file directory, select the
license and press [Open].
NOTE: All licenses are sent/provided in
a ZIP file. It is not needed the file to be
unzipped prior to their upload. They will
be accepted by the program as they
are.
1

4. Wait until the licenses are loaded;
5. Once the process is completed, a notification message will appear:
6. Press [OK] and the Main control window will appear.
1. Open the Main control window and click on [Setup]. The setup menu will appear;
2. Scroll down with the cursor to the ADVANCED settings and press Upgrade Licenses. The Following
window will appear:
NEW License
STEP 4.2

3. Press [Load Licenses];
4. Go to the file directory, select the license and press [Open].
NOTE: All licenses are sent/provided in a ZIP file. It is not needed the file to be unzipped prior to their upload. They will be
accepted by the program as they are.
5. Wait while the licenses are loaded;
6. Once the process is completed, press [OK] and close the Setup window so that the Main control
can appear.
If not already done that, connect the network cable to the device in order for it to be properly integrated into
your existing network.
Device Basic Set-up
STEP 5
The basic set-up of the inputs and outputs can be easily made via Inputs and Outputs section of the Setup
menu, in the Studio mode. Please use default login: studio without password to enter the Studio control
mode.
Inputs and Outputs Set-up
STEP 5.1
Then press [Setup] button to enter settings menu.(1)
1

The set-up process is different for each parameter, but quite simplified and explained in details below:
LIVEWIRE+/AES67 Inputs Set-up
1. Click on the audio inputs section;
2. Enable the input by selecting [ON] with a click;
3. Select LAN mode by clicking on [LIVEWIRE ...];
4. Define number of the Channel;
5. Select From/To Source mode;
6. Define the Name manually if necessary.
Livewire+/AES67 Outputs Set-up
1. Click on the name of the desired Output;
2. The respective set-up window will appear. Apply the desired settings and press [X]. The changes will be
automatically saved.
?Enable the input by selecting [ON] with a click;
?Select LAN streaming profile mode;
?Define number of Channel;
?Define Name and the Label.

Thank you for choosing SOUND4!
If you need any assistance on our side, please visit: www.sound4.com
Presets Selection
STEP 5.2
In the Studio control window select the channel, and select a preset, by pressing [Preset] button , and
list of all presets will appear on the screen.
(1)
1
Double click on the desired preset will load it automatically into current channel of the device.
Other sound4 Computer Hardware manuals
